How to paint a flamingo using negative shapes
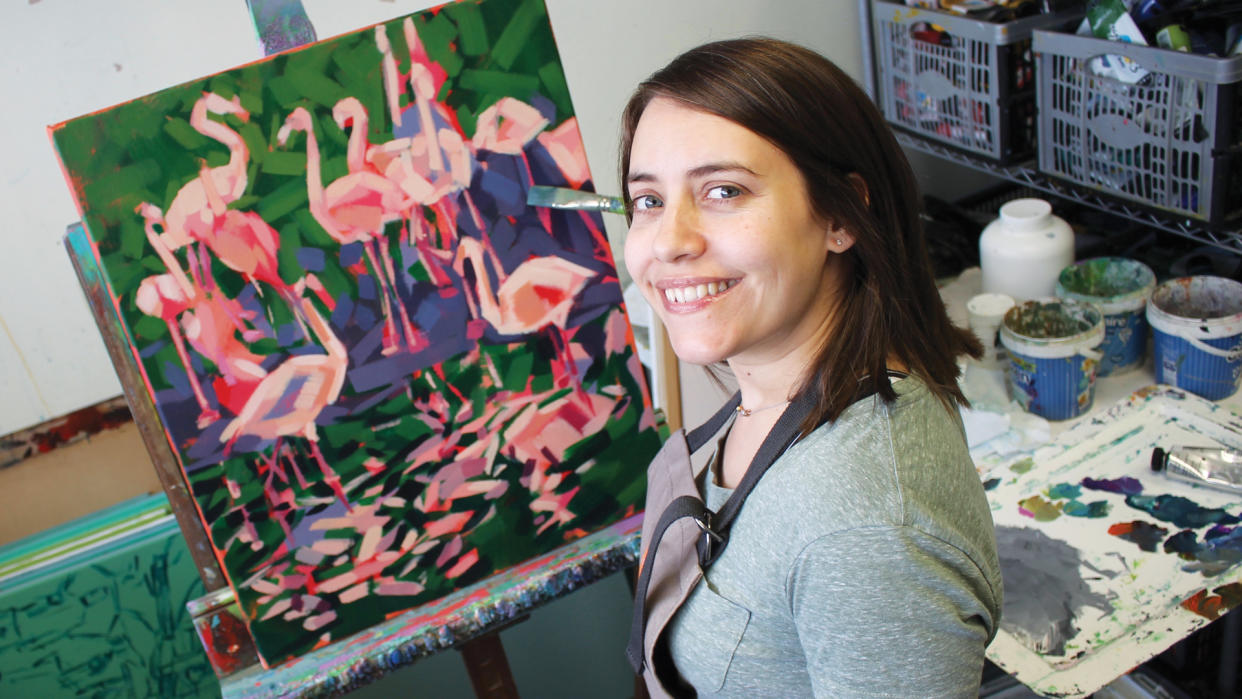
As a full-time artist, one of the things I often think about is standing out from the crowd. I realise that the interpretation of a subject is just as important as the subject itself. You can convey so much by adding that little extra to your painting, which keeps the painting process exciting for me and hopefully interesting for the viewer too.
- Stretched Canvas: 24x20in
- Daler Rowney system 3 original acrylics: Alizarin Crimson, Phthalo Green, Cerulean Blue, Cadmium Yellow, Lemon Yellow, Yellow Ochre, Cadmium Red, Process Magenta, White
- Mixing palette
- Water pot
-Liquitex flat heads – no. 8 (equivalent to quarter inch), no. 12 bright (one inch) two- and three-inch brushes, one-inch decorator’s brush
I love painting wildlife and I’m excited by how I can interpret this popular subject rather than going for a more traditional approach, which might be a photographic interpretation. For example, the wildness of an animal can be interpreted through expressive brush strokes or the hint of strong shapes. Patterns and colour may be all you need to suggest a fleeting glimpse of an animal in the wild. I always work in my studio from photos I have sourced at various locations around the country.
Studio-based work allows time to consider what I want to promote in my painting, whether it’s manipulating colours or playing with composition. I want to share an alternative approach to painting a group of flamingos. By focusing on their distinctive shapes, you can play around with the spaces in and around the flamingos, known as 'negative shapes' or spaces – we’ll use this technique as a way of forming the main subject, as opposed to starting out with outlines and colouring it in.
My materials are listed here, but also see Creative Bloq's guides to the best acrylics and best acrylic paintbrushes if you need materials.
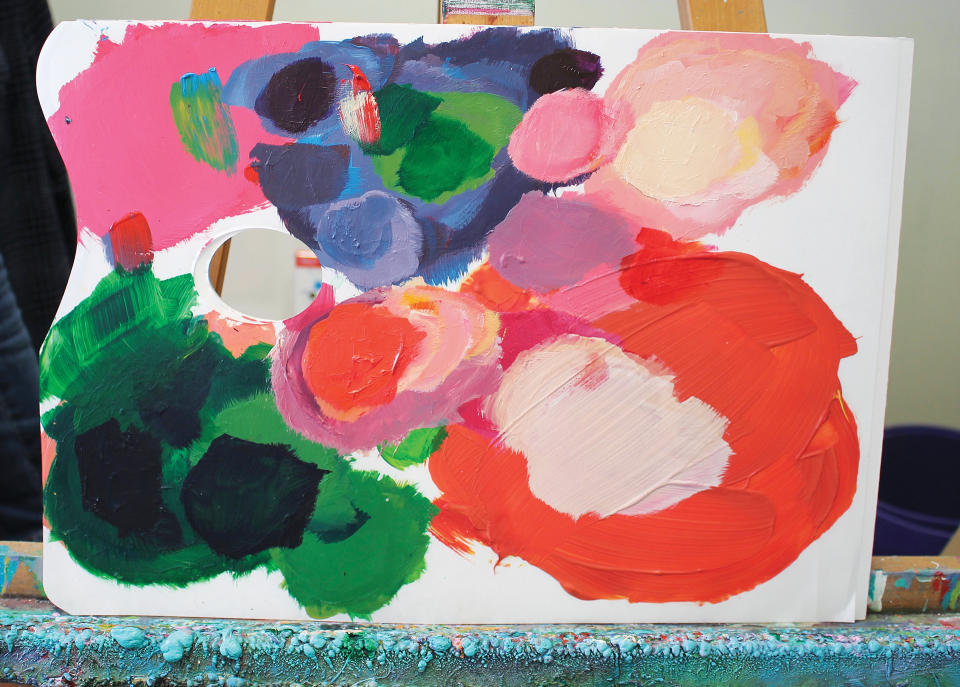
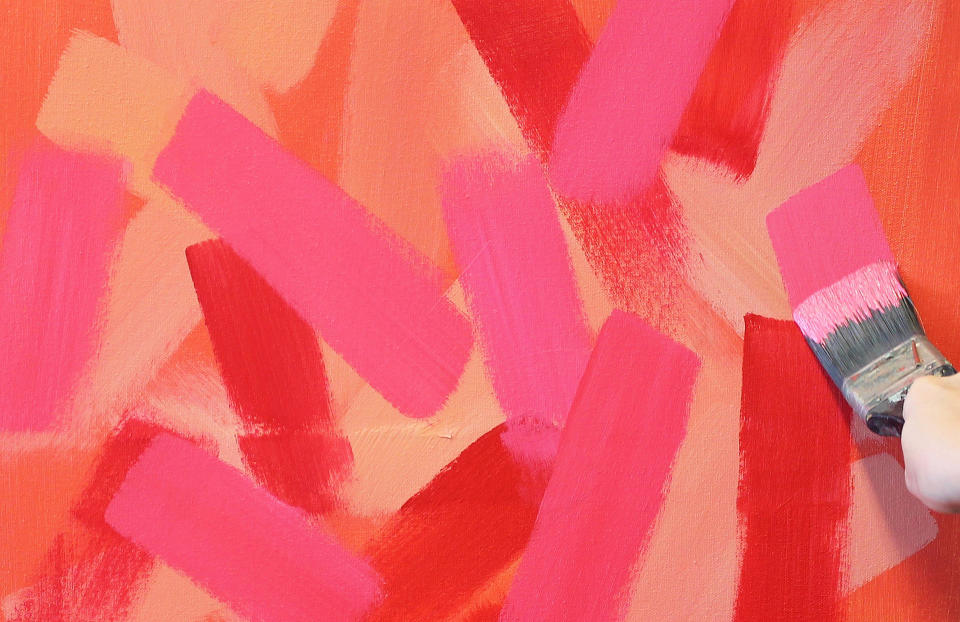
01. Create the base colour
(Image: © Marie Antoniou)
I begin by laying a base colour on to my canvas with a pure mix of Process Magenta and Lemon Yellow, using a two-inch brush. I decide this would work well as an initial colour for the painting’s latter stages of development. I choose this colour as it is close to the tones of flamingos.
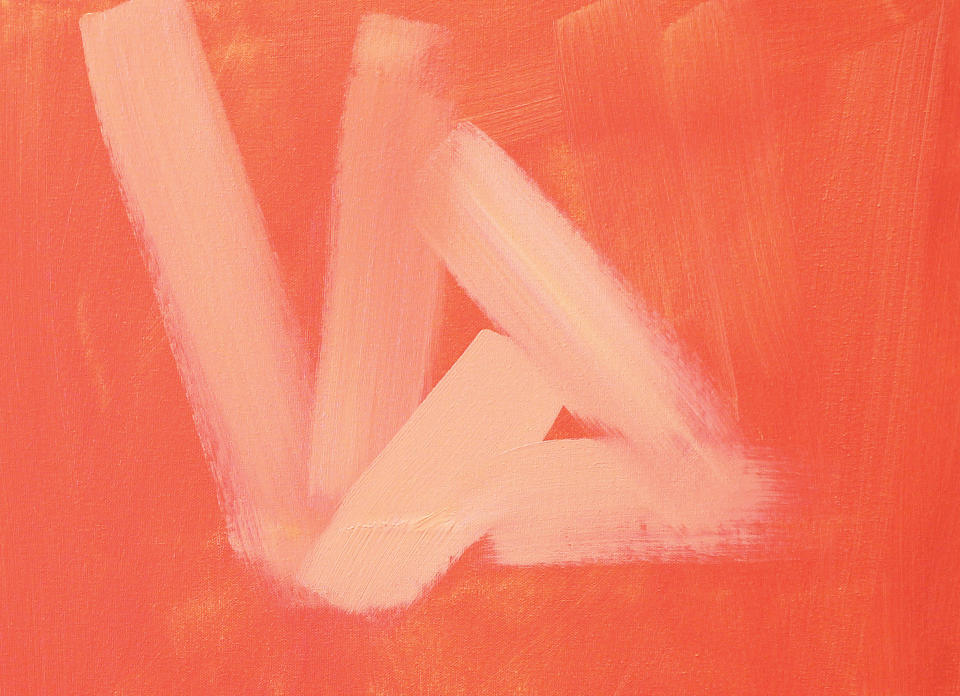
02. Tint the canvas
(Image: © Marie Antoniou)
I spend a little time before deciding what colours I want to use. Once
the base colour on the canvas has dried, I create tints onto the canvas that match colours within the flamingos. I begin by mixing Process Magenta, Lemon Yellow and White. Using directional brushstrokes, I randomly place them on the canvas.
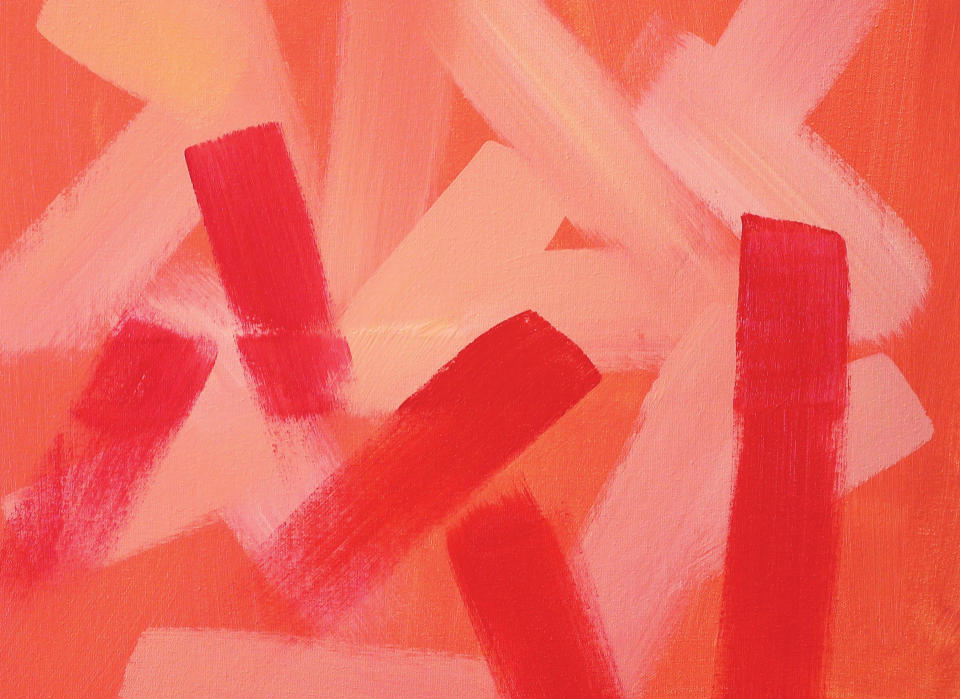
03. Make random, directional marks
(Image: © Marie Antoniou)
Once the initial marks have dried, I continue with creating more random directional marks using the same two-inch brush with a pure mix of Cadmium Red and Process Magenta. I use this layer of colour sparingly so initial tints still show through.
04. Add extra colours
Once the layer from step 2 has dried, I make more random directional marks using my two-inch brush and add White to my Cadmium Red and Process Magenta mix to create a pink shade that lies on top of previous layers. The random nature of the directional strokes enable previous shades to filter through, giving me a good idea for the colours I’ll be using for the flamingos. Get your arm moving, enjoy making marks and laying colours without the pressure of trying to draw the subject. Just enjoy yourself.
05. Cool things down

(Image: © Marie Antoniou)
I introduce some cooler shades. I mix Cerulean Blue, Cadmium Red and White, and it creates a contrast between the warm reds and pinks. Again, these are placed sparingly and randomly on the canvas in a directional manner. I still allow previous layers of colour to show through and make the directional marks with the two-inch brush, in keeping with earlier strokes.
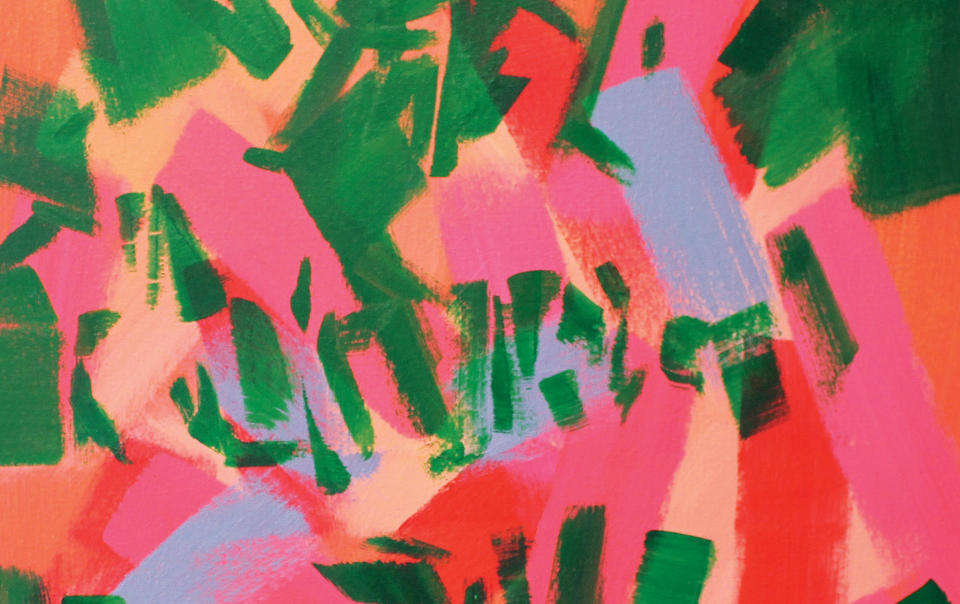
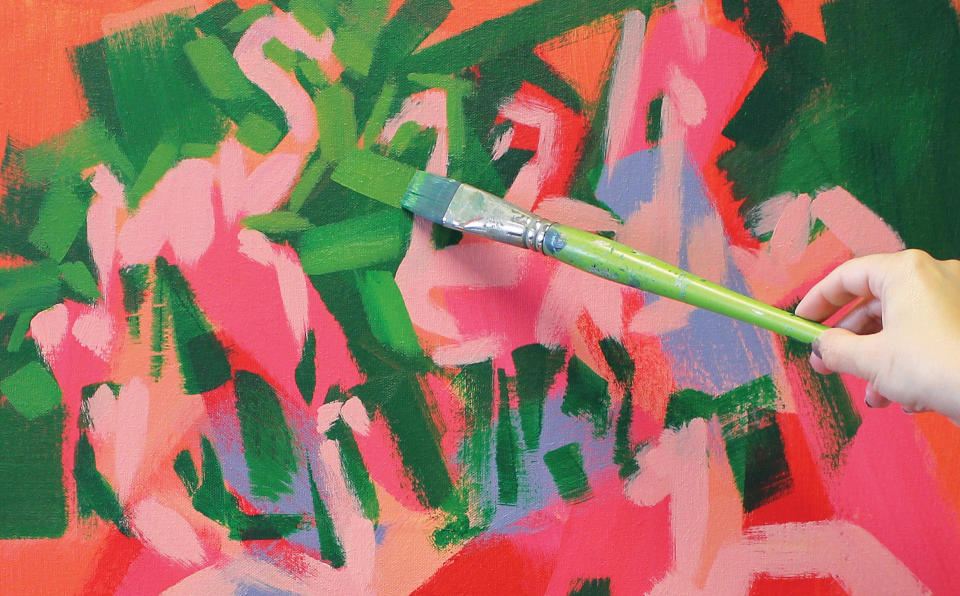
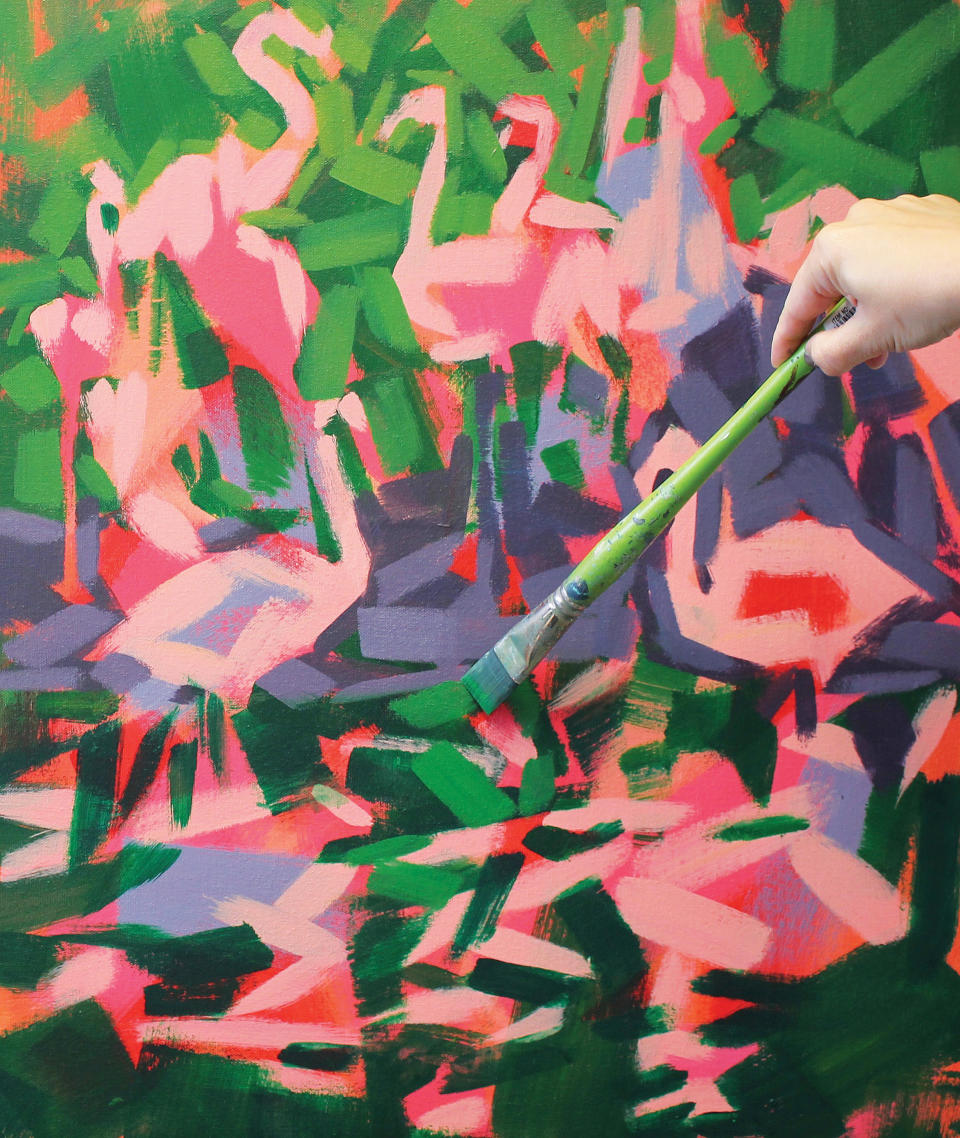
06. Start negative shaping
(Image: © Marie Antoniou)
I now begin to observe the negative shapes around the flamingos. I use my three-inch flat head brush and create a pure colour mix using Phthalo Green and Cadmium Yellow. Starting at the top left-hand corner, I utilise this colour to create the negative shapes, and all angles of the brush to create a variety of marks.
07. Check your source
As my eyes flick from the photograph to the canvas, I considered where the negative shapes are in relation to the flamingos. A rough estimation is all I need before I carry on.
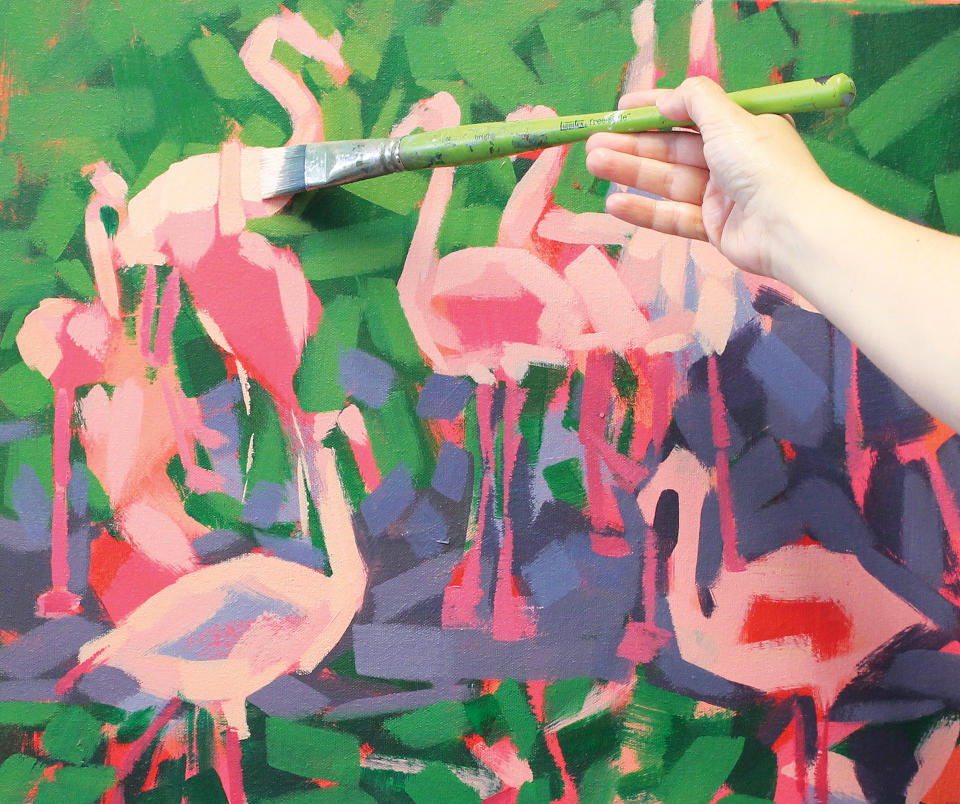
08. Block the flamingos
(Image: © Marie Antoniou)
Starting in the left-hand corner of the canvas, with a one-inch decorator’s brush, I ‘block’ the shapes of the flamingos, using a mix of Process Magenta, Lemon Yellow and White in between the negative shapes of green from step six.
09. Increase the contrast
(Image: © Marie Antoniou)
Focusing on the upper section of the painting, I want to create a contrast within the initial dark green of the negative shapes. So I scale down a brush size to a number 12 Bright and mix Phthalo Green and Yellow Ochre.
I use directional strokes to add interest to these areas while allowing the dark green to filter through. This creates some welcome texture, too. The contrasting colour creates interest within the present early negative shapes, but it also helps to define the shapes of the flamingos from the negative shapes around them.
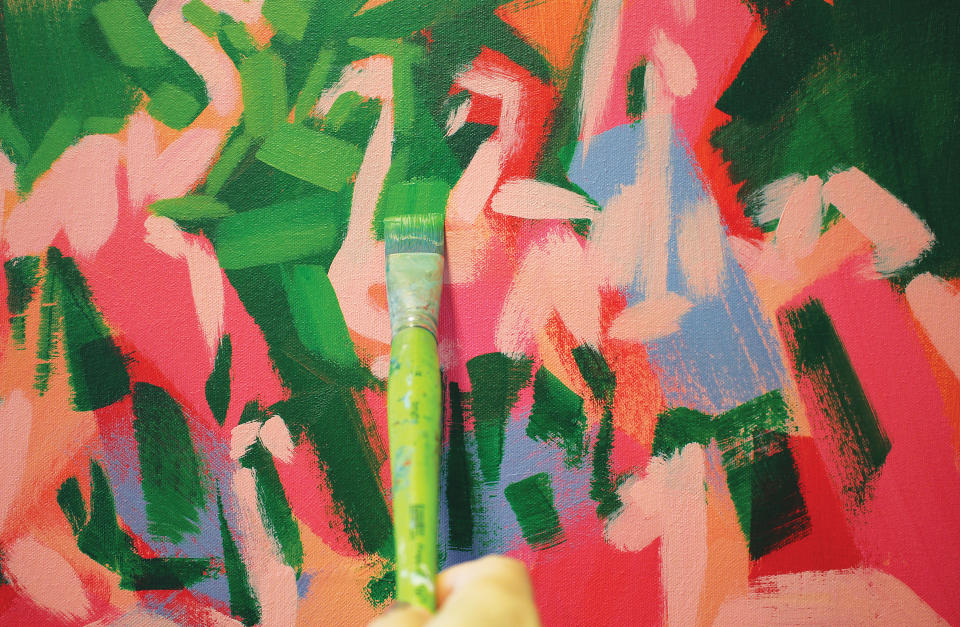
10. Start defining
(Image: © Marie Antoniou)
Working my way across the top section of the painting within the negative shapes, I help define the flamingo shapes using various angles of the brush. The birds take shape.
11. Fill middle sections
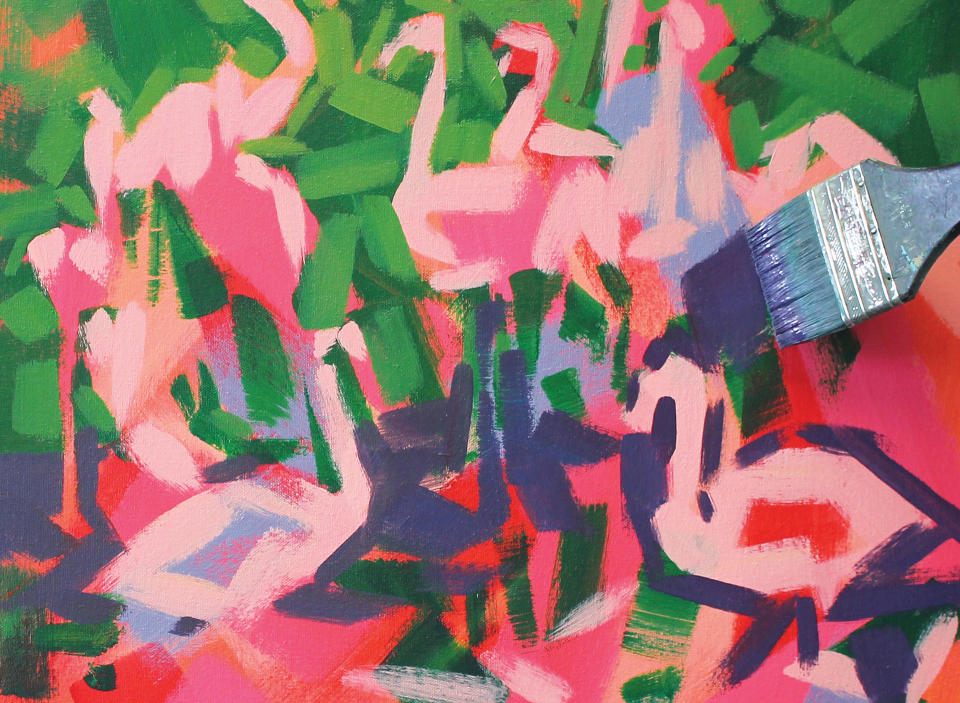
(Image: © Marie Antoniou)
I return to my three-inch brush and work in the middle section of the painting up to the water’s edge. I introduce a pure mix of Cadmium Red and Ceruleun Blue and use a variety of marks that create more solid negative shapes, which in turn define the shapes of the flamingos.
12. Continue blocking
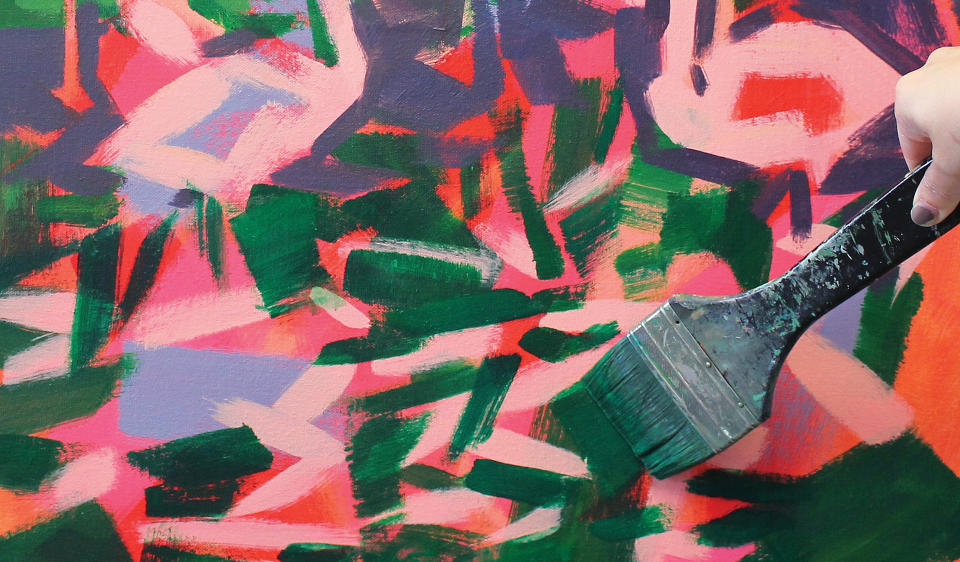
(Image: © Marie Antoniou)
While the previous layers of paint are drying in other sections, I work on the lower section. With a clean three-inch brush, I create marks within the water using Phthalo Green and Cadmium Yellow. Using all angles of the brush, I block in large and small areas of negative shapes.
13. Brighten it up
(Image: © Marie Antoniou)
Now other areas of the painting have dried, I return to the central area and add White to the original mix of Cadmium Red and Ceruleun Blue. Adding White helps creates a colour contrast without obliterating the darker shades underneath; this is a similar process as I used in step 7. I use directional strokes and utilise all angles of my no. 12 bright brush.
14. Green tints
(Image: © Marie Antoniou)
I return to the lower section and create lighter tints of Phthalo Green and Yellow Ochre on top of the darks in the water. I use directional strokes with my no. 12 bright brush.
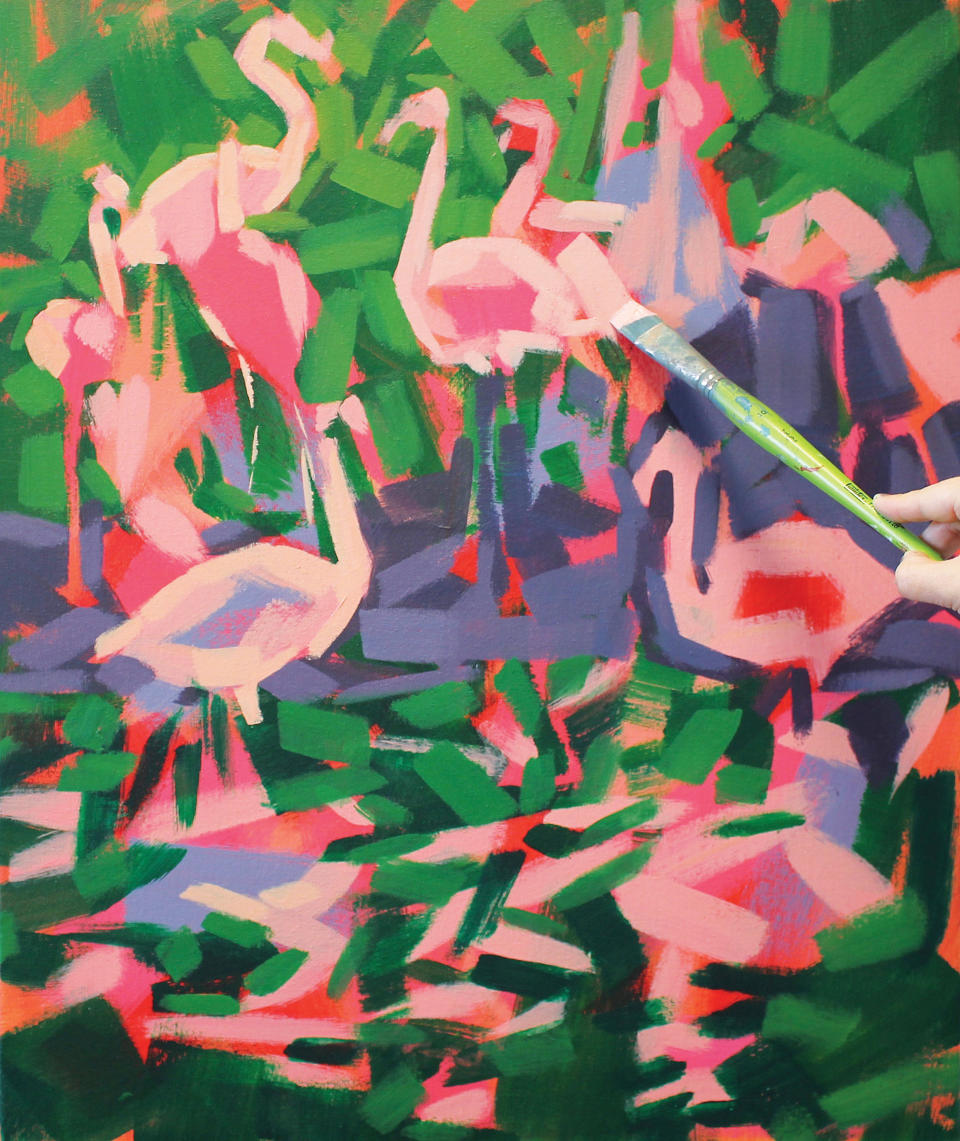
15. Add highlights
(Image: © Marie Antoniou)
Once the dark and lighter tints have filled the negative spaces around the flamingos, I start to lighten the flamingo shapes using Alizarin Crimson, Lemon Yellow and White.
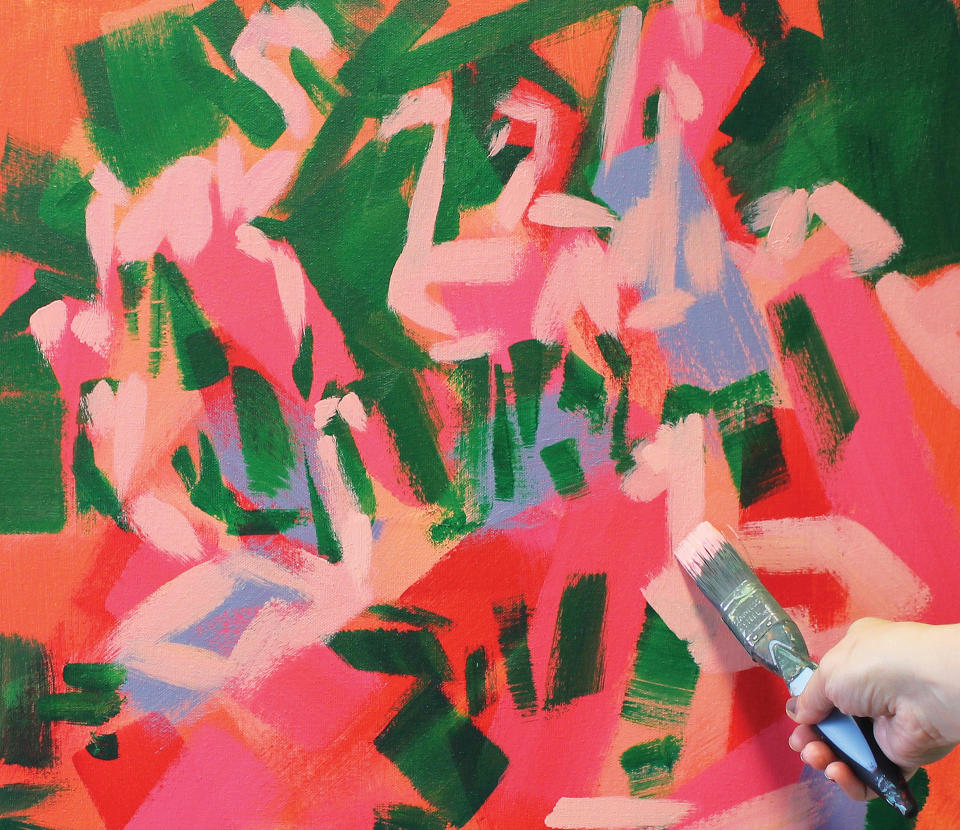
16. Add finishing touches
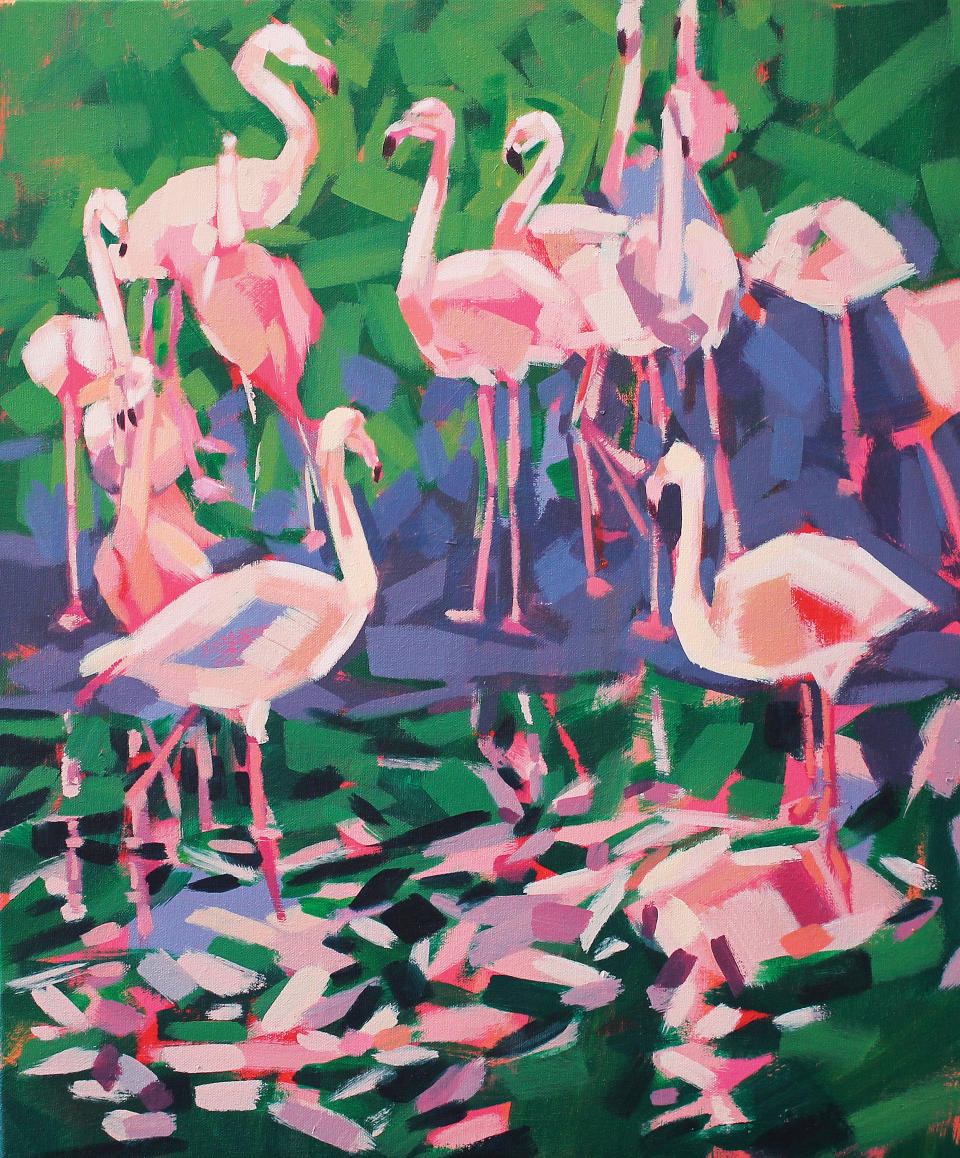
(Image: © Marie Antoniou)
In the final stages, I look at the overall image and see if I need to add any lights or darks. I use some darks in the water with some Phthalo Green and Alizarin Crimson. I also add some dark in the beaks, with Alizarin Crimson and Ceruleun Blue, using my smallest brush no. 8. I’ve included some extra tints on the flamingos too, with Process Magenta, Lemon Yellow and plenty of White.
This article appeared in Paint & Draw: Animals. Buy the bookazine from Magazines Direct.

