A One-Wall IKEA Hack Triples the Storage in This “Shoebox” Apartment

Credit: Carmen Murphy Credit: Carmen Murphy
Credit: Carmen Murphy Credit: Carmen Murphy
Credit: Carmen Murphy Credit: Carmen Murphy
Credit: Carmen Murphy Credit: Carmen Murphy
Credit: Carmen Murphy Credit: Carmen Murphy
ABOUT THIS BEFORE & AFTER
HOME TYPE: Studio Apartment
PROJECT TYPE: Bedroom, Living Room
STYLE: Traditional
SKILL LEVEL: DIY
RENTAL FRIENDLY: No
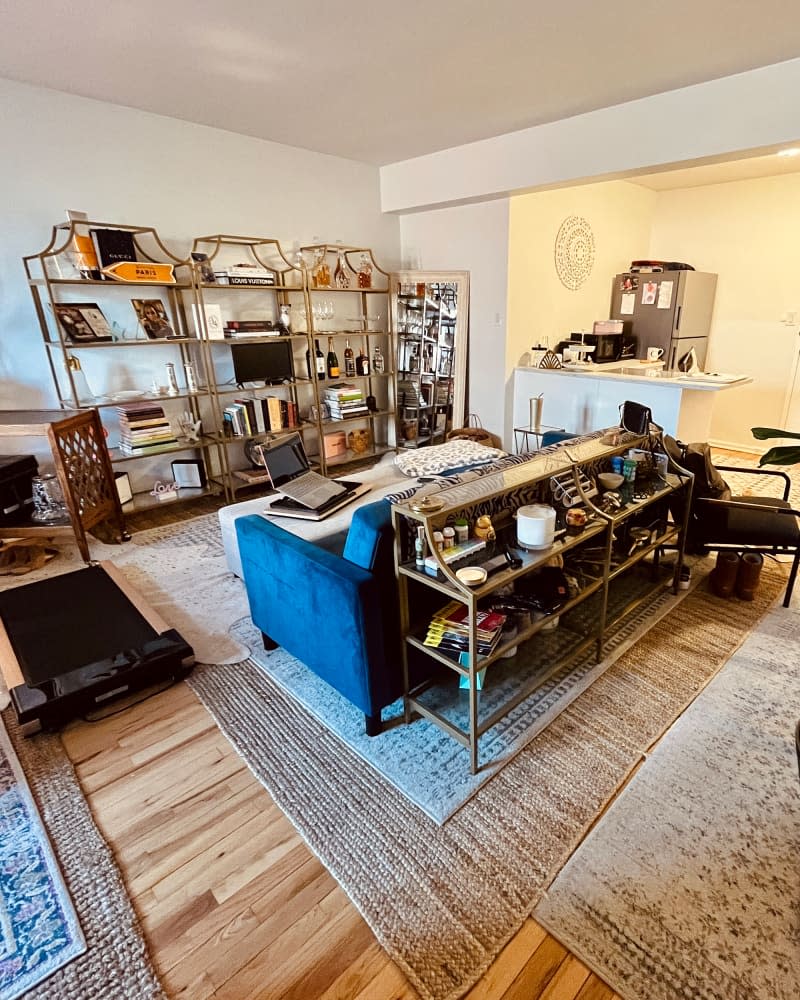
Storage can be hard to come by in any home with a relatively small footprint, but it especially rings true for studio apartments. As DIYer and studio apartment owner Carmen (@thetodolistwithcarmen) puts it, “when you live in a studio, storage is everything.”
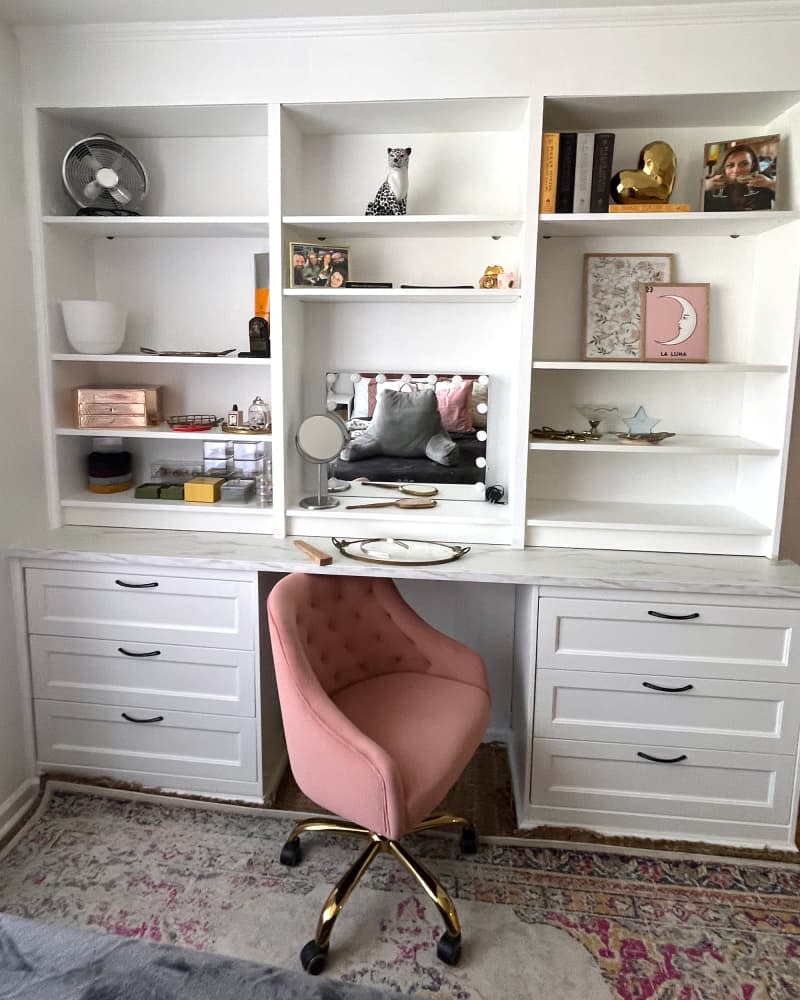
Carmen opted to install built-in shelving to maximize storage into her 400-square-foot “shoebox” apartment — she calls it that because it’s almost a perfect rectangle — and the result is a gorgeous bookcase/dresser that has become the focal point of the room.
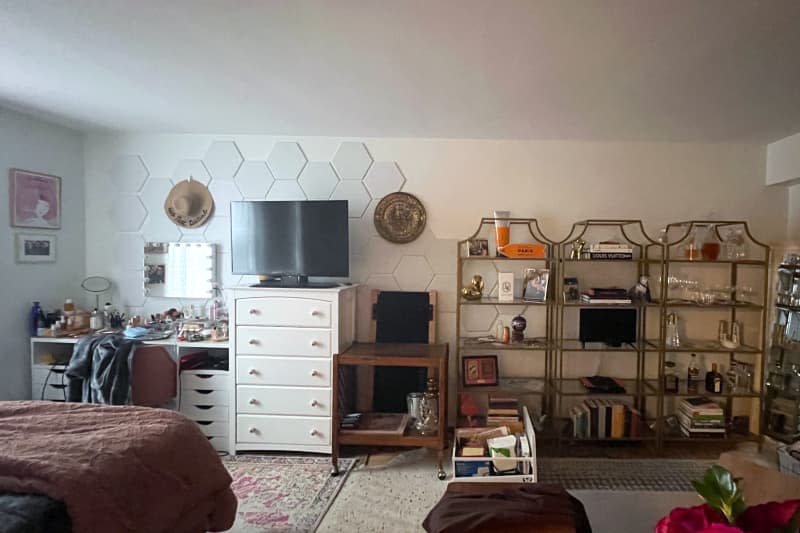
“The old look didn’t really allow for much storage,” she says. “There’s one large wall that runs across the majority of the space, and from the moment I saw it, I knew storage needed to be built-in. So I researched cabinet companies and custom wall units and ultimately realized, ‘I can do that.’”
The project cost under $2,000 thanks to an IKEA hack.
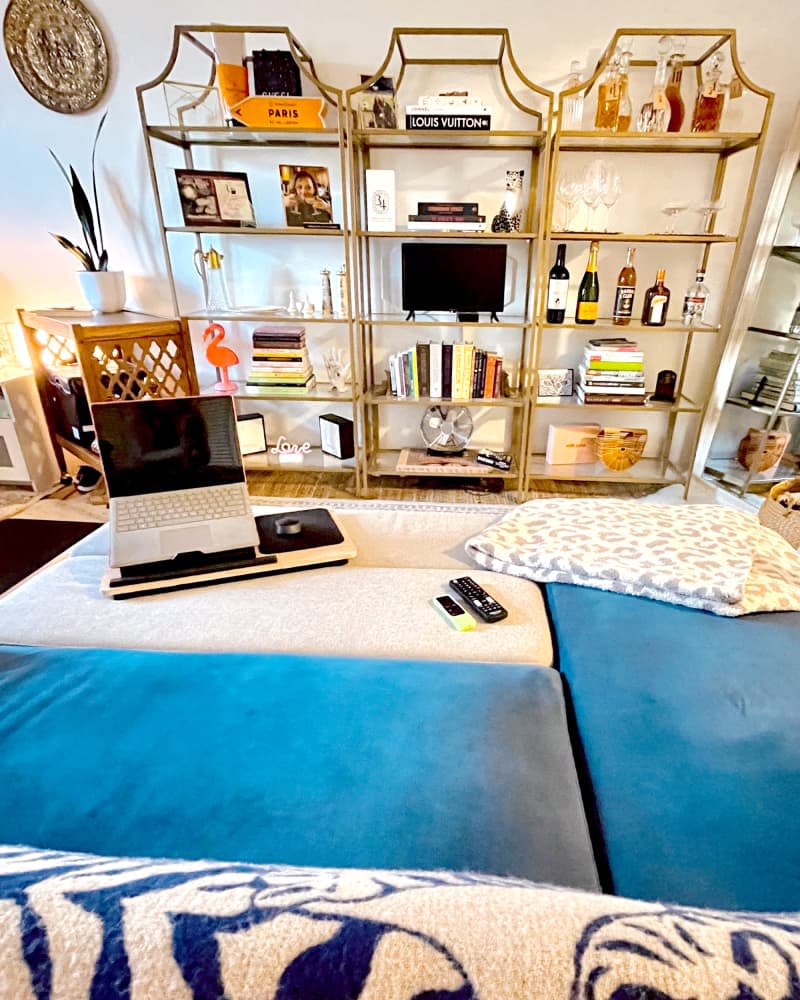
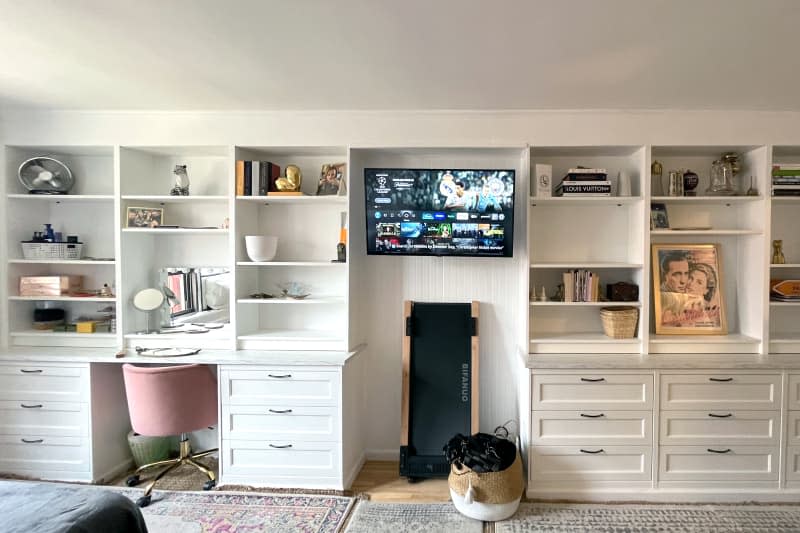
Carmen chose six BILLY bookcases of various heights and widths and five SONESAND 3-drawer chest dressers to create her built-ins. She added EKBACKEN countertops between the dressers and the shelving on each side of the room.
Although each “built-in” unit is almost identical, Carmen opted for three chests on the right-hand side of the studio in the living area, for extra storage, and she left the center spot open on the left side to create a vanity setup. Her boyfriend, Ron Noble, helped her build everything.
The total for the IKEA finds was $1,631. After that, the only other things Carmen needed to buy were paint, a bit of lumber, and some finishing details. “IKEA is a great starter tool,” Carmen says. “You purchase their base products and turn them into gold.”
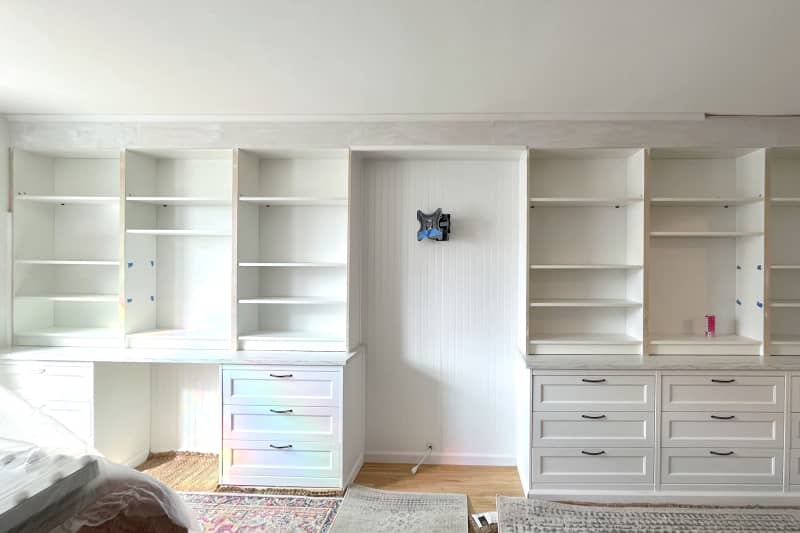
Framing and plywood made the project look built-in.
After purchasing and assembling all of the furniture, Carmen and Ron realized that adding a base under the dressers would help with height and remove the obstacle that was the kickboards. They then framed out the top of the units to reach the ceiling and covered the frame with 1/4-inch plyboard.
“Making a frame for the top seemed daunting, but it’s literally just that — a frame made of wood — and it was easy once I got over the measuring part,” Carmen says, adding that she’s more of a “wing it” type while Ron is a stickler for measurements. (Every great home project benefits from a bit of both!)
“I had never used a circular saw,” Carmen adds. “It was so much fun! I’m not the best at measurements, but using this tool really showed me how important the old saying is: ‘Measure twice cut once.’”
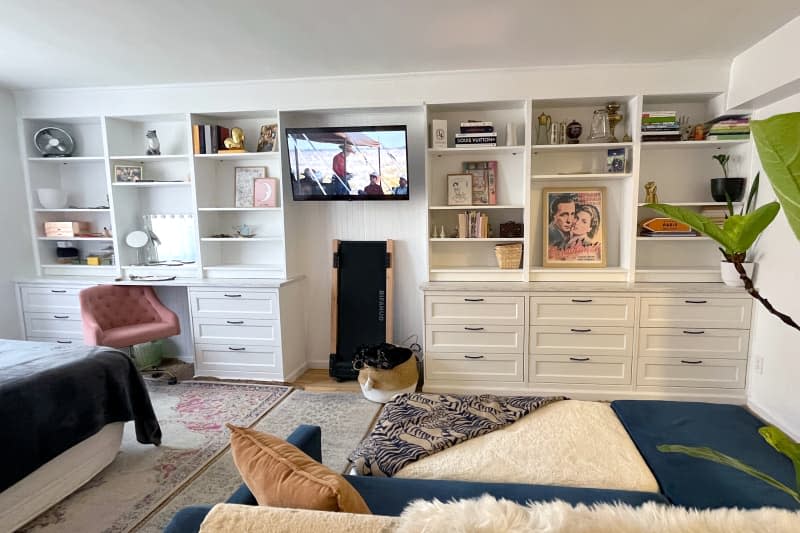
Paint, wainscoting, and brass pulls are the finishing touches.
Adding a bright and airy feel to the apartment, Carmen kept her IKEA pieces the standard-issue white, and she painted the frames and plywood white (Behr’s Ultra Pure White) to match. She also added a couple pops of glam with her brass drawer pulls and pink velvet vanity chair.
In the center of the two built-in units, she used a wainscoting to hide the TV cords and keep the space neat and tidy. There’s also a gap in the middle of the unit which makes for the ideal space for extra storage, the TV, and even Carmen’s treadmill. “It feels like a perfectly functioning home,” Carmen says. “Everything you could need to feel stress free in a small space.”
Lastly, for anyone looking to take on a similar project in a studio, Carmen has a bit of advice: “When you live in an apartment, it’s important to care about your neighbors,” she says. “We only worked during ‘school hours’ to keep noise levels down.” About two weeks later, she had the space-savvy studio of her dreams.
Inspired? Submit your own project here.

