The Most Interesting Thing You’ll Read This Week: How to Dress Up a Pet Door
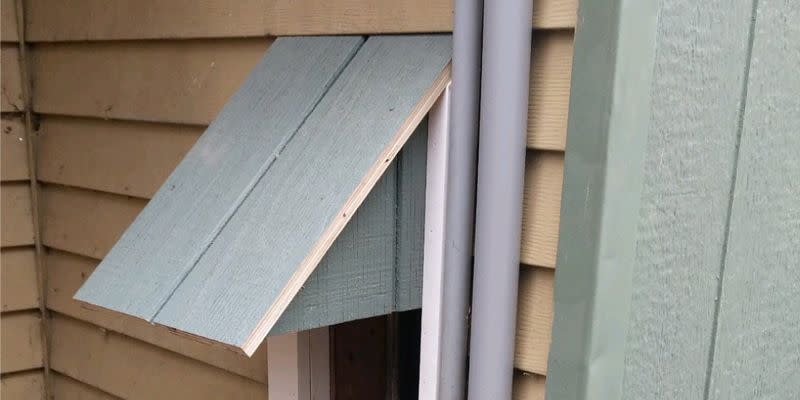
As those of you who own pets know, a pet door is a utilitarian solution. It solves the problem of pet access while creating an unattractive opening in a door or the side of your house. My friend Tom and I were studying such a pet door recently when we developed the fix you see here (mostly Tom’s idea). It not only improves the look of the entry, but shields it slightly in rainy weather. Your pet might also find a little shade under it in hot weather.
This little shed roof is easy to make. You can mount it on the sides of the opening so it doesn’t interfere with your dog or cat getting in or out. And because it’s screwed to the opening itself, you don’t have to worry about attaching it to the house’s siding, which could leave entry points for water. Any weather-resistant material will do; we used scrap of some T1-11 siding and PVC exterior wood trim. Here’s how to go about making one.
Materials and Tools
🧰 Circular saw
🧰 Miter saw (optional)
🧰 Brad nailer (optional)
🧰 Square
🧰 Tape measure
🧰 Hammer
🧰 Plywood or T1-11
🧰 Wood trim or PVC trim
🧰 Construction adhesive
Step 1: Template and Sides

To begin construction, use cardboard from a discarded box to cut out a template as shown. This will guide you in cutting out the sides and determines the roof slope. It’s an added grace note if the slope of the roof corresponds to that of the house’s roof, but your pet won’t care. Once the template fits the opening, trace it on one piece of siding material. Double up the siding to cut both pieces at the same time.
Step 2: Add Trim
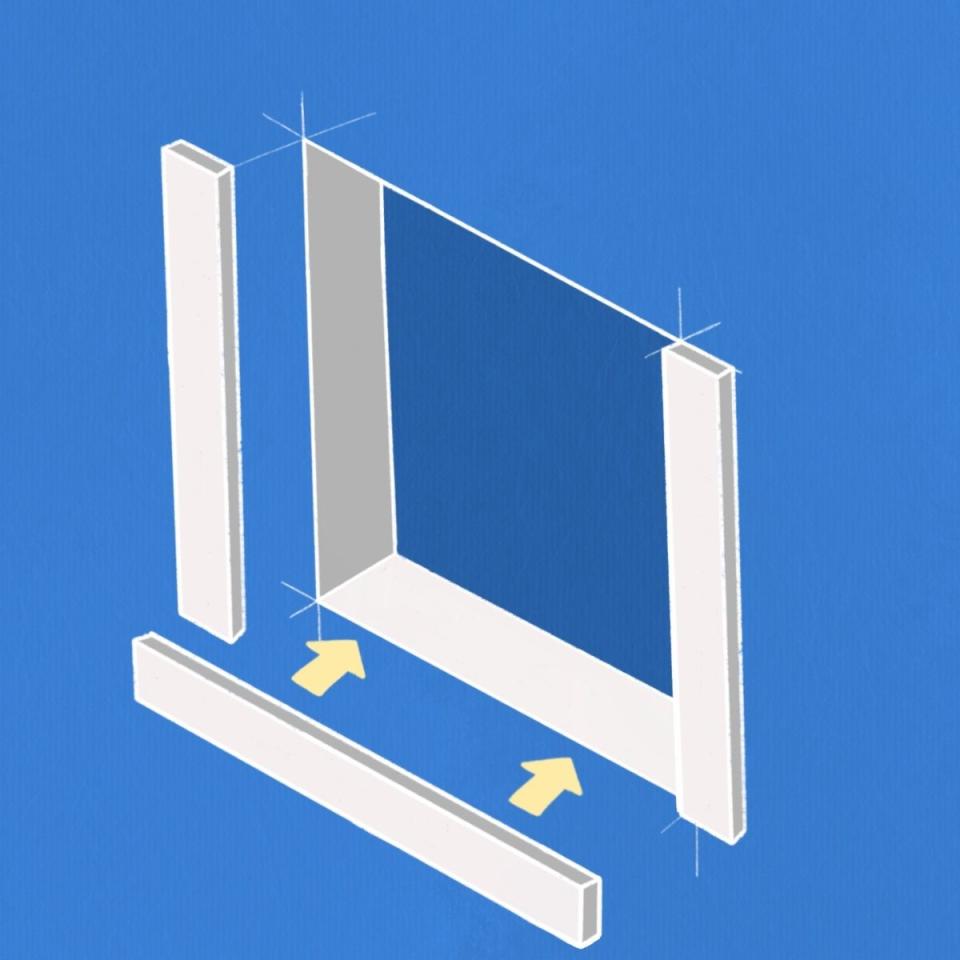
The interior of the pet door opening here was cased in construction lumber, but yours may be more nicely finished. If so, you can skip this step; otherwise, trim it out with some scrap pieces of PVC attached with 2-inch, 18-gauge stainless-steel exterior brad nails. Likewise, if your pet door has exterior wood trim that’s in good shape, you can leave it alone. If it doesn’t, remove it—as we did in the case of this pet door—and replace it with PVC for a neatly trimmed opening, inside and out.
Step 3: Assemble
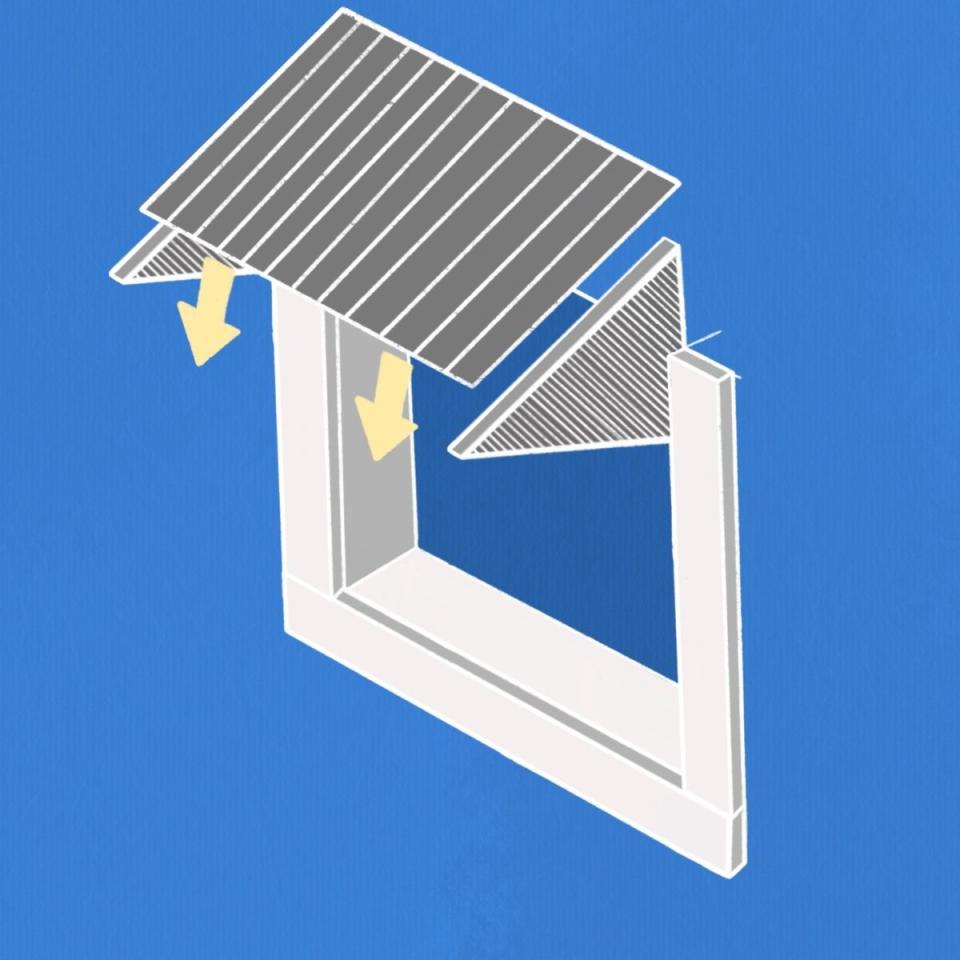
Next, we used 2-inch exterior wood screws to attach the sides we had cut out earlier. We simply screwed the sides through the PVC trim and into the lumber that framed the opening. We cut the roof out of T1-11 and used a little construction adhesive and plentiful 18-gauge nails to attach the roof to the sides.
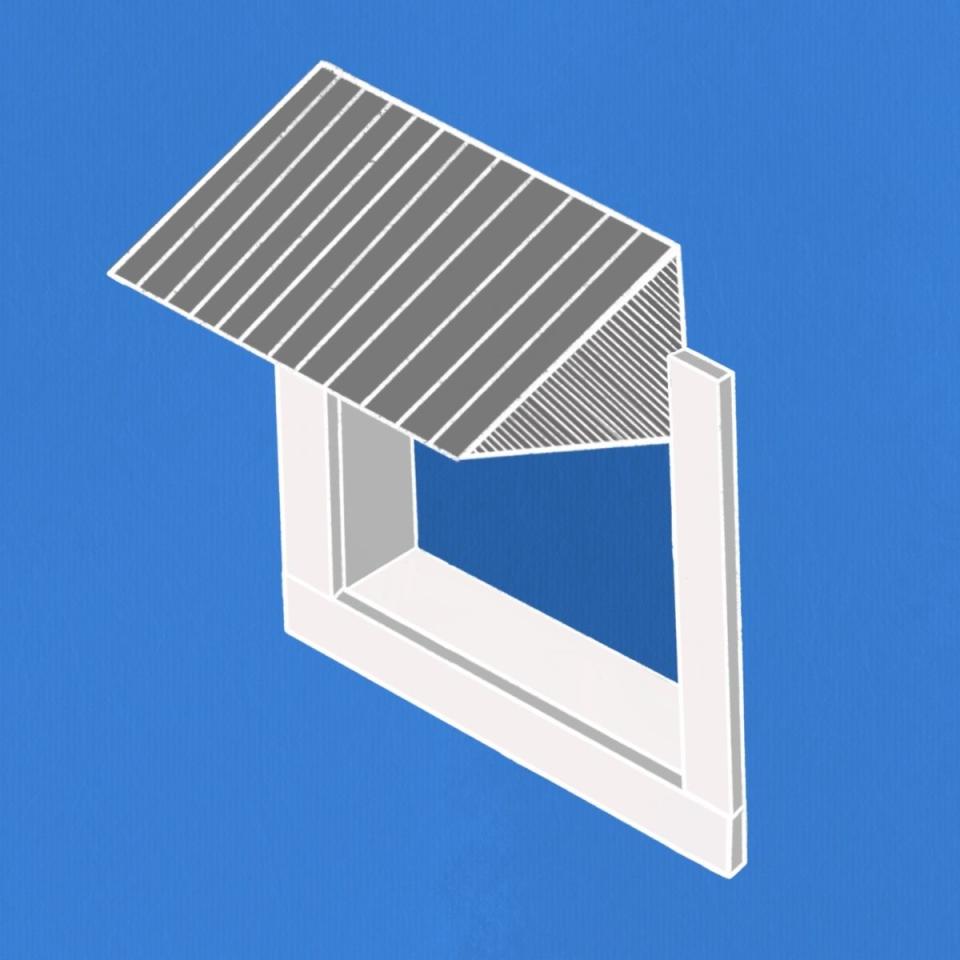
The roof over the pet door adds a finishing touch to the opening, converting it from a hole in the side of your house to an entry that has received nearly as much care as any other door.
You Might Also Like

