This Mickey Mouse Cake How-To Is A Disney Lover's Dream
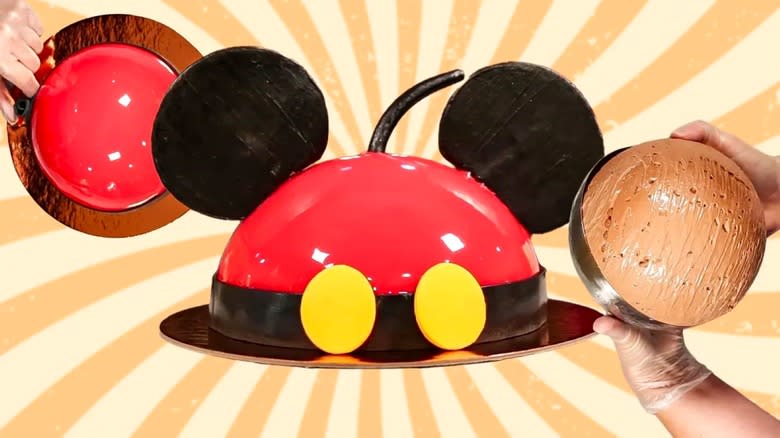
If you've ever visited Amorette's Patisserie at Disney Springs, you've likely ogled at the iconic Mickey Dome Cake. The shiny, round, and bright red confection is the ultimate sweet symbol of all things Disney. In addition to this classic dessert, the French-style bakery also offers dome cakes that emulate some of your other favorite Disney characters, including Pluto, Goofy, Donald Duck, Daisy Duck, and Minnie Mouse -- all featuring their signature colors and cute black ears. At first glance, these unique treats may seem impossible to whip up at home, but Tasting Table recently stepped into the kitchen with chef Katie from Amorette's Patisserie to learn all of her professional tips and tricks.
As it turns out, you don't need to be a professional to make cakes that embody all the magic of Disney. As Katie told us about the Mickey Dome Cake, "It is 100% possible to make this cake at home." And not only did she walk us through her step-by-step process for making this beloved Mickey-shaped treat, she also gave us plenty of advice that you can use for your own baking endeavours. Whether you're looking to replicate these domes cakes for yourself or you just want to pick up some fresh baking tips, we've got you covered.
Read more: 30 Types Of Cake, Explained
Create Supremely Smooth Buttercream Layers
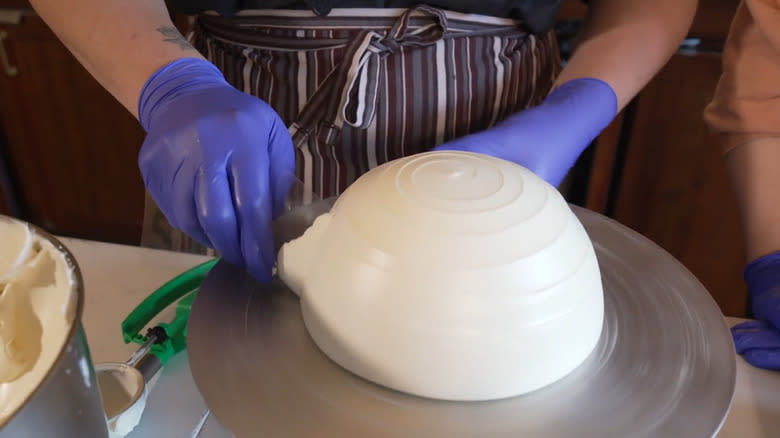
If your favorite part of cake is the frosting (and who could blame you?), now is your time to shine. We picked up some quality advice at Amorette's Patisserie about how to make your frosting the best ever. According to chef Katie, Disney's Mickey Dome cakes are made with light and fluffy Italian-style meringue buttercream. This is for two reasons: First, because the cake's signature red glaze is poured on later, and the neutral white color of the frosting helps it shine through; And second, since the cake is made with mousse, a buttercream topping helps ensure that it doesn't cave in.
No matter what shape, to create a perfectly smooth layer of buttercream on your cake, ditch your spatula or scraper and use a piece of food-grade acetate instead. These rectangular sheets (which look like pieces of plastic but are safe to use on your desserts) are sturdier than parchment but gentler than metal, so they're able to delicately form a pristine layer of frosting on the outside of your cake. Simply hold your acetate horizontally against the edge of your cake and rotate on a turntable. Repeat this step a few times and watch your dessert develop a smooth outer sheen.
Pour Your Glaze With Confidence
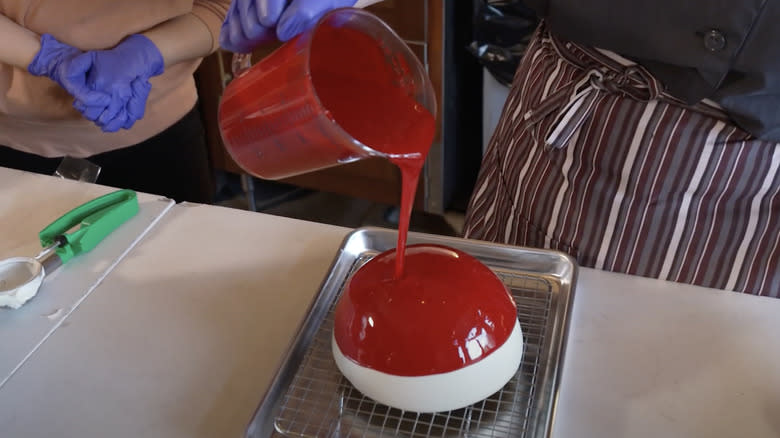
When making a cake with glaze, it can be tricky to figure out the perfect pour. If you're creating a fun design with a bright color -- as Amorette's Patisserie does with its Mickey Dome Cakes -- it's especially crucial to get the pour right to create that glossy, mirrored look. As chef Katie explains, before you even begin your pour, make sure you're holding the bowl or cup of glaze 6-8 inches above your cake. This creates enough distance that you won't be in danger of accidentally bumping your dessert as you go. Then, pour the glaze in circular motions to create an even layer and to avoid what Katie calls "cake rainbows," in which each layer doesn't fully stick.
Finally, a confident hand is a winning one when it comes to deploying your glaze. "If you pour too slow or too wimpy, then it's just going to fall off," Katie explained. Don't be afraid to let your glaze seep all the way to the bottom of the cake several times over, which will ensure a shiny, even layer on top of your dessert.
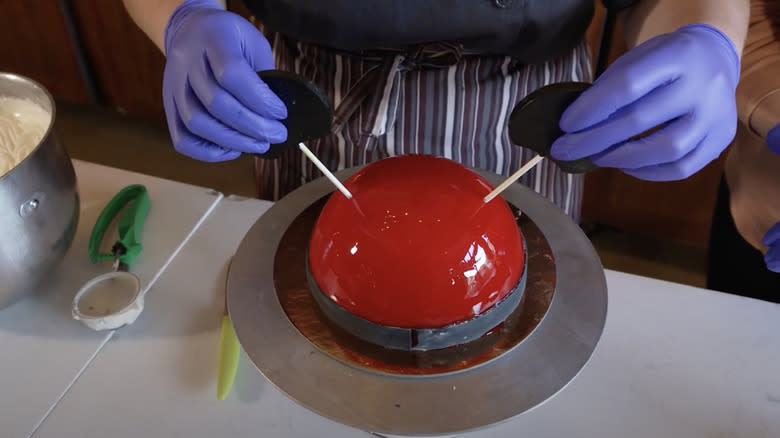
Cocoa Butter Paint And Chocolate Decorations Are A Match Made In Heaven
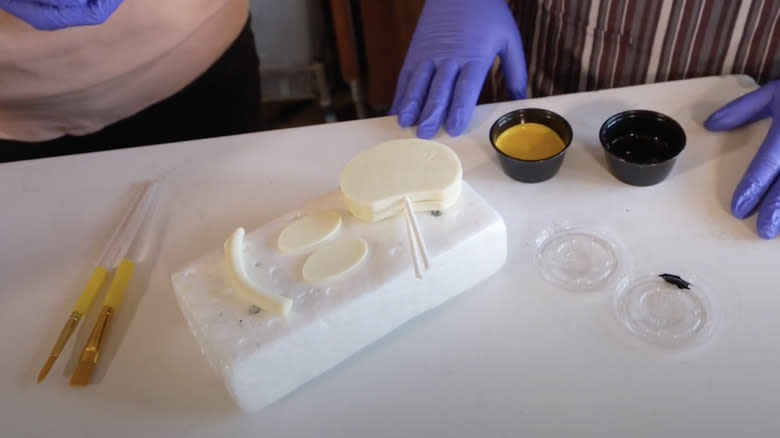
If you're making a fun character for your cake or any design that requires painting on edible decorations, then you'll want to pair the right type of paint with your cute add-ons. Amorette's Patisserie uses white chocolate shapes to make Mickey's buttons, ears, and tail -- so, of course, they need coats of yellow and black paint to give them the character's signature look. If you're also using chocolate to make the decorations for your cake, whatever your design may be, you'll want to pair them with a cocoa butter-based coating. Because chocolate contains plenty of fat, you'll want a paint that is also fat-based, which is why cocoa butter is ideal. If you use a water-based coating, on the other hand, you might end up with a wonky texture.
There are a few other advantages to using cocoa butter paint as well. Because of its fat content, it's less likely to bleed when exposed to moisture or humidity. And, unlike with water-based versions, you can easily paint over any mistakes you make. This is especially helpful when working with materials that aren't so easy to replicate, like chocolate shapes cut to look exactly like Mickey's ears.
Freeze And Thaw Your Cake Strategically
Soft ingredients like chiffon cake, mousse, buttercream, and glaze make for a melt-in-your-mouth cake but can be a little tricky to work with when you're creating your masterpiece. Luckily, Katie has a few hacks for making this process easier, too. If the base of your dessert is made from delicate ingredients, like the mousse-topped half-sphere in the Mickey Dome Cake, you'll want to stick it in the freezer before layering on any frosting or glaze. You don't necessarily need to freeze it completely — you only need it hard enough that it won't lose its shape. As an added bonus, if you're applying multiple layers of frosting, you generally won't need to chill your cake in between if your base is already frigid.
On the flip side, it can be a little difficult to insert decorations when you're working with an ice-cold cake. So, after you've applied all of your layers of frosting and glaze and allowed them to set, let your dessert thaw overnight to make it more malleable. Then, feel free to whip out your chocolate-based, cocoa butter-painted figures and stick them in.
Use Professional Tools For Professional Results

One advantage of working out of a professional patisserie kitchen is having access to a bunch of fancy tools that most people may not have at home. We picked Katie's brain to find out what she was using at Amorette's, and she clued us in to a couple of valuable (yet affordable) tools that can make your cake-building process much easier. If you want to build the Mickey Dome Cake at home or just whip up another dessert with perfect-looking half-spheres, buy a metal or silicone hemisphere pan.
Once your masterpiece is finished, one of the most terrifying parts of the process comes when it's time to transport your cake. After the hours (or days) it took to put your dessert together, the last thing you want is for it to slide off its base and fall to the floor. Katie has an easy solution for this: Apply rolled stickers to a cardboard base before carefully placing your cake on top. If you don't have stickers on hand for this, a few pieces of rolled-up masking tape can also do the trick. Then, once you transfer your cake to a metal stand, you can feel confident that it will stay put.
Check out Tasting Table's exclusive inside look at how Disney creates its Mickey Dome Cakes, and see more of chef Katie's tips for better baking at home.
Read the original article on Tasting Table.

