Master These 7 Advanced Exercises From Boutique Fitness Studios At Home
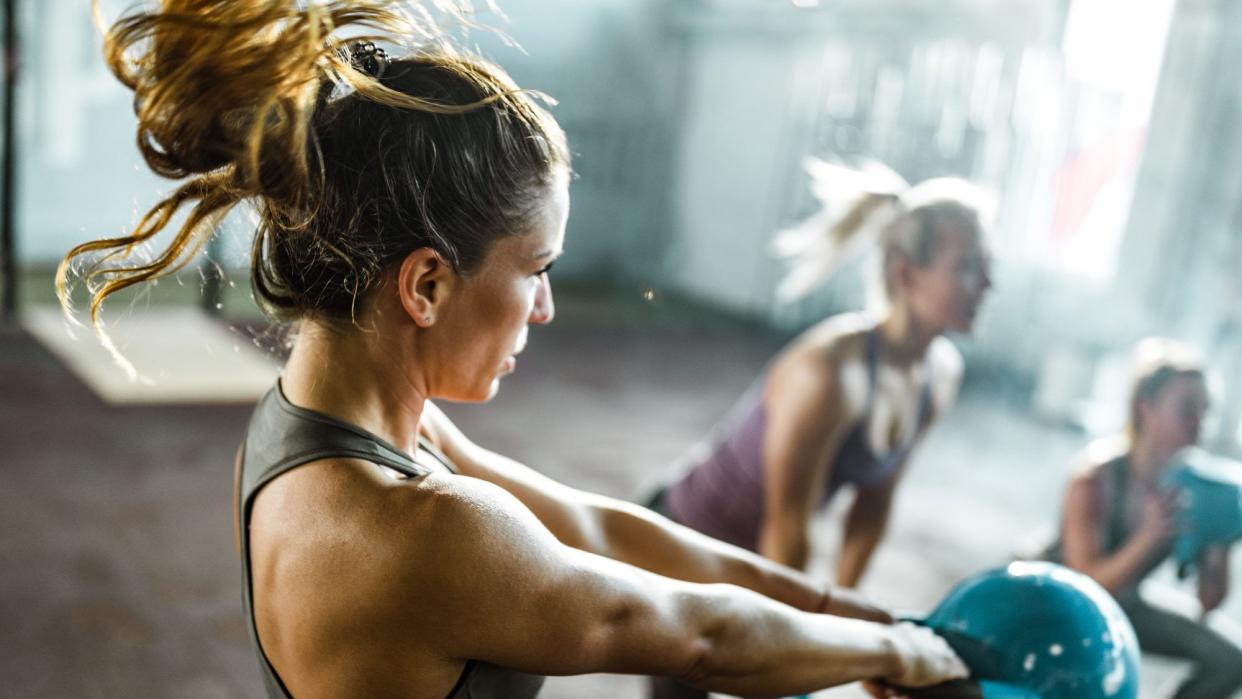
skynesher/Getty Images
You've probably heard it a million times: It's a great idea for your workout motivation to have a specific fitness goal. That could mean running a 5k or a marathon, reaching a high score at your indoor cycling class, or crushing a 30-day plank challenge.
That said, not all goals need to rely on a race, peer competition, or require a month's worth of sore abs. Sometimes, the mental and physical rewards of mastering a new, difficult skill can top that of training for hours on end just to cross a finish line. If you're looking to challenge yourself in a new way, this is for you: Seven boutique fitness studios picked the hardest move they offer in their classes, and give you the tips to try it for yourself below.
Work on mastering each one, then put them all together for a crazy-person workout that will surely challenge you to the max.
Physique 57
The Preztel
When you're sitting on the floor with one leg bent behind you and the other bent in front of you, you might think the instructor is downright crazy when she tells you to lift that back knee and start pulsing. Lift it...how? No, you're not being punked. That's the pretzel, infamous for being confusing to most and seemingly impossibly to some.
The main reason it's so difficult is that you have to get the alignment just right to target the correct spot. "The most common misalignment we see with pretzel is that the working leg is too far forward, and therefore not targeting the glute," explains Antonietta Vicaro, director of training for Physique 57. "It's essential that the working leg stays behind the hip and that the hip is rotated downward to allow room for the thigh to draw back."
Once you get the position just right, you might find it easier to target the glute. If not, "An insider tip is to reach both hands further forward past your front shin—you can even lie on your forearm, resting it parallel to the front thigh, to allow for the working leg to draw even further back." Try that variation until you master the move, and then work your way back to sitting upright.
How to Do the Pretzel
A. Start seated with the right leg at a 90-degree angle in front of body (knee pointing to the right) and left leg at a 90-degree angle behind body (knee pointing to the left). (FYI this is also called the 90-90 stretch.)
B. Place hands in front of right shin, framing right knee. Bring left thigh as far behind you as possible, making sure the knee is behind the hip bone. Internally rotate the left thigh so knee is tilted lower than foot, then raise the lower leg off the floor.
C. Lift leg up for 20 to 30 pulses, then hold leg up and press it back (think: moving left foot away from glutes) for 20 to 30 pulses. Then combine the two moves by doing one press back and one lift up for 20 to 30 reps. Repeat on the other side.
Barry's Bootcamp
The Jackknife
Jackknives are like a full-body crunch, so instructors love how they maximize the number of muscles engaged at once. "At Barry's Bootcamp, we incorporate these often because they're so effective in hitting the deep muscles of the core," explains Joey Gonzalez, celebrity trainer and CEO.
The problem? During a fast-paced class, newbies to the move might find it hard to execute. Here's the trainer's tip: "As you slowly stretch your arms and legs out in one long line with your body, take a big inhale. Exhale as lift your straight arms and legs and fold your body into a 'V,' letting all the air out. This will help you hollow out your abs so you can effectively perform the crunch at the top." (P.S. This is also a move gymnasts use to get insanely strong abs.)
As you build up strength and continue to practice, your form will improve: "It takes balance, coordination, and control," says Gonzalez. Start with just bodyweight, then add a dumbbell once you're feeling strong.
How to Do the Jackknife:
A. Lie face-up on a mat or a workout bench/step. Extend legs forward, keeping them straight and pressed together. Extend arms straight behind head to start. (Optional: Hold a single dumbbell between both hands.)
B. Inhale, then exhale and lift arms and legs up simultaneously, squeezing abs in to create a "V" position with body.
C. Lower back down to the floor, ideally maintaining arms and legs in a hover position without dropping them down to the floor at the bottom. Do as many reps as you can in 30 seconds.
SLT
The French Twist
If you take SLT or another Lagree Fitness Megaformer workout, you know the French twist well. It's the exact moment in class when you clench your teeth and start saying curse words in your mind. "During the French twist, you are required to pull the weight of the carriage and the spring using only your oblique muscles," explains SLT CEO Amanda Freeman. Unless you have obliques of steel, "it's very challenging for clients to keep their feet flat during the move," explains Freeman.
The other common issue: "Clients tend to want the motion to come from their legs instead of the oblique, so they struggle to keep their legs straight." If you want to hit that oblique head on, think "feet flat, legs straight" the entire time—even if you only end up moving the carriage a few inches. Still can't get it? "Practice on the front of the machine instead, which has less resistance so it's less challenging. You have to build up the strength in your obliques before you can master a French twist. Practice makes perfect."
Great news: You can also do it at home. Simply follow the same instructions below. (Add it to this Megaformer-inspired home Lagree workout.)
How to Do the French Twist
A. Start in a plank position with hands on the floor and feet on a towel or slider. Cross the left foot over the right foot, pivoting left heels to the floor so feet are flat on the floor.
B. Use obliques to pull feet in a few inches closer, hiking hips up toward the ceiling while keeping legs and arms straight.
C. Slowly slide feet back out to the starting "plank," keeping feet in the same position throughout the exercise.
D. Repeat, pulling feet in and out slowly for 30 to 60 seconds, keeping legs straight, feet flat, and using only side waist to pull feet in and out. Switch sides; repeat.
Peter Ardito
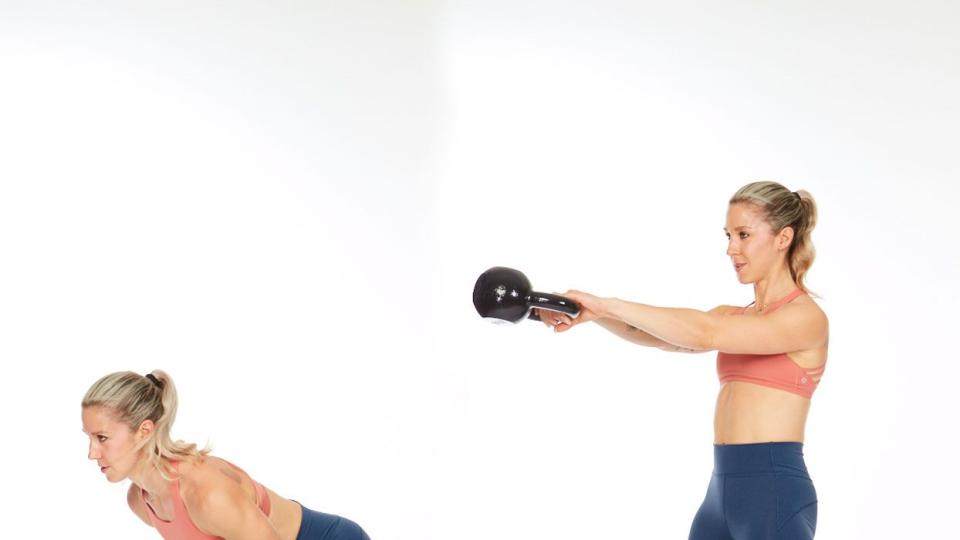
Kettlebell Swing
Despite being a longtime staple in high-intensity interval workouts, "this move is still foreign to a lot of people and is often misinterpreted as an arm exercise," explains Julia Avery, a trainer at The Fhitting Room. But your arms can sit this one out; it's an exercise for your butt and hamstrings, which are the exact muscle groups you should be using to thrust that weight back up each time.
"One simple cue we like to use is 'bend and snap,' the Legally Blonde reference. Simply bend forward at the waist and let the kettlebell pass through your legs (you should feel a nice stretch in your hamstrings), and then aggressively snap your hips forward and squeeze your butt to stand up. That force should cause the kettlebell to fly up into the air without you having to use your arms to lift it at all." (Here's more about the kettlebell swing, including form tips and all its benefits.)
Start using a 10 to 15lb kettlebell, though you may find that you can go even heavier, as this movement is powered by your glutes and hamstrings and not your arms.
How to the Kettlebell Swing:
A. Begin with feet shoulder-width apart, holding a kettlebell with both hands in between legs.
B. Bend forward at the waist, allowing the kettlebell to dip between legs, then quickly push hips forward and squeeze butt as you stand, creating enough force to raise the kettlebell up in front of chest.
C. As you continue the motion and gain momentum, the kettlebell should eventually reach chest-height every time. Complete as many reps as possible for 30 to 60 seconds.
Koldunov/Getty Images
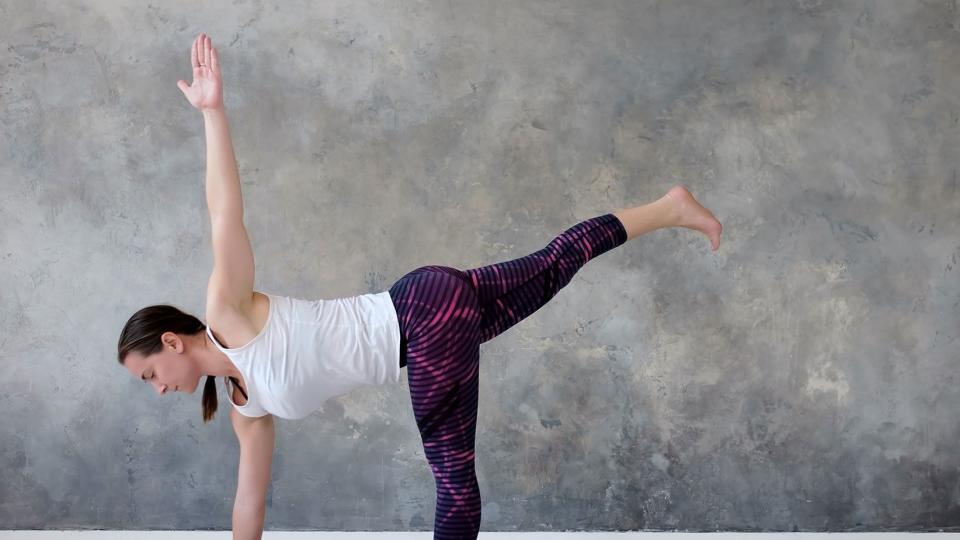
Twisted Half Moon
Just when you finally master the super-challenging half moon pose, you learn about an even more challenging variation, the twisted half moon. "Revolved half moon is one of my nemesis poses," says Sarah Levey, founder of Y7 Yoga. "Not only are you balancing on one leg, but you're also twisting!" It's mentally and physically complex, and it requires flexibility, concentration, and balance all at once.
"In order to master this pose, you need to be warmed up through the hamstrings, pelvis, and lower back, as this pose demands a lot of those areas." For that reason, hot yoga may be an easier forum to practice in than your regular Vinyasa class. Once you're warmed up, "think about being rooted strongly through the foot, which is the base of the pose. Try not to focus on lifting the raised leg, but rather on rotating through the pelvis. The more you rotate, the more your raised leg will move with it," explains Levey.
How to Do Twisted Half Moon:
A. Start standing with weight in left foot. Lift right leg behind body and lean forward, placing right fingertips on the floor (or a yoga block) next to the left foot.
B. Using left leg and core to balance, twist upper body to the left (it should feel awkward!), keeping right fingertips on the floor to steady you. Attempt to open chest and left arm up as much as possible, extending left leg long.
C. Attempt to hold the pose for a few deep breaths in and out, then switch sides.
New York PIlates
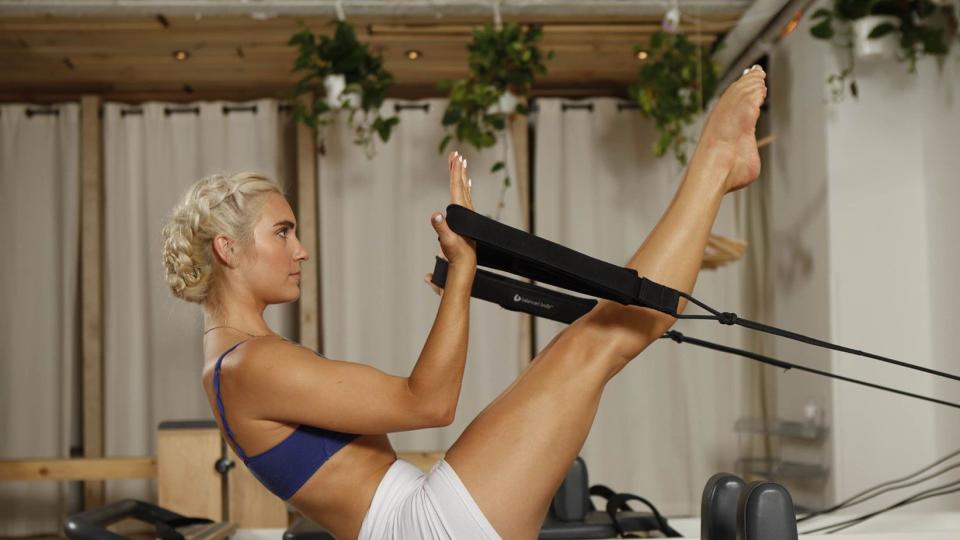
The Teaser
The teaser isn't easy, but it's a milestone for all serious students: "Balancing in teaser is a landmark for progress in Pilates," says Heather Andersen, founder of New York Pilates. Once you have the core strength to assume this pose, you're officially a beginner no more.
"The best way to get into teaser is to start seated, knees bent, feet flat on the floor. Tuck your tail under to roll back onto your sacrum, keeping your spine in a 'C' shape. Once you've found the position, practice bringing one leg at a time to tabletop (feet lifted, shins parallel to the floor). If balance is a struggle, you can hold onto the back of your thighs for support. The next step is to practice bringing both legs to tabletop, still holding onto the back of the thighs if you need to. Once you're able to balance with both legs in tabletop, straighten one leg at a time, really feeling the low abdominals pulling the legs in towards the chest as you straighten," explains Andersen. (Try these other Pilates moves for strong legs from Anderson.)
By gradually building up to the full, straight-legged balance, you'll learn to target your abs correctly and really feel your core working.
How to Do the Teaser:
A. Start laying face-up with both legs lifted to tabletop and arms lifted straight up to the ceiling.
B. Take a deep breath, then on the exhale curl chin and spine up off the floor and extend legs straight out, sweeping arms out to the sides and then forward and parallel to your legs.
C. Inhale at the top of the movement as you balance on the sacrum, then exhale and roll upper back down to the floor, legs back returning to tabletop. Repeat 5 to 10 times.
AKT
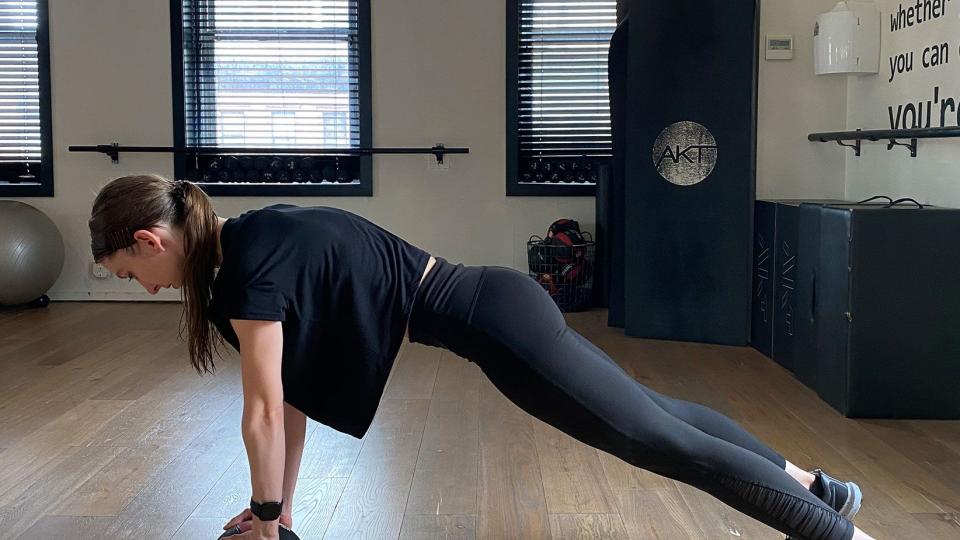
Medicine Ball Burpee
It's the high-intensity, full-body move you love to hate. In fact, many people are so tired after the first few burpees that they end up flubbing form big time and causing strain to other muscles. "People often sink into their lower back and overuse their neck and traps," says Anna Kaiser, founder of AKT InMotion.
To counteract that and keep the focus on the legs, upper back, and core, Kaiser recommends positioning your hands on top of a medicine ball instead of the floor. Also, "Don't look up: Keep your chin tucked down to your chest when you are coming in and out of the plank, which will help you align your body correctly from the top of your head to your heels," says Kaiser. And when you return to standing, "try stepping backward instead of jumping so you don't tweak your lower back." (Here are more tips for how to do a burpee correctly.)
Once you learn to keep your energy up and your form tight, you can add the jump back in and try the move with your palms on the floor instead of the ball.
How to Do a Medicine Ball Burpee
A. Begin in a plank position with hands balancing on a medicine ball.
B. Jump feet in, landing on either side of the ball, and lift chest up to assume a squat position. Jump up into the air, landing back in a squat.
C. Place hands back on the ball in front and step back into a plank. To make the move harder, jump back into the plank instead of stepping into it, and perform one push-up on the ball before jumping feet back in to a squat.
D. Do as many reps as possible for 30 to 60 seconds.

