How Martha Stewart Cured My Pie Crust Anxiety

I consider myself a decent baker. Ask my friends and family and they will vouch for all the cakes, cookies, muffins and other pastries I've served them over the years. However, there is one thing that puts my cooking confidence to the test: pie crust. That simple mix of flour, butter and water kicks my anxiety into overdrive and my mind starts racing. All I can think is "What if it's a failure?!"
Although my pies always turn out, my pie crust anxiety remains, so when I saw Martha Stewart, the hostess with the mostess, share her Perfect Pie Crust recipe, I took note. Could Martha cure my pie crust-making anxiety for good?
Get the Recipe: Martha Stewart's Perfect Pie Crust
Theresa Greco
The Ingredients For Martha Stewart's Perfect Pie Crust
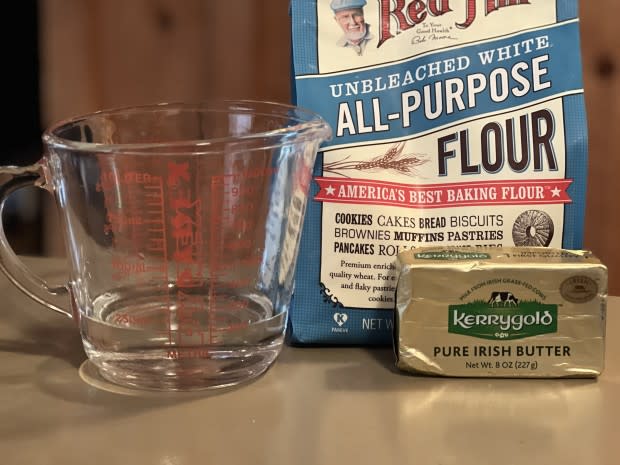
The recipe is about as basic as it gets, and in this case that’s not a bad thing. All you need is all-purpose flour, unsalted butter, salt, sugar and a bit of ice water. While some pie crust recipes rely on a combination of butter (for flavor) and shortening (for flaky texture), Martha keeps things simple and leans into an all-butter crust. Since I’m not a huge fan of using shortening in baked goods unless its absolutely necessary, this was a positive start.
Related: 27 Martha Stewart Recipes You Need to Master
Theresa Greco
How to Make Martha Stewart's Perfect Pie Crust
Martha suggests using a fork or pastry blender to combine the flour and cold pieces of chopped butter. Although this is a common pie crust method, I had always used a food processor in the past. I decided to give the fork technique a try and I'm a convert. Not only was it easy, but it also means I don't have to lug out (and then clean) the food processor. That's a win win in my book!
After the dough comes together it's divided into two pieces and chilled for at least an hour. I decided to take advantage of this down time to enjoy a glass of wine.
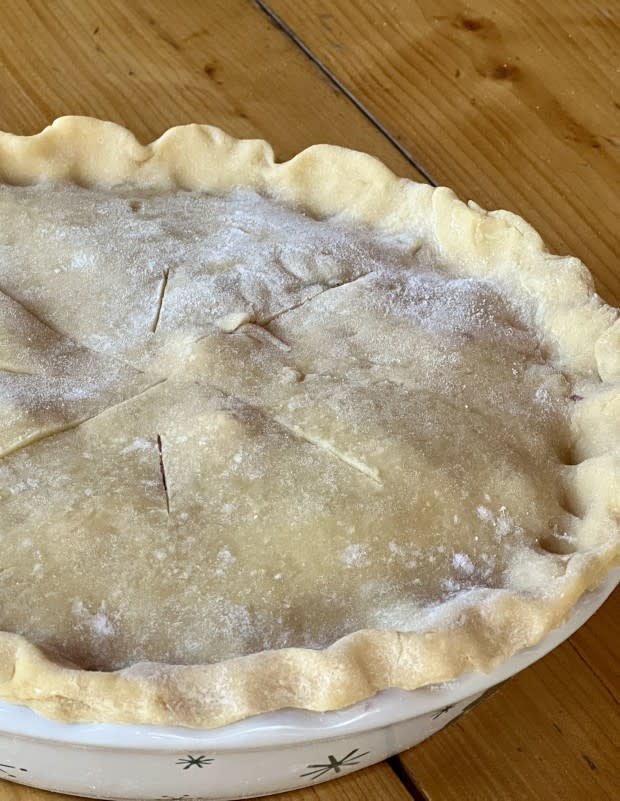
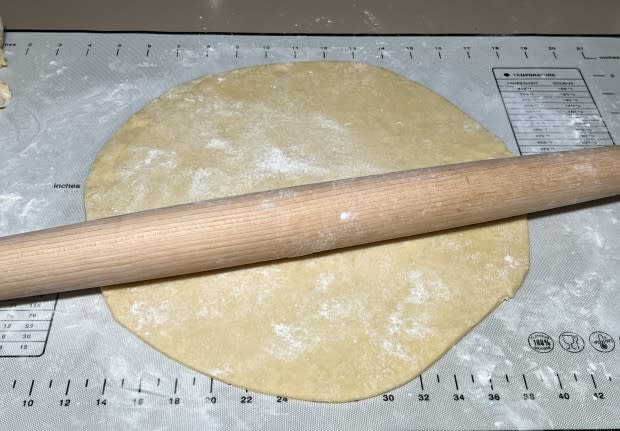
Once the two of us (the dough and I) rested, it was time to move on to the rolling. In her recipe Stewart suggests the importance of using the least amount of flour possible when rolling out the dough (too much flour can make the dough tough). This is something I hadn’t paid attention to in the past but I think it made all the difference. The final pie had an amazingly flaky crust, which is something I hadn't accomplished until this recipe.
But back to the rolling. I'll confess this is probably the most stressful part of pie making for me. My dough sometimes sticks to the surface or gets lopsided as I roll it out. The key to avoiding the amoeba-shaped pie crust is to stretch and roll the dough out from the center, rotating it slightly after each pass, and continuing like this until the dough reaches the desired size. To assist with this I use a marked pastry mat like the one shown below.
Theresa Greco
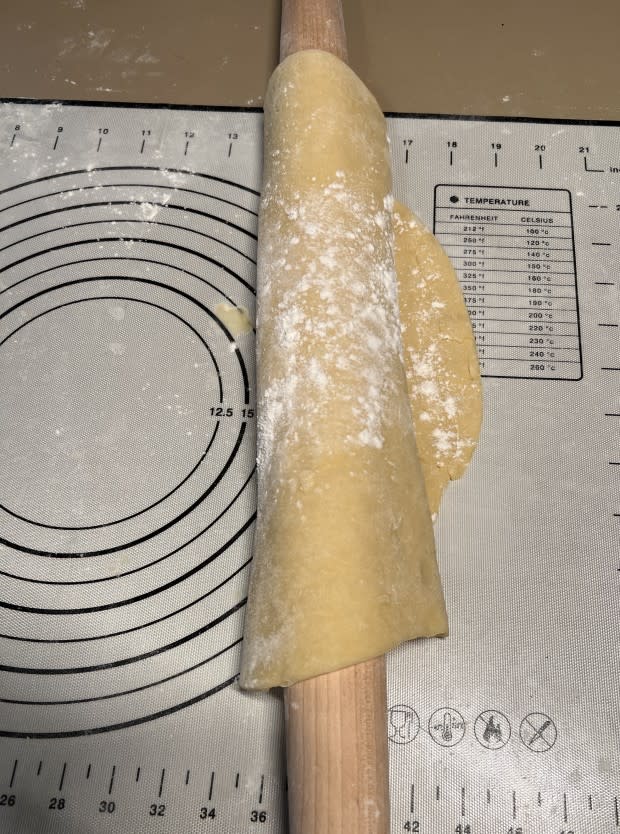
Getting the crust into the pie plate successfully is another pain point for me. While you can easily pick the dough up with both hands and hope for the best, Stewart's suggestion of rolling the dough around your rolling pin is pretty foolproof. Crisis averted. Thank you, Martha!
Theresa Greco
Once the dough is in the pan, gently press it into place and trim any excess around the edges. A sharp knife, pizza cutter or scissors all work well for this.
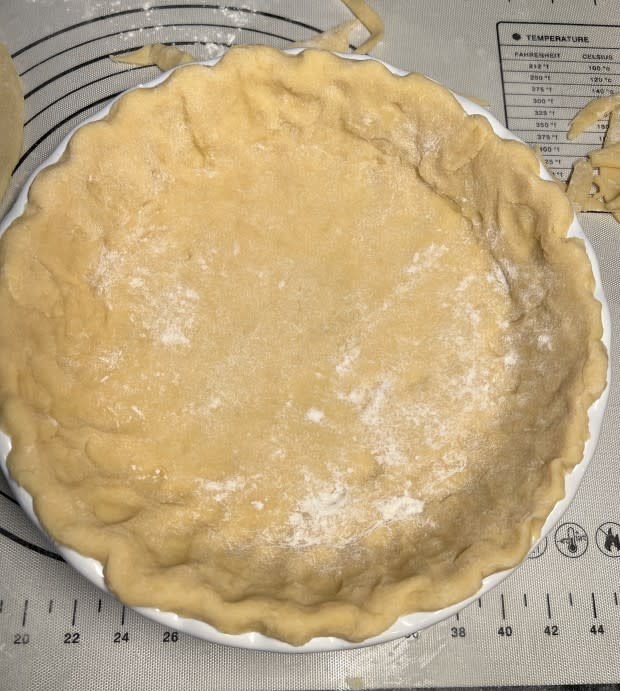
Theresa Greco
At this point the crust is ready to be par baked or filled. I love making blueberry pie this time of year and lean toward apple or pear pie in the fall, but there are tons of filling options, of course. Depending on the type of pie you're making, the second piece of dough can be rolled out and used as a top crust (as I did) or can be frozen for up to six months and used to make another pie.
My Final Thoughts
While Stewart’s recipe is very similar to other recipes out there I did gather a few good tips and tricks that definitely made the process easier.
Go hand's on. Use a fork for mixing, if not for anything more than making clean-up a breeze.
Take it easy on the flour. For tender, flaky crust, limit the amount of flour you add when rolling out the crust.
Use this transfer trick. Transferring the crust to your pie plate wrapped around your rolling pin is key.
After successfully using this recipe several times, I've decided that Martha's Perfect Pie Crust recipe will be my new go-to for making stress-free buttery crusts.
