With These Magnetic Frames, I Hung an Entire Gallery Wall in Less Than 20 Minutes
As an uncompromising perfectionist, I typically treat hanging a gallery wall as a fine art. For the wall in my living room, for example, I spent hours planning out the arrangement, meticulously tracing and cutting out each frame shape from kraft paper, taping the cutouts to the wall, leveling, adjusting, and (finally!) securing each piece with nails or picture-hanging strips. The result is just how I envisioned it, but it wasn't worth the headaches it caused. I was on the lookout for a better solution when I heard about TilePix.
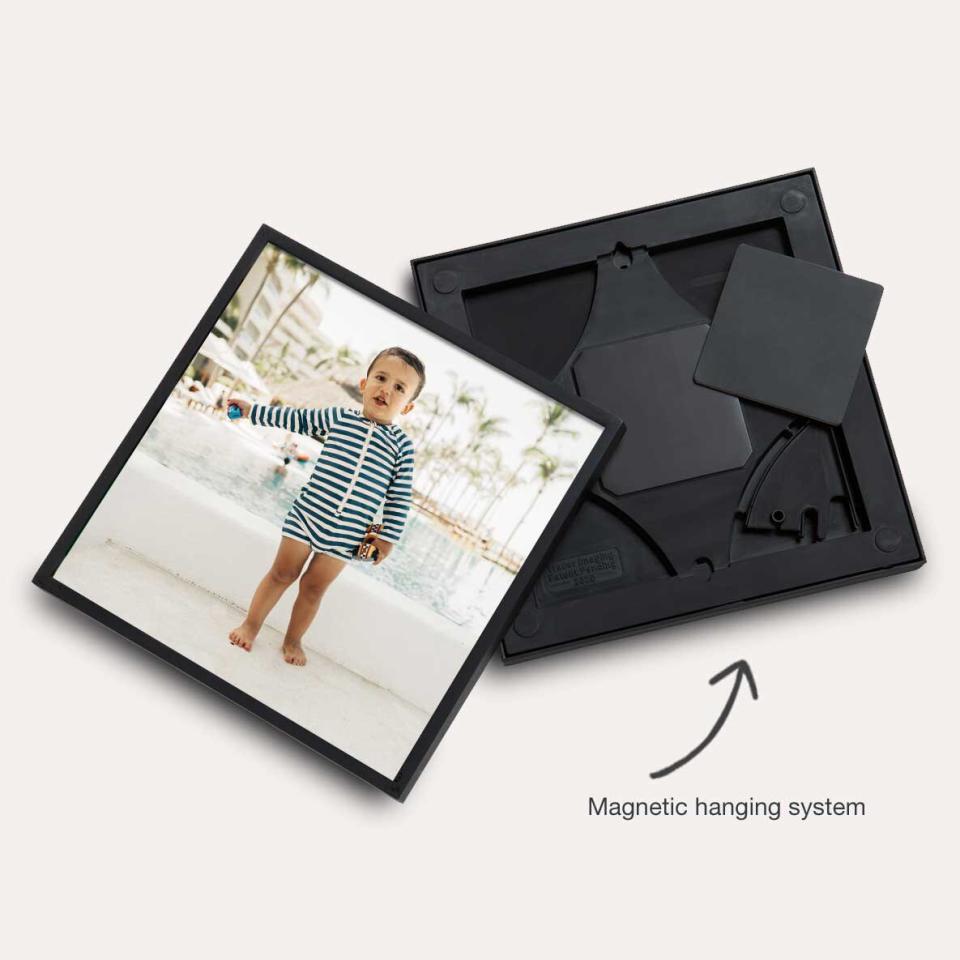
These ready-to-hang photo tiles feature a magnetic mounting system that lets you straighten, rotate, or swap out frames with ease. The back of each TilePix frame is fitted with a magnet, which corresponds to a peel-and-stick magnetic pad you mount to the wall. Once the frame is attached to the pad, you can slide or rotate it in any direction without taking it off the wall. And since the wall pads measure about 4 inches square, you have a ton of room for error when mounting them to the wall.

Jessica Bennett
Buy It: TilePix ($20 each, Walgreens)
I used TilePix to hang a gallery wall of travel photos in my guest room, and the process couldn't have been smoother. Starting with a clean, dry surface is key, so the first step was to wipe down the wall with a damp microfiber cloth and let it dry. To get an idea of the order and spacing, I laid out my set of 15 frames on the floor first.
Related: How to Clean Walls to Remove Scuffs and Stains
Courtesy of Walgreens
Then, beginning with the frame in the bottom left corner of my layout, I removed the magnetic wall pad, peeled off the adhesive backing, eyeballed the placement, and stuck it to the wall, pressing firmly for about 30 seconds. As long as they're in roughly the right spot, the wall pads don't need to be perfectly straight or in the exact center of the frame, so I didn't bother measuring or leveling at this stage. I then positioned the frame onto the wall magnet and repeated these steps for the rest of the arrangement.
Once the frames were all secured to the wall, I shifted them up, down, or sideways as needed to ensure they were all evenly spaced and straight. The entire hanging process took me about 20 minutes, and it looks as if I spent hours making it perfect. Best of all, I can easily switch up the arrangement with new photos from my latest travels or, since the pads are removable, take down the entire display without worrying about damaging my walls.
TilePix work best on wall surfaces that are clean, dry, and smooth, so don't skip the prep work. If you have textured or wallpapered walls, you can order a Rough Wall Kit from the TilePix website at no additional charge. Alternatively, simply push a thumbtack through the top edge of the magnetic wall pad for a more secure hold.
Currently available in an 8x8-inch size, each TilePix includes a glossy print mounted in a plastic frame. Choose from your own collection of digital photos, upload your selection to the Walgreens website, then pick up your framed prints once your order is ready. You can choose between black or white frames and add a border if desired to create a mat-board effect. Order them from Walgreens as a single frame ($20) or in sets of three ($45), and pick them up at your local store that same day. Otherwise, you can use Walgreens' Express Local Delivery service, which costs $4.99 and delivers to your door within 3 business days.
TilePix are a simple solution that takes the headache out of hanging a gallery wall, and personally, I never want to do it the old way again.

