Here’s How I Made a Totally Easy No-Sew Window Seat Cushion for Just $50
I recently moved into a new apartment, and when my partner and I first saw it, we fell in love with the giant window in the living room almost immediately (hey, they're hard to come by in NYC!). With its deep sill and a view of the park next-door, I knew it was perfect for a window seat—I could just picture myself curled up with a good book and a cup of tea, plus it was sure to become our cat's new favorite spot. But...we didn't exactly have the budget to have something custom made to fit, and hours of online browsing proved that cushions in the right dimensions just didn't exist. It was time to figure out a DIY solution.
The first thing I needed to determine was how it would be filled, and foam seemed like the best bet. I did some research and found a roll of multi-purpose foam at Home Depot for $25 that was wider and longer than my window, so I knew it would be easy to cut it down to fit. Next was the cushion cover. I have pretty solid sewing skills, but without a sewing machine, a cushion cover seemed like more work than I wanted to put in. A search for no-sew window seat cushion tutorials led me to DIYs that used plywood and a staple gun, but I didn't want to have to worry about getting wood cut to fit the window or buying a staple gun, since we didn't own one. The more I thought about it, the more I realized that the only parts of the cushion that would be visible were the top and the front—the whole point was for the cushion to take up the whole width of the window, so the sides would be hidden anyway. I decided to just fold the fabric strategically around it and pin it tight, essentially like wrapping up a present. I wasn't sure it would work, but in the end, I was so happy with how it came out. Here's how I did it:
You'll need:
Foam that's at least 3" thick (anything thinner might not be too comfortable!)
Large safety pins
Tape measure
You'll also need your preferred method of cutting through the foam. I used scissors because I admittedly didn't think this part through ahead of time, but that was a challenge, to say the least. A small hand-saw or electric knife would probably work a lot better!
Step 1: Measure your window sill
Measure the width of the inside of your window from edge to edge. You'll want a pretty exact measurement so that the cushion fits snugly inside and doesn't move around. Then measure the depth. I subtracted an inch from the depth measurement so that my cushion wouldn't hang over the sill and the edge of the window sill would still show just a bit, because I thought it looked neater. My sill is 58" wide by 18" deep, so I used 58" by 17" as my measurements.
Step 3: Purchase foam and and fabric to fit
For the foam, find a roll that is wider and longer than your window seat so you can cut it down to size. The foam I used was 24" by 72" and would likely work for most windows. Then, use your measurements to determine how much fabric you need—if you're using 3" thick foam like I did, you'll want the fabric to be at least 6 inches longer than the long side of your foam, and more than double the width of the foam. Because the measurements I was working with were 58" by 17", I ordered two yards of my chosen fabric.
Step 3: Cut the foam to fit
Mark out your measurements on your foam—I found it helpful to draw out the full lines of where I was going to cut, since it can be difficult to cut foam in a straight line without a guide. Then, cut using your tool of choice.
Step 4: Wrap foam in fabric and pin in place
Now, for the easy part: You're going to wrap the fabric around your foam just like you're wrapping a gift. Place the fabric on a clean surface with the outside facing down, then lay the foam in the center of it. Start by wrapping the bottom side up, and pin it into the foam in a straight line.

Once you've got the bottom half pinned, pull the top taut (it's helpful if you have someone to hold the foam while you do this for a tighter fit) and around the foam until it overlaps the fabric you just wrapped over the bottom. If the fabric is too long, you can fold it under or trim it. Pin in a straight line.

Next, you'll need to wrap up the sides of the cushion. Start by folding in the shorter sides, then fold the top down (or bottom up—whatever is easier for you!) and pin into the foam, pulling taut. Fold up the other half and pin in place, again, pulling taut as you go.
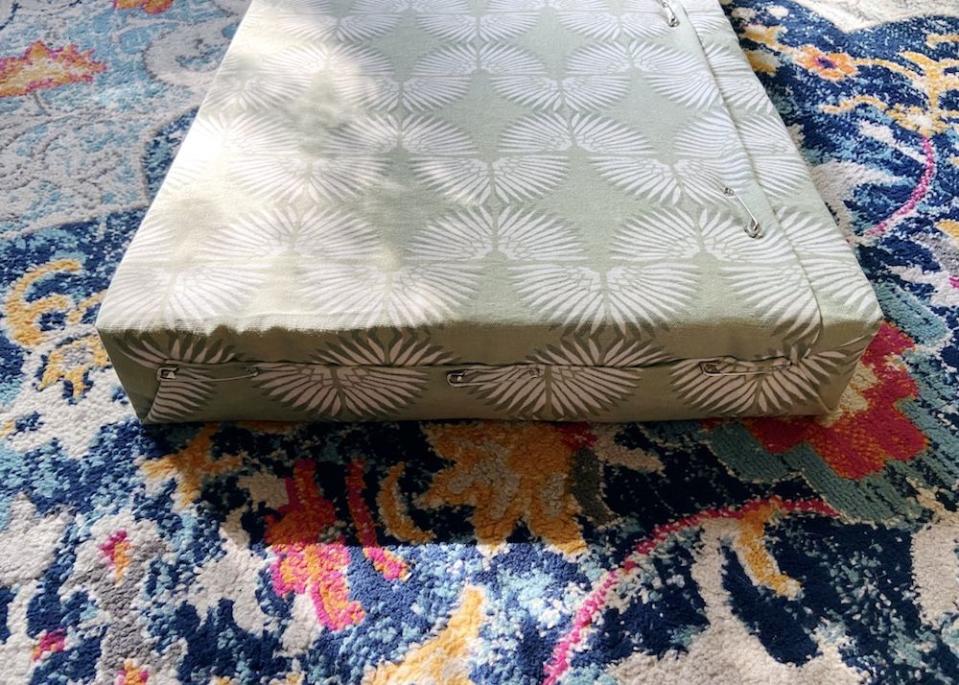
Repeat on the other side, and voila! You officially have a finished no-sew window seat cushion.
Step 5: Place on window and style
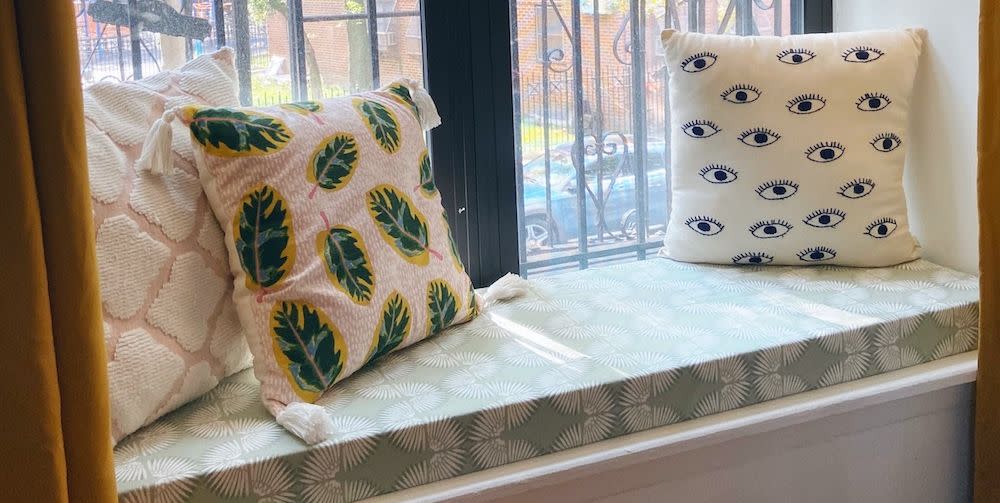
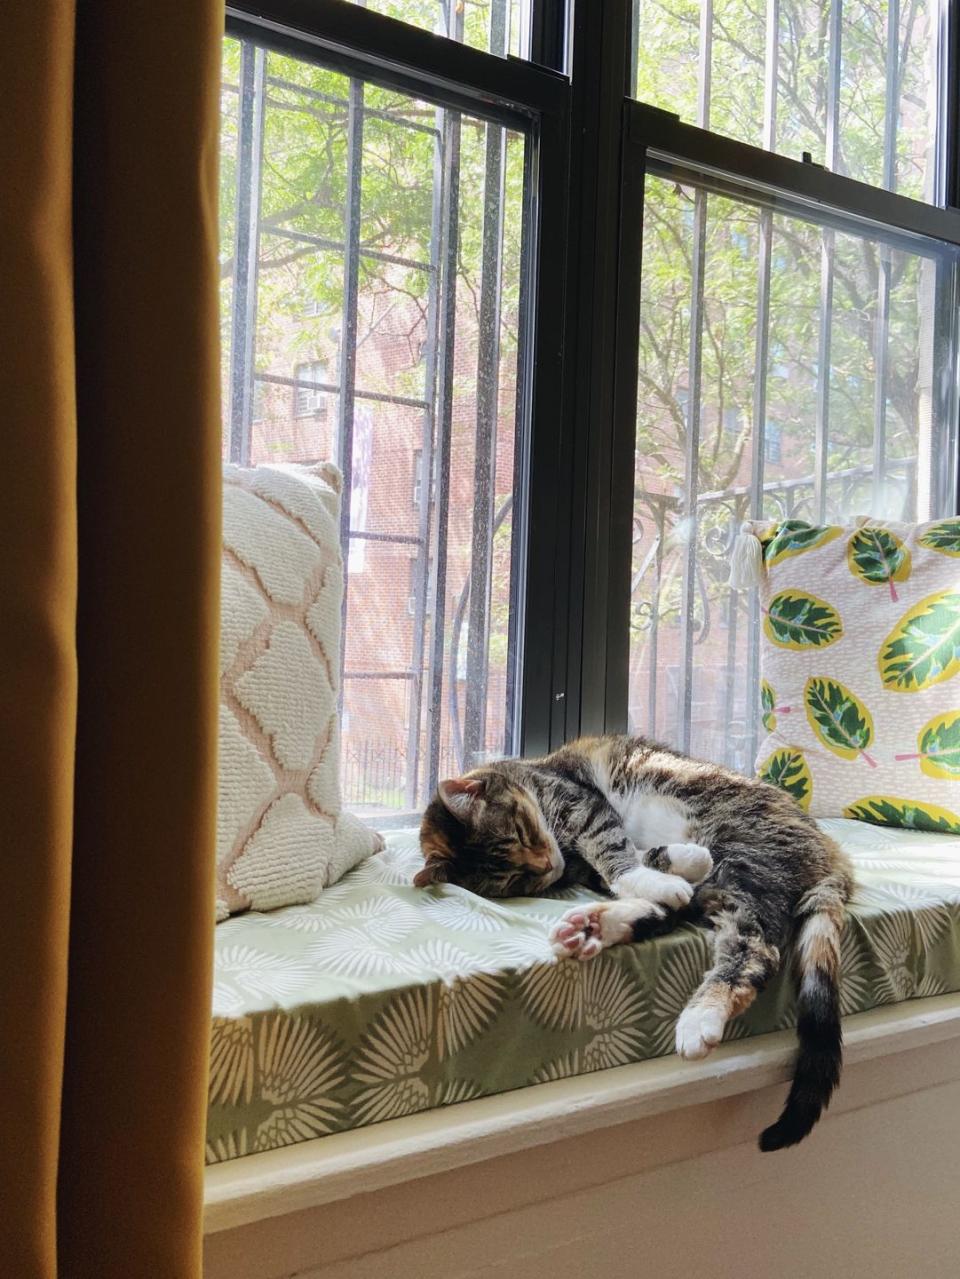
Place the cushion on your window sill, pinned side down. It should fit perfectly, and all that's left for you to do is to style as you please. We added some throw pillows to make it feel cozier and to have back support on hand for when we do want to sit in the window. Drinking tea and looking out at the park is just as lovely as I imagined, and as you can see, the cat is pretty pleased. Not bad for a project that cost $50 and took about 20 minutes to complete!
Note: You may find that the fabric is a little loose when you're done pinning it or with use over time, especially if you have a cat who's an avid bird-watcher—if that happens, just undo your sides and top layer pins, pull tighter, and re-pin for a better fit. I've found it's also super easy to just smooth out the fabric by hand when it's on the sill for a quick fix.
Follow House Beautiful on Instagram.
You Might Also Like

