Lingo Biosensor showed me how my body reacts to food stress and sleep
Wearables are big news this year, from headsets to smart rings but Lingo offers something that most devices can’t. The Lingo biosensor is a continuous glucose monitor that reads your body’s blood sugar levels throughout the day. It is worn directly on the skin and has a small canular that pierces the skin to take readings.
A non-invasive blood glucose monitor is something that Samsung and Apple have been rumoured to be working on but has still not appeared on a smart device. So for now, if you want to track your glucose levels, you need a device like Lingo or one of its competitors.
Glucose monitors have been around for some time and are typically used by type 1 diabetics to help determine when they need to administer insulin to help regulate their glucose. Or on newer closed-loop systems, to tell the onboard pump how much insulin to deliver. It’s something I know a lot about, as a member of my family wears one.
For that reason, I was really interested to try the Lingo device. I was curious, as someone with (as far as I know) a well-functioning pancreas, as to what benefits it could bring. So I wore the Lingo device for two weeks and went about my regular schedule, adding the data to the app as I went, to see what results I would get.
What’s in the box?
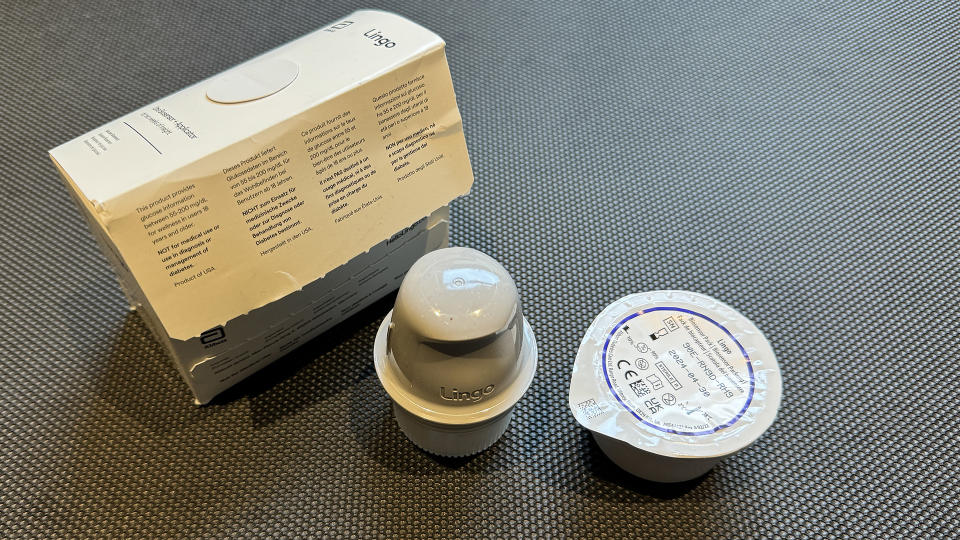
My Lingo package came with two biosensor packs, which each last for two weeks. However, the Lingo website now offers either a single pack which lasts for two weeks, for £89 or the two-month plan, which includes four biosensors, for £300.
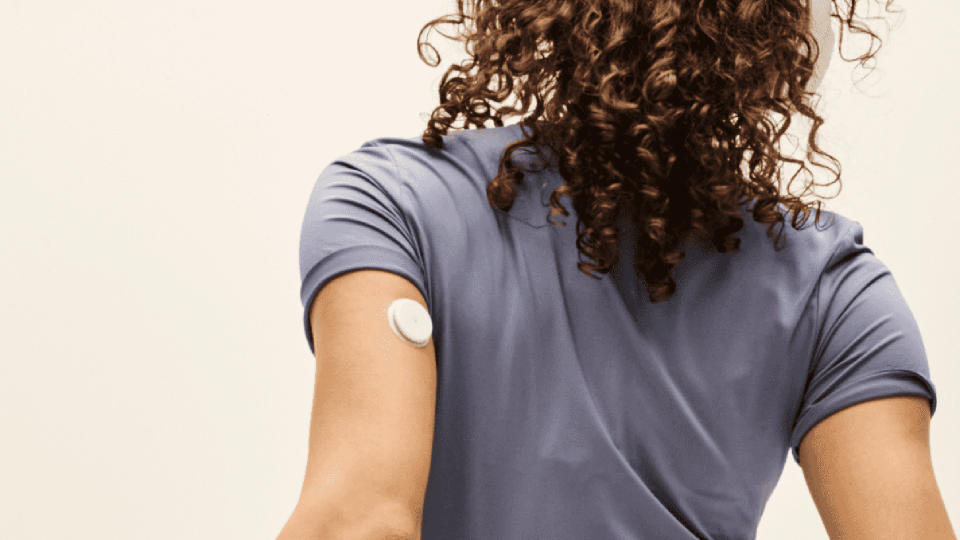
Each biosensor pack includes an applicator and the sensor. You also get alcohol wipes, to clean your skin before applying, and a protective sticker, which goes over the top of the sensor to help keep it in place.
Fitting the Lingo
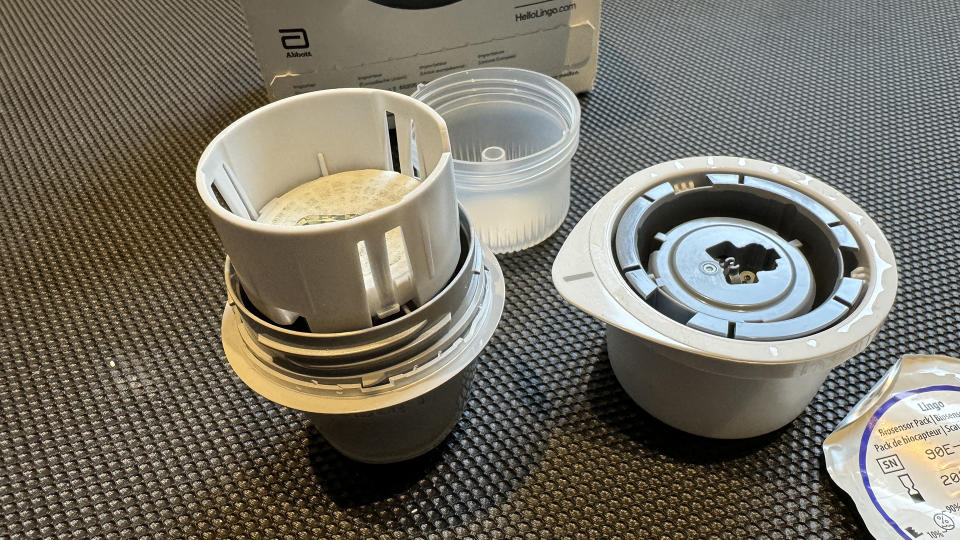
The applicator and sensor pack are inside each box, along with the alcohol wipe. The included paperwork takes you through the simple process of unpeeling the lid of the applicator, taking the cap off the sensor, and then placing the sensor inside the applicator. There’s also a guide and video in the app if you need it.
To place the sensor on your skin, you simply push the applicator onto your skin until you hear the click. That click is the canular releasing and piercing your skin, which may sound a little scary but you don’t feel a thing. The canular is tiny, and so doesn’t hurt a bit. There’s adhesive around the edge of the sensor to hold it in place, so you just need to make sure this is secure.
In the pack, you also get a sensor cover, which offers another layer of protection to hold the sensor in place – handy if you spend time in the water, or are worried about knocking it. I found though that the sensor was actually pretty sturdy once in place.
Once you’ve got the sensor on (the info recommends it goes on the back of your arm) you can pair it with the app. You simply hold your phone close to the sensor and it will recognise it and pair automatically. Unlike early biosensors, you don’t need to scan the sensor with your phone to get a reading. Now that it’s paired, it will continuously send readings the entire time, with updates every five minutes.

Logging your events
Once the Lingo sensor is on, it’s very easy to forget you’re even wearing it. However, to get the best out of it, you need to log events, such as meals, snacks, exercise and particular events like stress, that might affect your body.
If you use a fitness app also attached to your phone, the Lingo app will import any exercise you record. I use my Apple Watch to time my morning runs, and these automatically appear on my Lingo graph.
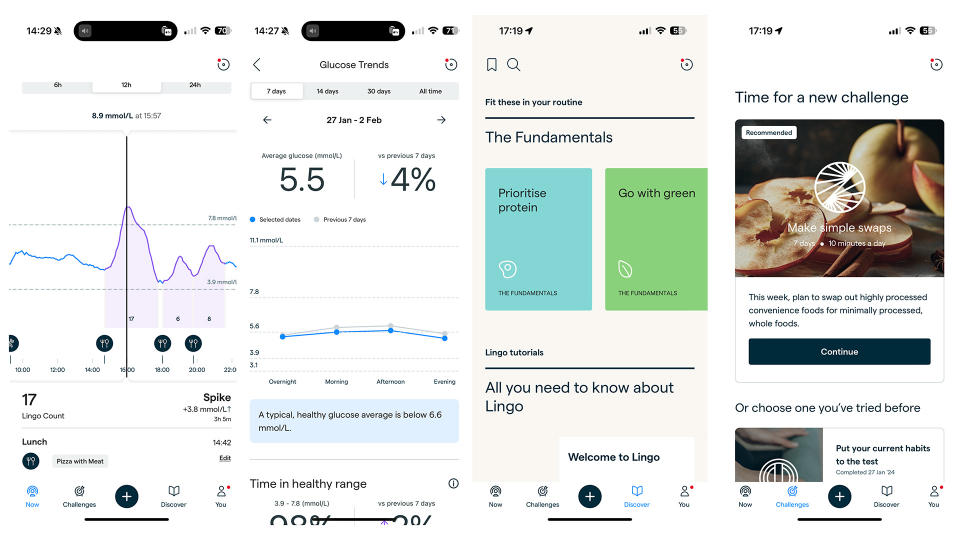
If you need some inspiration, the apps also includes a range of challenges that you can follow. These are principally aimed at eating more healthily, taking more exercise or destressing.
The results
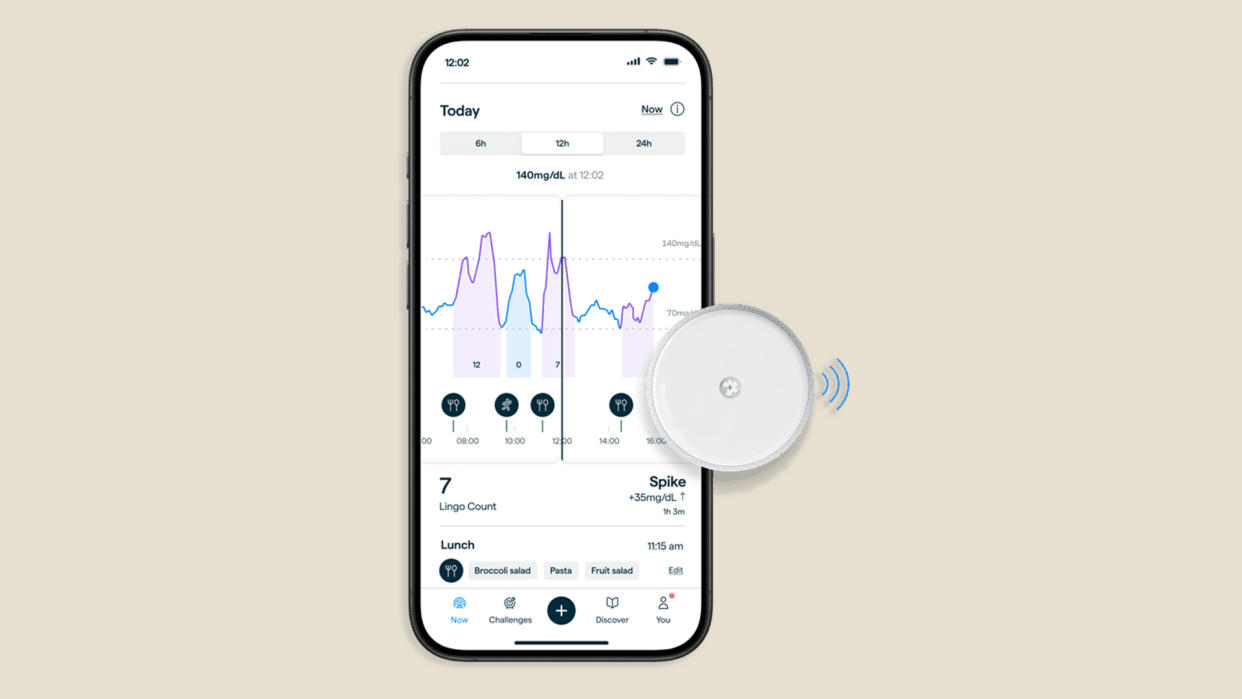
The Lingo app shows your blood glucose on a graph. For guidance, it places minimum and maximum levels as a dotted line on the graph, and ideally, your glucose level should stay between these two readings. It also highlights the spike periods for reference.
Having previously experienced a similar graph for a continuous glucose monitor used by a Type 1 diabetic, this was all very familiar to me. If you’re not used to seeing this, however, it might surprise you how much your glucose levels change through the day, particularly after some food.
My glucose levels were for the most part well controlled and for the majority of the time stayed well inside the recommended range. However, I did notice significant rises (and subsequent falls) after meals and around exercise.
When your glucose levels spike your pancreas needs to create more insulin to counteract. The spikes and subsequent crashes can cause lethargy, hunger and ultimately can be bad for the body. High glucose spikes can lead to weight gain, heart disease and Type 2 diabetes.
The most useful part of the Lingo app then, is analysing what causes the biggest spikes and trying to avoid repeating them. Food and drinks with high sugar content caused the biggest spikes, and I found that my morning coffee (with vanilla syrup) was really sending my levels through the roof. As did one of my mum’s homemade desserts!
Should I buy the Lingo biosensor?
Besides just general intrigue, there are a few good reasons why you might want to try Lingo out. It’s a very simple way to identify the reasons for large spikes in your blood sugar, and therefore a handy way to help regulate your diet and stress levels.
The two-week period I tried was more than enough to identify the problem areas but if you are looking to make changes to your routine and diet, you will probably want to go for the two-month plan. This gives you time to try out those changes and see how much better it looks before the monitoring finishes.
Aside from the challenges, the Lingo app is quite hands-off with helping you use the information in front of you. I feel a more structured approach could be more useful if you were intending to use it to control your diet, for instance. For now, measuring your glucose levels is still quite a specialist process, due to the need for an invasive canular. However, should one of the big names finally crack the non-evasive measuring, I can see this being a handy addition to your health app.

