How to Level a Layer Cake (No Toothpicks Required)
To level cake layers with ease, use this simple shallow-cut method.

Serious Eats / Vicky Wasik
Before assembling a layer cake, I always level each cake. That's because most cakes will dome slightly in the oven, and stacking the layers only compounds that effect, until the cake looks like that sloppy pile of mattresses from "The Princess and the Pea." Even when you have a good recipe and great pans that will produce relatively flat cakes, I still recommend trimming their tops.
Benefits of Leveling a Cake
This is more than the compulsive habit of a recovering pastry chef; by removing the comparatively thick and dry top crust, I'm putting the soft interior of the cake in direct contact with the filling, so that the cake can readily absorb both moisture and aroma. Not only can that improve the cake's flavor and shelf life, it will also produce a heap of tasty scraps that are ideal for checking the filling or frosting's flavor, allowing me to fine-tune either one before assembling the cake. Or, at least, that's what I tell myself as I snack on bite after bite.
Setup and Tool Selection
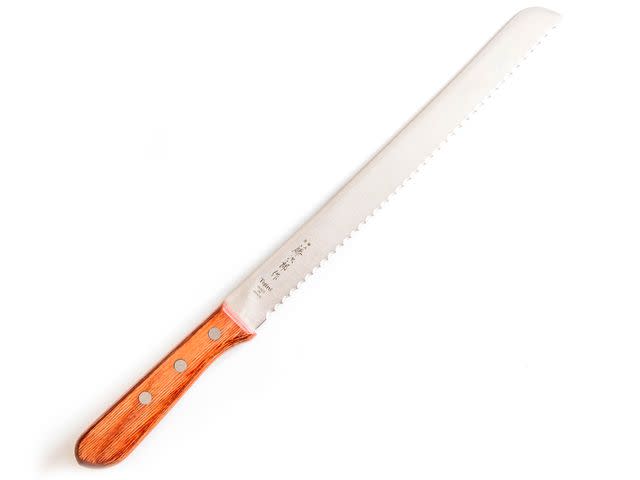
Leveling works best on a completely cool cake; a warm and fragile cake will shed a mountain of crumbs as it's sliced. It also depends on having the right tool for the job—not a senseless, unitasking cake cutter, but a 9- or 10-inch serrated knife.
Serious Eats / Vicky Wasik
On Daniel's recommendation—his review of the best serrated knives is right here—I've become a fan of the Tojiro Bread Slicer, which is long enough to glide across an eight-inch cake. If you favor nine-inch cakes, you'd be better off with the slightly longer version from Dexter-Russell. Otherwise, just reach for your favorite bread knife; chances are, it's long and sharp enough to handle a simple cake.
Make the Cut in Stages
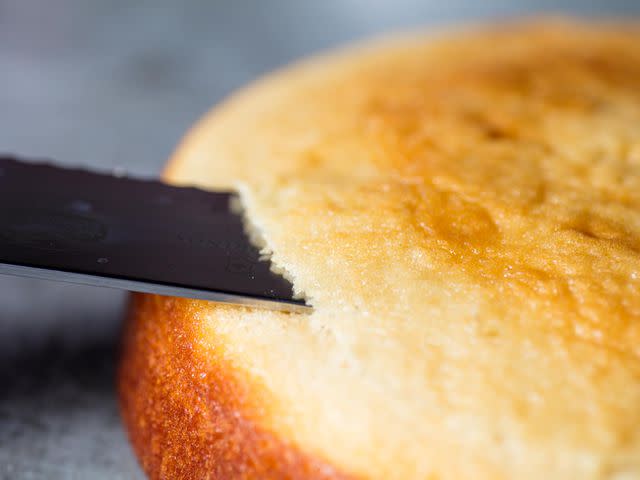
To level a cake with ease, position the blade right where the cake's dome begins to rise up. With a gentle horizontal sawing motion, cut roughly one inch into the cake, then rotate the cake about 45° and repeat.
Serious Eats / Vicky Wasik
Keep at it, turning and cutting shallow incisions, until there's a loose flap around the entire cake. From there, simply saw through the middle. No fussy toothpick placement required. Leave the cake top in place to prevent moisture loss until it's time for assembly, or else set the scraps aside and cover the cake with a bit of plastic. With that simple chore out of the way, your favorite layer cake will be on its way to looking and tasting its level best.
May 2017

