Your Laundry Routine Is Probably Outdated—Here’s the Modern Way
We may earn revenue from the products available on this page and participate in affiliate programs. Learn More ›
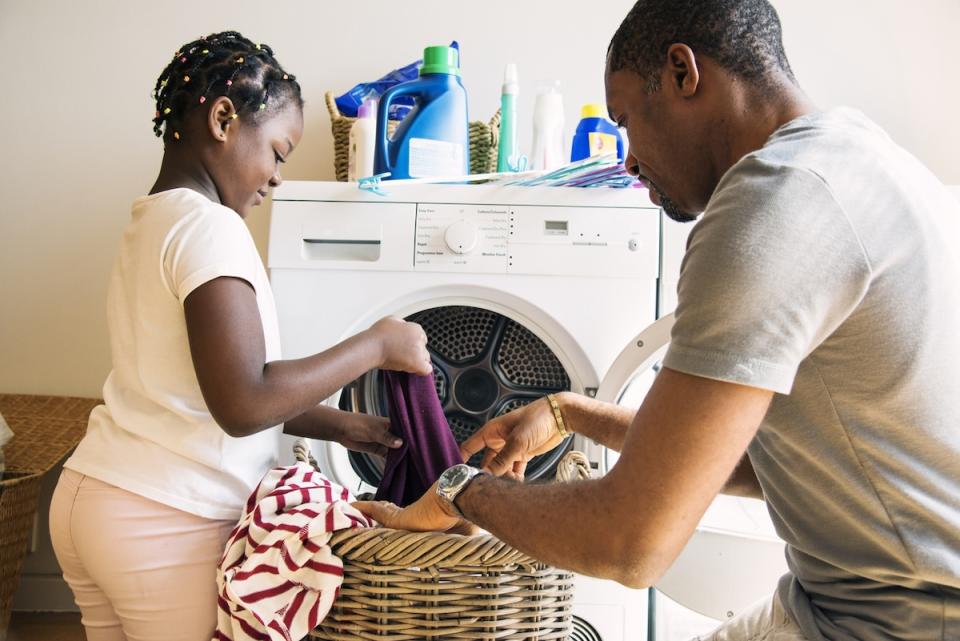
Learning how to wash clothes and do the laundry is a fundamental life skill that everyone should master. From freshening up your linens to maintaining the quality and longevity of your family’s clothing, knowing the proper techniques is essential. Not only does it save money on potential laundry mishaps and dry cleaning, but it also empowers people to care for their belongings by themselves. In this how-to guide to washing laundry, we’ll cover everything from sorting to drying and include helpful laundry hacks so you can tackle laundry day with confidence. Tools & Materials Bobvila.com may earn a commission from purchases made through these links. Laundry bags Dryer balls Drying rack Laundry detergent Fabric softener Whitener Project Overview Working Time: 1-2 hoursTotal Time: 3-4 hoursSkill Level: BeginnerEstimated Cost: $20 – $50, depending on the purchase of optional tools and supplies. Before You Begin Before starting your laundry, always check garment labels for specific washing instructions. Some fabrics require gentle cycles, cold water, or hand-washing to prevent damage. Understanding these requirements is crucial to maintaining the quality of your clothing and avoiding common laundry mistakes. STEP 1: Separate your clothes by fabric and color. Start the process by separating your clothes into different piles based on fabric type and color. Create distinct groups for whites, darks, lights, and delicates. Elizabeth Shields, operations manager of Super Cleaning Service in Louisville, Kentucky, suggests “Instead of tossing everything into one big laundry basket or heap, place separate baskets or hampers in your bedroom or laundry area for different categories like whites, darks, and delicates. This separation prevents color transfer that can occur when colors bleed, especially from new or dark textiles. Sorting by fabric type is equally important since different materials have different care requirements. Daniel Feliciano is the co-founder and CEO of Clotheslyne, an on-demand laundry service based in select U.S. states. He says, “Remember, delicate fabrics like silk and wool require gentler cycles than cotton and synthetics.” Photo: istockphoto.com STEP 2: Pretreat any stains. Before loading your washing machine, inspect each garment for stains. Shields says, “If you spot treat first, you address the stain right away so there’s no time for it to set in.” “Apply a stain remover or a small amount of laundry detergent directly to the stain,” Feliciano says. “Scrub the solution with an old toothbrush to ensure the stain remover is set.” Finally, he adds, “Allow the stain remover to sit for at least 15 minutes.” For tougher stains like oil or wine, letting the pretreatment sit overnight can be helpful. STEP 3: Load the washer and add detergent, fabric softener, and/or whitener. Once your clothes are sorted and any stains are treated, load the washer. Make sure to avoid overloading it—clothes should have enough room to move freely throughout the cycle. Add the appropriate amount of high-efficiency laundry detergent into the designated compartment. According to Feliciano, you should “use the recommended amount of laundry detergent for your load size and water hardness,” adding that “more laundry detergent does not mean cleaner clothes.” If you’re using fabric softener or whitener (like bleach), add these to their respective dispensers now. It’s important to measure these additives according to the manufacturer’s recommendations to avoid leaving residue on clothes or damaging the fabrics. Shields cautions against using commercially-made fabric softener, saying, “You can use fabric softener beads or liquid softener, but there’s a catch. While the buildup might not be a problem right away, it could cause issues with your washing machine later on.” She suggests going the DIY route, saying “All you have to do is pour about half a cup of white vinegar into the fabric softener slot during the rinse cycle.” Photo: istockphoto.com STEP 4: Choose the right washing machine settings. It’s important to choose the right washing machine settings to get the best results. Start by consulting your washing machine’s owner’s manual, which will detail your model’s specific settings. When choosing the cycle, consider the fabric type and soiling level of your laundry. Temperature and cycle type have a major impact on energy consumption, so using them judiciously can also lead to savings on utility bills. Here’s a breakdown of the most common settings: Water level: Adjust according to the size of your laundry load. Small loads require less water, while full or bulky loads need more. Water temperature: Choose hot for whites and heavy soil, warm for moderately soiled clothes, and cold water for bright colors and delicate fabrics. Cycle type: Normal, for regular, everyday items like sheets and shirts; Delicate, for items that require gentle washing, like fine fabrics and undergarments; Permanent press, reduces wrinkles in shirts and pants; Heavy duty, for durable items like towels and jeans; Bulky, for large items such as blankets and comforters. STEP 5: Move the clothes from the washer to the dryer. After the wash cycle completes, transfer your clothes from the washer to the dryer. “I know laundry can be a bit of a chore, but it’s important to transfer your clothes from the washer to the dryer quickly to avoid wrinkles and ensure that your clothes dry properly,” Shields says. Give larger items a good shake to remove any wrinkles and make sure they’re separated for uniform drying. Before loading the dryer, check the labels on your clothing again to confirm which items are dryer-safe. Any garments that require hang-drying should be removed at this point. Avoid overloading the dryer and ensure there is enough space for air to circulate around the garments. “When you’re loading up your dryer, start with larger items like sheets and towels first, so that they create a cushion for the smaller items,” Shields advises. “This will help promote better airflow and make sure everything dries evenly.” She also recommends using dryer balls or clean tennis balls to fluff and separate your clothes during the drying cycle. Photo: istockphoto.com STEP 6: Select the best dryer settings and start the machine. Choosing the correct dryer settings is crucial for ensuring your clothes come out dry, undamaged, and minimally wrinkled. Start by consulting your dryer’s manual to understand the specific features and settings of your model. Choose a drying cycle based on the fabric type. Adjusting the heat setting is also important; high heat can quickly dry clothes but may cause shrinking and fabric damage, whereas low heat is better for delicate items but takes longer. Some dryers come with sensor drying, which automatically adjusts the time and temperature based on the moisture level of the clothes, ensuring energy efficiency and fabric care. Here’s a breakdown of common dryer settings and the fabrics they are best suited for: Regular/heavy: High heat for towels, cottons, and other heavy fabrics that are tolerant of heat. Permanent press: Medium heat with a cool down period to reduce wrinkles; good for most synthetic fabrics and everyday wear. Delicate: Low heat for drying items like lingerie, fine knitwear, and other delicate fabrics. Air fluff: No heat, just air, perfect for fluffing items and removing dust without additional heat. Timed dry: Allows you to set a specific time for drying; useful for when you know exactly how long you want the cycle to run. Always remember to clean the lint filter before starting a new cycle to prevent fire risks and ensure the dryer is working at peak performance. STEP 7: Remove the dry clothes immediately and separate them into piles. “If you want to keep your clothes looking neat and tidy, removing them from the dryer as soon as possible after the cycle is done is a must,” says Shields. Shake out each item to loosen any creases formed during the drying process. Sort the clothes into piles based on their storage needs—like items that need to be hung and items that require folding. STEP 8: Fold the clothes on a flat surface. Folding clothes on a flat, clean surface is crucial for achieving neat, compact folds that preserve the shape and appearance of your garments. Begin by smoothing out each item to get rid of any wrinkles. Use systematic folding techniques so that everything is uniform: for shirts, fold the arms back and then fold the shirt in half vertically; for pants, fold them lengthwise and then in half or thirds depending on their length. Shields adds, “if you want to get really fancy, you could even invest in some folding boards or templates to make the process even easier.” Photo: istockphoto.com STEP 9: Hang up and put away the clothes. Once your clothes are neatly folded or designated for hanging, it’s time to put them away. “Use hangers for things like shirts, dresses, blazers, and pants so they don’t get wrinkled or lose their shape,” Shields recommends. “Then, put things like t-shirts, sweaters, and jeans in drawers or on shelves, so they’re easy to find when you need them.” Final Thoughts Mastering the process of doing laundry effectively is an essential skill that ensures your clothing remains in good condition. This comprehensive clothing care guide provides step-by-step instructions to tackle laundry from start to finish. Remember to always check care labels before washing clothes and choose the appropriate settings for both your washer and dryer to protect your clothes. By following these detailed steps, you’re equipped to handle laundry efficiently, preserving your wardrobe while saving time and energy.

