LaserPecker 4 review: great hardware innovations but a fiddly app
While other laser machine brands are fighting over the new swish encased CO2 laser market, LaserPecker has been steadfastly refining its desktop approach to laser engraving and cutting. The LaserPecker 4 is the latest machine in an established line and, honestly, the hardware is best-in-class… but there's a catch.
The LaserPecker 4 leads the pack due to its new and unique dual built-in dual laser heads, which can be swapped between easily via the on-machine LED touchscreen. They can also be automatically connected when designing projects in the LaserPecker app and assigning material types. What this means in practice is that the LaserPecker 4 can engrave almost any materials and at a zippy 2000mm/s (and cut to a depth of 5mm for wood acrylic).
The size and flexibility of the LaserPecker 4 means it's a compact laser cutter that specialises in laser engraving (see my guide to the best laser machines for more choice). This also means it retails for less than some of the larger do-all laser machines; LaserPecker 4 is priced at $1599 / £1,533. This base model can be upgraded to include the rotary extension and slide extension and I’ll explain below why you should consider this bundle.
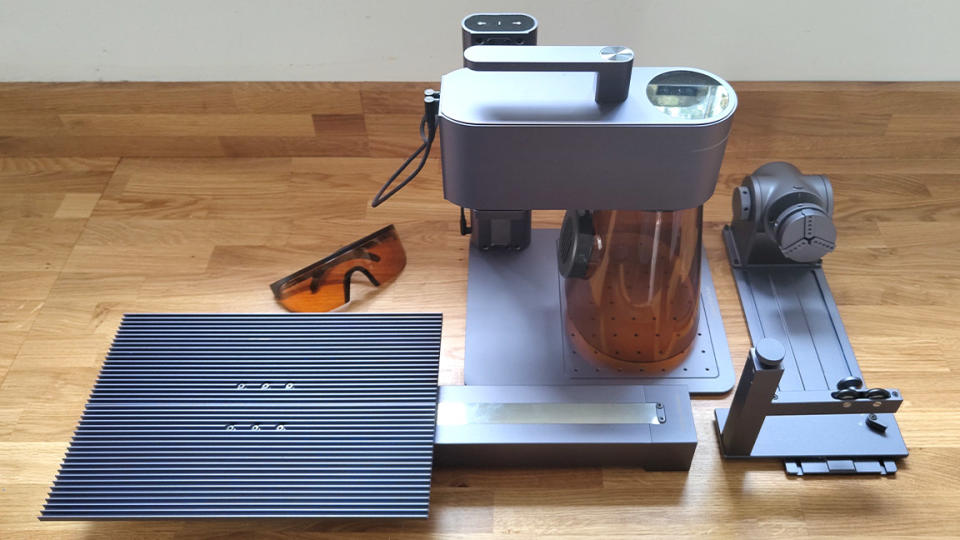
LaserPecker 4 review: what’s in the box?
LaserPecker 4 specs
Lasers 10W 450 nm Blue Diode Laser
2W 1064 nm Infrared Laser
Work area 160 mm x 120 mm (Basic)
160 mm x 300 mm (with the Slide Extension)
Speed 2000 mm/s
Preview speed 16000 mm/s
Resolution 1K / 2K / 4K / 8K
Materials for 10w 450 nm Blue Diode Laser Lacquered metal, Anodized aluminum, 304 stainless steel, Bamboo, Wood, Leather, Food, Paper, Fabric, Photosensitive printing, Plastic, Acrylic, Tinted glass, Color glaze ceramics, etc.
Materials for 2w1064 nm Infrared Laser Metal, Plastic, Leather and any material with paint coating
Cutting depth 5 mm Wood, 5 mm Dark Opaque Acrylic
Dimensions Laser Head: 241 x 82.1 x 139.7 mm;
Stand: 260.5 x 218 x 283.5 mm
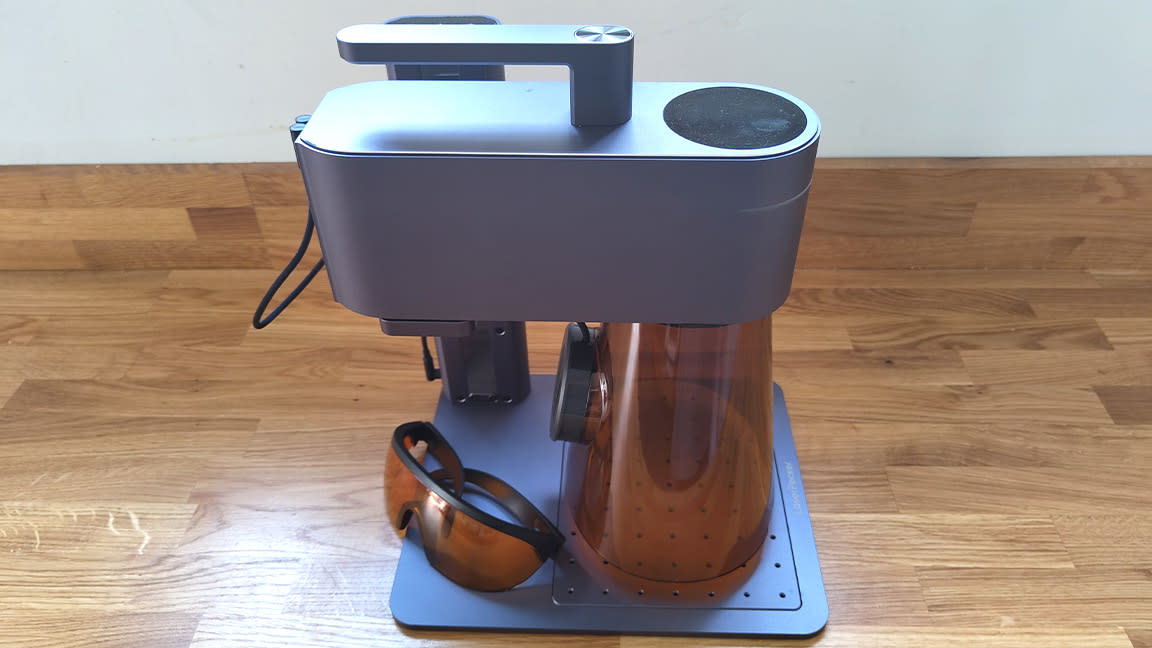
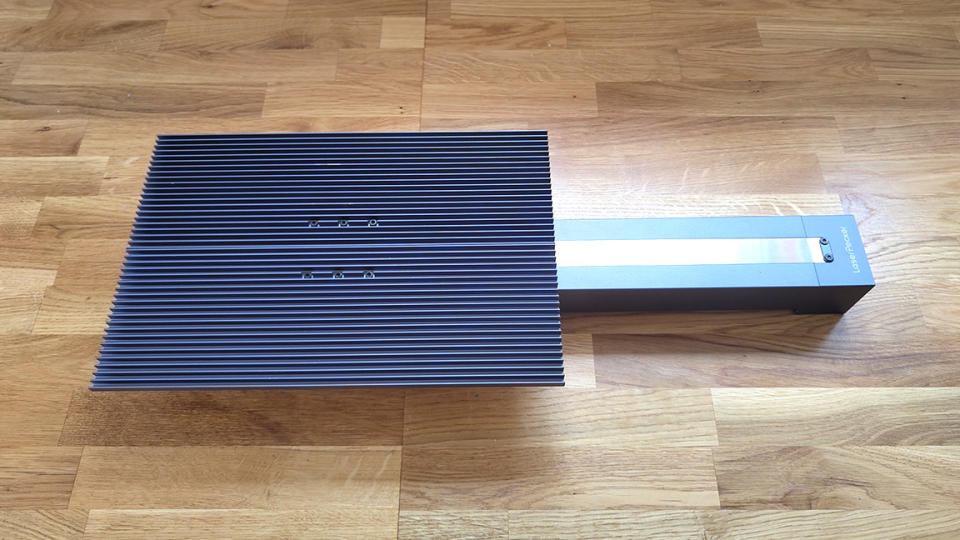
Firstly, unlike the Glowforge Pro or xTool P2 the LaserPecker 4 needs to be assembled. The packaging is neat and well thought out, and each piece logically fits together so there’s not too many issues with building the device.
My review kit didn’t come with a manual, which would have been a good idea as this is an expensive device and you really don't want to piece it together in error. I understand the final product for release does come with a booklet and instructions. Thankfully, everything you need to get started is in the box, including screws and hex keys to piece the LaserPecker 4 together.
I assembled the LaserPecker 4 in around 10 minutes without instructions, so it’s very easy to do. Once up and running you’ll need to download the LaserPecker Design Space app, I’d recommend visiting the LaserPecker website and downloading the latest version from there. (There are older versions on various app stores that don’t work properly with this new machine.) The app will connect to the LaserPecker 4 via bluetooth or USB and you’re ready to engrave and cut.
In the package you do get some sample materials to use with your first projects, including a piece of wood, metal tags and serval gloss acrylic cards, but there isn't an onboarding project tutorial as you'd find with other laser machines. The app does have a small library of stock images to use and there's a new community link in-app to study other user's projects or ask questions.
LaserPecker 4 review: how does it work?
The LaserPecker Design Space app includes some limited free images to use to start practising and the LaserPecker 4 comes with some sample plastic and wood material. You can easily upload SVG files or images to the app and send them to the laser engraver directly too, including photos taken on your smartphone.
In my review I used some designs created using the excellent Shaper Trace tool. The LaserPecker Design Space app also includes a creator space to tweak images or build designs from scratch using basic shape geometry and fonts.
The app is fairly limited so you find it best to design in one of the best digital art software such as Photoshop, Illustrator or CorelDRAW and then import your files to the LaserPecker Design Space for tweaks. When doing this review I used files created using the Shaper Trace kit, and it works seamlessly.
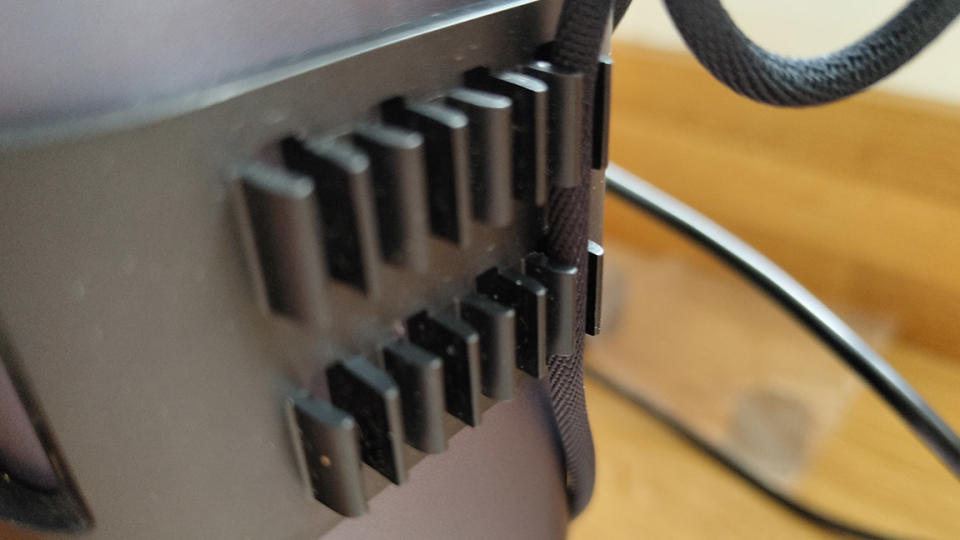
There are some nice design features to ensure the machine is tidy and compact, such as neat lead connections and a cable tidy attachment that clips to the LaserPecker 4's main stand.
Using the app, I find it’s not as automated as other laser machine software and lacks the same level of material presets as, for example, the xTool P2. The basic materials are listed - wood, plastic, etc - but you’ll need some trial and error to get the best results, noting the depth and laser power settings as your work and tailoring them to each project (LaserPecker 4 uses depth instead of speed to adjust to materials, so it's a little different to other laser engravers).
So, the big idea is the combination of two kinds of the lasers - the 10W 450nm diode laser and the 2W 1064nm infrared laser. Each serves a purpose, for example infrared laser is best for engraving on metal and plastic while the diode laser is preferred for engraving on wood, leather, ceramics and glass.
Together in one laser engraver you can do pretty much anything, including engraving and then cutting on the same material. Accuracy is also good as the head doesn't move, instead mirrors inside the LaserPecker 4 adjust to move the beam.
The LaserPecker 4 will either automatically select the required laser from the file you send to it, if you're settings are correct, or you can swipe left or right on the top-mounted display to switch between the two and experiment directly.
LaserPecker 4 review: performance
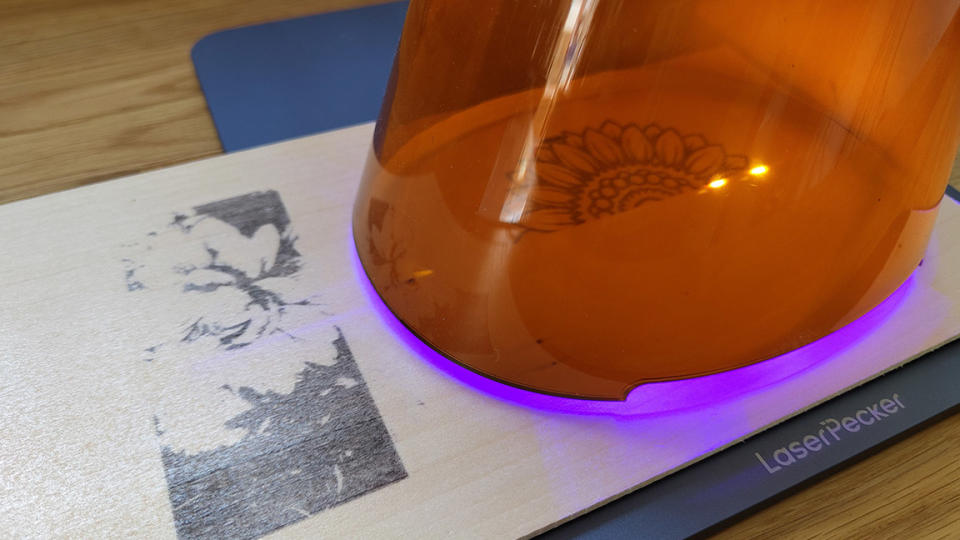
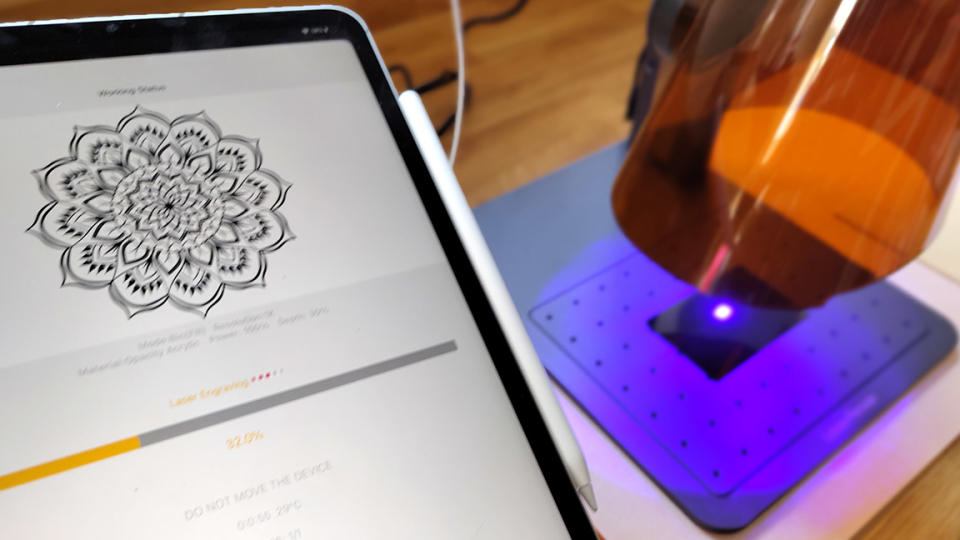
With an engraving speed of up to 2000mm/s the LaserPecker 4 is one of the fastest desktop engraving machine I’ve tested. It’s a best-in-class machine and in use really does zip through engravings in seconds. One detailed image I sent to the machine took five minutes, but this was for a complex illustration, one I’d not tweaked for engraving but sent directly, and the result was faultless.
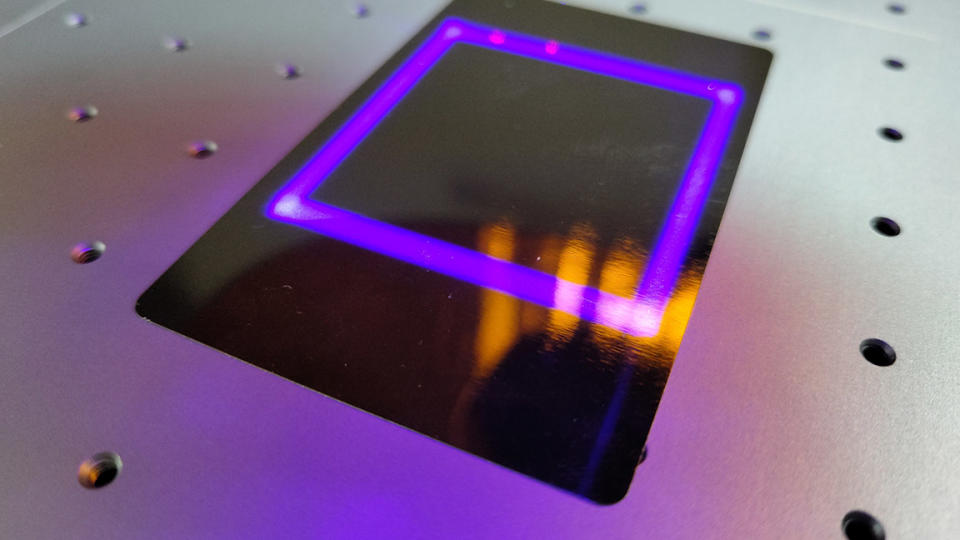
The LaserPecker 4 includes a manual alignment mode set during a project preview; simply adjust the height of the laser head until the two dots join and then move the image around in the workspace in the app to set it, a blue frame light shows where the design will sit. It's very easy.
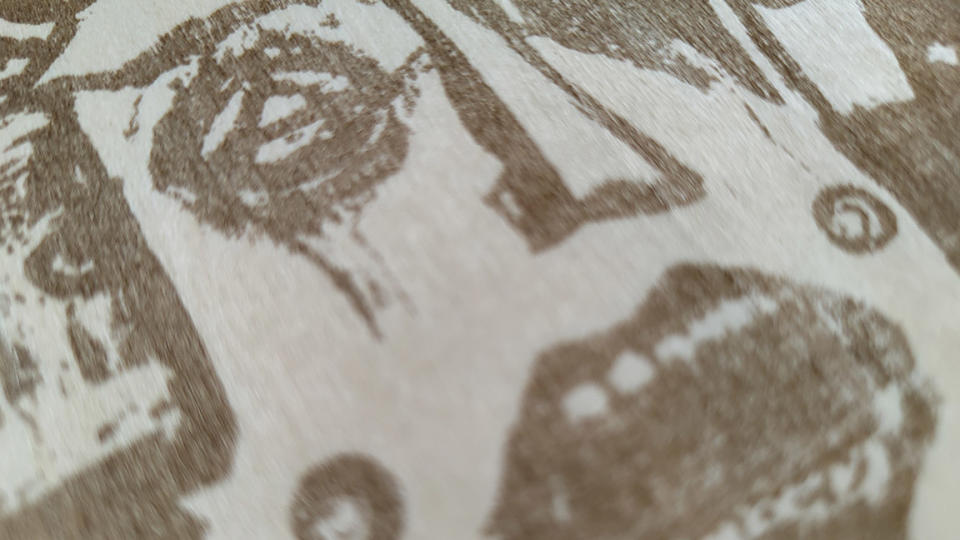
In the app you can also set the fidelity of the engraving, up to 8K and a granularity of 0.003mm, which means at this incredibly high setting engravings will look as if they’ve been drawn or painted into the material. Again, there’s no real guidance from LaserPecker as to which resolution to use, but some trial and error and you’ll get the hang of it. It does mean you'll need to test settings on spare material and note your depth and speed preferences, so be prepared to work for the best results.
That 0.003mm granularity means the LaserPecker 4 engraves even the finest line and detail of a design, meaning for example engraving a photo onto a material transfers every slight detail, depth of line and graduation of shadow and light. It’s also essential for logo designs where fonts need to be engraved with precision.
LaserPecker 4 review: expanding the use
LaserPecker 4 is designed as a desktop engraver and cutter so its work area is limited to 160mm x 120mm, which is good for small projects like coasters, iPhone cases and tags.
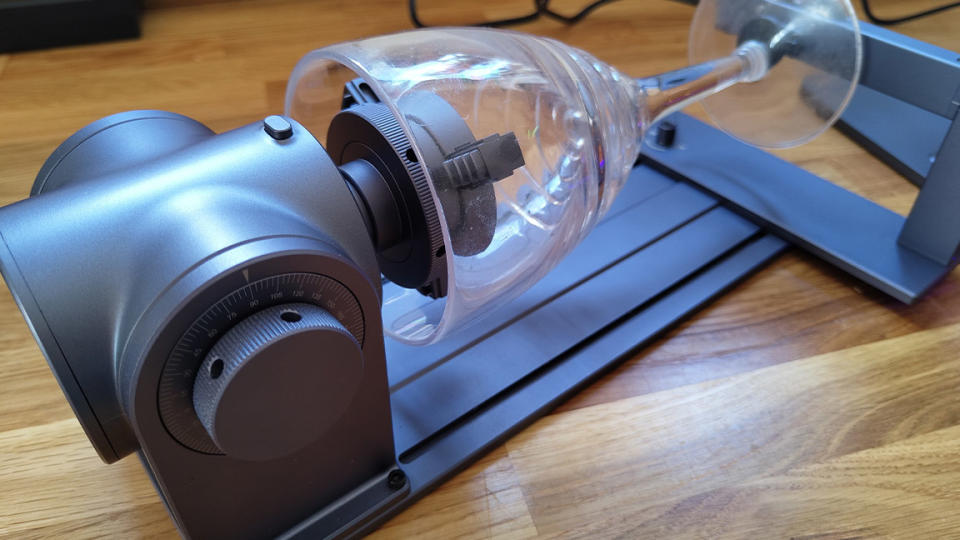
You can extend the work area with the Slide Extension, which more than doubles the length to 160mm x 300mm. I would say, this add-on is a must. Like other LaserPecker machines you can also hook up a rotary engraver for use with cylindrical materials (engraving on jars, glasses and cups).
As with the LaserPecker 4 you need to piece these accessories together and it can be a little tricky if you're new to laser engravers, but not too difficult. The use of these add-ons does increase the price and also expands the footprint of this laser engraver.
Both work well, and deliver excellent results with some experimentation. Like the LaserPecker 4 in general you need to have some patience to get more from this laser engraver. One advantage, however, is the dual laser system that means, with some clever design in the app, you can engrave and cut in the same project without needing to stop and move to a different machine. But this is dependent on the app working properly…
LaserPecker 4 review: using the app
I love the LaserPecker 4 hardware, it’s innovative, fast and flexible. The app, however, is holding back the full potential of the new laser machine. I’ve tested this laser engraver and app on iPad, Android and a Windows tablet, and the user experience is very different. For example, the app on iPad lacks the full list of material presets, omitting something as often-used as acrylic, while on Android the full list is present.
One minor issue on iPad is the app doesn’t support landscape mode, so if like me you’re using a Magic Keyboard the app becomes very frustrating and restrictive. Other workflow issues across both iPad and Android include a clumsy UI and there's a lack of instructions or explanations for newcomers.
If you’re designing projects in other software and importing images to engrave then the app is fine, but you won’t be creating much natively inside LaserPecker Design Space. This is a great shame because the hardware is compact and creative, but unlike Glowforge and xTool that have invested heavily in creating apps that work across all devices and onboard newcomers perfectly, LaserPecker has neglected this side to its product.
One caveat, the LaserPecker app works better on a Windows desktop PC or tablet than it does on Mac and Android. Using LaserPecker 4 with a Windows PC is a little less stressful and a nicer experience, for example you can easily setup a project to cut and engrave in one go, something I found clumsy on iPad, and the workspace is easier to use.
Across all the platforms one thing that kept rearing its head was a poor bluetooth connection or USB connection. LaserPecker 4 really didn't like connecting to my Wacom Studio Pro or my iPad Pro. The app is still in beta so I'll continue to monitor how LaserPecker develops its software and update this review in the coming months.
LaserPecker 4 review: price and early deals
LaserPecker 4 costs $1,999 / £1,552 via the LaserPecker website, so it’s well priced for a mid-range, compact laser engraver, but it has more competition in 2023. If you order before 31 July there's a $500 discount, and an extra $50 off the price using the code: CB50L4.
LaserPecker 4 review: should I buy one?

If you’re used to using laser engravers and cutters and have experience of working with fiddly apps, and have a knowledge of materials, then LaserPecker 4 is an innovative and compact machine that's ideal for a desktop or small craft studio.
However, if you're new to laser machines and this kind of digital crafting I’d urge you to look at the xTool M1, which is a larger machine but costs the same at $1,499 / £1,986, and has a good app and support system to ensure newcomers can feel welcome. (The M1 is also a little messier and lacks LaserPecker 4's compact approach.) Likewise, the xTool F1 is a similar compact dual-laser machine and uses the same xTool app, but it does cost more ($1,999 / £1,999) than the LaserPecker 4 (read our guide to the best xTool machines for more alternatives).
Overall the LaserPecker 4 is a good engraver and cutter that will sit nicely on any desk setup. It's a capable machine but one I feel is slightly let down by its app and a need to manually adjust settings for materials and projects – if you're familiar with laser engravers it's a good buy but first-time users may want to opt for a device with better software support and onboarding.

