How to Install a Bidet Attachment
Toilet paper is a bathroom staple, but paper products aren’t cheap—and anything thicker than one-ply isn’t great for septic and plumbing systems. Installing a bidet is a great way to reduce your home’s reliance on TP alone, but most bathrooms don’t have the plumbing connections or the space for a full-size bidet installation. That’s where bidet attachments come in.
Bidets spray water from below the toilet seat for easy-to-use cleanup, and they’re typically considered more hygienic than using toilet paper to wipe. A bidet toilet attachment can be installed on any toilet, so existing toilets can be retrofitted with a built-in bidet toilet seat or a bidet sprayer. If you’re ready to take the bidet plunge, this guide will walk you through how to install a bidet attachment on your toilet from start to finish.
Project Overview
Working Time: 20 to 45 minutes
Total Time: 30 minutes to 1 hour
Skill Level: Beginner
Estimated Cost: $30 to $500
Before You Begin
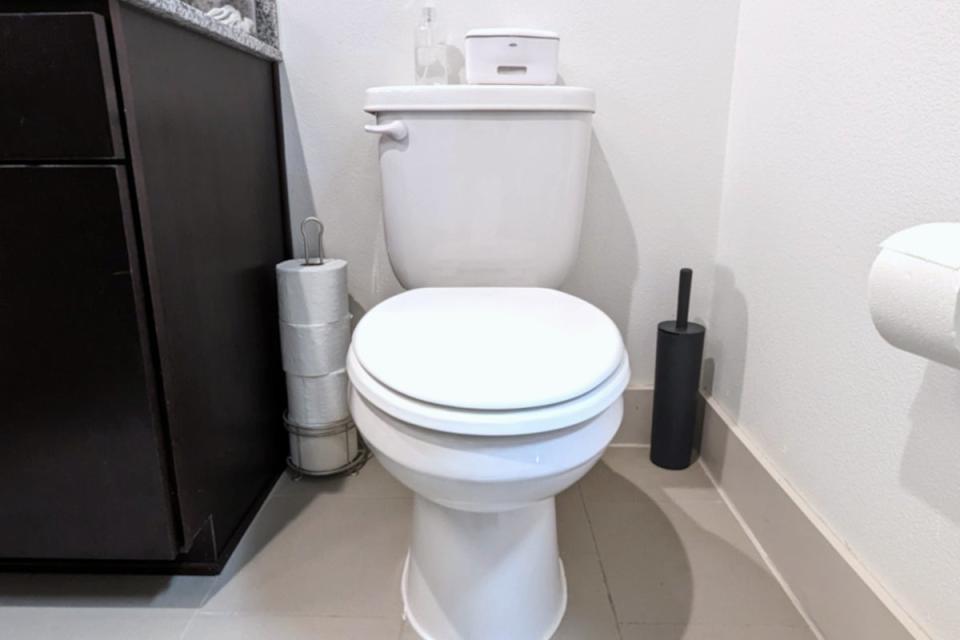
Photo: Phillip Tinner for Bob Vila
Bidet toilet seats and bidet sprayers are not difficult to install, so even beginner DIYers with basic plumbing knowledge should be able to handle this job.
Before you install one, though, it’s important to understand: How does a bidet work? Full-size bidet toilets look similar to other types of toilets, save for a built-in spray nozzle that extends from the back of the toilet bowl. After doing their business, seated users can use the bidet’s spray function to wash off before drying off with toilet paper or designated bidet towels. There are also bidet sprayers that connect to a regular toilet’s incoming water line for the toilet and essentially work like handheld shower heads.
Bidet toilet seats and bidet attachments are a middle ground between the above options, They provide the adjustable spray nozzle of a bidet toilet and an installation method similar to a sprayer, and they can be used while seated without needing to control a handheld nozzle. Instead, clean water flows from a dedicated water line to the bidet attachment’s spray nozzle, which functions almost identically to the nozzle on a full bidet toilet.
RELATED: The Best Smart Toilets
STEP 1: Remove the toilet seat (optional).
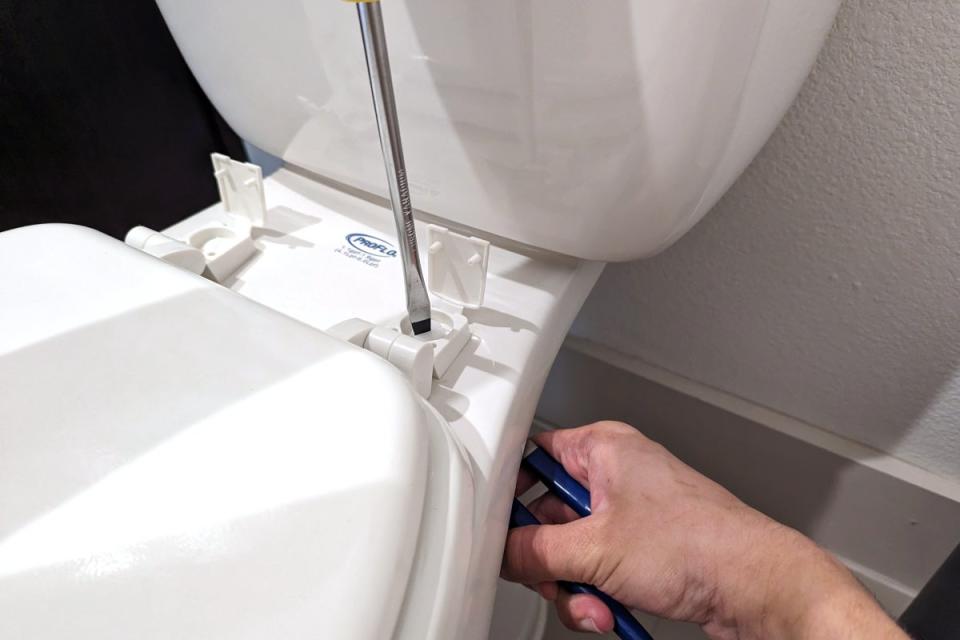
Photo: Phillip Tinner for Bob Vila
The first step in learning how to install a bidet toilet seat is to remove the existing toilet seat—but not always. Before removing the seat, check the manufacturer’s directions. Some bidet attachments are designed for use with the existing toilet seat, so this step may not be necessary.
If you do need to remove the toilet seat, it’s recommended to spray the bolts on the back of the toilet seat (likely covered by a plastic flap that can be opened) with a lubricant like WD-40. Let the lubricating spray sit for a few seconds before using a screwdriver and channel lock pliers to remove the two bolts holding the toilet seat in place. Generally, you can insert the screwdriver into the head of the bolt from above, then use the channel lock pliers to loosen and remove the nut from below.
STEP 2: Turn off the toilet water supply.
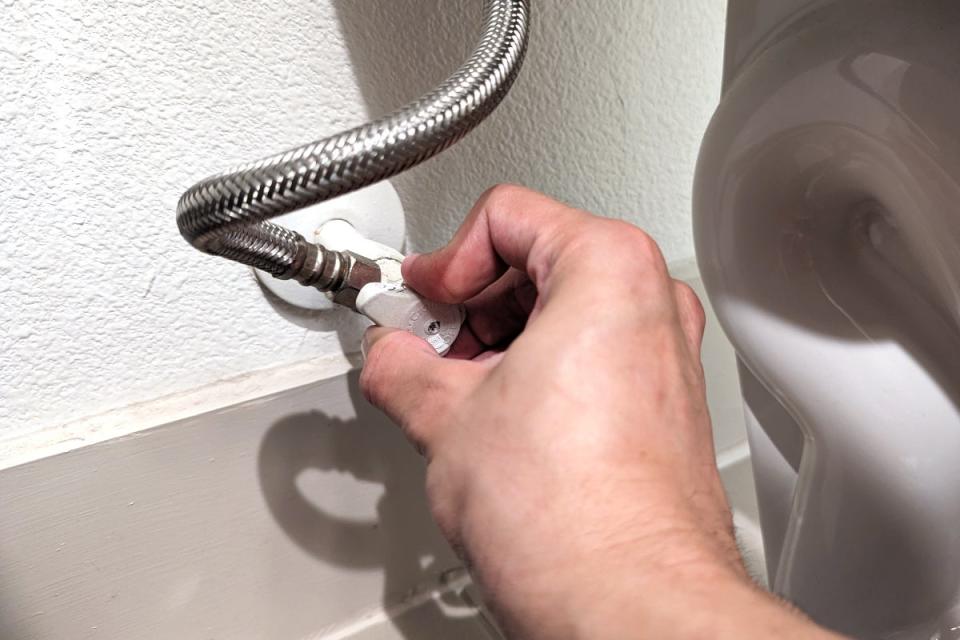
Photo: Phillip Tinner for Bob Vila
After removing the toilet seat, locate the water supply valve for the toilet. It should be just behind or to the side of the toilet near the base of the toilet tank. Turn off the valve to shut down the water supply to the toilet, then flush the toilet to drain as much water as possible out of the tank. You can also use a towel to dry up any remaining water from inside the tank.
STEP 3: Install the T-valve on the water supply line.
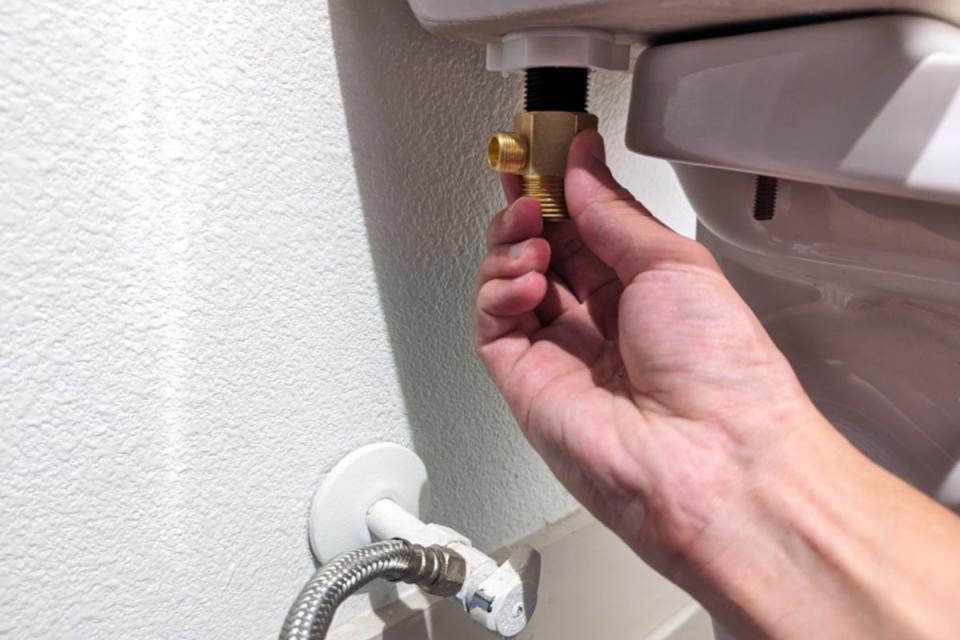
Photo: Phillip Tinner for Bob Vila
Typically, a bidet connects to the incoming water supply line so that the system is only using clean water. Set up a bucket and/or a dry towel on the ground below the water supply line connection. With your bucket or towel in place, use the channel lock pliers to disconnect the water supply line from the base of the toilet tank and allow any remaining water from the toilet tank to drain and wipe up any water that makes its way to the floor with a towel.
Your bidet installation kit should include a T-valve. Connect this T-valve to the base of the toilet tank—tightening it by hand to avoid any damage—then reconnect the water supply line to the T-valve, also by hand until completely snug. This connection will divert a portion of the incoming clean water so that it can be used by the bidet sprayer. Note that even when learning how to install a bidet with warm water, the bidet usually connects to the cold water line.
Generally, only non-electric models that can connect to two separate water lines are made for use with cold and hot water. If this is the case, then you may need to install T-valve connections on the incoming cold and hot water lines at a nearby sink, instead of making the connection directly at the toilet.
STEP 4: Attach the bidet.
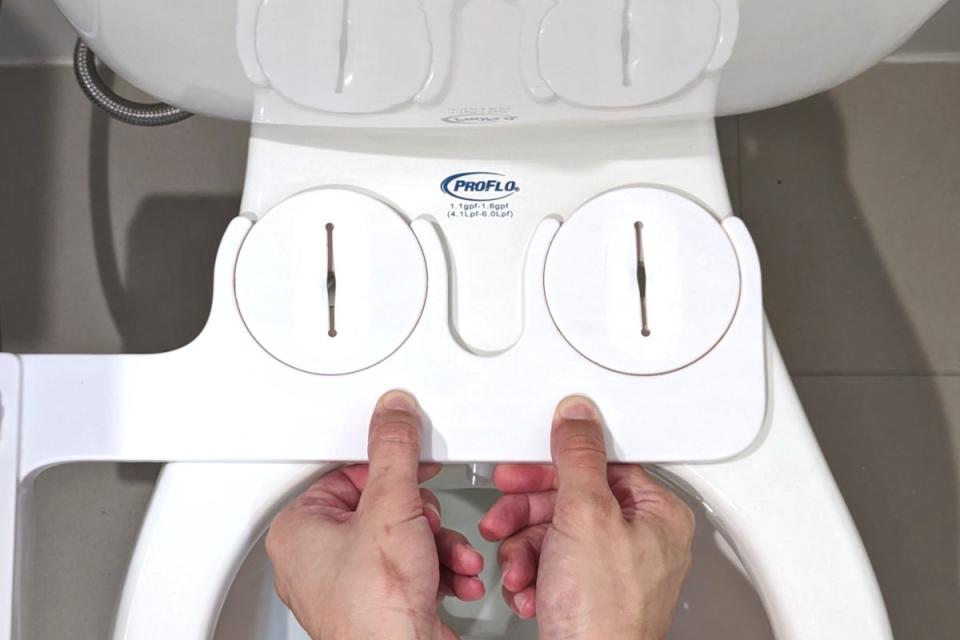
Photo: Phillip Tinner for Bob Vila
Once the T-valve is connected to the water supply line, you can install the bidet. Ideally, you checked the size and shape of the toilet before purchasing the bidet so that you can be certain that the bidet fits the toilet. Line up the holes in the bidet mounting plate with the holes in the toilet, then insert the bolts to secure the mounting plate to the toilet. Hand-tighten the nuts on each bolt, then use the channel lock pliers to snug up the connections. Finally, slide the bidet toilet seat onto the mounting plate, pushing it forward until you hear a click to indicate that the bidet is locked in place.
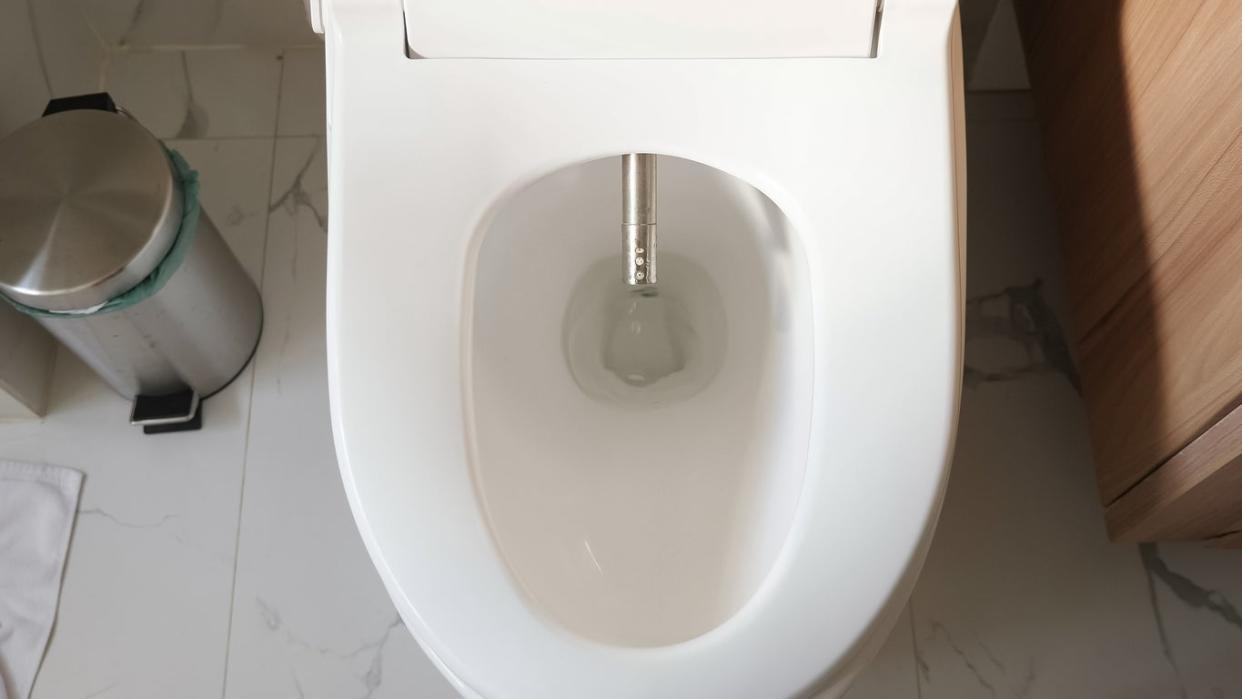
STEP 5: Test the bidet and check for leaks.
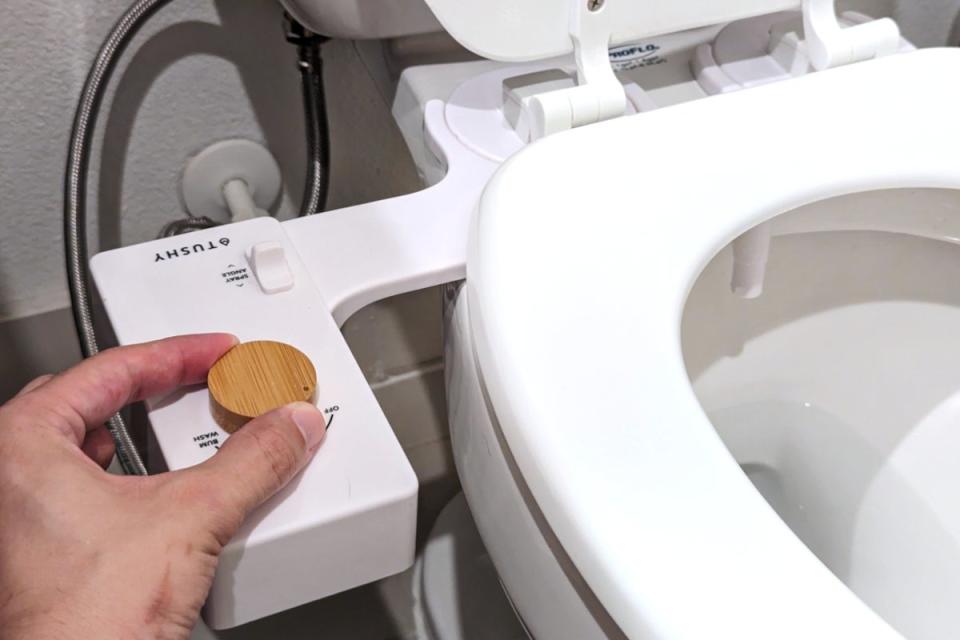
Photo: Phillip Tinner for Bob Vila
Turn the water back on at the shut off valve and inspect the connections for any leaks. After making sure that the installation was a success, you can test any features that the bidet has to ensure that they are working properly. Common features include a heated seat, warm air drying, remote control functionality, oscillating spray, a built-in night light, and a gentle-close lid to ensure the toilet seat doesn’t slam closed when you’re done. Some bidets may also come with a warm water storage tank that attaches to the toilet to provide a small supply of warm water for washing. Other bidet models may have on-demand heating systems that offer a more comfortable cleaning experience.
RELATED: How to Get Your Bathroom Guest-Ready in 20 Minutes or Less
Final Thoughts
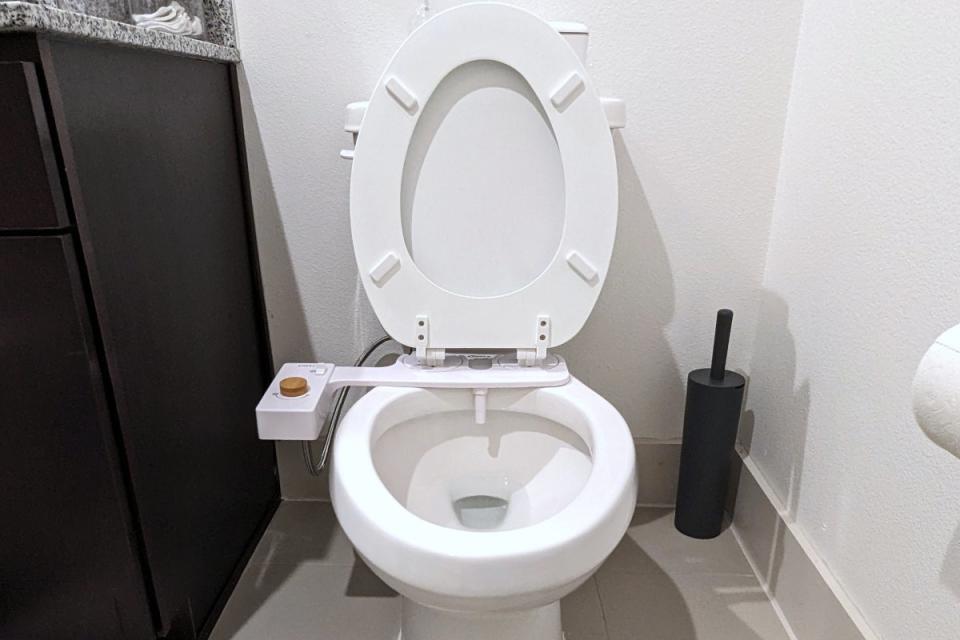
Photo: Phillip Tinner for Bob Vila
Bidets are popular throughout the world because they are considered more hygienic than wiping with a wad of toilet paper. These innovative devices use a spray of clean water to wash and rinse the bottom of the user. Some models may also offer a range of features, like warm air drying or an oscillating spray, to increase comfort and elevate the bathroom experience, so always refer to your bidet’s instructions during installation.
Bidet attachments, like bidet toilet seats and bidet sprayers, are easy to install, so DIYers of any skill level can take on this project without concern. Your savings on toilet paper will add up, and you can eliminate that bathroom cost altogether by keeping a small stock of bidet towels on hand if the new bidet lacks a drying function.
Meet the Author
Timothy Dale is a home improvement writer who spent his post-secondary education years working in the plumbing trade. He took on a position in project management that ended up lasting 10 years before segueing into a career as an expert writer. As a project manager, Timothy had a wide range of work that included plumbing, carpentry, and electrical work, as well as handling emergency response and home restoration.

