Get the infrared look in Affinity without a costly IR camera conversion

Watch video (above): Get the Infrared look in Affinity Photo
Infrared light is all around us, yet we can’t see it. That’s because the visible spectrum is only a very narrow band of the entire range of electromagnetic radiation we know as light. If you think of the colors of the rainbow – violet, indigo, blue, green, yellow, orange, red – each color has a slightly different wavelength, and therefore a different speed.
Red visible light has the longest wavelength and is the fastest. But just beyond visible red light is infrared, which is faster still. While not visible to the human eye, there are cameras and sensors that can detect and capture infrared light. If you have an old EOS camera, you can get it converted to capture infrared – an irreversible process – for a few hundred pounds.
But if you’d rather not make permanent changes to your camera, it is possible to add an infrared look to any photo with a combination of tonal adjustments and filters. We can do so in Affinity Photo 2 with ease. Color infrared photography creates a certain look in which green and yellow foliage becomes reddish and appears to glow, while blue skies become very dark.
We can mimic the look by changing the brightness of different color ranges, then use a glow filter to enhance the effect. We’ll walk you through the simple process here, and along the way encounter key Affinity Photo tools like Channel Mixer controls, Adjustment Layers and Live Filters.
Read more: Infrared photography using a filter: tips and techniques
1. Adjust color brightness
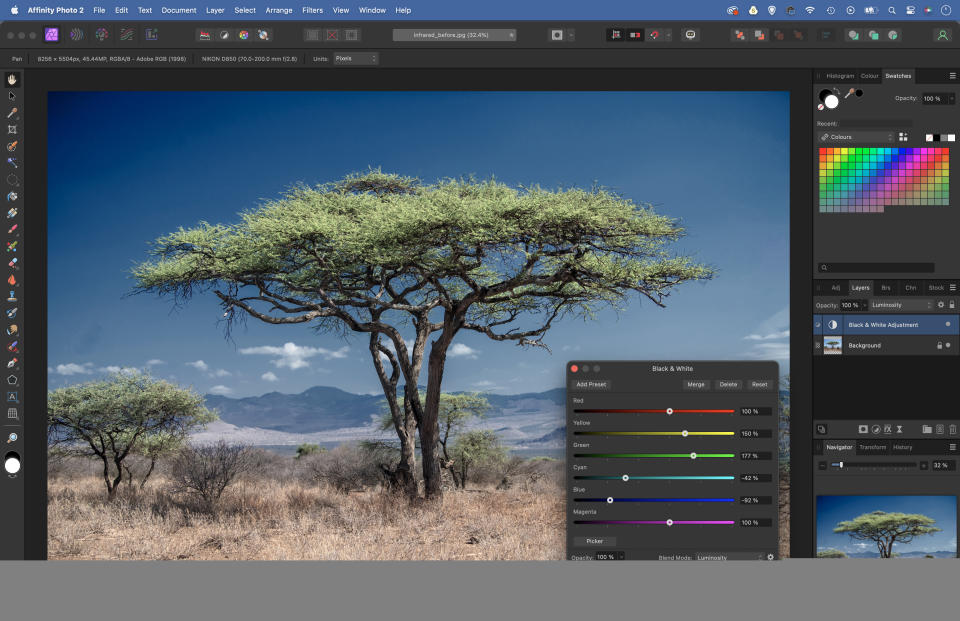
Download the start image on your computer and open in Affinity Photo (photos of trees and foliage work well, or use our free image). Go to the Layers Panel, click the Adjustment icon at the bottom and choose Black And White. Change the Blend Mode of the Layer to Luminosity, then use the sliders to darken the blues and lighten the greens and yellows.
2. Invert the colors
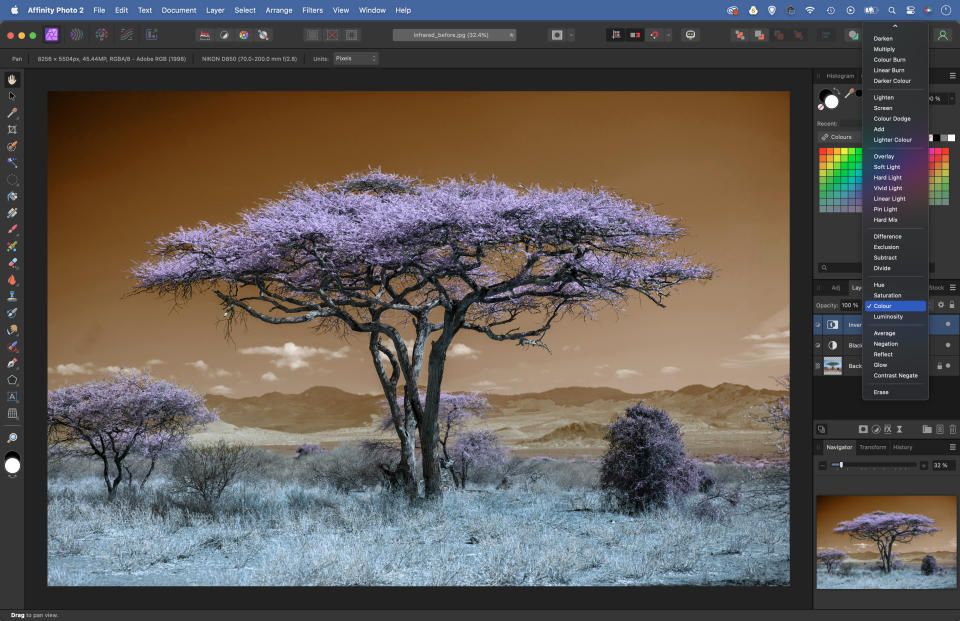
Click the Adjustment Layer icon again and then choose Invert to invert the image to a negative. Next, go to the Layer Blend Mode drop-down and change it from Normal to Color. This gives you the beginnings of the color change that you see when you use an infrared camera.
3. Swap red and blue
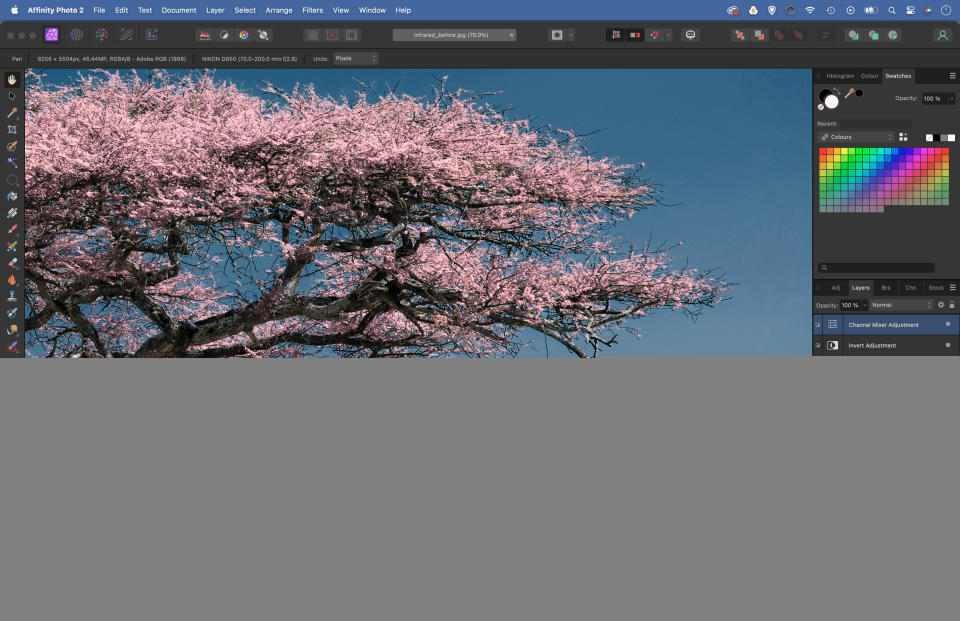
Click the Adjustment Layer icon once again and choose Channel Mixer. We need to swap the red and blue channels (which is what we would also do when processing a true infrared image). Select the Red channel and set Red 0%, Blue 100%. Next select the Blue channel and set Red 100%, Blue 0%.
4. Give it a glow
Go to Filter>New Live Filter Layer>Blur>Diffuse Glow. Experiment with the settings to make the highlights glow slightly. We’ve used Radius 8px, Intensity 15%, Threshold 50%, Opacity 50%. Close the dialog. Because it’s a Live Filter, you can adjust the settings at any time by double-clicking the layer.
5. Tweak the blues
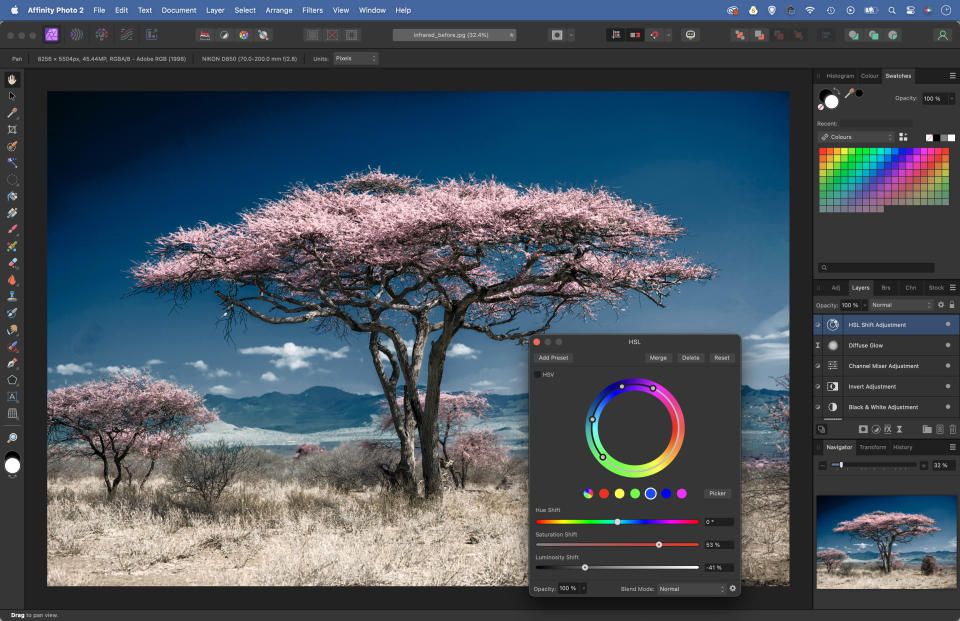
Add an HSL Adjustment Layer. Click the Cyan button to target the colors, then increase Saturation and decrease Luminosity to make the blues more intense. You might also want to expand the range of affected colors by increasing the spread of the dots around the color wheel, as shown.
6. Intensify the reds
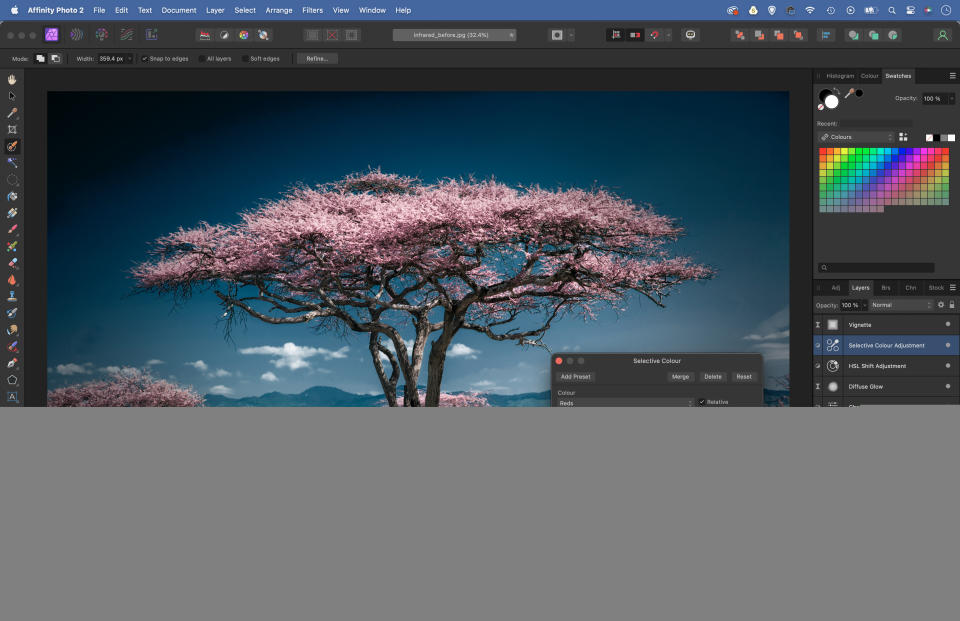
We can tweak different colors with a Selective Color Layer. Target Reds and reduce Cyan, as shown, to make the reds more intense. We finished here by adding a vignette, which suits the central composition. To add one yourself, go to Layer>New Live Filter Layer>Colours>Vignette.
• See more of our Affinity Photo tutorials
If you enjoyed this tutorial but want a bit more power from your laptop, why not look at the best photo-editing laptops? If you're really keen to improve your skills further then online photography courses could be the way to go.
PhotoPlus: The Canon Magazine is the world's only monthly newsstand title that's 100% devoted to Canon, so you can be sure the magazine is completely relevant to your system. View Deal

