Creative and Impressive Before-and-After Furniture Makeovers
These before-and-after furniture makeovers used paint, fabric, and other upgrades to transform thrift-store finds.
Thrift stores and garage sales are full of budget-friendly finds perfect for furniture makeovers, but those secondhand scores often need some TLC. Take a look at how we've transformed common thrift-store finds into statement-making furnishings. These before-and-after updates use fresh paint, new fabric, and other cosmetic upgrades to give old pieces a whole new look.
Related: 24 DIY Furniture Projects to Personalize Your Home on a Budget
Before: Plain Armoire
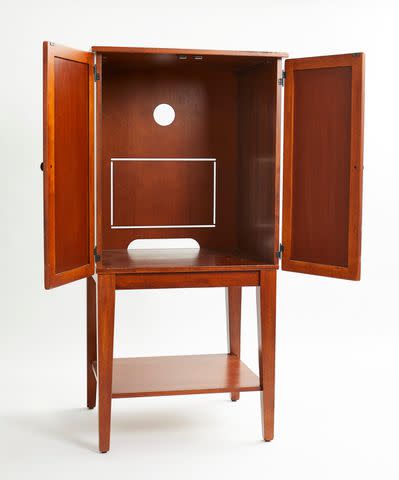
With its clean lines and simple form, this TV cabinet was an ideal candidate for a furniture makeover. The large, open interior could easily be customized for storing dishware, linens, or shoes. We outfitted the piece with organizers and a modern farmhouse look to create a stylish hub for entertaining essentials.
Related: How to Organize a Small Closet with Smart Storage
After: Modern Farmhouse Entertaining Station
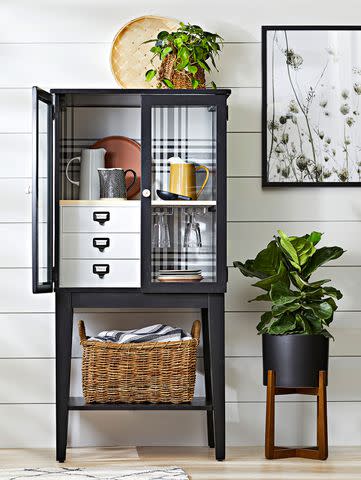
Black paint, plaid wallpaper backing, and doors retrofitted with glass panels gave this armoire fresh farmhouse appeal. A three-drawer organizer topped with a new shelf provides napkins, bottle openers, party supplies, and glassware storage. Installing wineglass holders underneath the shelf makes clever use of otherwise unused space. A basket below (similar to the Better Homes & Gardens Braided Rush Round Baskets, $50, Walmart) houses tablecloths.
Before: Nondescript Dresser
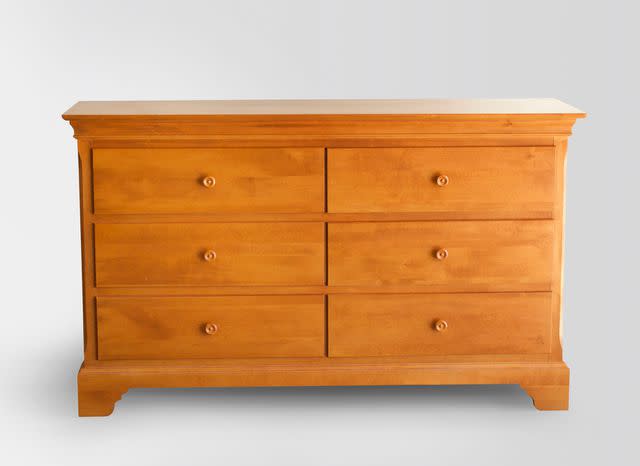
Although it had good bones, the dull finish on this dresser was dragging it down. We painted the entire unit and added dowels to the drawer fronts to add dimension. When choosing a dresser for a furniture makeover, check the construction carefully to ensure it'll still function properly after attaching the dowels.
After: Fluted Dresser Makeover
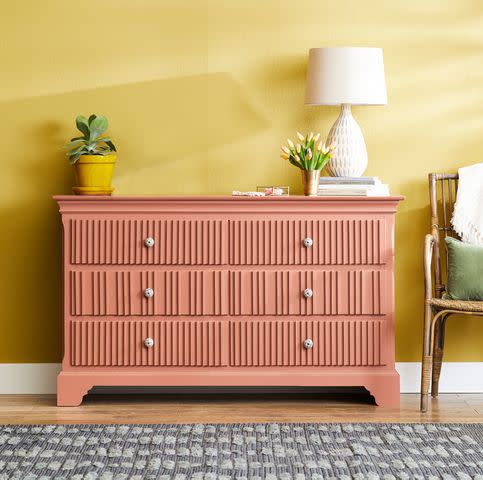
We started with square wood dowels for this dresser makeover, cut to size and sanded on all edges. They're attached at evenly spaced intervals using a pin nailer rather than glue to keep them perfectly vertical and secure. Coating the entire piece in coral paint highlights the fluted design.
Before: Short Side Table
We scored this low-slung side table for just $12. Adding legs and a shelving unit for this furniture makeover turned it into a living room standout. A fresh coat of paint disguised the imperfections in the original finish.
After: Stylish Shelving Unit
After attaching legs, we built a custom shelving unit to our desired height. L brackets secure the sides of the shelving unit to the cabinet. A bit of prep work, primer, and green paint transformed the chipped wood finish with a fresh look.
Related: The Top Green Paint Colors Designers Swear By
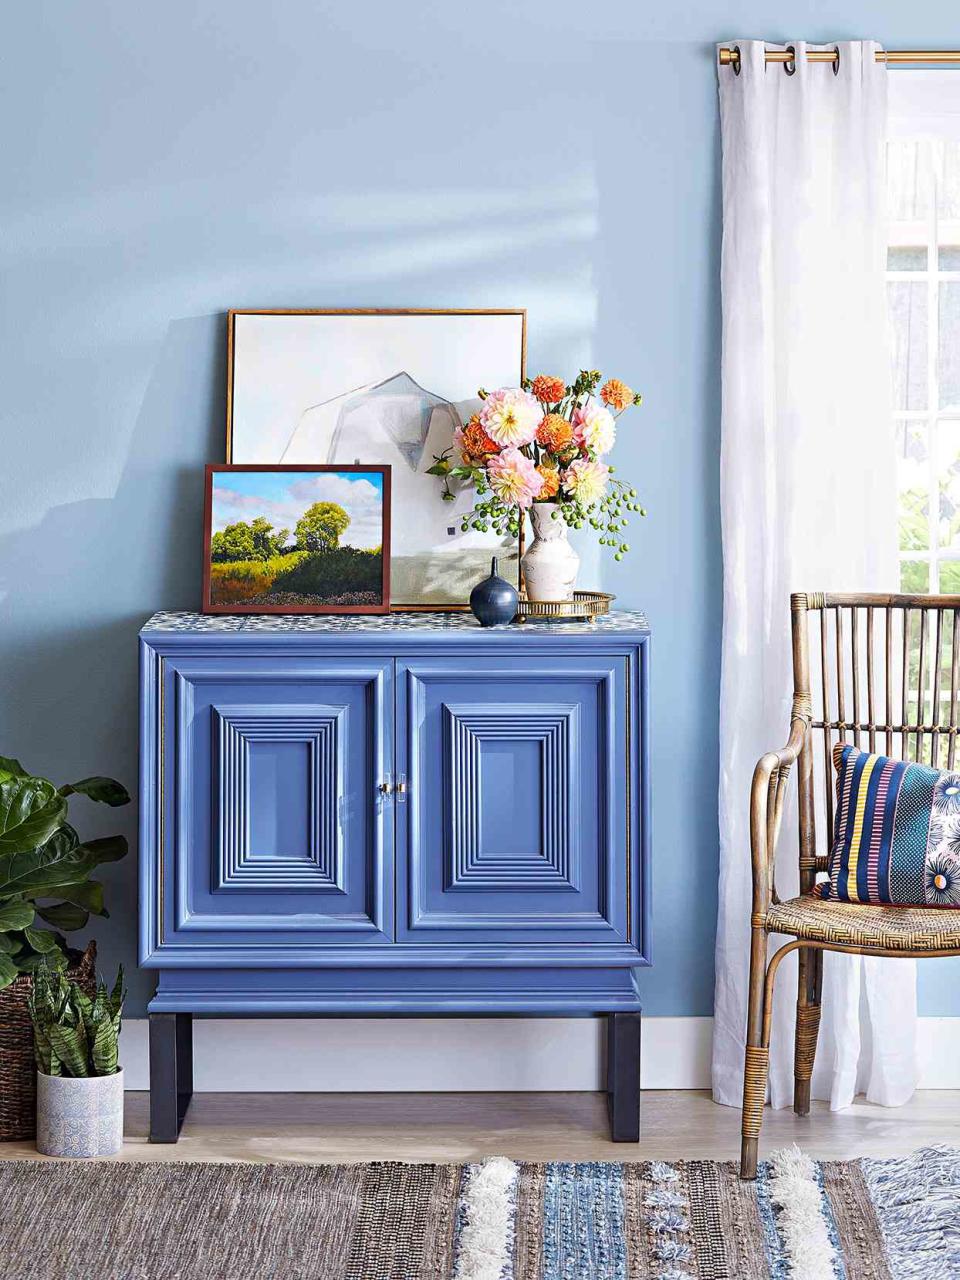
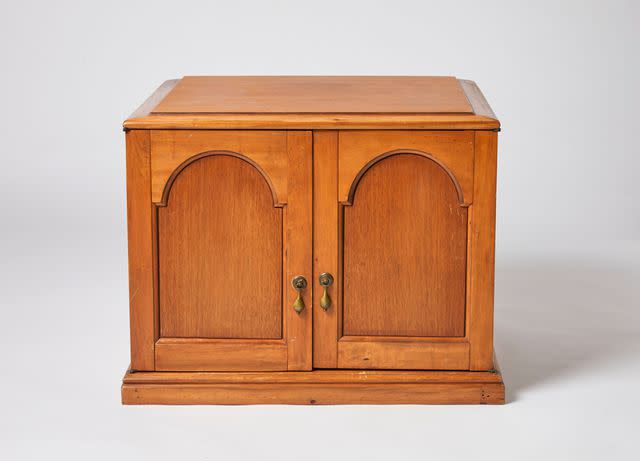
Before: Shapely Yet Drab
If the finish isn't your style, but you love the shape of a piece, a coat of paint, some minor repairs, and easy embellishments can give it your own spin. This piece featured architectural details that made it too pretty to pass up. We added legs along with a splash of color and pattern for extra flair.
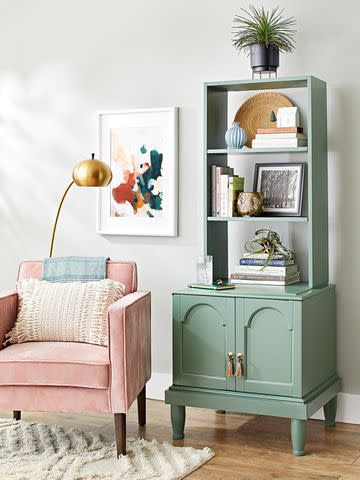
After: Midcentury Furniture Makeover

Blue paint updates the midcentury paneled door design, while Lucite hardware and squared-off metal legs add contemporary touches. Cement tiles on the top provide a durable surface and a pop of pattern. We installed the tiles flush with each other to eliminate the need for grout, using only adhesive.
Paint Furniture Like a Pro
If you're ready to paint a piece of furniture, there are a few tricks you need to know. Our step-by-step will show you how to paint furniture correctly. These tips will help you achieve smooth color and a durable finish.
Before: Boring Bookshelf
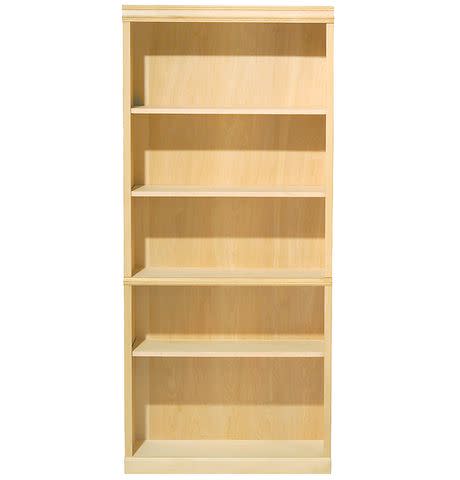
This simple shelving unit provided the perfect starting point for a makeover. Its plain wood finish and bare-bones shape left a lot of room for creativity. We used paint and a clever shelf layout to turn it into an entryway catchall.
After: Customized Storage Center
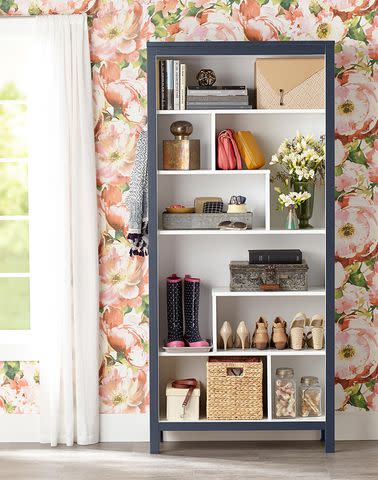
Creating dividers and shorter shelves made room to easily store tall boots, bags, dog leashes, and other accessories. The key to this furniture makeover is to ensure the shelves line up with the bookcase's predrilled holes. White paint on the interior stands out against the navy blue exterior.
Related: The 8 Best Paints for Furniture That Will Give Your Home Decor a Quick Refresh
Before: Stuck in a Timewarp
This wing chair had an attractive shape but unfortunate upholstery. Updating the fabric was a must to make it usable again. See how we reupholstered this chair to put a modern spin on an antique.
After: Reupholstered Cane Chair
Fresh white paint enhanced the cane panels and the chair's wood frame. Gray-and-white ikat fabric replaced the gold velour. When picking upholstery fabric for a furniture makeover, pay attention to scale. Because this chair is tall, it easily handles a larger print.
Related: Cane Furniture May Have Ancient Roots, but It's Timeless
Easy Nightstand Makeover
A furniture makeover doesn't need to be a complete overhaul. See how simple and easy can have a major impact. We used paint to update this plain nightstand with added personality.
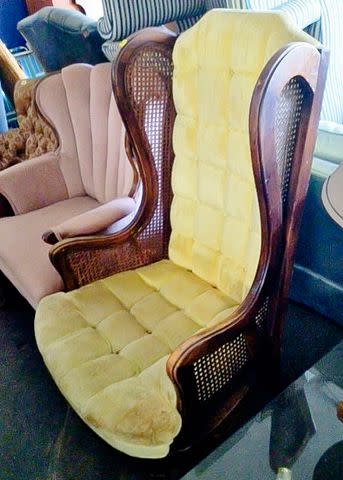
Before: Dingy Chair
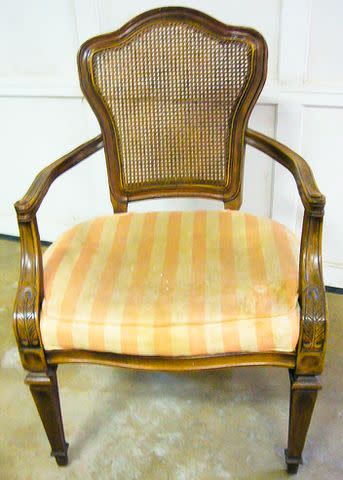
This vintage chair had a gorgeous silhouette and unique details. However, its icky upholstery and dull brown finish begged an update. Bold paint and fabric added eclectic personality to this impressive before-and-after furniture makeover.
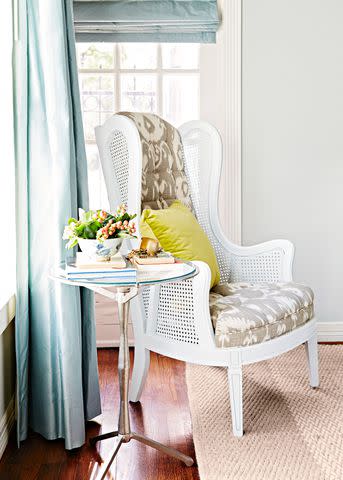
After: Bright Perch
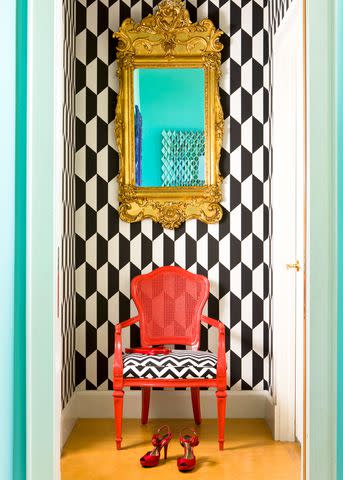
The cushion's graphic black-and-white chevron fabric adds a playful twist to the chair's classic style. Lipstick-red paint on the frame emphasizes its shapely curves and pretty details. The customized chair looks right at home in this wallpapered nook.
Before: Easily Overlooked
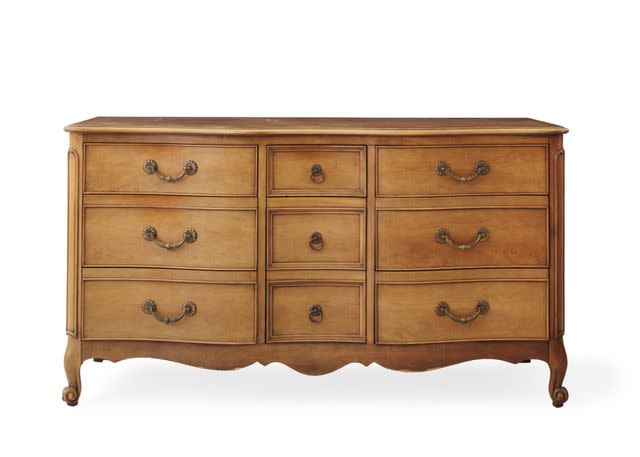
A blah finish overshadowed the beautiful lines of this buffet. Plus, the ornate hardware made it look fussy, not classic. We used an unexpected paint color for this furniture makeover to achieve a one-of-a-kind look.
After: Painted Furniture Makeover
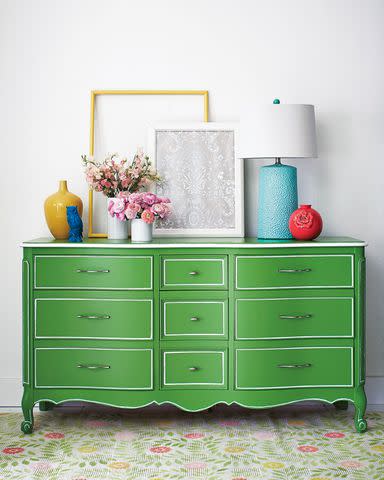
Eye-catching colors and details make this piece stand out. We used decorative detailing to outline the dresser's curves. We replaced the intricate hardware with sleek metal pulls and knobs for an extra dose of customization. Finish the look with frames (like this Better Homes & Gardens Gallery Wood Picture Frame, $14, Walmart), vases, and lamps in complementary or neutral colors.
Related: Shades of Green: Best Paint Colors for Olive, Sage, Mint, and More
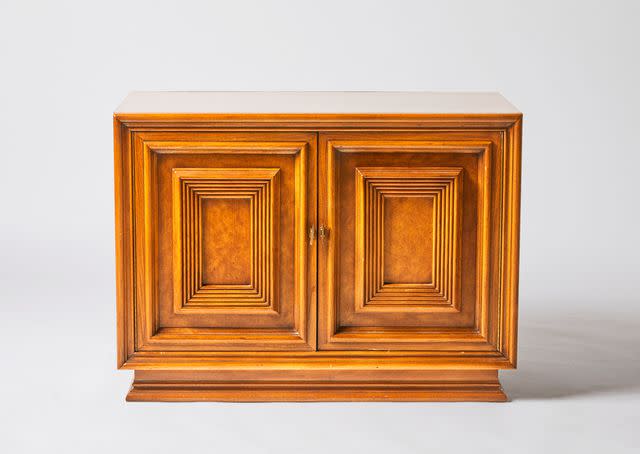
Before: Fussy Desk

This fussy French-style desk called for a makeover. The ornate details gave it a much too-dated look. A bold paint color helped bring this piece into the 21st century.
After: Colorful Desk Update
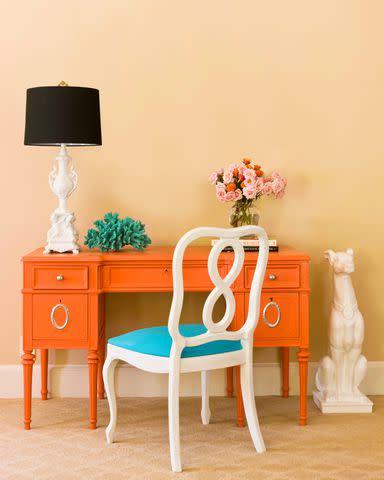
Bright orange paint minimizes the desk's intricate details. We didn't skimp on sanding and priming to achieve smooth, long-lasting color. New hardware and silver details add sparkle. Balance a bold color with a neutral lamp (like this Better Homes & Gardens Diamond Weave Ceramic Table Lamp, $30, Walmart) and chair.
Before: So-So Chair
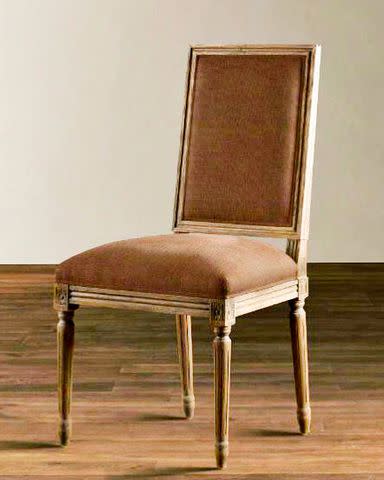
The beautifully carved frame and great shape drew us to this set of chairs (one pictured here). However, boring brown upholstery wasn't doing them any favors. Fresh fabric and paint helped their good looks shine.
After: Updated Dining Chairs
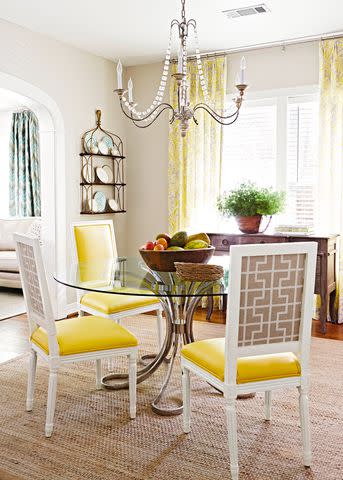
Two complementary fabrics refreshed this set of dining room chairs, as did a fresh coat of white paint. Using durable vinyl or leather on the fronts for this furniture makeover ensures longevity and easy clean-up. On the back, a less hardy, but fun fabric adds something a little unexpected.
Reupholstering Tips
Reupholstering furniture can be challenging. Before you tackle this type of furniture makeover, consider these tips. Our secrets to success will help you navigate your project.
Before: Entertainment Center
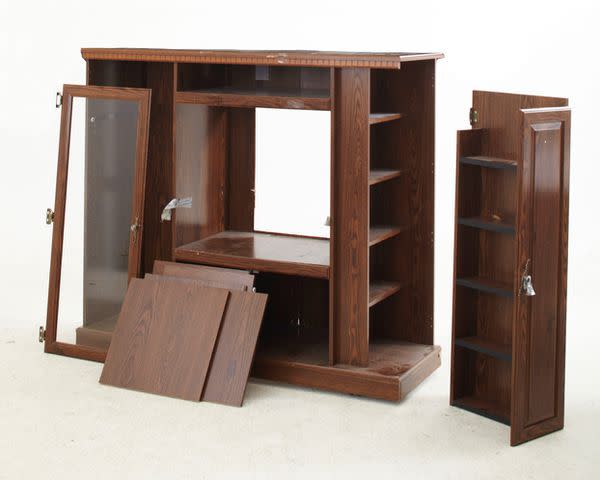
With the advent of flat-screen TVs and digital streaming, the need for bulky TVs, stacks of tapes, and DVDs has gone by the wayside. These innovations have left imposing entertainment centers collecting dust. But with plenty of built-in storage, these gems can find a new purpose elsewhere.
After: Entryway Organizer
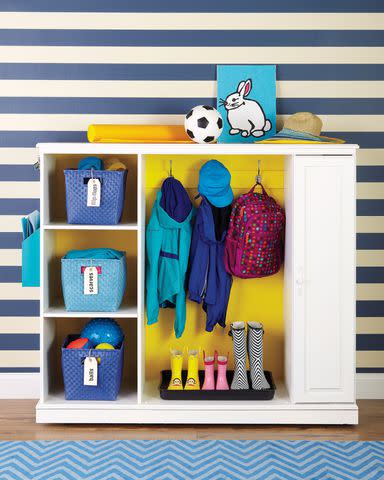
Our furniture makeover transformed an entertainment center into a spot for entryway organization. By. removing the doors, we created open shelving. We replaced the worn backing with a new board. For extra style, we painted the unit in a bright color. A 1x4 attached to the inside has coat hooks, while a boot tray below catches dirt and drips. The shelves, marked with tags, are equipped with baskets for storing seasonal items, such as scarves, flip-flops, and sports gear. A side wall is transformed into a message center with dry-erase paint, and a wall pocket file holds important papers.
Related: 6 Easy Organization Hacks That Repurpose Household Items
Before: Basic Wood Armoire
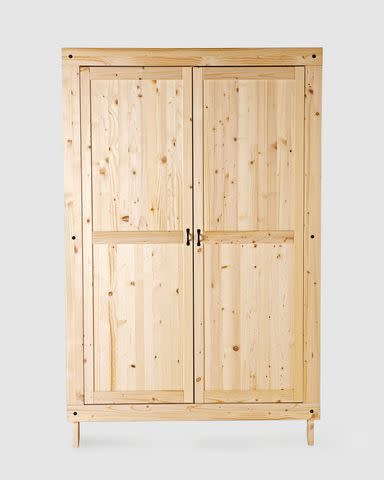
This roomy armoire was ripe with storage potential. We used a few custom additions and tweaks to turn it into something even better. This before-and-after furniture makeover added so much space for organization.
After: Smart Serving Station
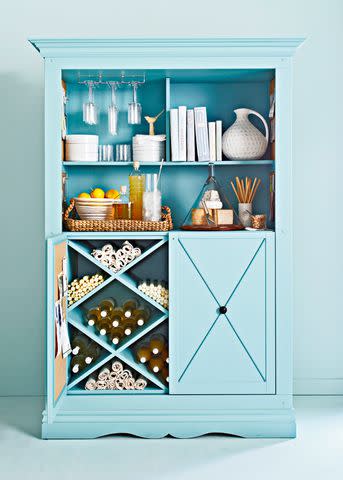
Cutting the doors in half and moving hinges made room for a beverage bar with storage cabinets underneath. Crown molding on top and scrolled molding on the bottom add a touch of class. The new light blue color is calm and relaxing. A divided shelf added to the open top provides bonus storage for dishes, wine glasses (Better Homes & Gardens Clear Flared Red Wine Glasses, $10, Walmart), and books. X shelves in the lower cabinet are perfect for bottles and rolled linens.
Before: Tired Design
This iron headboard was ready for an update. Rather than starting from scratch, we add an upholstered cover to update the look and make it more cozy and comfortable for reading and watching TV in bed.
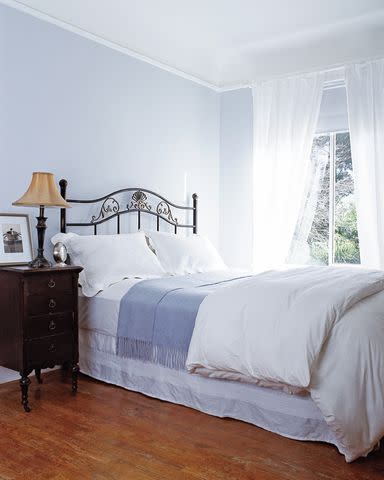
After: Easy Bedroom Refresh
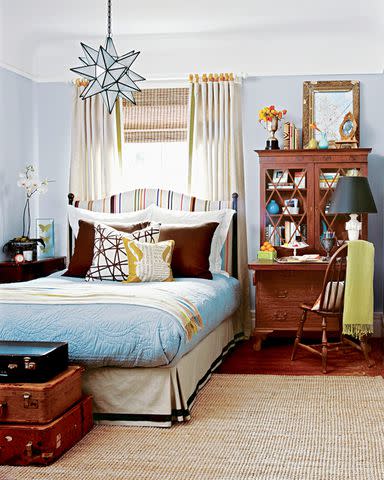
An upholstered plywood board softens the look of this iron headboard. The secret to this project's success was using steel straps to fit snugly around the rails of the iron headboard. Typically used for supporting conduit and pipe, we found these at our local hardware store.
Related: 32 DIY Headboard Ideas for a Low-Cost Bedroom Refresh
Before: All Worn Out
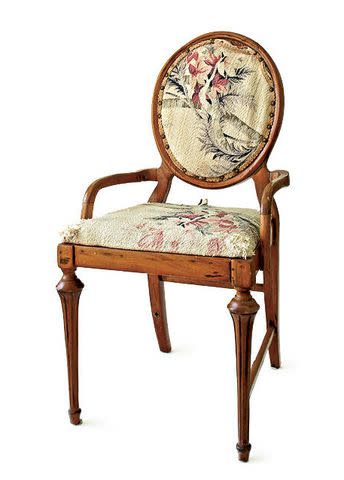
Don't overlook ragged pieces at thrift stores. Many forlorn items are just gems waiting for a furniture makeover. For example, we updated this tired French armchair with a bold new look.
After: Colorful Chair Makeover
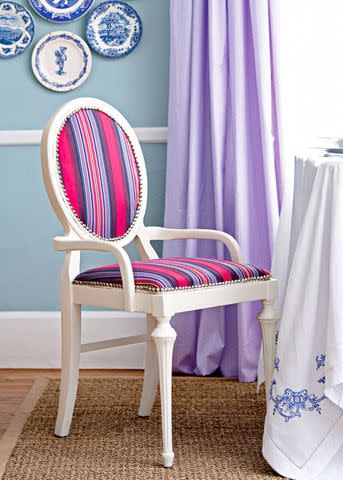
New paint and an upholstery job transformed this chair from blah to beautiful, and strategic trims hide the striped fabric's raw edges. We painted the chair and stapled an oval of the bright fabric to the back of the chair. After recovering the seat, braided trim was attached with hot glue. Instead of the tedious work of adding nails one by one, we used nailhead trim from a fabric store to add a touch of shine.
Before: Dismal Dining Chair
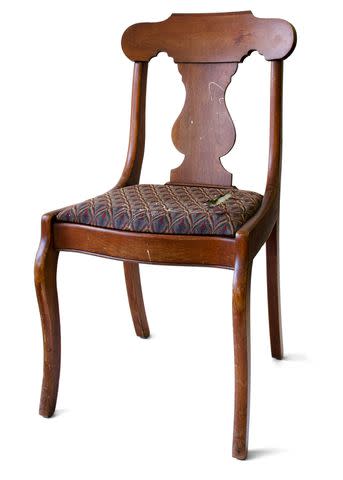
Dining room chairs abound at thrift stores and flea markets. Don't overlook a piece with a nice structure but unsightly upholstery as you shop. Often, the seats can be removed for easy reupholstering.
After: Sunny Furniture Makeover

Yellow paint and fabric brighten this thrifted find. We used a pillow cover fabric, slightly larger than the cushion, that's durable with a pretty pattern for the new seat covering. Remove the seat, wrap the pillow cover around it, and then staple it underneath. Reattach the seat to the chair.
Try These DIY Projects to Update Your Decor
14 DIY One-Weekend Projects for Colorful Bedroom Furniture and Decor
31 Creative DIY Paint Projects to Personalize Your Home Decor
For more Better Homes & Gardens news, make sure to sign up for our newsletter!
Read the original article on Better Homes & Gardens.

