Hike Smarter: 14 Expert Pieces of Advice Every New Backpacker Should Know
This article originally appeared on Backpacker
Taking those first couple of steps into the wild can be intimidating. So can trying to parse all the advice out there: Everyone crunchy old hiker has their own, occasionally contradictory, ways of doing things. We here at Backpacker want to make your life a little easier, so we’ve pulled together these essential pieces of advice that we want to pass down. These aren’t the basics--you won’t find a step-by-step on how to set up your tent here. Instead, they’re the little hacks, tricks, and hard-won knowledge that will make your trip go that extra bit more smoothly. --The Editors
Hike Right
Save yourself a lot of trouble later with a little bit of effort now by embracing these techniques
Treat your feet
Get boots that fit: snug in the heel, but with enough room in the forefoot to allow for inevitable swelling on long days with a pack. Allow plenty of time to walk around in the store (you weren’t going to buy new boots without trying them on, were you?) Feel for pressure points and blister-causing heel slip. Most stores have an incline board; check for movement with your foot pointing both up- and downhill.
An even better idea in warm weather: use trail runners or other lightweight, breathable shoes. They'll reduce heat buildup, and heat accelerates blisters. The Altra Lone Peak series is a tried-and-tested fave.
Keep your socks dry (change into a new pair if needed); air your feet at rest breaks.
Treat hot spots proactively with a nonstretch sports tape like Leukotape (plain old duct tape also works).
Cut your toenails short.
Use a lubricant like Body Glide to reduce friction in problem areas.
Lace boots with precision comfort: Tie an overhand loop at the ankle to create a locking twist, and repeat at each eyelet (see below). Adjust tension where needed, or even skip an eyelet altogether.
Got a blister anyway? Use blister cushions until you have a chance to clean and drain it.
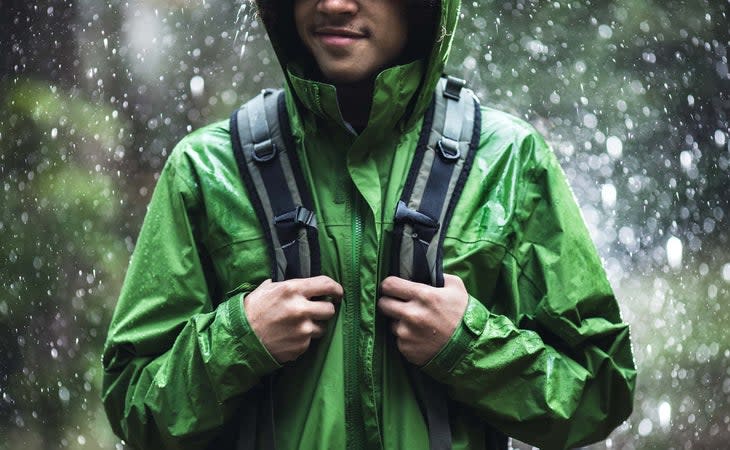
Stay dry in a storm
Start with a shell that extends below your hips, so there's no gap between jacket and pants where rain can sneak in. Cinch the hem snugly.
Roll up the cuffs of your baselayer so they don't wick water up your sleeves, and cinch your jacket's cuffs. Avoid raising your arms (giving water easier access to your cuffs) and shorten your trekking poles so your wrists are angled down.
Keep your hood snug, and wear a waterproof/breathable billed cap (like Sealskinz Waterproof All Weather Cap, $30) underneath to enhance face protection in the worst weather.
Wear gaiters with your rain pants when you're walking through leg-soaking, wet brush.
Don't sweat. Even the most breathable raingear can be overwhelmed from the inside if your exertion is too great for the temps. Getting steamy? Open every pit zip and vent, shed layers, and, if needed, simply slow down. In warm, humid conditions, consider skipping the jacket and use a lightweight umbrella.
Keep your stuff dry. Use a pack liner or dry bags, and don't expose dry gear to the rain during breaks.
Navigate without a compass or GPS
You should really bring the right equipment. But these nifty techniques can work as a last-ditch effort, or as a party trick
Stars Find the Big Dipper. Extend an imaginary line through the two stars at the end of the outer cup to a medium-bright star (about five times the "distance" between the two Big Dipper stars). This is the North Star.
Watch Hold an analog watch level, with the hour hand pointing to the sun. South is halfway between the hour hand and the 12 (Note: This trick only works in the Northern Hemisphere, and also assumes your watch is set to the right time).
Shadow stick Stand a 3-foot stick vertically in the ground and mark the tip of its shadow with a rock. Wait at least 15 minutes, then mark the shadow again. The connecting line roughly indicates east-west (south is on the sun side of the line).
Walk right
Yes, there’s a wrong way to put one foot in front of the other. Watch for these pitfalls
Over-striding Taking giant steps can lead to overuse injuries like strained quads and hip bursitis. Shorter steps minimize pounding and muscle exertion, making your stride more energy efficient even though you take more steps overall.
Forefoot striking This is OK for running, not walking. Pounding on the forefoot (rather than gradually rocking the foot from back to front) can cause foot and leg problems, including the very painful metatarsalgia.
Shuffling You want to push off with your toes with each new step. Omitting this final toe-off phase (by shuffling or dragging your feet) jars joints from head to toe.
No danglies
Avoid lashing heavy items to the outside of your pack. They'll throw you off balance and stress pack seams. Plus, they just look silly.
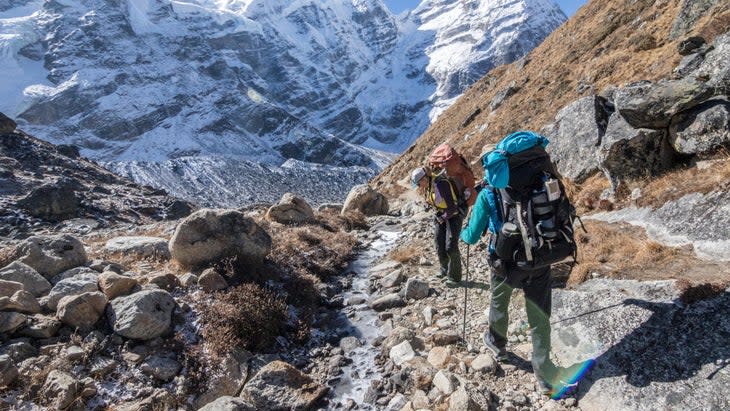
Hike Higher
The mountains require a whole different set of techniques than the lowlands. Keep these tips in mind when you venture into the hills.
Acclimate wisely
Traveling from low to high elevation? Build in an extra day or two and allow your body to adjust, moderate your effort the first couple days, and try to avoid driving directly to trailheads above 10,000 feet (plan a dayhike at a lower elevation).
Stay hydrated (air is dry up high); avoid alcohol.
Hike high, sleep low. Camp each day below the highest elevation you've reached.
Avoid ascending more than 2,000 feet total per day.
If symptoms of altitude sickness develop (persistent headache, loss of appetite, fatigue, loss of coordination), stop ascending. Go down if they don't improve within 24 hours.
Descend safely
Made it to the top? Congratulations. Now don't ruin your trip on the way down.
Keep your knees slightly bent as your transfer weight to the downhill leg, absorbing impact with your muscles instead of your joints.
Align your foot, knee, and hip on big downward steps. This helps prevent rolling an ankle and takes some strain off your muscles.
Use your trekking poles like crutches when stepping off huge ledges. Plant them in front of you, on either side of where you want to land, and lower yourself in a controlled way using the poles for support.
Glissading? Remove your crampons (if you tumble with spikes on, they can cut you, and catching a point can spin you out of control).
Use crampons correctly
These spikes are your ticket to safely traversing steep snow and ice. But there's a learning curve: Flex your ankle with each step, so your foot is flat against the slope, bringing all points in contact with the ground. Don't move one foot until the other one (and your ice axe) are secure.
Learn to self-belay
Walking unroped on steep snow? Use your ice axe to prevent a slide. With feet secure, plant the spike and shaft (adze forward) at least 6 inches deep. Keep your uphill hand on the axe head as you step. Repeat. If you slip, keep one hand on the axe head and grab the shaft (low) with the other. Your weight should pull against the buried shaft.
Layer smart
On alpine starts, it's tempting to bundle up against the chill. Start cold; you'll warm up fast going uphill and won't overheat.
Hike Comfier
Performance isn’t everything. Stay cozy with these hard-won tips.
Pitch the perfect camp
Choose a site 200 feet from lakes and streams. Camp at established sites and on durable surfaces whenever possible.
Hang your bear bag or stash your canister at least 200 feet downwind from camp.
In grizzly country, cook 200 feet or more downwind from your tent.
In calm conditions, orient your tent door to the east for early sun.
Look up to make sure no dead trees/branches threaten to fall on your site (especially in beetle-damaged forests in the West).
Find a flat rock, preferably with a windbreak, for your kitchen.
Protect yourself from wind
Spend extra time searching out a sheltered site, like in a low-lying forest. Above treeline, seek protection on the lee side of a rock outcropping or ridgeline.
Orient your tent so the smallest side is facing the wind. If it's not raining, wait until the winds die down (often at sunset) to pitch your tent. You'll reduce the risk of damage from a big gust.
Guy out your tent securely. Here's how: Tie small overhand loops at each end of a nylon cord (4 to 8 feet). Pull one end through a guy loop, then pass the other end through the loop in the cord to fasten it. Anchor the other end tautly to a stake.
Eat better
Five ways to improve the menu:
Pack a few lightweight, fresh add-ins to boost the taste of any dehydrated meal. Ideas: cilantro, jalapeno, parsley, basil.
Serve an appetizer. Soup is a no-brainer in cool weather.
Upgrade any lunch wrap with an avocado. Pack it in your pot to prevent squishing.
Add butter. Simple!
Use extra water in dehydrated meals. There's nothing worse than not-quite-rehydrated stroganoff.
Flame control
If you must cook in your vestibule during a storm, prime a liquid-fuel stove outside and then pull it in.
Originally published in 2014; last revised and updated April 2023
For exclusive access to all of our fitness, gear, adventure, and travel stories, plus discounts on trips, events, and gear, sign up for Outside+ today.
