A "Hideously Outdated" Kitchen Goes Bold with a Must-See Accent Wall

ABOUT THIS BEFORE & AFTER
HOME TYPE: Townhouse
PROJECT TYPE: Kitchen
STYLE: Colorful, Maximalist
SKILL LEVEL: DIY
RENTAL FRIENDLY: No
If you love to cook, your kitchen might have something brewing seemingly 24/7. But if you’re on the other end of the spectrum, your kitchen might be “an easily ignored snack repository” as self-described “not much of a cook” Lori Johnson (@lajphotos) puts it.
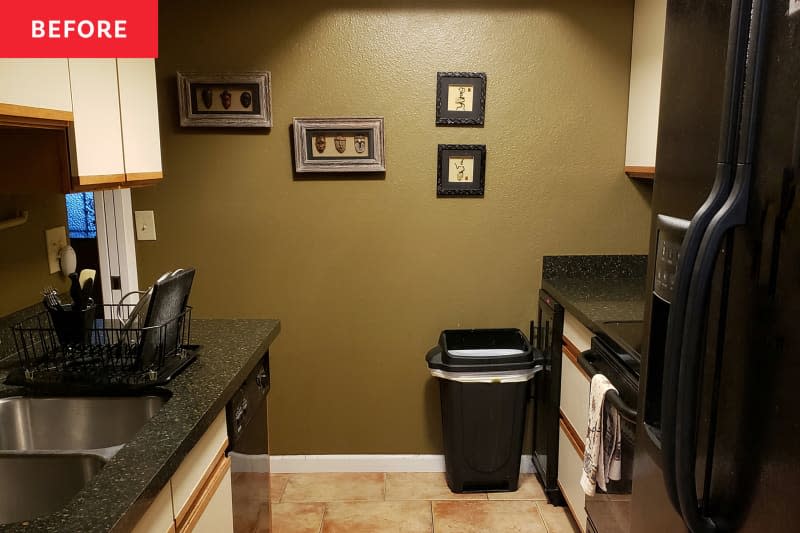
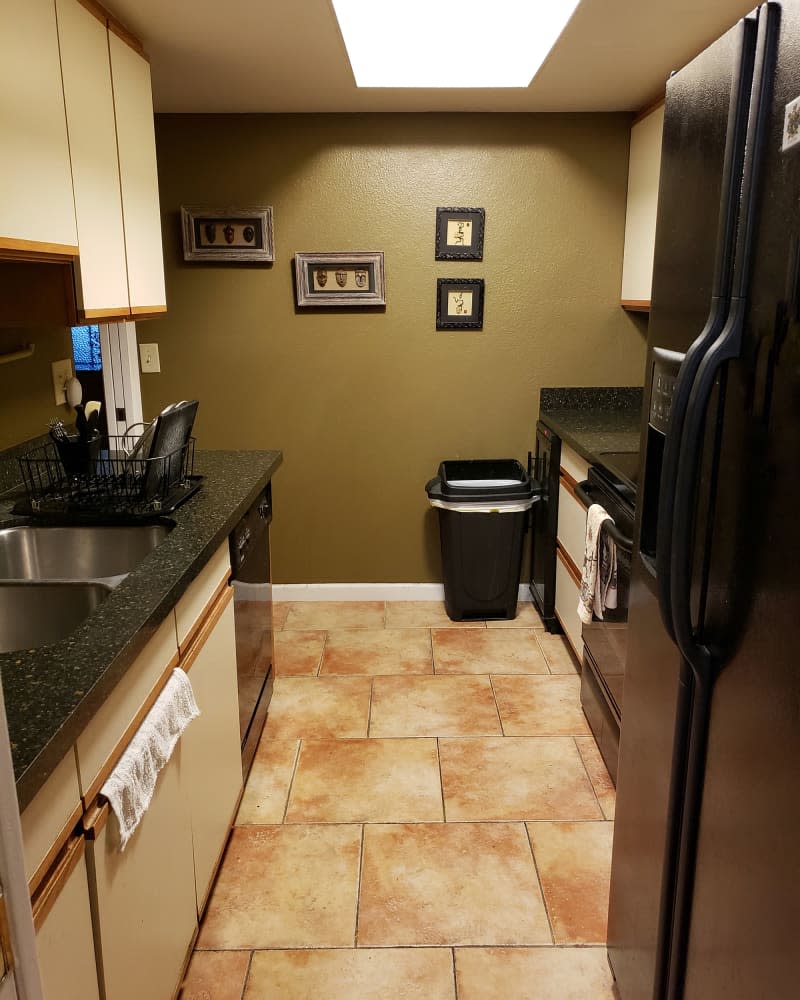
Lori describes her townhouse kitchen’s original state as “hideously outdated,” with melamine cabinets from the ‘80s, poor lighting, and brown walls. Since moving into her place in 2007, Lori almost tried to ignore it. “One good thing about the openings at each end is that they enable me to get a good running start with a carefully timed snatch and grab from the fridge on the way past, thus minimizing exposure to the ugliness for the several years before I’d had enough,” she says.
After 13 years of living with the kitchen, she began to make some changes. “I wanted to make it more colorful, taking color inspiration from my love for desert plants and to feature my own photography as decor wherever possible,” she says.
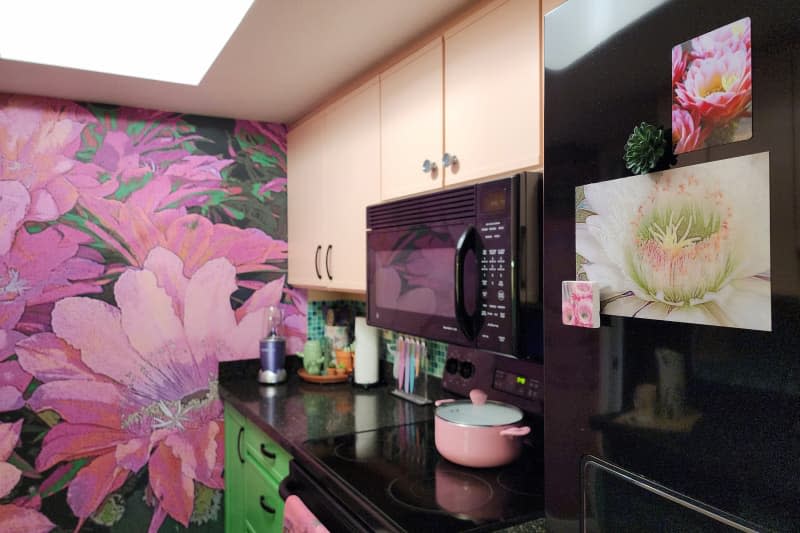
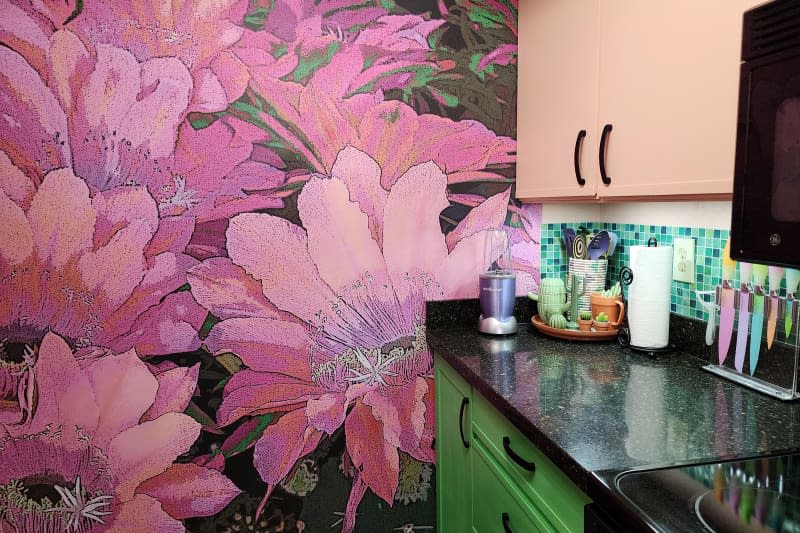
The homeowner’s original photography makes for stunning wallpaper.
On the back wall, Lori created a bold purple statement using a blown-up photo of a cactus blossom. She designed the wallpaper herself, adding some filters and editing the colors to add more black and peach tones, and Image Craft printed and installed the final design.
She also used her own photography on magnets and hand towels she ordered from Zazzle. “I also incorporated vintage finds, such as cactus-themed mugs and drinkware, a vintage cactus-shaped cookie jar, along with purchases from various artist friends, such as prints and ceramic pots,” she says.
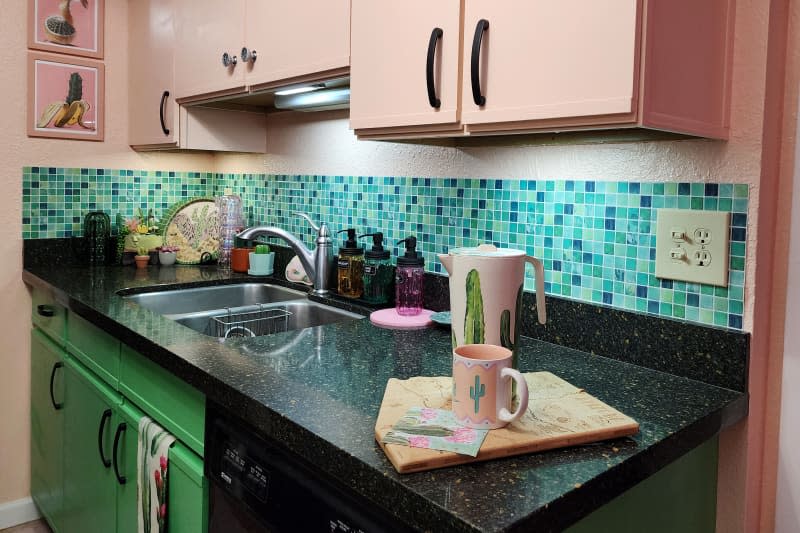
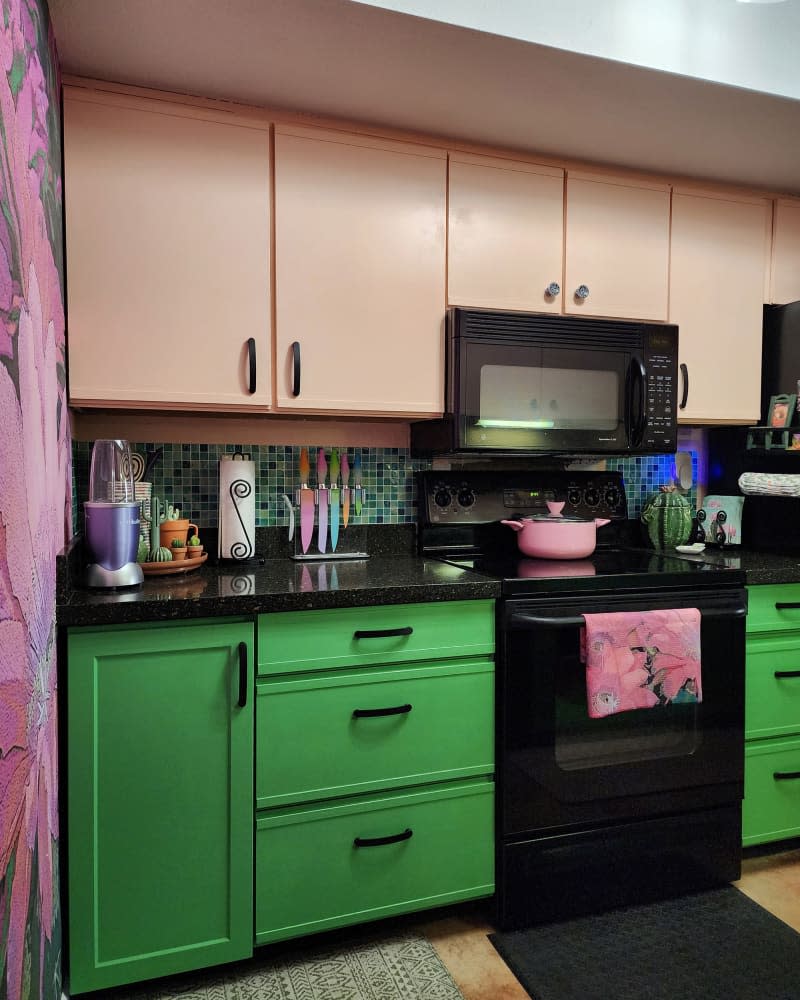
Paint improves the melamine cabinets.
“Painting cabinets was a first for me!” Lori says. “The original 1970s cabinets I inherited were in excellent condition, but I’ve never liked the white melamine look. I researched extensively whether and how melamine cabinets could be painted and finally settled on the right primer … which allowed me to use regular household latex paint.”
Lori spread her cabinet doors out in her living room, cleaned them with Krud-Kutter Gloss-Off, scuff-sanded, primed with Kilz Adhesion primer meant for slick surfaces, and painted. She used the Valspar’s Coral Peach for the uppers, and a light green, Valspar’s Elf, for the lowers. She topped both with a coat of Minwax Polycrylic in satin finish.
Lori also added hardware to the cabinets. “Drilling holes into melamine is also tricky because it shatters easily, but if you have support below it and drill through painter’s tape, it can be done,” she says.
Removing the wine fridge creates more under-counter storage.
While the hardest part of the project was mostly figuring out how to paint melamine cabinets, Lori says there was one other hiccup: “The only real setback involved the removal of a wine fridge that was under the counter,” she says. “I thought that space would be better served by hiding a trash can that otherwise had to sit out. However, when my handyman tried to pull the fridge out, it was caught on the edge of the [floor] tile … the only way to get it out was to break off a small section of tile. I was unable to find a matching tile anywhere in stores or online, so I was worried how I’d fill in that hole.”
Out of desperation, she decided to check her garage storage one more time to see if the previous owner left any parting gifts, and there was exactly one terracotta tile in there to do the job. After installing a new base cabinet from The Home Depot to fill the gap (also painted green), she took out the rest of the broken tile and replaced it with the “new” one.
The backsplash also provides a pop of green.
Lastly, Lori added teal peel-and-stick backsplash tiles where there were only bare walls previously, calling them “much cheaper than ceramic.” In addition to being budget-friendly, they were easier to install than Lori expected, including trimming the tile to fit around the light switch plates.
The last project on Lori’s to-do list is to finish off the backsplash edges with the perfect decorative trim that she’s still on the hunt for. For more ideas of small ways to improve your kitchen like Lori did, check out these eight DIY projects.
Inspired? Submit your own project here.
Correction: An earlier version of this post mistakenly said the floor tiles were black. They’re actually terracotta. We’ve updated it to be more accurate.

