HGTV's Jasmine Roth Shows How Easy It Is To Make Wood Transfer Wall Art
When it's done right, wood transfer art can look like something you battled someone at Brimfield or Round Top to secure. Or cost you $350 or more. That was the struggle Jasmine Roth found herself in when she wanted to get the look in a home she was designing-and realized there had to be a better way.
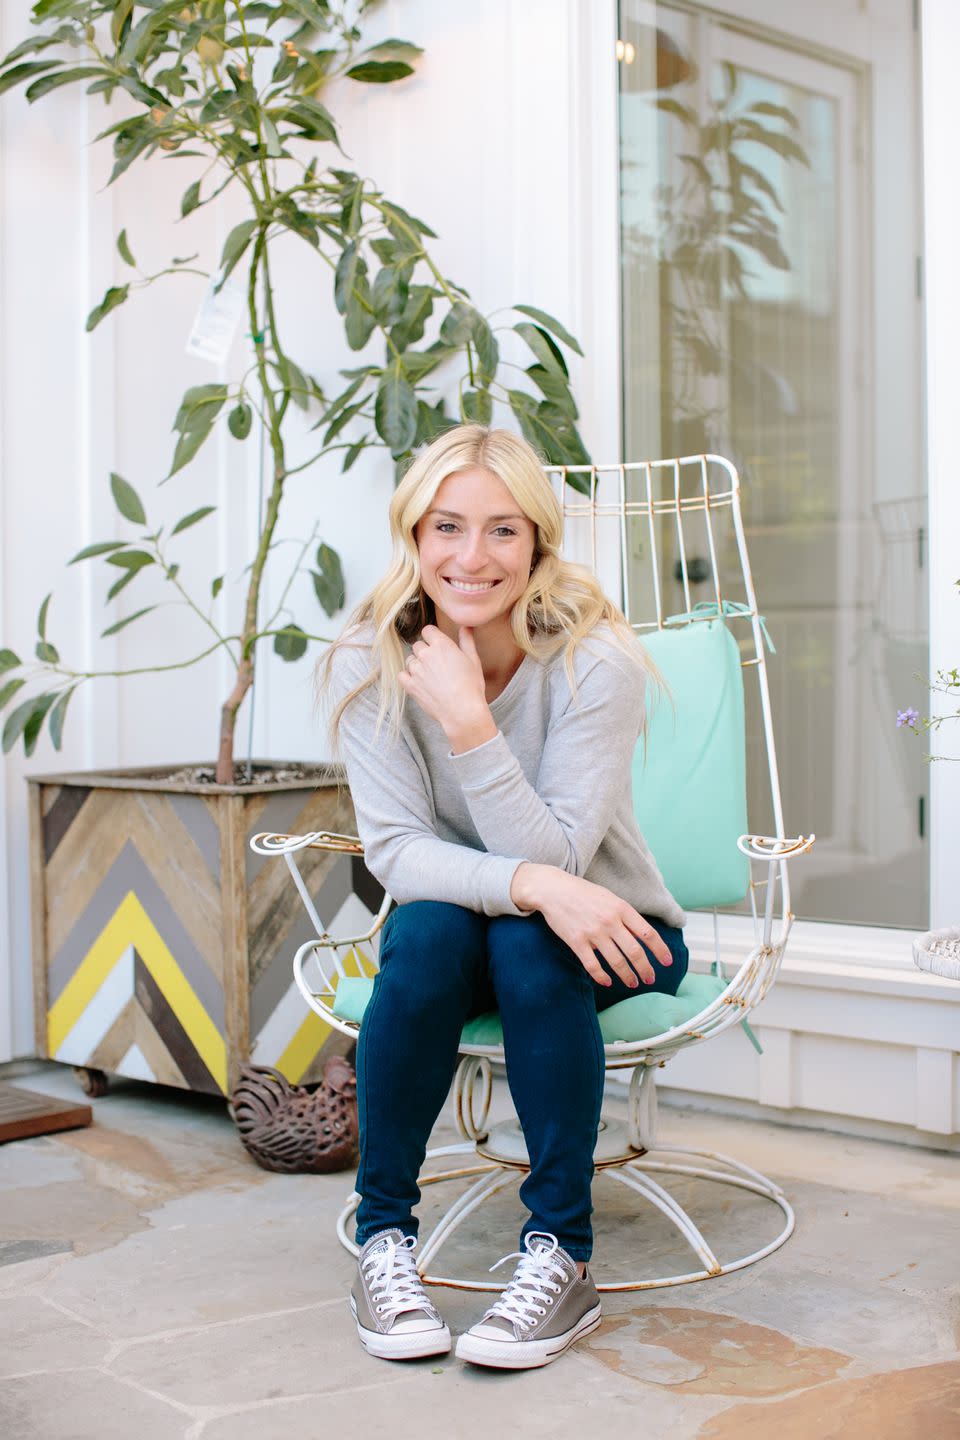
The Hidden Potential star has no problem rolling up her sleeves and getting to work, so after reading a few tutorials-like that on The Brandon Family Blog and The Wed Loft Blog-she decided to try it for herself. And was gracious enough to break down exactly what she did, how long it took, and what she wished she knew sooner, so you can try it, too.
What You'll Need:
Rubber gloves
A large-print image
Plywood large enough to fit the image
Acrylic gel
Paintbrush
Wood stain
Acrylic craft paint (optional)
Here's How To Do It:
Pick Your Pic-And Size It Up.
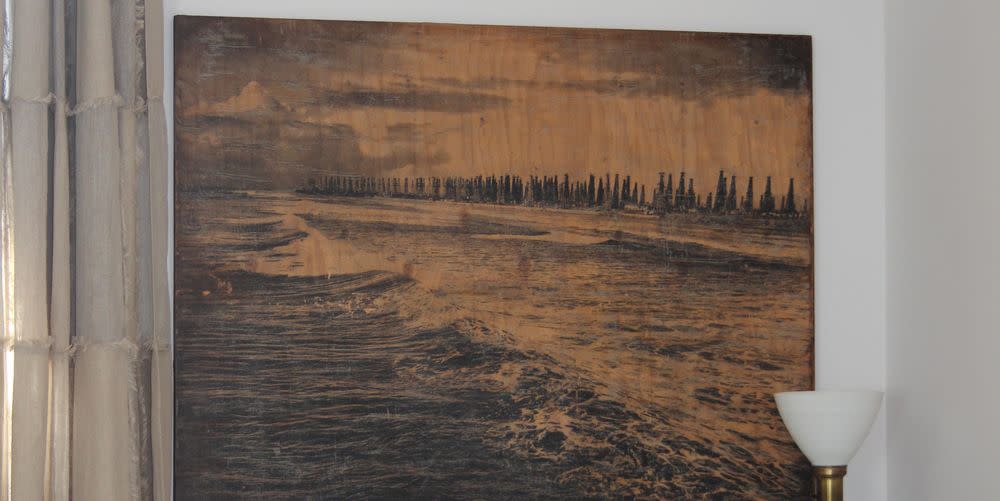
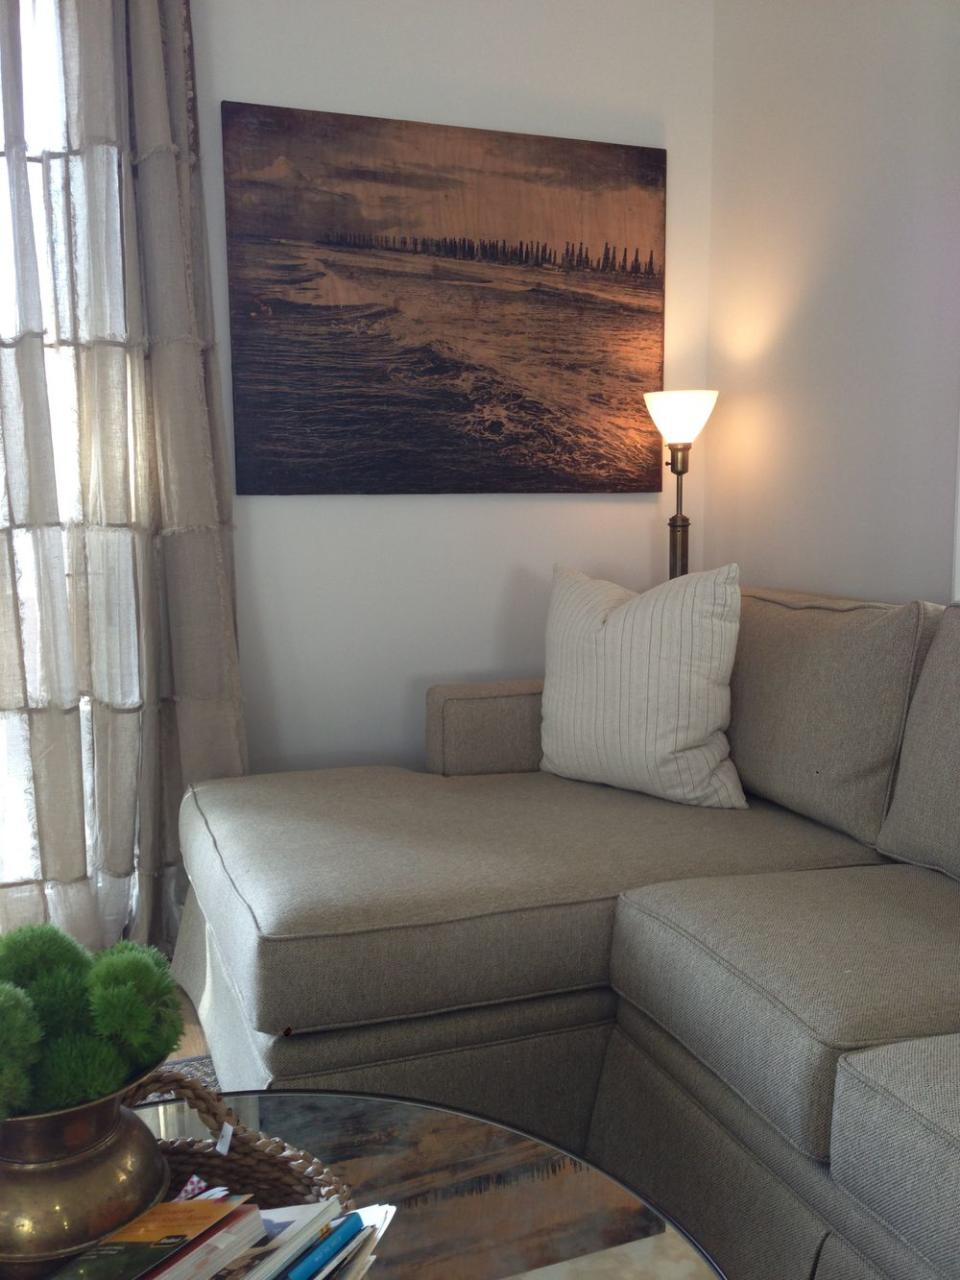
Ever the California girl, Jasmine chose a photo of the Huntington Beach Pier from a January 1940 copy of The Los Angeles Times. She bought the image, then measured her wall to determine exactly what size she wanted it. Since it was a hi-res photo, she could really blow it up and make it the focal point of the wall, so she decided on making it 48" x 37".
"The images that work best are ones that can be a bit abstract, usually something that doesn't have to be perfect," Jasmine explains. "There should be some saturation on every part of the photo. For example, if the sky is just plain when you make the photo black and white, that part will be pretty boring after the transfer. If that sky had some pigment-gray or even darker clouds-it would turn out better."
Print It And Reverse It.
Jasmine recommends going to Staples or another company that offers large-scale printing services and asking for a laser print. Reverse the image in Photoshop-or use another image-editing tool-so that the photo appears correctly when you press it facedown and transfer it to the wood.
Transfer It.
Coat the wood with acrylic gel-just enough to lightly cover it, not too gloppy-then place the image facedown on top of it. Jasmine used a wooden dowel to smooth out any creases and bubbles in the paper, then let it dry overnight.
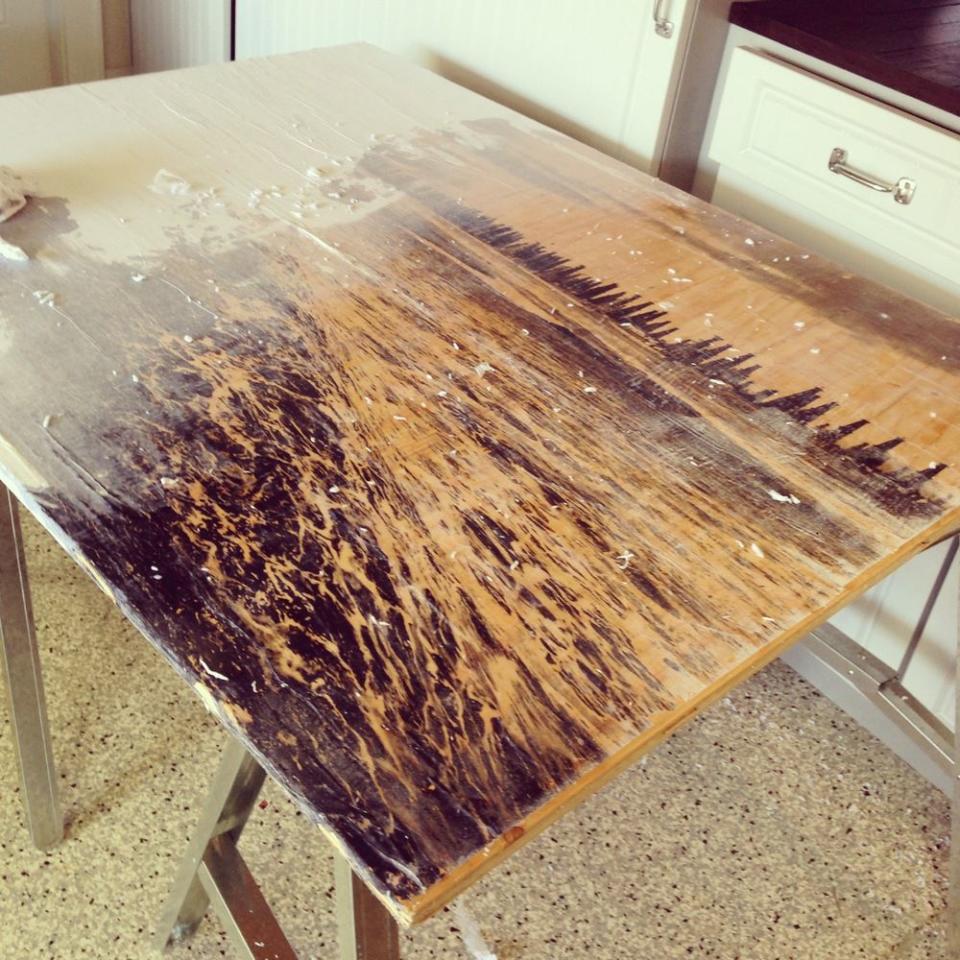
Get To Scrubbing.
Use a damp cloth to wet the area you want to work on, then gently rub off the paper, leaving the ink behind on the wood. Be careful not to rub so vigorously that you scrape off the ink, too. Jasmine suggests starting in one corner and working your way across the wood.
Note: This will take a WHILE. In Jasmine's case...10 hours. "I had my friends help me, and it made it go faster," she said. "We all listened to reggae music. Iration is on constant repeat in our house."
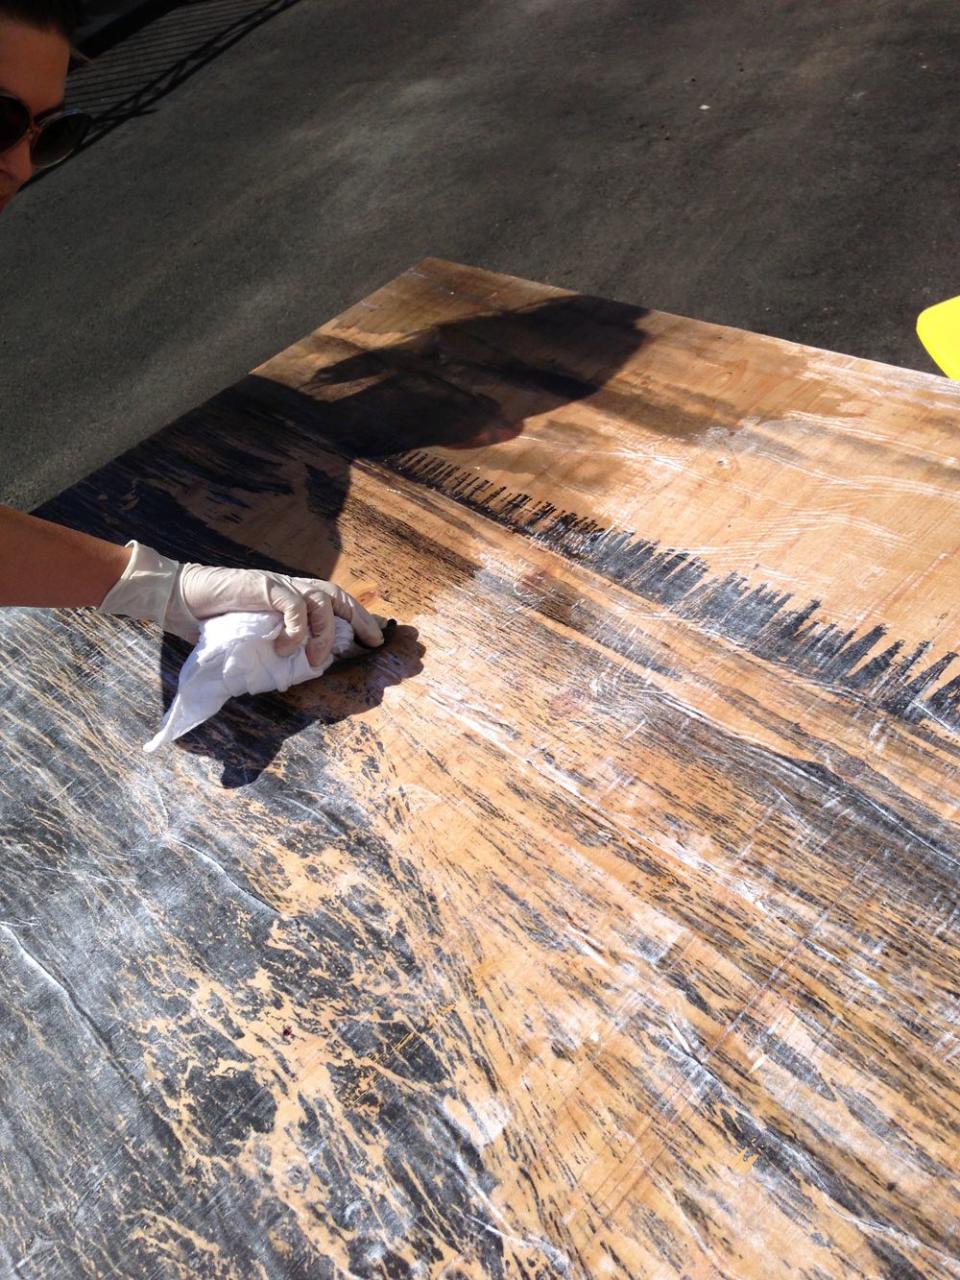
Also, make sure you wear gloves, or you'll rub your hands raw, she says.
Stain And Deliver.
Once all the paper's off, apply a wood stain. Jasmine added some craft paint to hers, just to give it a darker look.
Let the stain dry, then you're ready to flip it over and stick a photo bar on the back, so you can hang it up.
The verdict:
While the whole project cost her less than $40-a fraction of the $350 Jasmine had seen when she was shopping for something similar-it did take some serious commitment. To the tune of 10 hours' worth. But, with friends around and reggae blasting, Jasmine turned it into a party.
For even more details on this project-and other DIY ideas-check out Jasmine's blog at BuiltCustomHomes.com.
Follow House Beautiful on Instagram.
('You Might Also Like',)

