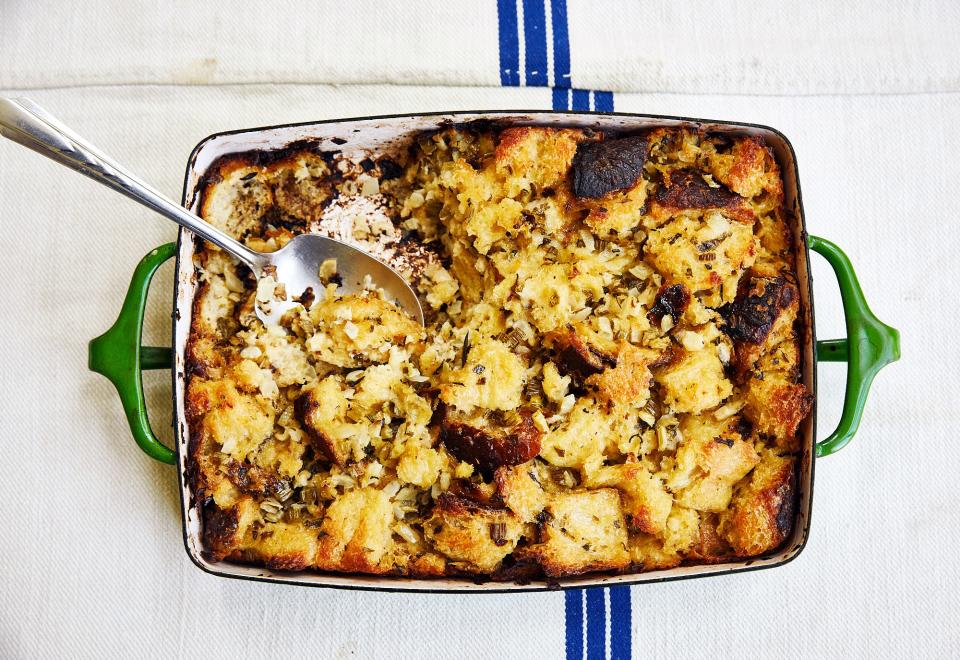
Be a Hero and Follow These 6 Rules for Perfect Stuffing
Every time the BA Test Kitchen comes up with a new stuffing recipe—which is, um, every Thanksgiving—the team edges a little bit closer to stuffing nirvana. (They’ll never reach this magical place of course, but it doesn’t hurt to strive.)
When he was developing our newest, greatest stuffing, flavored with herbs (parsley, sage, rosemary, and thyme), fennel, onion, and celery, senior food editor Andy Baraghani reflected on all the stuffings he’d tried over the years—hopping from stuffing to stuffing to stuffing—in order to create our ultimate Franken-stuffing, which combines the very best features from stuffings past.
The recipe thus serves as a compendium of our favorite stuffing techniques, those that have survived the test of time (and the test of the test kitchen). Best of all, you can apply them to nearly any bread-based stuffing, whether you’re using Andy’s recipes or a family heirloom. We hereby decree our six rules to the best stuffing ever:
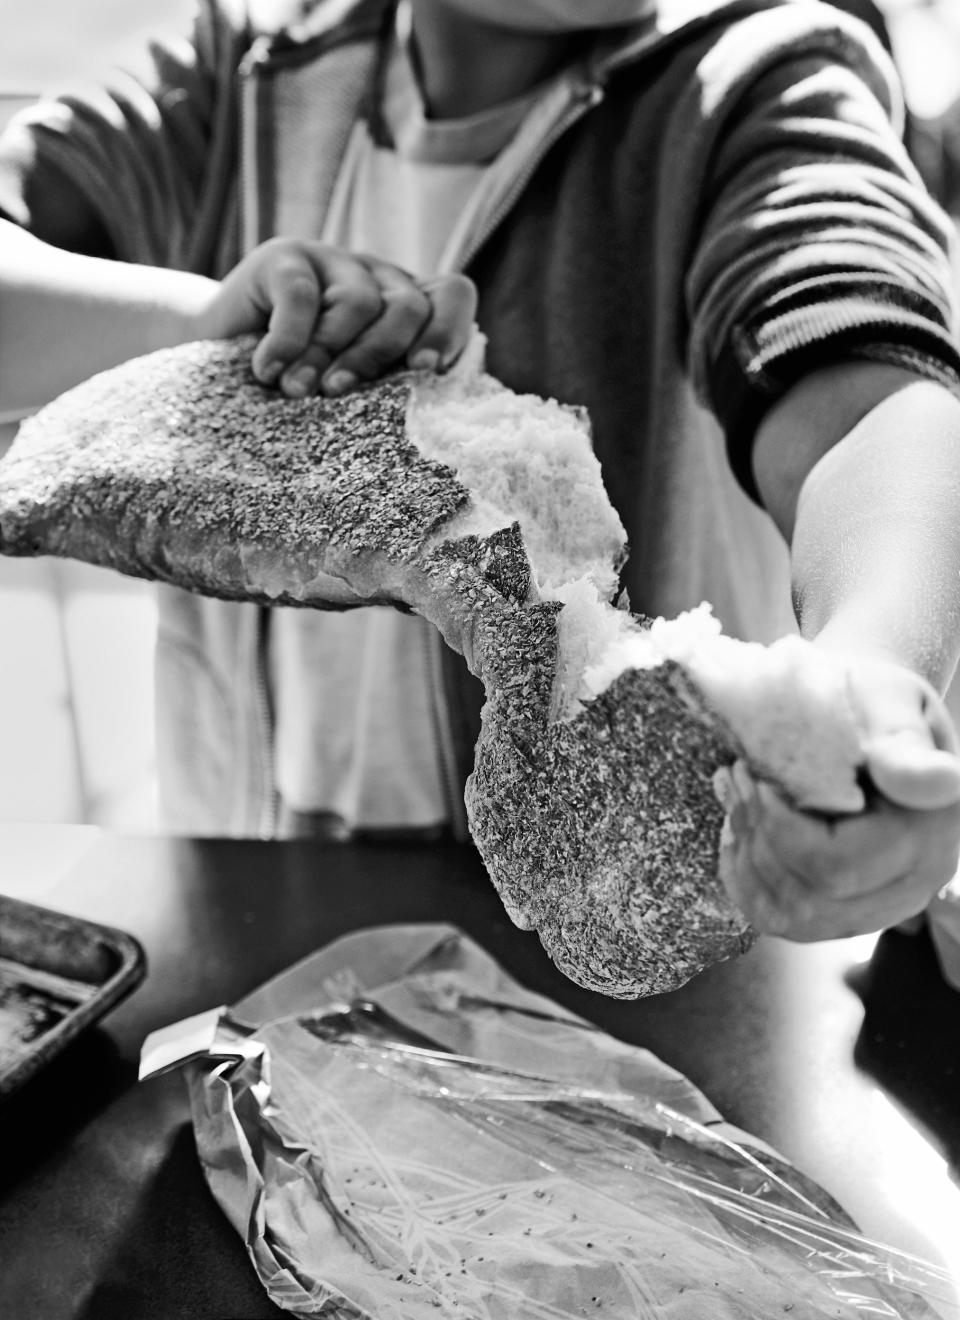
1. Tear, don’t cut, your bread. Irregular torn pieces, as opposed to neat cubes, create extra texture and surface area for browning, making for a more beautiful stuffing. (Yes, stuffing can be beautiful.) It’ll let out some of your Thanksgiving stress to rip apart that loaf, and the crevices on each craggy chunk are the perfect crannies for chopped vegetables and torn herbs to nestle into.
2. Don’t stale the bread—dry it out in the oven. Dehydrating the bread removes moisture, effectively transforming it into a sponge that can absorb all of the flavors of the stock and aromatics. We don’t recommend letting your bread become stale at air temperature, though—it’s time-consuming and unreliable. Instead, tear it, then cook it in a low-temp oven (between 200° and 250°) until crouton-like in texture but without taking on any color (about 45 minutes to 1 hour).
3. Lean into the aromatics. Now’s not the time to skimp on the vegetables and herbs that go into the stock mixture. We use onion, fennel, celery, parsley, sage, rosemary, and thyme so that once-neutral bread becomes anything but.
4. Use eggs, stock, and butter too. Egg is a binder, adding richness and body; stock moistens and flavors the bread; and butter is our fat of choice: It enhances browning, both on the top crust and the bottom floor, and makes the interior tender. Too much cream, on the other hand, can mute the flavors of the stock and turn the stuffing into something more akin to a pudding.
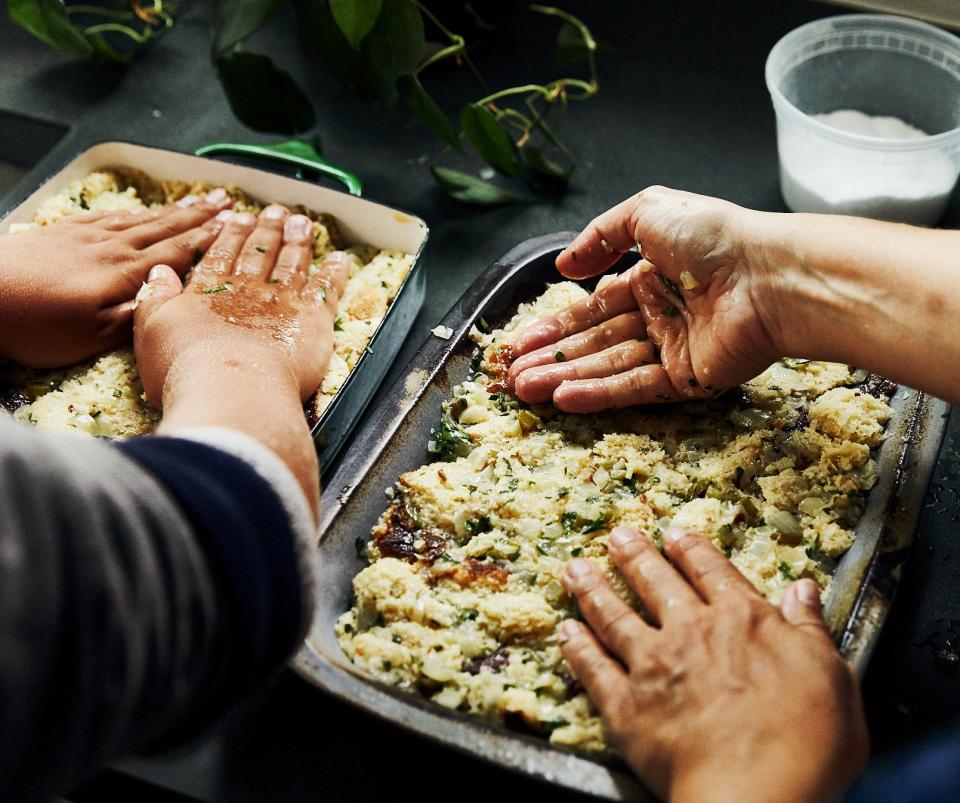
5. Don’t mush; do press. We’ll admit that it’s a fine distinction, but what we mean is this: When you pour the stock and eggs over the bread and sautéed vegetables, use a big spoon or a spatula to gently fold everything together. Your goal here is to make sure the pieces of bread are evenly coated, but you don’t want to break them apart into crumbs or mash them into a paste. Then, after transferring the mixture to the baking dish(es), press the mixture down to pack it into the pan so that it all melds together into a scoopable stuffing. (Press gently—you still don’t want to lose the integrity of the chunks.)
6. Smaller vessels mean more crispy edges. Lots of stuffing recipes call for 3- or 4-quart casserole dishes. You can, of course, bake your stuffing in one large dish, but splitting the stuff between two 8x8s allows for more perimeter pieces to go around—plus, you’ll have a dish for either end of the table, which means one less thing for everyone to fight about.
Get the recipe:
Classic Herb and Fennel Stuffing