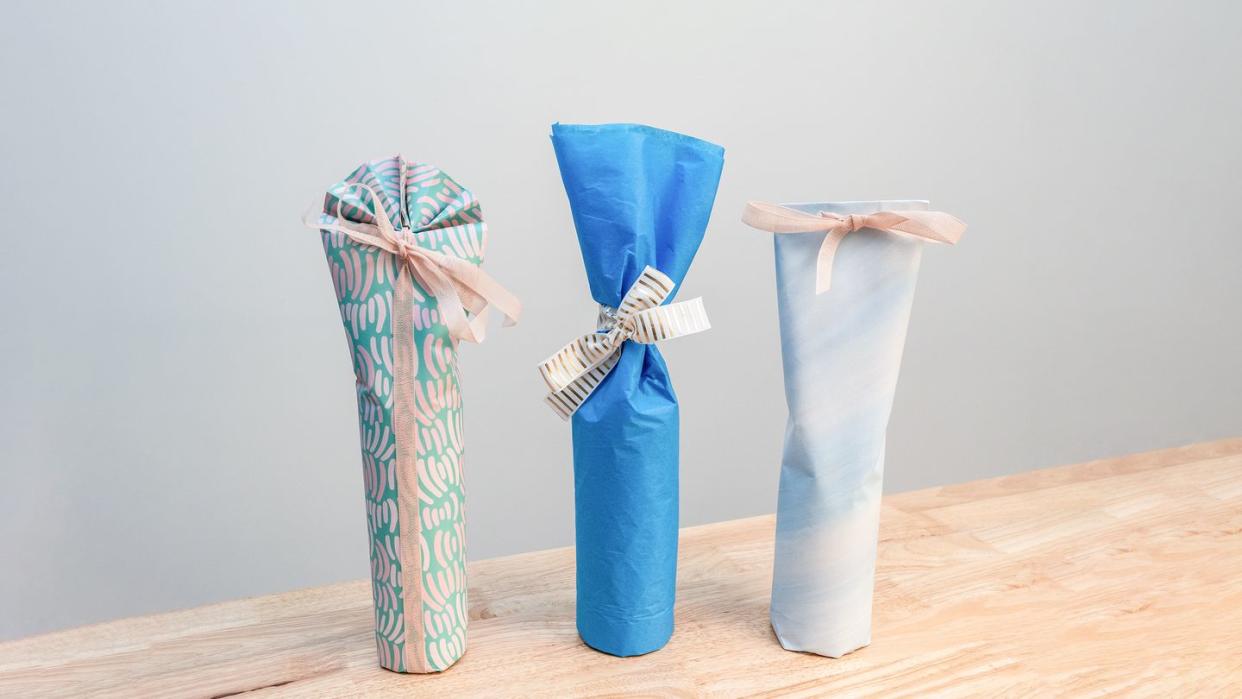
Here's How to Wrap a Wine Bottle, So You'll Never Have to Buy Those Skinny Gift Bags Again
"Hearst Magazines and Yahoo may earn commission or revenue on some items through these links."
[table-of-contents] stripped
Whether you’re heading to a birthday party, housewarming, or weekend potluck, you never want to show up to a gathering empty-handed. If the host is a wine-lover, gifting a bottle of their favorite red, white, or rosé is a no-brainer — but simply grabbing it from the wine shop on the way to your destination is a pretty obvious last-minute gesture. Gift-wrapping the wine bottle for your recipient will make it feel much more meaningful, and it’s easier to do than it sounds!
To wrap a wine bottle in any of the three methods outlined here, all you need are basic gift-wrap supplies and just a minute or two of your time. The measurements in these techniques work for standard 750-milliliter wine or Champagne bottles, but you can adjust them to wrap other bottle sizes, too. Just keep in mind that when you’re selecting wrapping paper for the job, using traditional thin, glossy paper from the roll works better and is more forgiving than stiff kraft paper.
Without further ado, here’s how to wrap a wine bottle (in three different ways)!
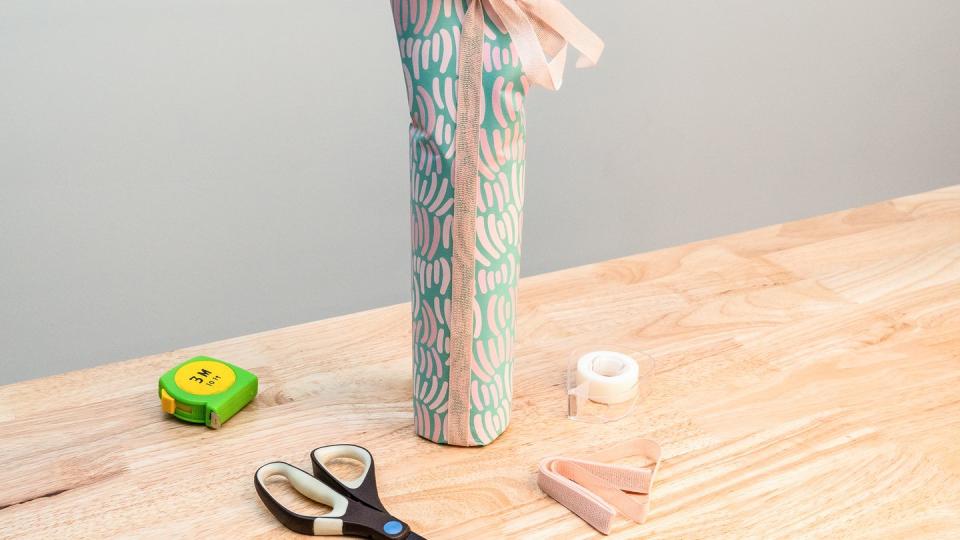
Method #1: Hole-Punched Bow
Supplies:
An 11x17-inch piece of wrapping paper
Measuring tape or ruler
Scissors
Tape
Single-hole puncher
Ribbon
Instructions:
Lay the wine bottle horizontally and parallel to the long side of the paper.
Wrap the paper around the wine bottle. Tape it into place, then remove the wine bottle.
Create a base for the bottle by making a 2.5-inch fold at one end of the paper, then press the sides of the fold inward to create a diamond shape. Fold the upper and lower corners of the diamond into the middle and tape one on top of the other.
Place the wine bottle back inside the paper, sliding it down to the newly formed base. Scrunch the paper under the base to get rid of any pointy angles.
With the taped side of the bottle facing you, press together the paper opening above the top of the wine bottle and fold the paper down. Secure this fold with tape and flip the bottle over.
Make two single-hole punches through the top fold.
Thread your ribbon through one hole toward the taped side, then pull it through the other hole in the front. Tie a bow with your ribbon.
Product credits:Noble Vines 515 Rosé, Minted transparent Ice Wrapping Paper, Minted Blush Loose Weave Cotton Ribbon, Hallmark Invisible Tape, Scotch Precision Scissors, editor's own measuring tape and single hole puncher.
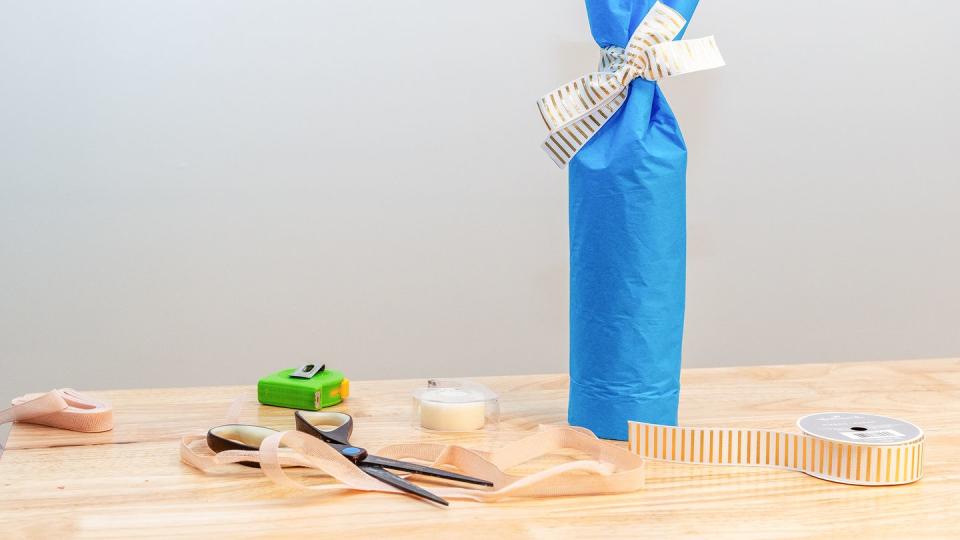
Method #2: Fanned-Out Top
Supplies:
An 11x22-inch piece of wrapping paper
Measuring tape or ruler
Scissors
Tape
Ribbon
Instructions:
Lay the wine bottle horizontally and parallel to the long side of the paper, leaving about 2 inches on the base side and 8 inches on the top side. Wrap the paper around the wine bottle and tape it into place.
Fold in triangle-shaped sections around the bottom of the bottle until the base is covered. Tape these folds into place.
Press the opening above the top of the bottle together. Create a fan shape by folding down the paper forward and backward in half-inch segments. When you reach the top of the bottle and can’t fold anymore, tape it in the middle to secure these folds.
Wrap a ribbon around the length of the bottle and tie it into a bow just underneath the taped accordion fold. Bring the separate folds of the fan together and tape them together so that it makes one cohesive shape.
Product credits: Tank Garage Winery Alright Fight Club White Wine, Minted Succulents Wrapping Paper, Minted Blush Loose Weave Cotton Ribbon, Hallmark Invisible Tape, Scotch Precision Scissors, editor's own measuring tape.
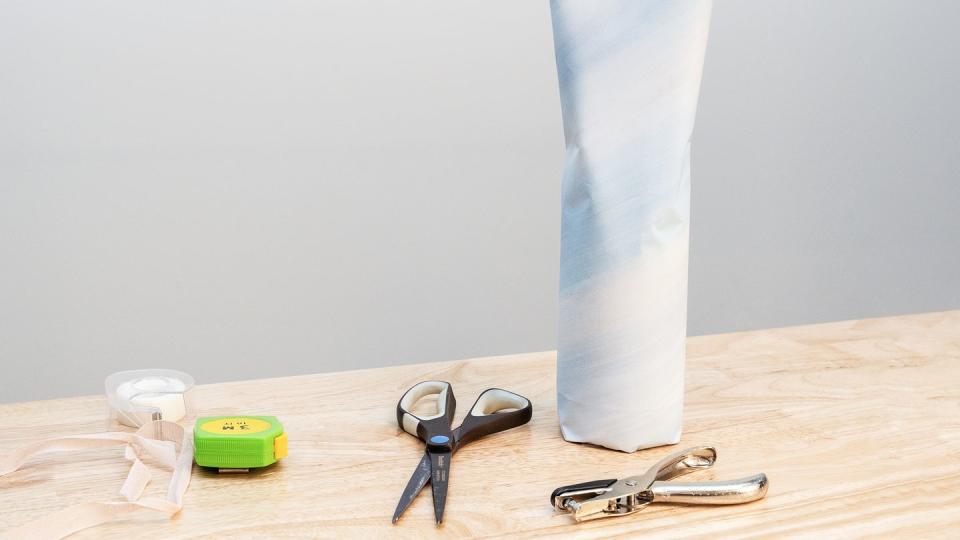
Method #3: Tissue Wrap
Supplies:
One piece of tissue paper
Measuring tape or ruler
Tape
Scissors
Ribbon
Instructions
Take one sheet of tissue paper, fold it in half with the opening to one side, and fold the opening again so that there's only 3-4 inches of paper above the top of the wine bottle. Place your wine bottle on the paper parallel to the two open sides. From the open side of the paper, start rolling up the bottle in the paper until half of the bottle is covered, then pause.
Hold the paper at the base with one finger, then use your other hand to pull and fold subsequent sections of the paper diagonally until almost the entire base of the bottle is covered. Fold the remaining section over to cover the base completely and tuck this section up toward the bottle. Doing this, you shouldn’t need any tape to secure the paper at the base. With the base paper folded in, carefully continue rolling up the bottle in the tissue paper until you’ve reached the end.
Secure with tape.
Leaving the tissue paper at the top open and unfolded, loop a ribbon around the neck of the bottle and tie it in a bow that faces the opposite direction of the taped side.
Product credits: Z. Alexander Brown Uncaged Red Blend, Hallmark Fiesta Blue Tissue Paper, Hallmark 1" Gold and White Stripe Grosgrain Ribbon, Hallmark Invisible Tape, Scotch Precision Scissors, editor's own measuring tape.
..
You Might Also Like

