I Had No Back Pain During My Pregnancy. Here’s How I Avoided It.
This article originally appeared on Yoga Journal
Pregnancy can come with A LOT of symptoms. While each pregnancy is unique, one common feature of the constant changes our bodies undergo is the onset of pregnancy back pain and aches and pains.
This is actually by design. Our bodies display an immense amount of natural intelligence during pregnancy. The spinal curves adapt to accommodate the additional weight-bearing along the front body, which places strain on our anatomy. As we adapt to each stage of pregnancy, our movement patterns shift. We look and feel different as we bend, sit, stand, and walk.
Our tissues are also flooded with the hormone relaxin, which causes the essential loosening of ligaments prior to childbirth. This can create a slight structural instability in the pelvic girdle, and the muscles around the low back and hips may become tighter to compensate.
All of this can cause or contribute to stiffness, achiness, compression, and even pain in our low backs. Although we can't always predict how our bodies will adapt to the physical and hormonal changes taking place, certain yoga poses can stretch and strengthen the muscles of the lower back, glutes, and thighs in ways that help prevent pain.
The following sequence is what I practiced throughout my 37 weeks of pregnancy and it helped me experience no pain and only slight discomfort during the last days. The movements help create stability, mobility, and resilience in ways that support your low back, sacrum, and hips as your body continues to change.
Video loading...
Yoga Practice to Prevent Pregnancy Back Pain
Always consult with your healthcare provider before beginning a physical yoga practice. This is especially important during pregnancy.
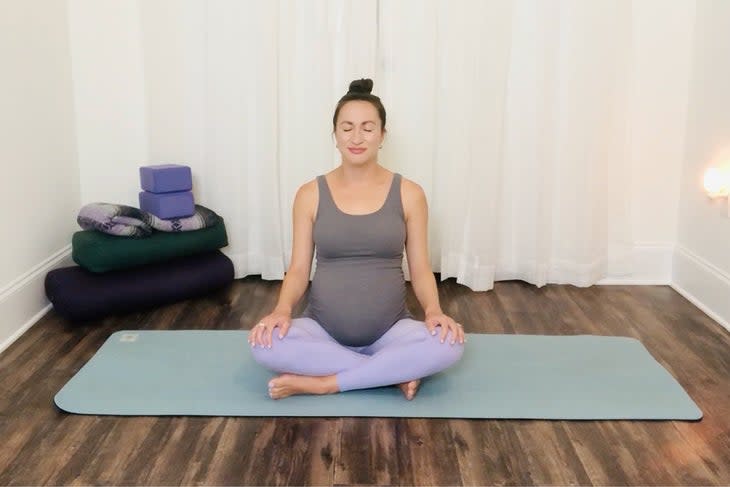
1. Easy Pose
Come to sit in a comfortable cross-legged position or take a seat at the edge of a chair. Reach the top of your head toward the ceiling to create a straight spine. Begin to bring your attention to the long, slow, smooth flow of your breath. Gently and gradually deepen your breath. Feel yourself sitting taller with each inhale, lifting upward through the crown of the head. If you typically engage Ujjayi breath as part of your regular yoga practice, begin to establish it now.

2. Dynamic Child's Pose
Come to your hands and knees. Take the knees wider than your hips as needed to accommodate your belly so you can comfortably move in and out of Child's Pose. As you exhale, gently round your low back and press your hips back toward your heels in Child's Pose, bending your elbows and lowering your forehead toward the floor. (You can use a prop like a folded blanket or block to support your forehead.)
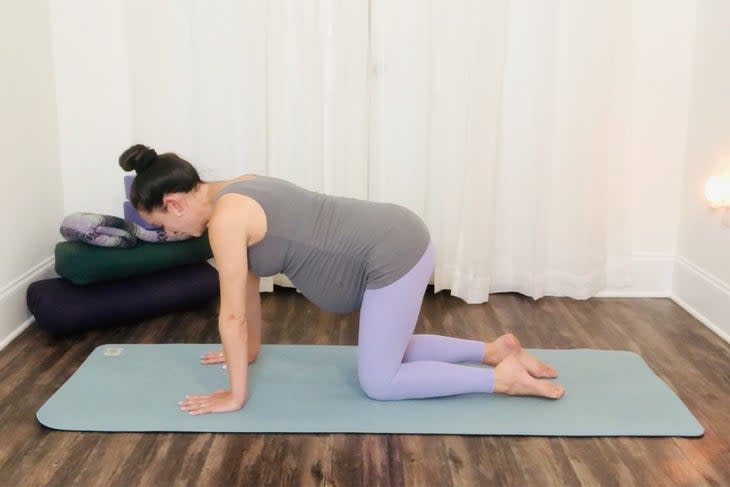
As you inhale, lead with your chest as you come back to hands and knees and gently lift the front of your chest forward and up, emphasizing a bit of backbend in the upper back. Repeat this 6 times and then stay and rest in Child's Pose for 4-6 breaths.
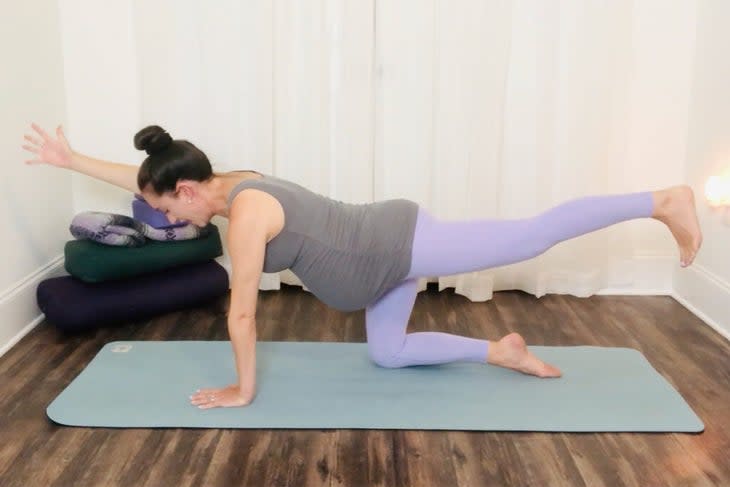
3. Bird Dog
From Child's Pose, come back to hands and knees, stacking your joints with your knees directly below your hips and wrists directly beneath your shoulders to create a stable base as we practice balance. On an inhalation, lift your left leg straight back until it's parallel with the floor, with your foot flexed, and reach forward with your right arm until it's also parallel with the floor. On an exhalation, return to your starting position. On your next breath, repeat this on the other side. Practice 3 rounds of this exercise, alternating sides. With each successive round, you can raise your heel, your arm, and the front of your chest a little higher to continue emphasizing even more strength along your back body.
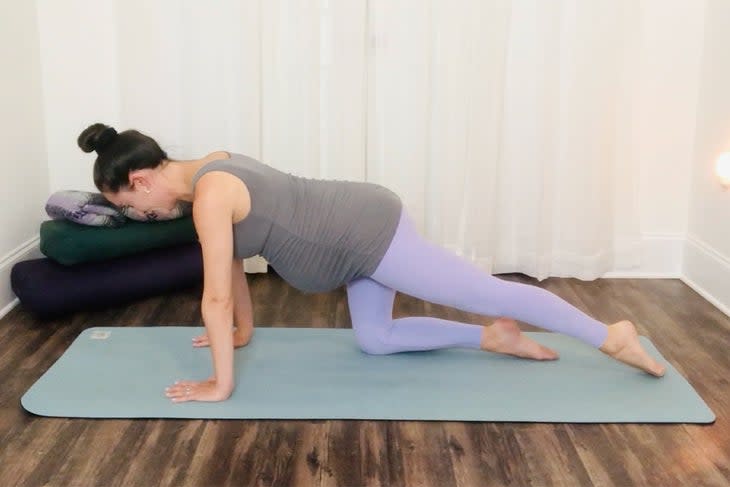
4. Balancing Toe Taps
From hands and knees, inhale and lift your left leg straight up and back until it's parallel with the floor. Flex your foot flexed. Exhale and keep your leg straight while you slowly lower it and tap your toes to the ground. Inhale and slowly lift your straight leg. Repeat this 4 times, moving slowly with your breath and feeling your back, glutes, and leg working. Pause to rest before repeating on the other side.
Repeat moving between hands and knees and Child's Pose. See if you can feel any warmth, circulation, or even a bit more ease as you stretch your low back after you've worked those muscles.
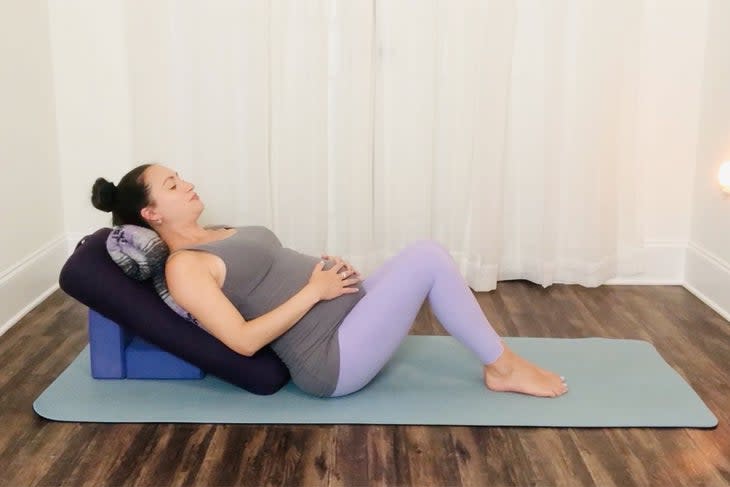
5. Dynamic Supported Reclining Bound Angle Pose
To create an incline support for your back, place one block on its highest level at the back of the mat and a second block on the lowest level in front of it. Rest a bolster or couch cushion against the blocks on an incline.
Lie back on your support with your knees bent and your feet planted on the mat a comfortable distance from your hips and wide enough to accommodate your growing belly. Rest your hands on your belly.
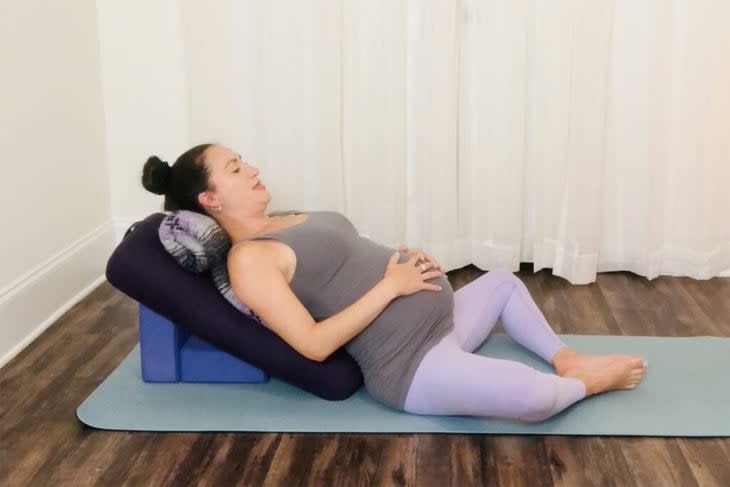
As you inhale, slowly open your knees out to the sides until the bottoms of your feet come together and your knees are wide apart. As you exhale, gently engage the inner thigh muscles and slowly bring your knees toward starting position. Repeat this 4 times.
Then rest with your knees wide and the bottoms of your feet together for 6 breaths. You can place blocks or folded blankets under your knees for added support. Feel your inner thighs gently stretching while you stay in the position as you take some long, smooth, relaxing breaths. Feel your belly rising and falling underneath your hands as you breathe.
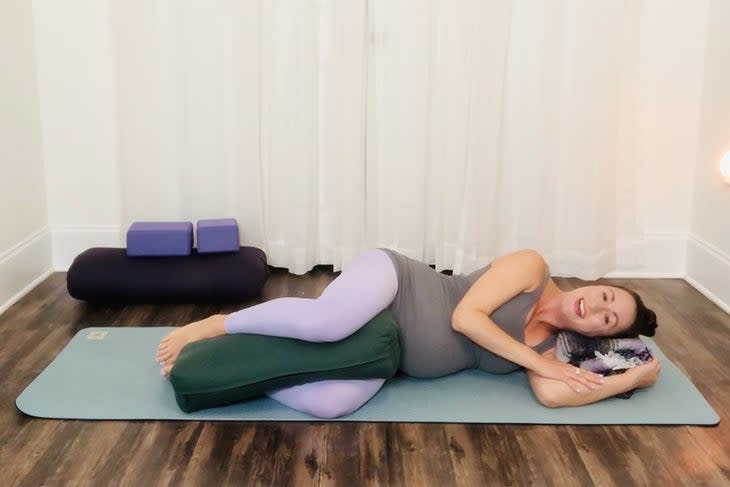
7. Side-Lying Savasana
If you're still comfortable in your Supported Reclining Bound Angle, you can remain there for Savasana. You may want to prop a bolster under your knees for support and continue to rest on your back. Or plant your feet on the floor, bring your knees back to the starting position, and rest for a few breaths before slowly rolling off the support and onto your left side. Tuck a pillow or blanket under your head and a pillow or bolster between your knees. Rest here for 3 minutes.
When you're ready to come out of Savasana, move slowly and mindfully. Use your hands to help you sit up and take as much time as you need to transition.
About Our Contributor
Bernadette Soler is a certified yoga therapist and teacher in the Viniyoga lineage. She is dedicated to the study and practice of yoga and has a gift for applying ancient techniques to our contemporary lifestyles. Bernadette has more than a decade of experience teaching and she believes in the life-changing power of a daily yoga practice to uncover one's potential. She has immense gratitude to her teacher, Gary Kraftsow, for preserving and transmitting the teachings of yoga in a way that is authentic and timeless.
For exclusive access to all of our fitness, gear, adventure, and travel stories, plus discounts on trips, events, and gear, sign up for Outside+ today.

