How to grow microgreens – The tiny, delicious leaves everyone should grow in a kitchen
You might never have considered learning how to grow microgreens. If that's the case, you are seriously missing out on the ultimate tiny homegrown produce, which packs a huge flavour and nutritious punch.
You may have seen them being used to garnish dishes in restaurants. But they shouldn't be reserved for fancy Michelin star plates as they are so fast and simple to grow at home. From beetroot microgreens to celery microgreens, the tiny leaves have so much flavour, that will elevate any dish, and you don't even need a plant pot or a dedicated herb garden to grow them!
'Microgreens are young herbs and plants that are harvested when they are still very small, instead of harvested later on when they are fully grown,' outlines Steve Chilton, garden expert at LeisureBench.

There are a wide array of different microgreens that you can grow from seeds. ‘Herbs such as mint, basil and coriander, and punchy seeds including radish, mustard and rocket are great for creating flavoursome salads and spicing up sandwiches,’ suggests Fiona Jenkins, gardening expert at MyJobQuote.co.uk. While ‘beetroot and red cabbage microgreens will add a vibrant splash of colour to your dishes.’
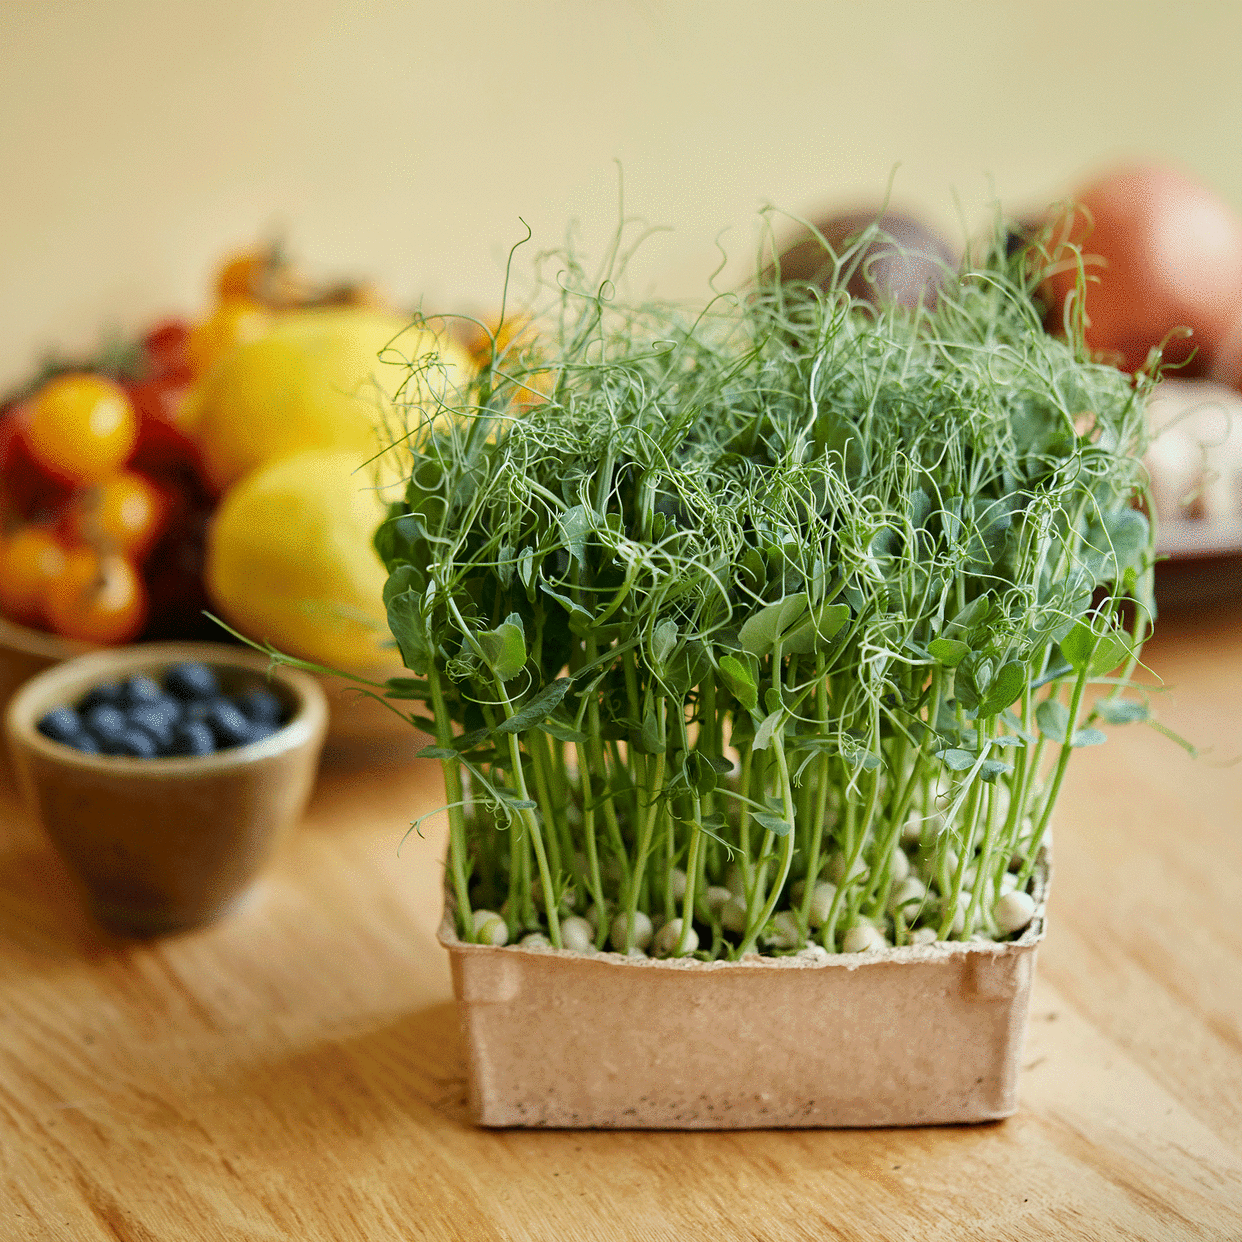
You may remember growing cress at some point during nursery or primary school. But did you also know that vegetables such as broccoli, carrots, kale, peas and broad beans can be grown as microgreens?
How to grow microgreens
One of the biggest benefits of growing microgreens – other than having tasty flourishes to add to our dishes – is the fact that they can be grown year-round. And because of the limited amount of space that they take up and the conditions that they thrive in all you need is a sunny windowsill and a container of some kind to grow them in.
The tiny leaves are also packed with nutrients, making them a welcome addition to our diets if you need another excuse to start growing them. Really there is no excuse not to be growing your own microgreens. If you're suitably intrigued, here are the expert's top tips to grow them at home.

What you’ll need
Microgreen seeds, available on Amazon
Some small, flat-bottomed containers with drainage holes; try this 3 pack of Skelang Rectangle Plant Pots from Amazon (but you can also use an empty yoghurt pot or empty egg carton)
Multipurpose potting compost with coconut fibre mixed in; the Coco & Coir Coconut Coir Compost Brick from Amazon is a great option
Or peat-free compost; we like the Miracle-Gro 40L Peat Free Premium All Purpose Compost from Argos
A spray bottle; This Bamboo Spray Bottle from Dunelm is just £2
Small scissors or snips
Step-by-step
'In the world of gardening, the allure of growing microgreens is undeniable,' asserts Daniel Carruthers, Director at Cultivar Greenhouses. 'These petite powerhouses of flavour and nutrition are easy to cultivate, even more so when you adopt eco-friendly practices like using peat-free compost.'
1. Choose your seeds
The world is your oyster when it comes to which microgreen seeds you choose to grow. If you’re not sure which ones to grow first, opting for a mixed pack of microgreen seeds can be a great way to get started. While Daniel admits that 'high-quality organic seeds, such as radish, mustard, or broccoli are perfect for beginners.'
For others, you may want to consider which type of microgreens will best complement the dishes that you make most. For example, ‘you may choose to stick to a particular cuisine's flavour such as Italian or Greek, with a range of complimentary microgreens or grow a variety of flavours that suit a wider range of dishes,’ suggests Antony Flooks, Digital Manager at Hillier.
Bigger seeds, such as peas can be soaked before you plant them, according to Fiona. ‘This helps them to germinate quickly and reliably,’ she continues.
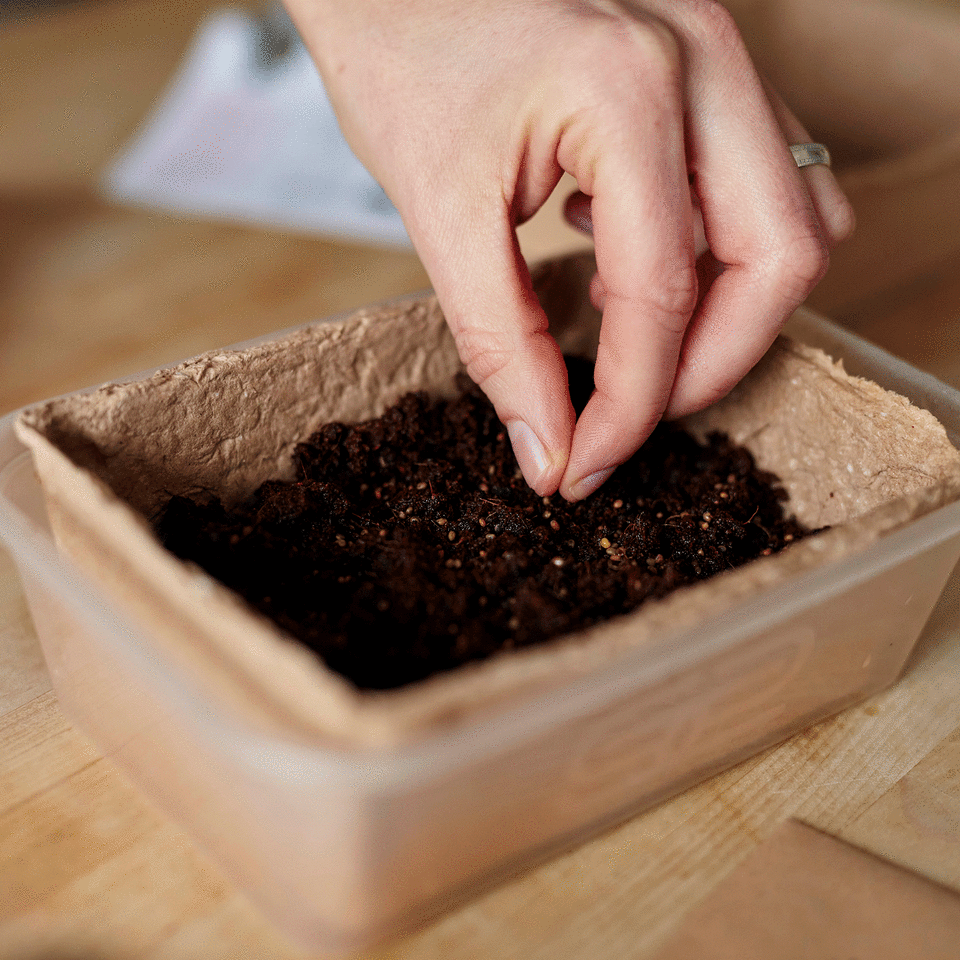
2. Fill your chosen container with compost
‘Plant your seeds in shallow containers or trays with drainage holes to prevent waterlogging and use organic potting soil that is free of pesticides,’ Antony recommends.
Really any flat-bottomed tray or container, with suitable drainage, should work well. Angela Slater, gardening expert at Hayes Garden World, even suggests using empty yoghurt pots or fruit punnets, if you happen to have any lying around.
3. Sew seeds over the compost
Fill the containers about three-quarters full and ‘lightly press it down, so you have a nice flat surface,’ Fiona states. Then it’s time to evenly spread your microgreen seeds over the top. You can actually do this quite liberally, as long as you watch out not to let them get too clustered as this may hinder their development.
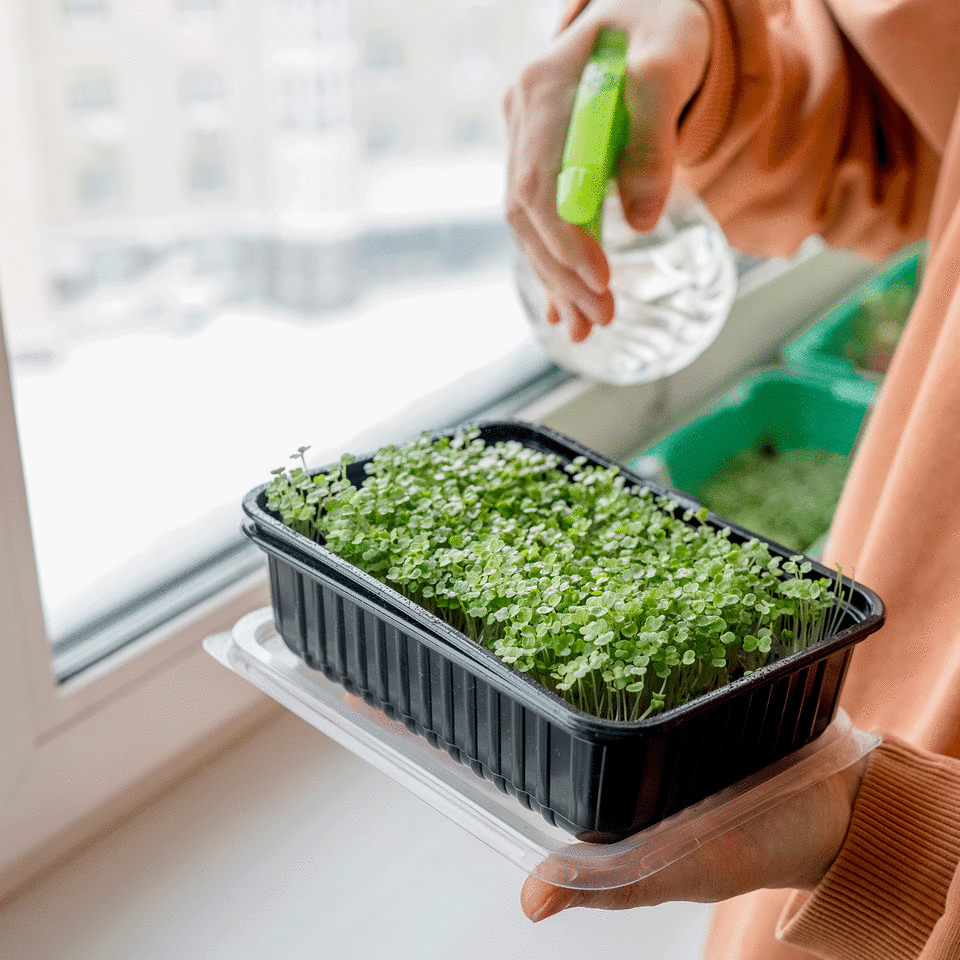
4. Lightly water seeds with a spray bottle
‘Tamp your seeds down carefully, so they’re snug on top of compost but not covered,’ Fiona declares. And keep them moist by lightly watering them. ‘Using a spray bottle is the best way to do this without damaging the seeds or soaking your compost too much,’ Fiona continues.
5. Cover container to speed up germination
You can speed up the process slightly by covering 'the container with a lid or a plastic wrap to create a mini-greenhouse effect,' Daniel suggests. This will mimic a small propagator and help get your microgreens off to a good start. However, this isn't an essential step.
Once the seeds have sprouted, they should start to develop their first leaves. Most microgreens will be between 3cm to 8cm tall when they are ready to harvest. Simply take a pair of scissors or snips and you’re ready to garnish your favourite dishes.

FAQs
How long does it take to grow microgreens?
‘Depending on the variety, they should then be ready to clip within 2-10 weeks,’ Antony says.
Some can even be much quicker, according to Daniel, who estimates that many may be ready to harvest 'in about 7-14 days.'
Where should I grow my microgreens?
Even though microgreens can be grown year-round and indoors, they do ‘require varying levels of temperature, light, and humidity,’ affirms Antony. So, ‘during cold winter spells or extreme heat waves, move any microgreens inside to better control their growing environment.’
'Germination will also be slower in winter when temperatures are cooler and there are less hours of daylight,' warns Angela.
‘Aim to keep them at a temperature between 18 and 22°C to be sure of germination,’ Fiona adds. You’ll also want to ‘ensure proper air circulation to avoid the risk of disease or mould and promote strong growth,’ Antony adds.
‘If you don’t think there’s enough sunlight reaching your seeds, you can use grow lights to help them along,’ says Fiona. ‘Go for a full spectrum LED to get the best results.’ You can even buy microgreen mini garden kits that include a grow light on Amazon to help your tiny crops along.
However, in most cases, an indoor windowsill that gets a decent amount of light should more than suffice and be a great location from which to grow your microgreens.

