Before & After: Green Tiles and Gray Cabinets Bring “Old World Charm” to This White Kitchen

When Sasha Faiz and Andrew Ghose were looking for a home in Toronto, the pair opened their hearts to “fixer-upper project” homes. And thus, they were game to make a change when they saw the “modern” original kitchen clad in grays and whites in their now-modern-meets-vintage home.
“It was very nice but did not match the era and feel of the rest of the house,” Faiz says. “We wanted to make the change so it could feel more like us and how we live. The kitchen previously felt very ‘kitchen-like.’ I wanted it to feel more like another living space.”

Inspired by kitchens with “old world charm” typical in England or Europe, the couple wanted to create a cozy, moody atmosphere. They achieved this by painting the white cabinets in Benjamin Moore’s “Wrought Iron” in a satin finish. But the transformation didn’t stop there.
One of Faiz and Ghose’s proudest DIY projects is the tiles they hung on their kitchen walls. The couple purchased green Turkish-inspired tiles from a clearance sale, and the entire tiling project cost them only $400. Here’s how they used tiles to complete their kitchen.
How to Install Wall Tiles
Faiz explains that prepping the wall before installing tiles is an important step that shouldn’t be overlooked. Here’s how she recommends doing it.

Remove tiles with the following tools: a scraper, protective gloves, eye protection (plus “patience, and a glass of wine nearby”).
If the walls look good underneath, plaster over them.
For the areas that aren’t in good condition, you’ll have to drywall them again.
Sand down the walls to get an even finish.
Prime the walls.

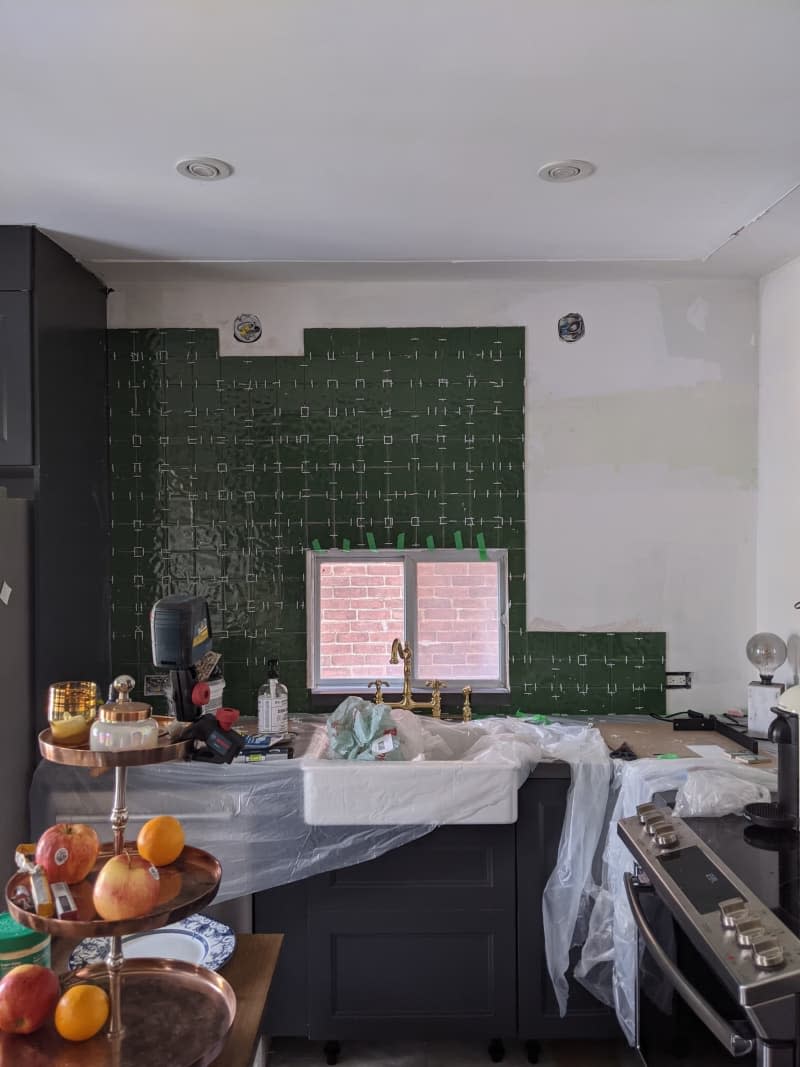
Once the walls are primed, it’s time to install the tiles. “If you have crooked walls and ceilings (typical in an old home), please do this with a partner,” Faiz says. Here’s how she installed the tiles in her kitchen.
Use a trowel to apply mortar to small areas of the wall.
Align the tiles using a laser level and “eye check,” Faiz says.
Spacers will help keep tiles stationary.
“Gravity is real, so start from the bottom and work your way up,” she says.
Prepare for several “eye checks” if you have a crooked wall.
Use a wet saw to cut tiles.
After applying tiles to the mortar, let it dry according to the package instructions.
Add grout between the tiles.
Use clean water and a sponge to wipe down the tiles.
Let the grout dry and clean the tiles again.

Faiz has a pro-tip from a project roadblock: “If you’ve chosen the wrong grout color like me, stain the grout after it’s dried with a green acrylic paint mixed into grout and paint over the grout lines,” she says. “Let dry and add a sealant to ensure the newly painted grout line is sealed and stays put.”
The entire kitchen renovation (including creating an island from an antique hutch and custom-cut quartzite) cost around $11,000. But this isn’t the only space the couple has transformed — to see more, visit the full home tour on Apartment Therapy.

