How to glaze glowing skies using oils
Take a walk around any large art museum and the chances are you will see some very old paintings that still have such rich, luminous colour in them that it seems they have been lit from within. The traditional method of glazing can seem daunting at first as it carries an air of mystery. Glazing as a basic technique is actually very simple but does require patience, so expect this exercise to take several days. Each layer must be completely dry before adding the next. For this reason, I work on several paintings simultaneously and have them hanging up to dry around my studio, waiting for the next layer.
One advantage of this method is that should you make a mistake with a glaze, you can wipe it off knowing that the previous layers will be undisturbed. Glazing can create a visual depth, optical complexity and intensity of colour that is impossible to achieve by any other method, so it is well worth learning. (To get you started, take a look at this guide to the best oil paints and best oil paint canvases to get you set up for success).
Glazing can be used for an entire painting, as in this case, or just in places to modify a colour, deepen a dark tone, transition or unify particular areas of a painting. At its most basic, a glaze is the application of a transparent layer of paint over a dry layer of underpainting.
Traditionally, artists would start with a tonal underpainting called a ‘grisaille’, which is what we will be doing in this demonstration. A painting of glazes is only as good as the structure and values of the underpainting, so it’s worth taking your time over this first stage.
Adding a transparent pigment to a transparent glaze medium such as Liquin speeds drying time, extends the paint and makes it even more transparent. By layering several glazes, an extraordinary depth of colour can be achieved.
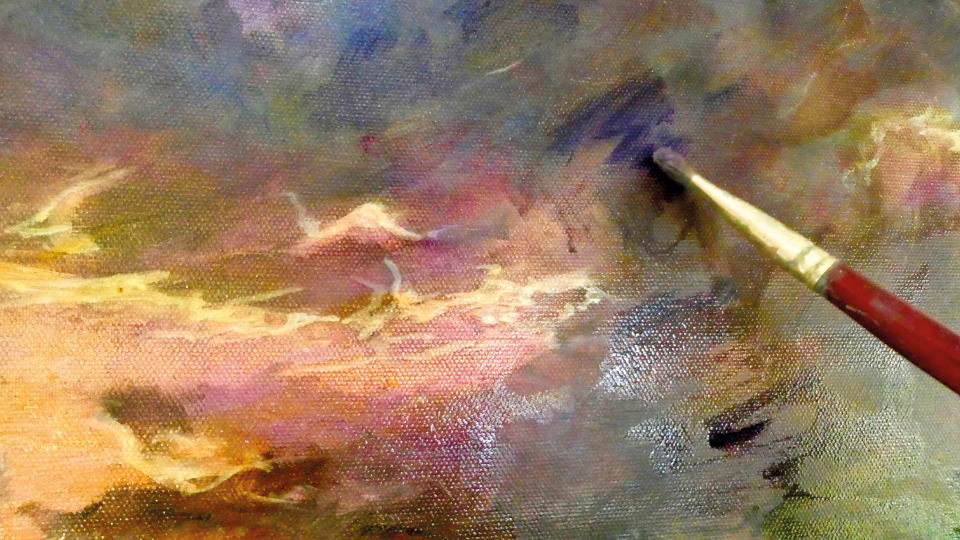
01. Gather your materials
(Image: © Getty Images)
To begin this project you will need:
- 40 x 50cm cotton primed canvas
- A range of brushes and knives, the more variety the better, so you can vary the size and shape of the marks you make. e.g. large 2” flat brush, 1” natural hair brushes round, 1” natural hair brushes flat, Size 14 brights, Size 8 filberts, Size 5 brights, rigger/fine-liner brush, selection of palette/painting knives
- Limited palette of transparent oil colours; Lemon Yellow or similar, Ultramarine Blue, magenta or Alizarin Crimson, Burnt Umber
- Titanium White (I use Alkyd for speed of drying)
- Fast-drying flow/gel medium such as Liquin
- Low-odour solvent for brush cleaning
- Rags/paper towel
02. Source your image and begin to sketch

(Image: © Sarah Jane Brown)
I chose this image for the purpose of demonstration because it is relatively simple, but you can choose your own if you prefer. I recommend that you work from a black-and-white photograph or drawing because you will find it easier to see the tonality and be less distracted by colour.
At the first stage this is especially important because the tonal underpainting, or ‘grisaille’, will be the foundation for all the subsequent layers. Use some masking tape to isolate a pleasing area of the image, making the orientation and relative proportions the same as your canvas.
03. Start to lay the groundwork

(Image: © Sarah Jane Brown)
Using Ultramarine Blue and Burnt Umber, mix up a neutral dark colour. Roughly sketch in the composition, making sure that the key elements are in the right place and pleasing to the eye. I placed my horizon quite low on the canvas, as in the photograph, because I wanted the sky to be the main focus of the painting.
I also decided that I wanted the viewer’s eye to zigzag around the painting. Mapping out the main focal point and areas of interest at this stage ensures a strong composition, creating a good structure from which to build your painting.
04. Block in your tones (grisaille)
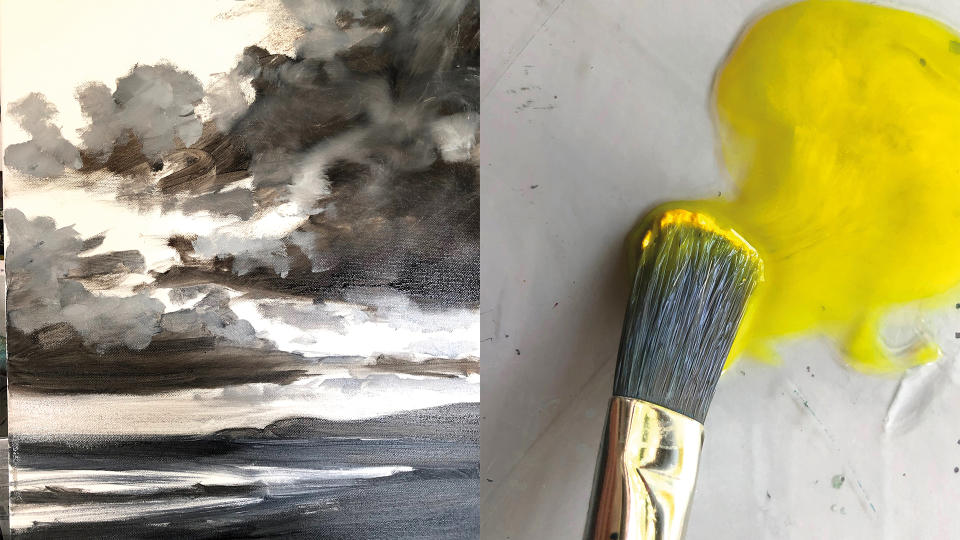
(Image: © Sarah Jane Brown)
Slightly dampen a larger brush, pick up some of the paint and thinly block in the darkest areas. Next, add a little Titanium White to create a mid-grey tone in the transition areas.
Try not to get carried away here – leave big areas of white where your sky colours will be. Keep these areas fairly separate and clean. Once you’re happy that the structure is right, leave it to dry for at least 24 hours, or for speed you could do this whole stage in acrylic.
VERY IMPORTANT: You MUST let this layer dry completely before moving on.
05. Apply the first glaze

(Image: © Sarah Jane Brown)
Pour out a little puddle of glaze medium and, picking up a tiny dot of paint with the tip of a clean brush, mix a transparent ‘wash’. Make sure there is no white or other opaque colour in your mix, or it will go cloudy.
Apply the glaze over all the areas you wish to tint. I started with yellow over the bottom third of the canvas, across the horizon area, for a golden sunset effect. Work the glaze over both the light and the dark areas.
06. Create depth by changing colours

(Image: © Sarah Jane Brown)
Make a separate transparent puddle with a dot of magenta. Apply it cleanly above the yellow only, blending down into the yellow slightly at the end. Repeat this process with Ultramarine at the top.
Work the glazes over the dark tones as well as the light. Make sure you use clean brushes for each colour and be sure not to get the yellow and blue mixed unless you want a dirty green sky! Leave it to dry – this will usually take at least 24 hours. Don’t rush this because you need dry, clean layers.
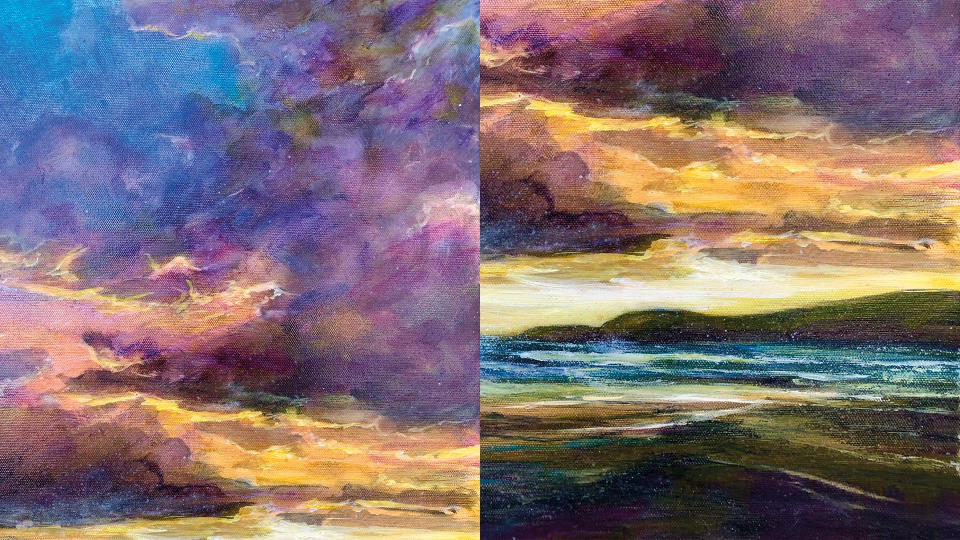
07. Apply the second glaze – optical colour mixing

(Image: © Sarah Jane Brown)
Once your first glaze is dry you can repeat the process, which will intensify the colours, creating depth and richness. This time you can overlap the colours slightly in places to create optical colour mixes. By layering yellow over some of the areas of magenta, or vice versa, you will get vibrant oranges and reds.
By overlapping the magenta and blue you will get optical violets and purples. Glaze a little blue over the yellow below the horizon to get a deep sea green. Add a little of the magenta glaze to the foreground to suggest a reflection of the sky. Be aware that each layer will intensify the colour but also darken it, so don’t overdo it in the light areas.
08. Don't be afraid to apply a little force

(Image: © Sarah Jane Brown)
A white area under a glaze is known as a ‘force’. Light passes through the glaze and is reflected, or ‘forced’, back to the eye, creating the illusion of light being emitted from within the painting.
With each layer of glaze, less light bounces back from the original force, so we now need to re-introduce it in the areas where we want a really glowing effect. I used a rigger brush loaded with pure white along the bottom edges of the clouds. Bear in mind that this will look a bit odd until the next glazes go on.
09. Create the sea, beach and headland

(Image: © Sarah Jane Brown)
Using the same rigger brush loaded with white, drop in a couple of tapering horizontal lines to suggest breaking waves. Next, with a clean brush, use some of the original dark mix to deepen and define the headland, and then add some details on the beach. Again, you must now be patient and let it dry completely!
10. Create golden glow and deeper shadows

(Image: © Sarah Jane Brown)
When completely dry, add more glazes, being careful where you apply each colour. Using yellow over the white force areas will produce golden, glowing edges, while over the dark headland shape the yellow will appear a rich, dark green.
In areas of the clouds where you wish to create deeper shadows, glaze over the third complementary colour. For example, where you have already glazed yellow and magenta over the dark areas of grisaille, add Ultramarine. Alternatively, you could mix a new glaze using a little of each colour to create a transparent dark that is still cohesive.
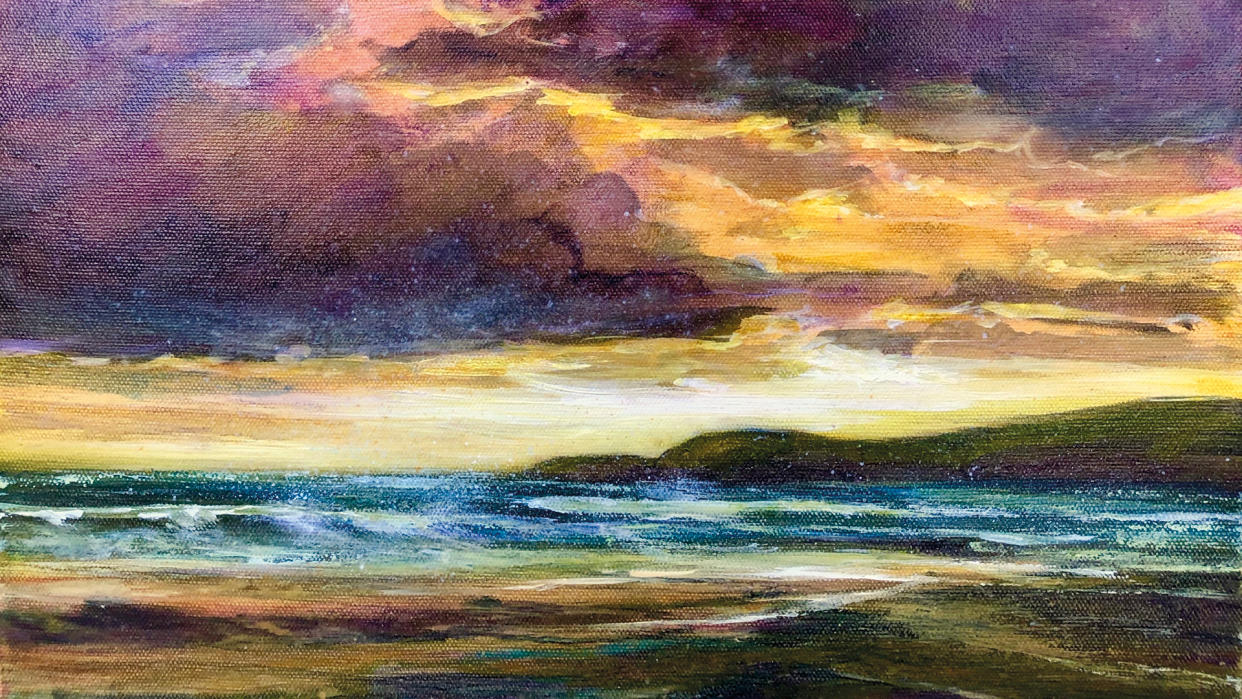
11. Apply the final glaze
(Image: © Sarah Jane Brown)
Reapply the force if necessary, just in the places you want a really bright effect. When completely dry, apply a final yellow glaze over the force to give the clouds their ‘golden linings’. I also added a few strokes of yellow glaze to the tops of the waves where they face the sky and reflect its glow. This also helps tie the sea and sky areas together.
12. Create wave highlights

(Image: © Sarah Jane Brown)
Using the side edge of a palette knife, pick up a very thin roll of white and slice it sideways across the canvas and along the tops of the waves to give them a subtle highlight. The tooth of the canvas will catch some of the paint in a broken line that resembles sparkles on the water. Don’t go mad – you only need this treatment in a couple of places.
13. Create spray and other final tweaks

(Image: © Sarah Jane Brown)
When the surface is completely dry you can add some finishing touches. To create the effect of sea spray, use a small, stiff brush and mix up a fairly fluid off-white. Holding the brush with the bristles up, draw your fingernail or a palette knife across the top so that the paint spatters in a fine mist where the waves are.
Don’t do it everywhere, or it will look messy rather than atmospheric. It’s wise to practise this on something else first! If you do get it wrong, wipe it off with a clean paper towel and try again. This is one advantage of the previous layers being completely dry. Finally, taking a small brush, add any little shadows or reflections for implied detail and dot in some thicker highlights if needed.
This article originally appeared in Paint & Draw: Oils bookazine. Buy the bookazine from Magazines Direct.
