How to Fray the Hem of Your Jeans in 3 Quick Steps

We’re dedicating this week to all things DIY denim, so check back each morning for more fashion girl-approved ways to customize your jeans–from personalizing with patches to acid-washing flares, distressing boyfriends jeans, and more!

Wearing customized Forever 21 jeans and Oscar de la Renta shoes.
More from StyleCaster
These 3 Men's Denim Trends Will Transform Your Summer Wardrobe
Here's How to Get Rid of Skin Tags Without a Derm Appointment
We’ve said it before, and we’ll say it again: Ripped, frayed, cut, and torn jean hems are officially a thing. According to the fashion blogger and street style crowd, wearing your denim hemmed with a needle and thread is old news–now it’s all about unfinished and frayed edges. But before you hack away at your best pair of jeans, learn how to do it the right way in this easy three-step tutorial.
You’ll need:
Click here to read the full article.
Jeans (we used this $27.80 pair from Forever 21)
Sharp fabric scissors
Sandpaper block
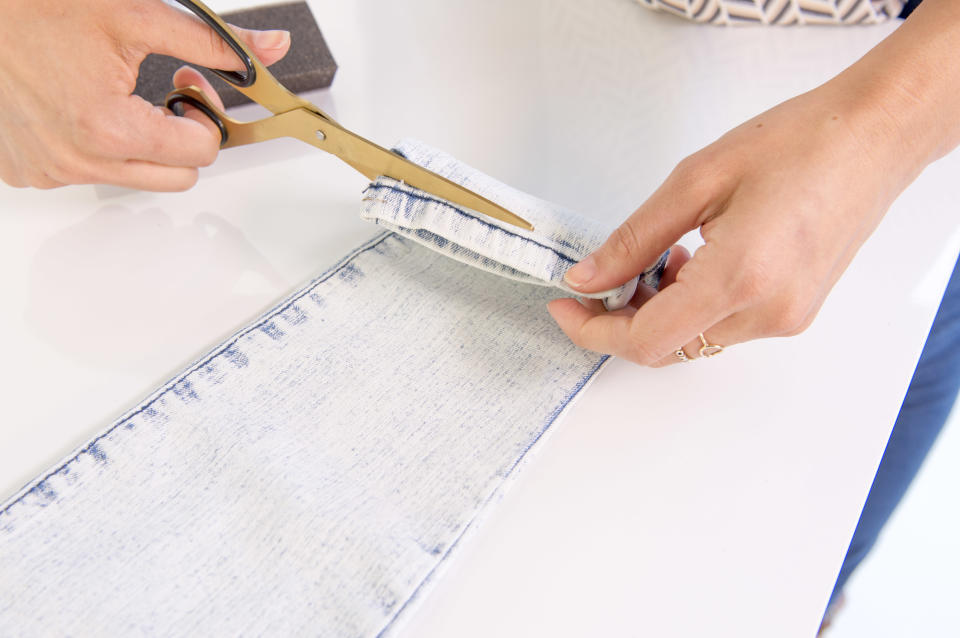
Step one: The easiest way to cut in an even line is to directly follow the hem of your jeans with a pair of scissors. It’s a good idea to try on the jeans before you start cutting, to make sure this new length works. If you need it trimmed higher, use a pencil to outline a guide for the scissors to cut.
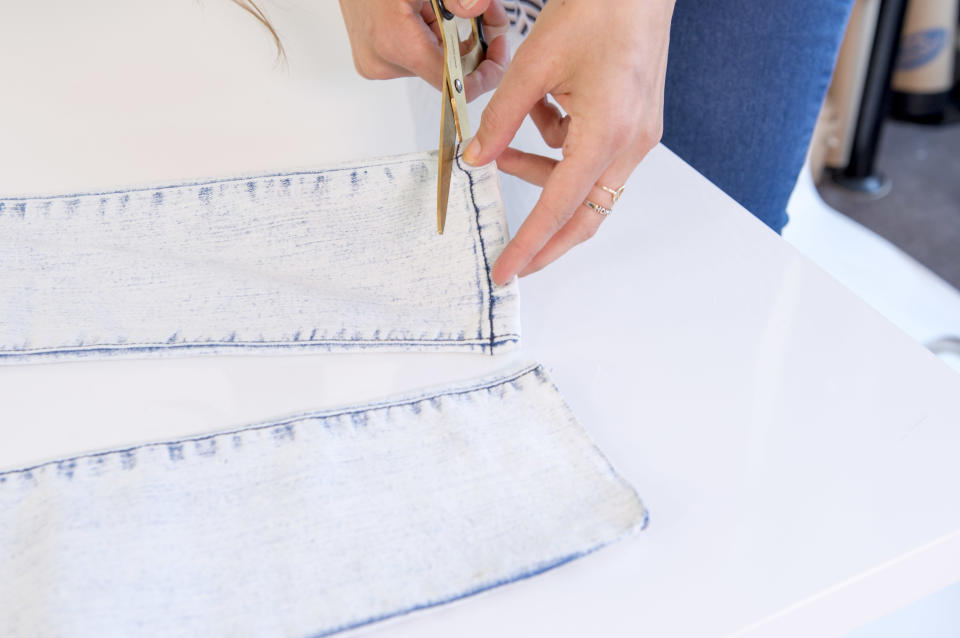
Step two: Repeat on the other hem, making sure both are equal in length.
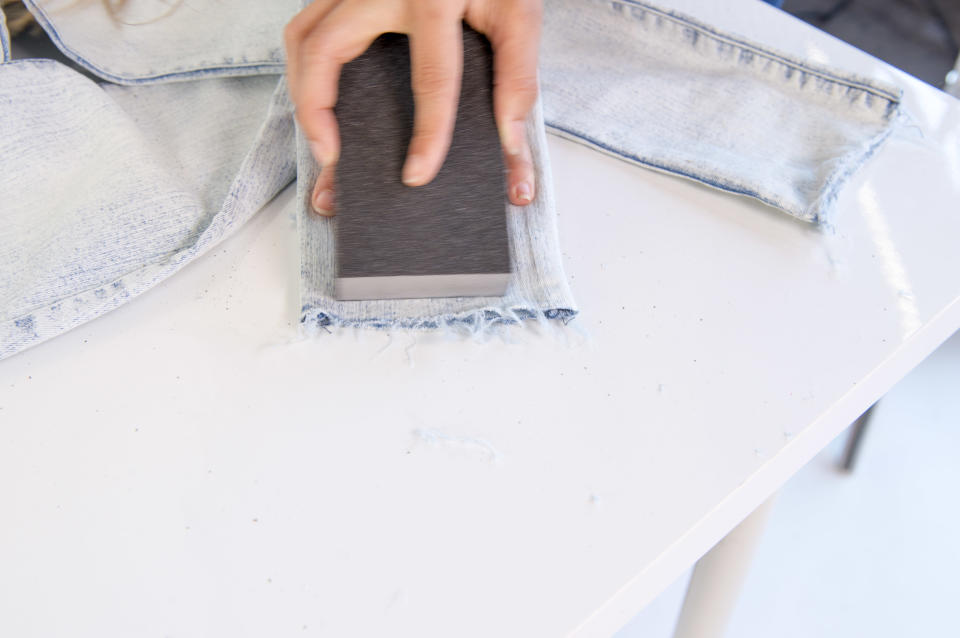
Step three: Use a sandpaper block to fray the newly cut hems. Stop when you reach the desired results, remembering that the hem will continue to fray with wear and after the jeans are washed–so don’t go overboard. We used quite a light sandpaper block for this pair, however for a more distressed look you should choose sandpaper with a very coarse finish.
MORE: How to Rip Your Jeans at the Knee
Best of StyleCaster

