How to Frame a Wall Like a Professional Carpenter
We may earn revenue from the products available on this page and participate in affiliate programs. Learn More ›
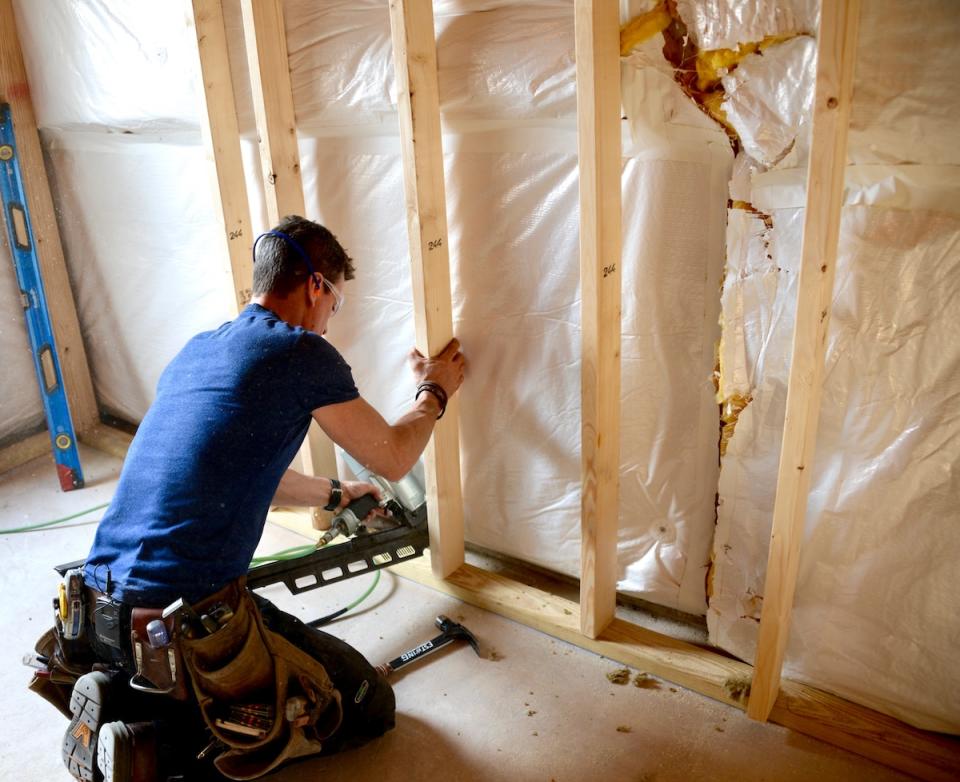
Wall framing is a baseline skill for anybody doing a larger home improvement project. Even if you’re not actually framing a wall, knowing how a wall is assembled is important information to have so you can get the results you want. It’s important knowledge for projects that include hanging a TV or shelf, installing trimwork, finishing a basement, renovating a bathroom or kitchen, and building a shed. While framing a wall is not a complicated endeavor, there are mistakes that are easy for novices to make that can cause problems later on. It’s a skill that requires more than just slamming the hose on your framing nailer and blasting in wood studs. There are various ways and locations in which to frame a wall. In this article, I’ll focus on how to frame a wall in a basement or interior where there is a ceiling above that must be interacted with. Wall Framing Parts Wall framing basics includes knowing the common parts of a residential stud wall. For a non-load-bearing wall, you need to know the following: Illustration: Davro Ave for Bob Vila Bottom Plate The bottom plate is two things: It is a piece of 2-by lumber, and it is an expression of the entire wall system’s location in three dimensions. In a basement, the bottom plate should be pressure-treated or isolated from the slab. That’s all easy. What matters more is that the bottom plate is positioned correctly—what carpenters call wall framing “layout.” That is done with tape measures, laser and spirit levels, and chalk lines. Top Plate The bottom plate needs to be laid out well because the top plate, wall frame, and transitions to adjoining walls depend on it. Once laid out, the top plate needs to reflect the bottom plate. In other words, the top plate needs to be “plumb” up from the bottom plate so that the wall is straight up and down. And it needs to be connected to structure. In basement renos where walls are often built piece by piece instead of tipped up, you can fasten to the floor joists above on two walls. On the other two walls, parallel to the floor joists, blocking must be installed to fasten the plate. Stud Studs do many things. In a finished room, they provide a sturdy location to fasten kitchen cabinets, TV brackets, heavy framed artwork, and shelves. They partition spaces and may be removed in non-load-bearing cases. And they do some really cool stuff, like keeping your house up by bearing the weight of whatever is above them. Their use with jacks and headers divert the gravitational load of your house down through what is called the “continuous load path” into the foundation. Blocking Wall studs in remodeling or DIY projects need “blocking” for several reasons. “Blocking” is a general term that applies to various applications of wood framing inside the wall system. Fire blocking (aka fire stop): In a basement reno, this is a layer of drywall or plywood installed to the bottoms of the floor joists to slow the movement of fire to upper sections of the home. Ladder blocking: This is installed in corner transitions to connect one wall to another or for vertical wall claddings such as shiplap or beadboard. Tools & Materials Bobvila.com may earn a commission from purchases made through these links. Tape measure Laser level Chalk reel Speed square Rotary hammer Framing nailer Miter saw Circular saw Impact driver Scaffold Screws Construction adhesive (optional) Framing nails Project Overview Working Time: 4 hoursTotal Time: 8 hoursSkill Level: IntermediateEstimated Cost: $450 Photo: istockphoto.com Before You Begin All walls are different. What is common among them is the skill set and tools required. This wall framing article details what you need to know about an interior wall framing layout for applications such as a basement, bathroom, or partition wall. While many of the steps cross over to wall framing for an addition, shed, or three-season room on a deck, I build my interior wall framing piece by piece. Walls framed where there is no ceiling are framed on the “deck” and tipped into place as a unit. If you’re building a wall, the likelihood you need a permit is near 100 percent. Despite the complaints I’ve heard that building codes are just a money grab for the local government, they’re extremely important for your safety. Broadly speaking, even if you have read books and boned up on YouTube videos, there’s a lot that can happen to a building when a new wall system is installed. There are electrical requirements, nailing plates over plumbing that are needed, and—the worst one—the possible creation of a new dew point that can lead to mold. Obtaining a permit means there will be an extra—and expert—set of eyes on your project and your home’s well-being. Removing framing. If you’re thinking about removing framing, think again. Framing holds everything up and this is nonnegotiable. Ascertain what is a load-bearing wall and what isn’t before doing anything to a wall. Vapor and mold. Lots of DIYers have no idea that when they frame their basement—more specifically, frame and insulate—they’ve also built a potential terrarium of mold and moisture between the framed wall and the foundation wall. This is why building permits are important. A basement remodel requires a permit, and mold is one reason why. Moisture may also occur between a newly framed and insulated wall and a concrete block or stone exterior wall if the insulation is not detailed properly. STEP 1: Lay out the bottom plate location(s) and snap lines. Everything in a new wall frame is based on the positioning of the bottom plate. When I’m framing a basement, I allow for the foundation wall, especially in an old house, to be generally straight but not flat. Plus, there needs to be room for a vapor barrier and I’d like a little room for air to travel between the stud wall and the foundation. For those reasons, I mark 4½ inches out from each corner and snap a chalk line between my marks. If I’m working alone, I drive a screw into the concrete on one end and pull my string to the other. If I have help, this is a good two-person job. Make sure to get the string pretty tight so you get a nice, crisp snap. STEP 2: Measure and mark the plates. Lay bottom and top plates parallel to each other and mark stud locations. For most wall-framing applications, we need to be thinking about drywall and studs landing in what we call a 4-foot matrix such that 4×8 sheets of drywall land halfway on a stud. Framing 16 inches on center is how we achieve this. Briefly hook your tape measure on the end of the plate and mark ¾ inch back from every multiple of 16. So you’d mark 15¼, 31¼, and so on. Make a line and then mark an X to the right of it. Use a speed square or framing square to transfer lines from one plate to another. STEP 3: Fasten the bottom plate. If you’re framing a wall for a bathroom or kitchen application, you can secure the bottom plate to the existing subfloor or framing. If you’re working in a basement that has a perimeter drain installed, using fasteners to secure the bottom plate usually voids the drain warranty. Plus, there’s not much concrete to bite into. In this condition, use construction adhesive. Otherwise, I drill pilot holes with my rotary hammer through the plate into the concrete and fasten with 3-inch screws. STEP 4: Transfer the bottom plate location to the top plate location. This can be done with a spirit level, but I use a laser level. In all top plate applications, the plate needs to be connected to something. When running perpendicular to the joists above, that’s a no-brainer. But if you need to connect parallel to the joists above, blocking needs to be added between the joists so there is something to fasten to. Photo: istockphoto.com STEP 5: Install the studs. In typical platform framing that is common in American homes, we build the wall on the “deck” and tip it up. We lay out each stud on the floor and then install each by blasting nails in from the top and bottom, bam! It’s fast. It’s light, it’s pretty easy, and makes using nail guns fun. In interior framing where there is a ceiling, it’s a different story. The reason is geometry. Think of a wall stud as a rectangle. The distance from edge to edge is equal. But the distance from corner to opposite corner isn’t. It’s more. So when you tip up an 8-foot-tall wall to fit an 8-foot opening, the top plate hits the joists because it is longer than 8 feet on the diagonal. Plus, old houses and basement slabs undulate, which makes each stud a slightly different height. So I measure, cut, and install studs one by one. Final Thoughts Wall framing is the skeleton of a bigger project. Sure, the wood frame will be covered up by drywall or another sheet material, but constructing it properly matters to the rest of the bigger renovation project. It’s essential to always have an eye peeled toward what will be put on top of that framed wall. For example, a standard wall frame layout may need to be adjusted in order to avoid interruptions from an HVAC duct; to accept trim; and to place electrical devices, TV, sink, or wall-mounted toilet. Taking the time to keep the studs in a 4-foot on-center matrix and keeping them nice and plumb saves time when your drywall or other cladding lands flat and right in the middle of a nicely placed stud. Plus all of the tools are cool, too.

