How to flesh out your creature art using Photoshop
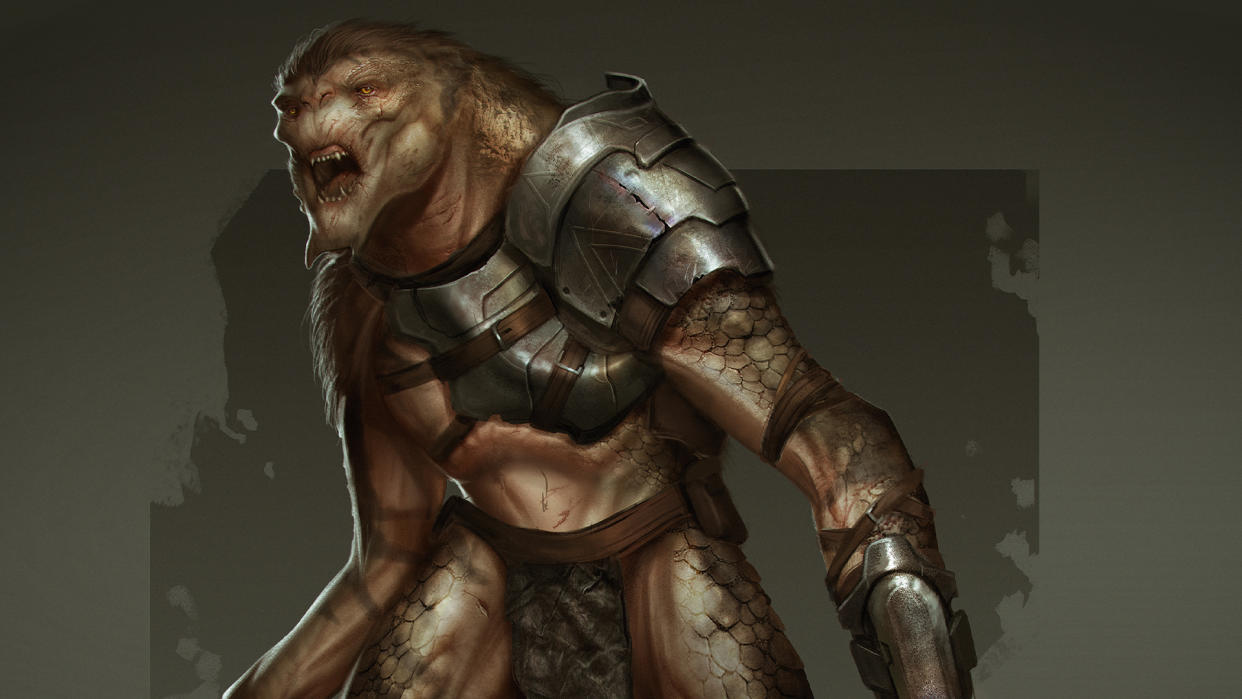
Today we’re going to be adding costumes, armour and weaponry to a creature design using Photoshop. The point of this process is that we want a character, or really a creature that is a character, to have a bit of a personality and some brains to them. We want to show that this isn’t just this wild beast, there’s some semblance of intelligence, so it uses weapons and props, and dresses itself in clothing and armour for protection.
This is a great way to tell extra story and convey more character in your design. And to me, once you have the initial creature blocked out, it’s this fun, additional layer that you can work up alongside your design to get even further iterations out.
We’ll use a variety of layers, brushes and techniques to build the items, which will give us something much more complete and believable in terms of the character and their narrative journey. Take a look at our list of the best Photoshop tutorials for more tips and tricks like this one.
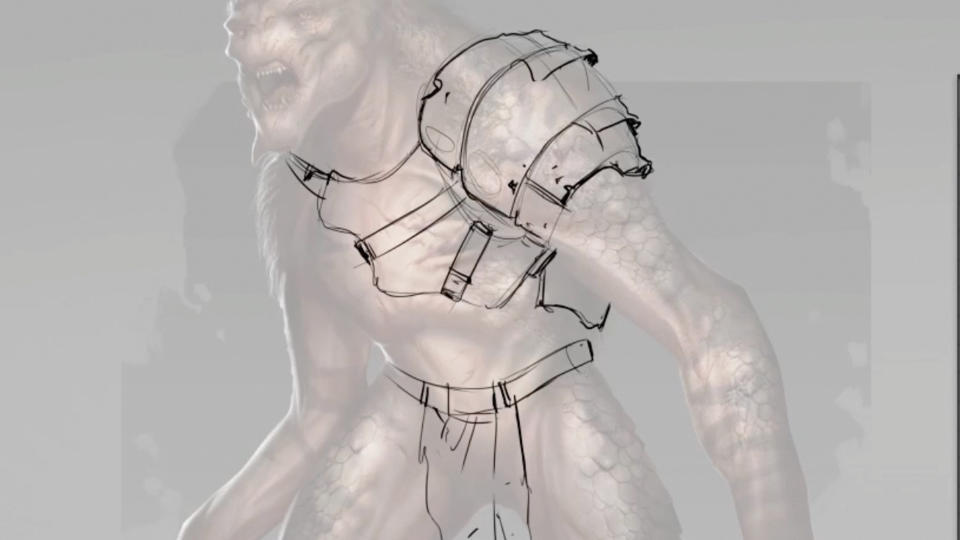
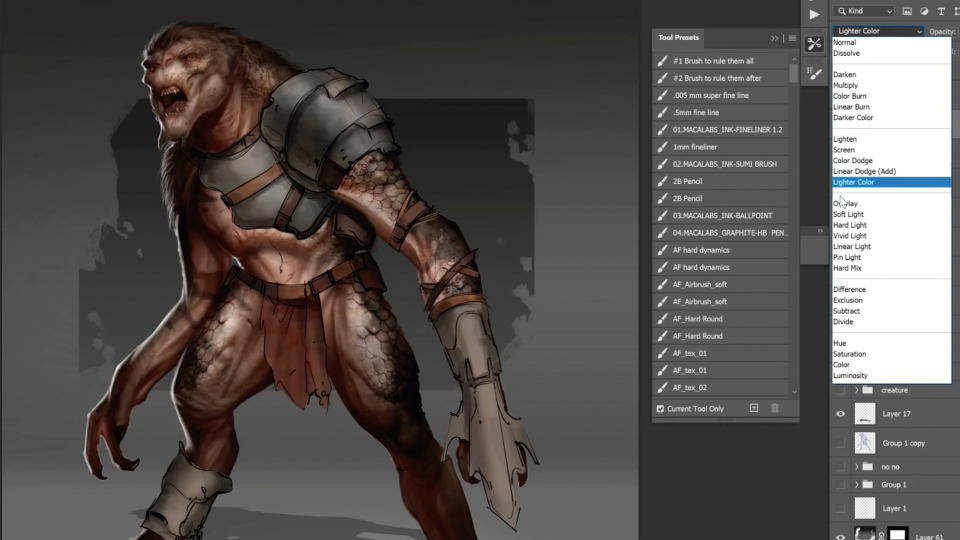
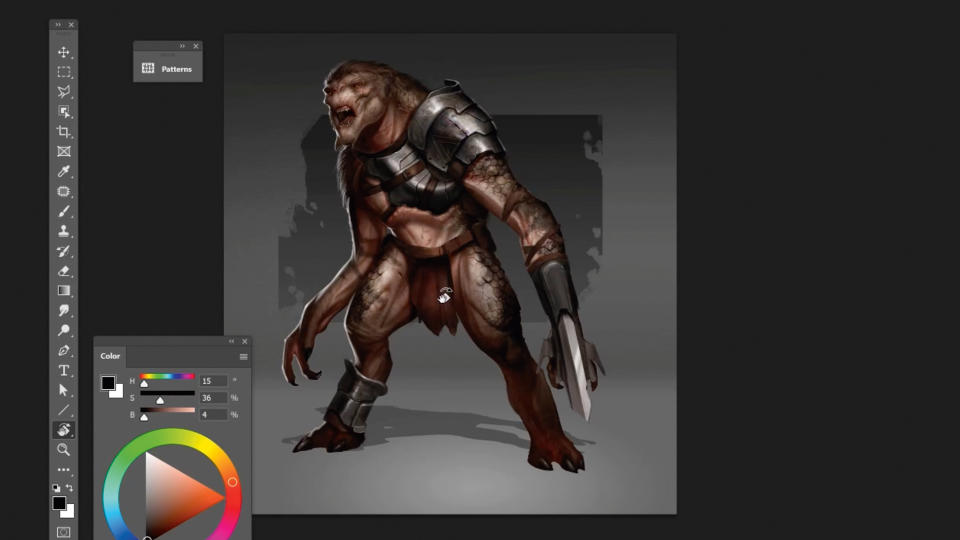
01. Create initial form lines
(Image: © Kyle Brown)
First off you need to establish the shapes of the armour and get the cuts in the plates or the leather straps. They will serve as form lines that help reinforce the directionality of those shapes and the form as a whole. You have to be deliberate with the placement of those lines and make sure that these areas you’re dressing feel like they’re actually enveloping or sitting on top of the creature
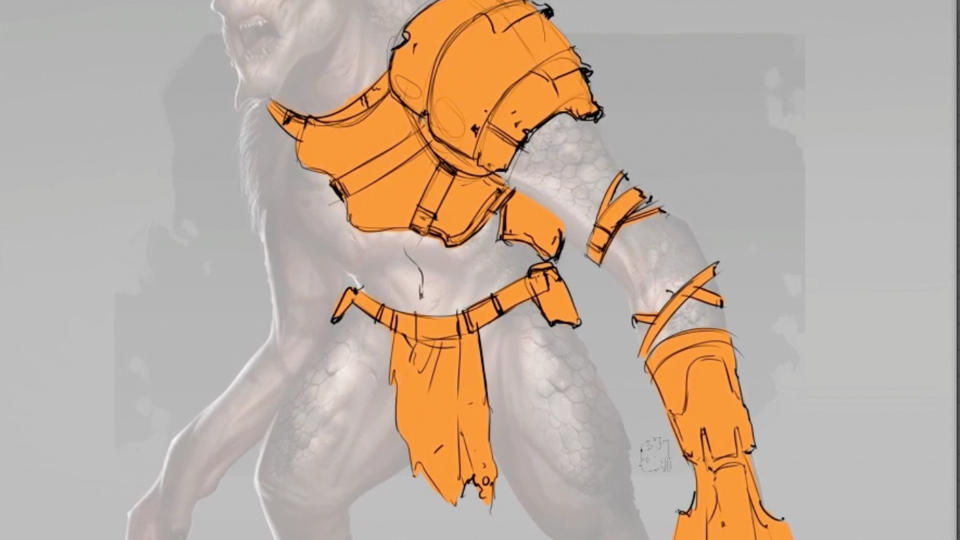
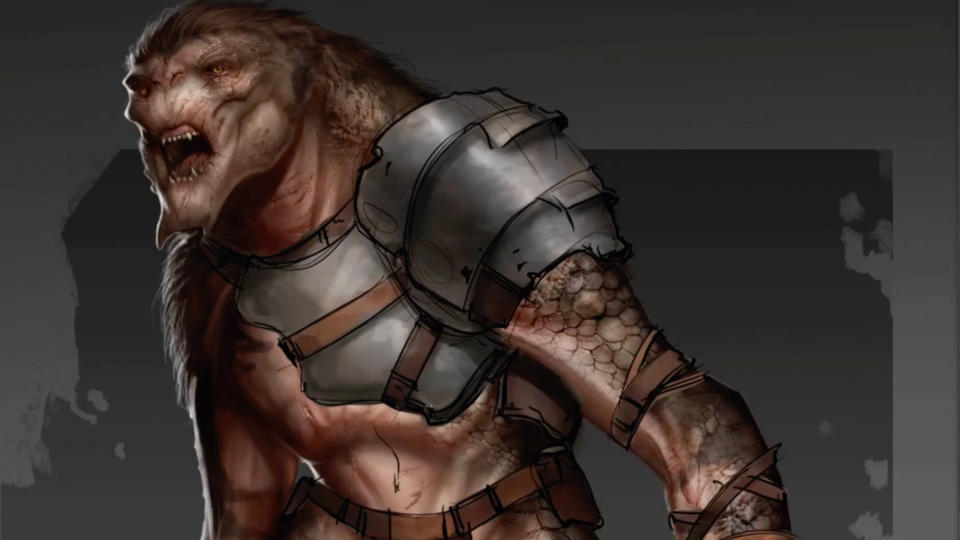
02. Make silhouttes to use as a guide
(Image: © Kyle Brown)
Now you want to colour blockout the areas so you can quickly identify where you’ve painted or not. It’s similar to the flattening process
in comic book illustration, or for those of you that work in 3D and utilise clown passes or material ID passes, you can do that and then grab selections from there. This is more so I can have a clean silhouette to work with as I paint, because it’s going to be an organic, fluid process.
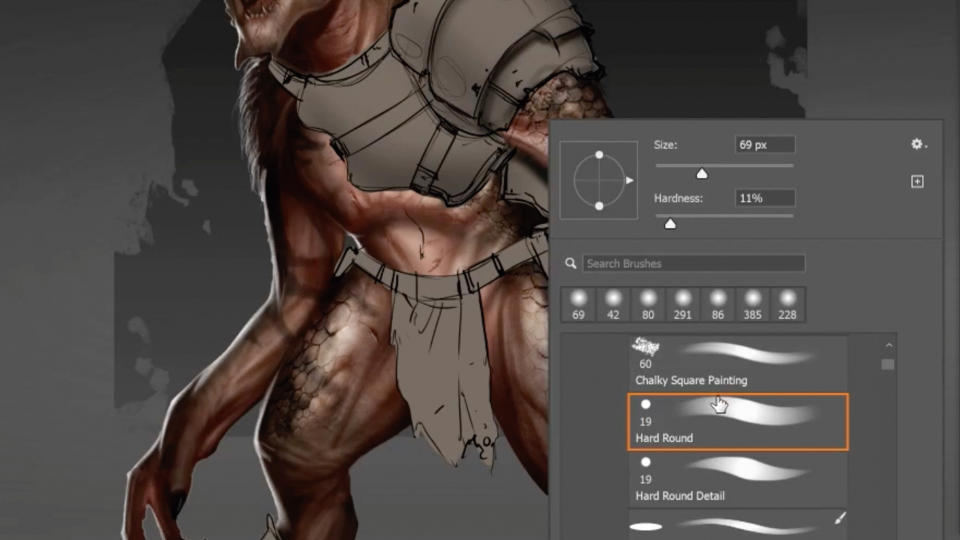
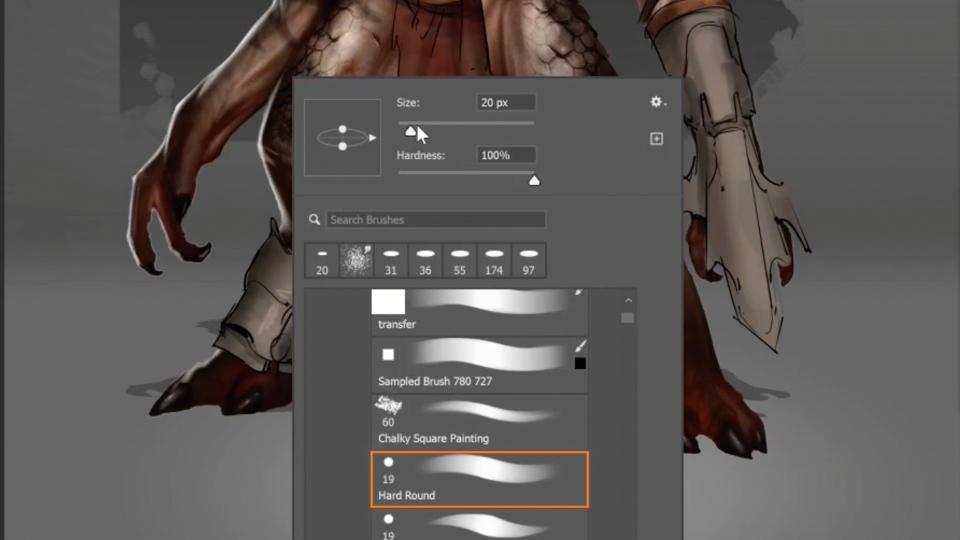
03. Start initial painting
(Image: © Kyle Brown )
Desaturate the values and create a Multiply layer set on top of, or a clipping mask attached to, that base layer and just go in and render out some of the shadows.
You can do this with an Overlay layer as well if you’d like to handle both your shadows and highlights on the same layer, but this is a bit more of an organic process and with it being the metal, I can go in here and just quickly blockout these forms. Use a brown brush and smudge it to give more texture to the natural elements and chunkier brush strokes to fill in the metallic areas.
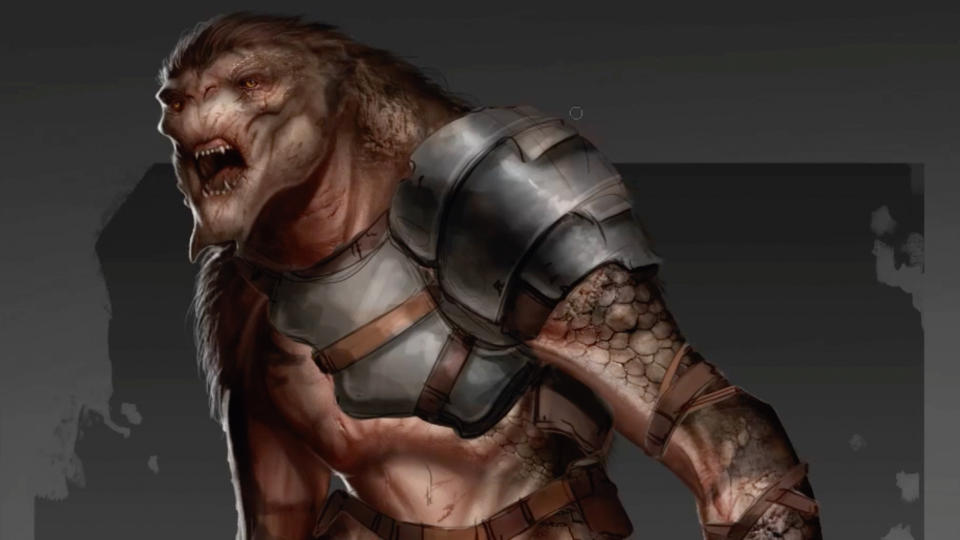
04. Start secondary forms
(Image: © Kyle Brown )
Now I want to describe some of the secondary forms in terms of the leather straps. I do that by just locking the active pixels so I can quickly block over what was already established.
I’m also thinking about the harmony of the material, the choice of material and the colour. You can either contrast it by doing something extreme, getting that break in-between what the material is and what the creature itself is, or you can harmonise it a bit more. I want this to feel like science fiction or a goblin; it’s this almost predatory creature.
05. Create natural forms
(Image: © Kyle Brown)
For the more natural materials like the red loincloth, I’ll quickly wash over with some different, natural tones to get that break-up in an opaque hue. I’m not worried about being too precise. With the metal, I’m putting in some blues while washing in warmer tints to get those variations in this imperfect surface.
06. Add definition
(Image: © Kyle Brown )
Continue now to rendering over the top. I want to get those chromatic shifts in that give the metal that natural flair, so in an Overlay layer I’m going to do some embellishing. It’s the same thing; rough in the approach here, and using a brushstroke back and forth to get this chiselled aesthetic, this hammered metal, to show that it’s not a perfect-looking surface.
07. Take a step back to consider your approach
(Image: © Kyle Brown )
We’ve now removed almost all of the initial line work. Some artists want to maintain more of a painterly aesthetic in their work, but you can choose to either bring those lines back in or not. Alternatively, you can work with opacity to balance between the two.
08. Cement your chosen style
(Image: © Kyle Brown)
When you’re trying to establish a design language for something that’s supposed to feel alien and from beyond Earth, it can be tricky to come up with elements that feel relatable to the audience.
In this case I wanted both an alien and medieval look, so I introduced leather seams that bind everything together and make it more believable. They give it that extra touch that starts to feel a little alien or exotic too.
09. Apply shadows and highlights
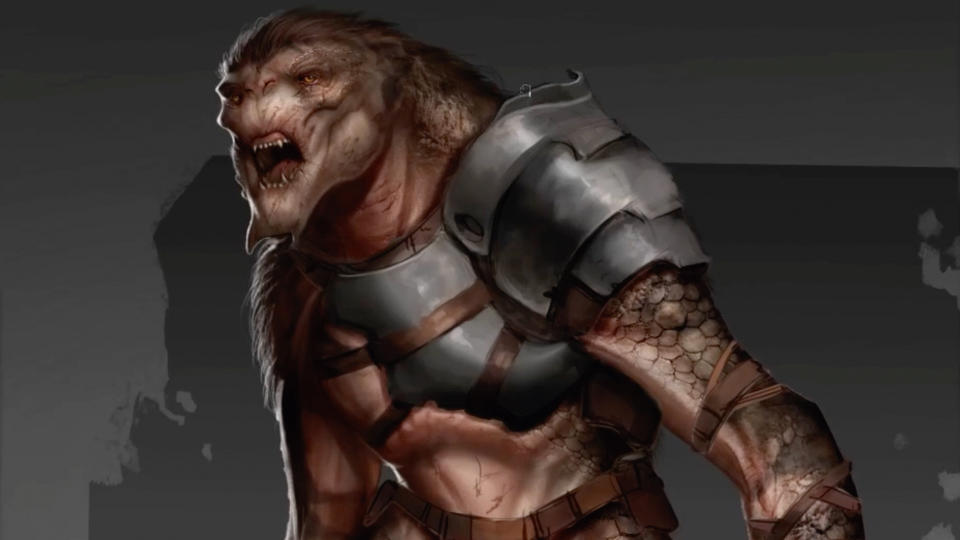
(Image: © Kyle Brown)
Introducing darker areas that act as shadows between the armour and the creature is key. To do this you’ll want to make sure you know where your light sources are. The smaller the shadow, the closer the object is to the creature and vice versa. Also remember that highlights on the armour following the shape and form appropriately are vital for creating shape.
10. Create signs of wear and tear
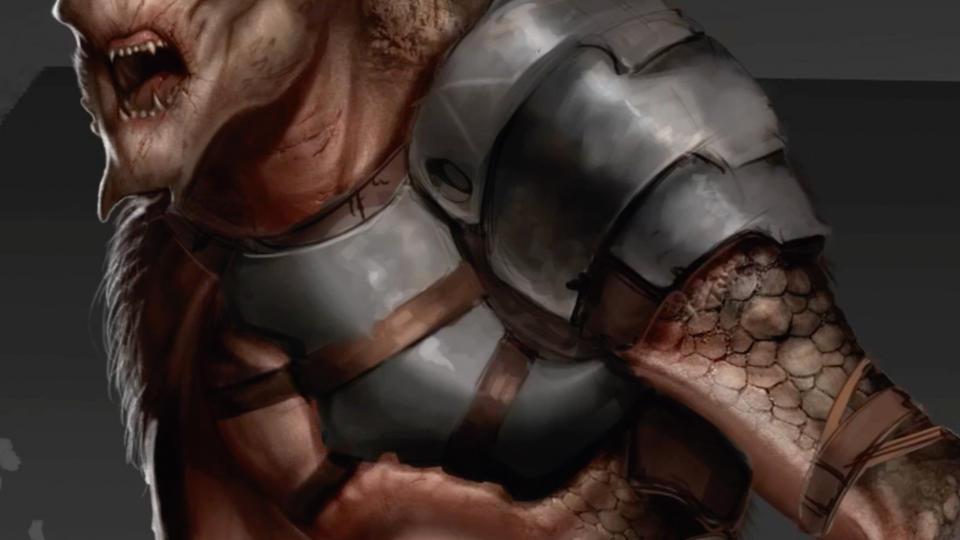
(Image: © Kyle Brown )
On an Overlay layer I can work in brighter and darker areas. I want to include some battle bruises in the armour to show where it has been dented and busted. Whether it took a laser blaster or just blunt trauma to the armour, introducing these details adds real life to the story. Breaking up the specular read will help to show how the metallic surface has been affected in battle.
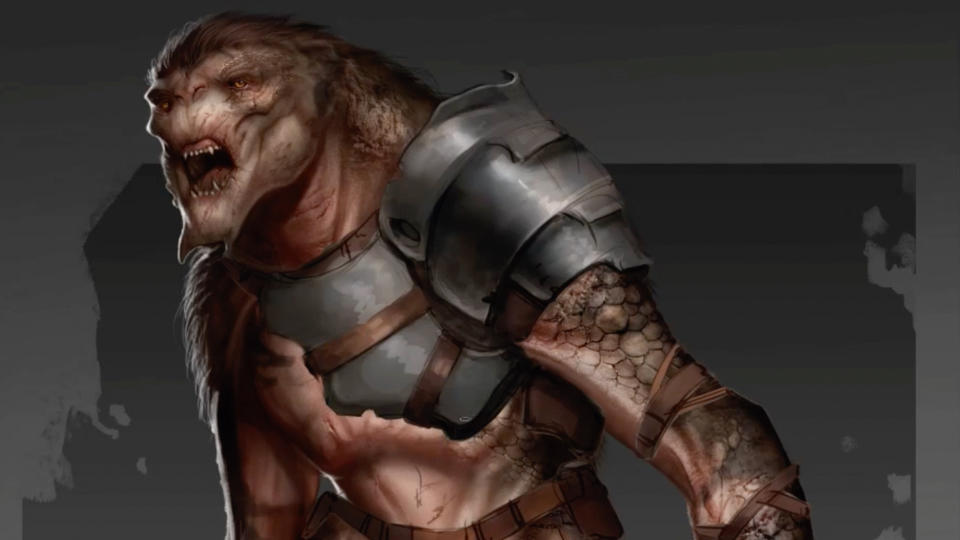
11. Define edges to create contrast
(Image: © Kyle Brown )
You’ll want to make sure you’re getting that contrast between what’s metallic and what is the organic tissue of the creature itself. There’s a tendency to use big, giant brushstrokes that can often feel soft.
So what I’m trying to go through and do is chisel out some of these edges, even if graphically just to go back in and catch some of these rivets and divots in the surface with sharper, more aggressive lines, a few scratches, and some edge highlights.
12. Consider the piece as a whole
(Image: © Kyle Brown)
After working on your piece for a while, you might find it’s hard to have the energy to continue. So for me, I try my best to just step back for a second and start to think about it as a whole new design.
Yes, it’s on this creature that I’ve been working on. And yes, it has to work smoothly with what I’ve already established, or what I’m trying to think about. Is it a design as a whole? But the element that’s sitting on top can’t be lesser than the overall piece, because it will detract from what I’m trying to achieve and can fall apart.
13. Rotate the canvas
(Image: © Kyle Brown )
To help with the brushstrokes, I’m using the hotkey ‘R’ to rotate the canvas. It’s an invaluable tool when you’re working on an illustration, as you can rotate around and get the best angle to work on whatever shape you’re looking for. But ultimately it just comes down to observation here, and with a normal layer you can paint opaquely based on the references that you’ve gathered.
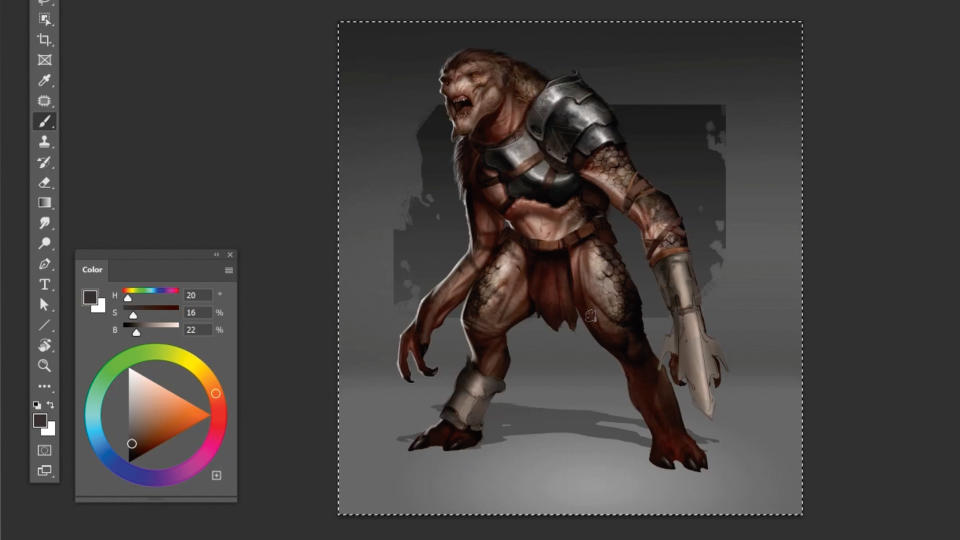
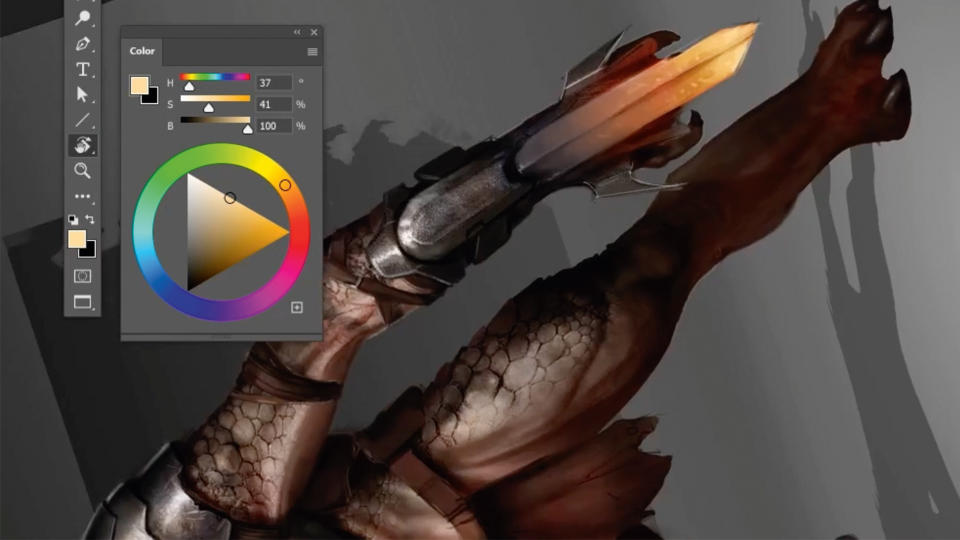
14. Curate the final details

(Image: © Kyle Brown )
I’ve created an ignited blade that adds some lovely visual interest. At this stage it doesn’t have anything to do with blend modes or other technical options; whatever gets you the desired effect is the way it works.
For me here, I might want to wash a colour in, but it’s about observation because we might have the darkness of the blade, but then almost a semi-translucency as the blade heats up and becomes ignited.
This article originally appeared in ImagineFX. Subscribe to the magazine at Magazines Direct.

