Everything You Need to Know About Lifting Barbells for the First Time
At some point, everyone who strength trains can benefit from picking up a barbell.
Barbells help you perform foundational moves like deadlifts, squats, presses, and rows with far more weight than you can with dumbbells and kettlebells, Lauren Pak, a NASM-certified personal trainer and co-founder of Achieve Fitness Boston, tells SELF. While dumbbells and kettlebells get bigger, and harder to grip and maneuver the heavier they get, barbells stay the same size, thanks to the handy-dandy weight plates on the end. So, to keep yourself challenged in the weight room, growing, and getting stronger, at a certain point, barbells can be the most efficient way to make that happen.
However, knowing that you should pick up a barbell and approaching one with confidence are two entirely different matters. “Whenever I see a ‘new-to-barbell’ lifter venture over to the power rack, they look a bit timid, unsure, and overwhelmed,” says Chase Karnes, C.S.C.S., a Kentucky-based strength and conditioning specialist. “It’s completely normal and part of getting out of your comfort zone.”
Here, we lay out everything you need to know to get started with barbells to minimize discomfort and maximize results.

How to know if you’re ready for barbells
To get started with barbells, there’s no requisite amount of time that you need to have spent strength training. Rather, the only thing that’s 100 percent mandatory is good form, Anna Swisher, Ph.D., C.S.C.S., coach education and sport science manager at USA Weightlifting, tells SELF. She explains that being able to perform fundamental moves—using your bodyweight, kettlebells, and dumbbells—with solid, pain-free technique sets you up for success.
“By the time you get to a barbell, you should feel as though you’re already very comfortable with the squatting, pressing, and hinging mechanics of the squat, bench, and deadlift, and you’re just ready to start loading them up heavier,” Pak says.
Below are some sample progressions that you can try to work your way up to barbells. Once you’re able to perform each with proper form, you can start to integrate barbell variations of that movement into your routine.
Squat
Progressions: bodyweight box squat, bodyweight squat, dumbbell goblet squat (shown here), offset kettlebell squat, double-kettlebell front squat
Deadlift
Progressions: kettlebell deadlift, double kettlebell deadlift (shown here)
Chest press
Progressions: single-arm dumbbell floor press, double-arm dumbbell floor press (shown here), single-arm dumbbell bench press, double-arm dumbbell bench press
Row
Progressions: single-arm dumbbell row, bent-over dumbbell row (shown here)
Overhead press
Progressions: single-arm overhead dumbbell press, double-arm overhead dumbbell press (shown here), single-arm overhead kettlebell press, double-arm overhead kettlebell press
When getting started with barbells, it’s also important to consider the mobility of the joints you’re using and working in any given exercise. “Barbells are very constricting in that you have to conform to the barbell, whereas dumbbells and kettlebells allow for a little more freedom of movement,” Pak says.
So, for example, to get into a proper back-squat position, you need the shoulder and spine mobility to get your hands behind your head without arching your back. With deadlifts, you need to be able to hinge your hips while maintaining a neutral spine as you lower down toward the floor, Pak says. If you find yourself having to round your back to reach the bar, you’ll most likely need to work on some hip mobility before performing barbell deadlifts. And when pushing or pulling, if you always have pain in your shoulders, you may actually be best sticking with dumbbells. Your joints aren’t necessarily symmetrical, and they just might not be structured in a way that allows for them to follow the exact same movement path.
Similarly, “if you know you have a complicated injury history or have pain with certain movements, you definitely want to work with a coach or trainer to get started,” Swisher says.

A breakdown of the different types of barbells
Of course, when deciding to start using barbells, your current strength comes into play. Fortunately, there are multiple kinds of barbells out there, so you’re bound to find one that works best for you.
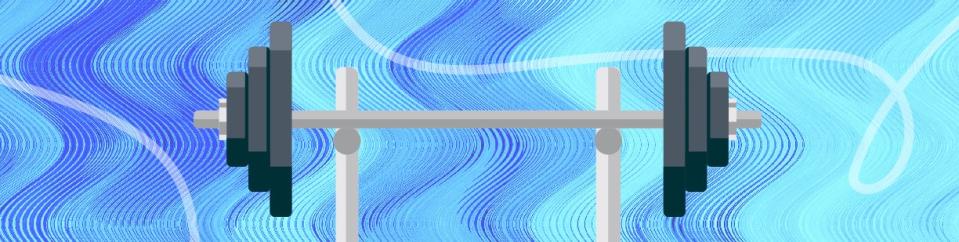
The most standard barbell in gyms—the one you will find in most power racks, called an Olympic barbell—weighs 45 pounds (~20 kg). “If you are able to comfortably use this for exercises like squats and presses, have at it,” says Swisher, explaining that you can then add weight plates to each side to further increase the weight. “If that’s too heavy, then see if the gym has a lighter one.”
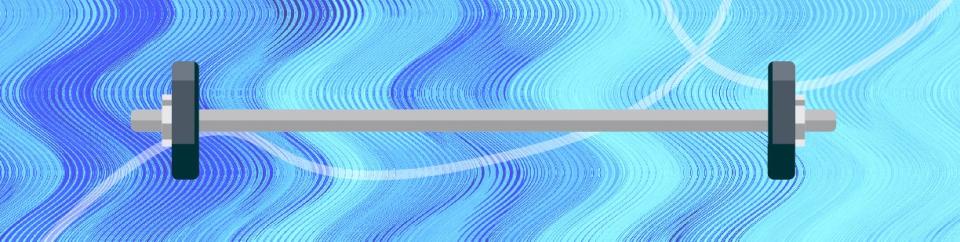
Lighter options include a women’s Olympic bar, which weighs 35 pounds (~15 kg), is shorter, and has a smaller diameter compared to standard Olympic bars, making them easier to grip if you have small hands. Fixed, or pre-loaded, barbells (like this one) are also convenient because they are even shorter and easier to move around, you don’t have to put weights on each side, and some are as light as 35 pounds or less.
“Pre-loaded barbells are OK for exercises like biceps curls and overhead presses, but they’re not usually great for the main powerlifts like the squat, bench, and deadlift,” says Pak, noting that they are too short to fit in safety-bar clad power racks. “Deadlifts are particularly awkward with pre-loaded barbells because the plates are usually smaller, so you have to go down really far to pick the bar up off the floor, which can lead to some form issues.” (Note: When deadlifting from the floor, it’s important to use rubber bumper plates—they look like this—on the sides. These are all the same height, no matter the weight, ensuring that you never have to sink down crazy far to reach the barbell.)
Lastly, many gyms have trap bars, also called hex bars, which aptly look like a giant hexagon (you can see one here). When using one, you stand in the middle and grip handles on both sides of you. These bars vary in weight, anywhere from 35 to 55 pounds, and have a straight bar on either side to hold weight plates. When lifting these bars, the weight is distributed around rather than in front of you, and you hold the bar with a neutral grip, so most people can squat and deadlift more weight with a trap bar than they can with a straight Olympic bar. So even if they look complex, they are totally beginner-friendly.
How to use barbell racks
“One of the toughest things in the beginning is setting up the racks,” Pak says. That’s especially true because every gym has slightly different versions, so it’s hard to give blanket advice for how to do it right.
The most common contraptions for holding barbells are squat racks and power racks (for reference, in this photo, the squat rack is on the left and the power rack on the right), and they can be used pretty interchangeably. They all will have weight pins that the bar rests on when not being used as well as safety bars or pins that, if you happen to lose control of the bar, will catch the weight so it doesn’t squish you or your toes. These pins and bars are always adjustable, and secure into holes in the rack frame. If you have any trouble figuring out how to adjust yours, ask a gym employee or personal trainer walking the gym floor for help. Even veterans frequently have trouble with squat and power racks, according to Karnes, so no need to be embarrassed.
When selecting the height at which you will set up the barbell and safety bars, take into account your end ranges of motion. “If you are squatting, be sure to do so inside the power rack with the safety bars just below the lowest depth you will squat to,” Swisher says. “That way you can lower the bar to the safety bars and move out of the way if you are unable to complete a rep. For the bench press, select a bar height where you have 6 inches before your arms are fully extended when lying flat on the bench, and the safety pins at a height that will keep the bar from hitting your chest.” Also always make sure to have a spotter, especially with the barbell bench press.
Another big tip in terms of safety is always securing your weight plates on the bar with weight clips that slide onto the bar immediately outside of the plates. They come in multiple varieties including plastic collars and metal pinches (which are particularly clunky), so, again, if you’re having trouble using them, there’s no shame in asking for help, Pak says. You’ll usually find the clips hung on the weight racks or in a bin near the barbells.
Apart from squat racks and power racks, many gyms will also have a Smith machine, which has a similar set-up, but the difference is that the barbell is secured to a track. This often feels more beginner-friendly, but since the bar has a fixed path, it can actually be difficult to use it in a way that does not force you to move in unnatural and injury-risking movement patterns. Only use this if there is a really specific reason why you need to use it as opposed to a free weight. (Like if your personal trainer or physical therapist says that you need to perform a specific exercise in a more stable environment to isolate a certain muscle, or if the exercise you want to perform is really hard to set up with a barbell and having it in a fixed path won't really throw off your form: hip thrusts are one example.)
Also, keep in mind that the bars on Smith machines generally weigh less (usually 15-20 pounds), and combined with the fact that your body does not have to work to stabilize the bar during exercises, you can often lift more weight with a Smith machine than you can with a regular barbell.

The many ways to hold a barbell
There are multiple ways to grip a barbell, and the best one for you depends on the exercise you’re performing, your goals, and what kind of barbell you’re using, Pak says.
Pronated: The most common way to hold a barbell, this palms-down grip should be the basis of your barbell lifting. However, it’s not your strongest grip and limits how much weight you can hang onto during exercises such as deadlifts.
Supinated: A palms-up position, this grip is good for curls and row variations in which you want to target the biceps. It doesn’t work for most other barbell exercises, though.
Alternated: This technique involves holding the barbell with one hand in a pronated grip and the other in a supinated grip. This allows you to grip more weight than you can with a double-overhand grip. This asymmetrical grip may increase the chance of injuring the biceps tendon and shoulder, so when using it, switch how you have each hand positioned for each set. This will ensure that you work both arms equally.
Hook: Performed by grasping the bar with a pronated grip, but with the fingers folding over the thumb, this grip can help you hold heavier weights in deadlifts and rows, but can be very painful for the thumbs. It’s mostly used in weightlifting competitions. Use sparingly, if ever.
Neutral: Holding the bar so that your palms face in toward the sides of your body, common with dumbbell exercises, isn’t possible to perform when holding straight barbells with both hands. It can be used, however, with trap/hex bars, and may be a more comfortable shoulder position for anyone with cranky shoulders.
You can see what these different grips look like here.

On accessories like lifting straps and belts
Take a look at your fellow gym-goers wielding barbells and you will likely see them using a lot of paraphernalia, including gloves, straps, and belts.
“While gloves can be a good option if your hands are sensitive or you want to avoid calluses, most of the time, it’s best to not use straps or belts and to instead lift au natural,” Karnes says.
He explains that straps typically serve to help you hold onto bars that are heavier than your hands alone can grip. Meanwhile, lifting belts help you lift more weight by creating as much tension as possible through the torso.
Pak doesn’t recommend lifting belts or straps for beginners. “They’re only going to be helpful if you’re already very well-versed in the exercise and you’re just using them for that last little edge,” she says.
As with all things strength training, it's mastering the barbell basics that will take you the furthest, not any extra bells and whistles.
6 beginner barbell exercises to try
Once you’ve progressed through bodyweight, dumbbell and/or kettlebell exercises, and have developed solid form, try starting with these beginner barbell exercises:
1. Barbell back squat
To perform the back squat, grab a barbell inside a squat rack with your hands a bit wider than shoulder-width apart.
From there, duck underneath the bar and push your upper back against the bar, so that the bar is resting on the very top of your upper back. Squeeze your shoulder blades together to create a muscular “shelf” for the bar to rest on.
Stand up tall and walk yourself backwards, a few steps away from the squat rack. Place your feet slightly wider than shoulder-width apart and turn your feet out a little, 20 to 30 degrees.
Then, push your hips back and bend your knees to lower into a squat, pushing your knees slightly out to the sides. Aim to descend until your hips go below your kneecaps, or until your lower back wants to tuck under. Only squat as deeply as your mobility allows.
Push through both feet to stand back up. That's 1 rep.
2. Barbell front squat
To set up for the front squat, stand directly underneath the bar, with your feet parallel and the bar resting on your collarbone and gently pressing against your throat. This position may feel a bit uncomfortable at first, but it should improve after a few workouts.
Grab the bar with your hands just wider than shoulder-width apart, elbows bent and facing forward, palms facing up and your fingers by your body.
Stand up tall and walk yourself backward and away from the squat rack. Place your feet slightly wider than shoulder-width apart and turn your feet out a little, 20 to 30 degrees.
Then, push your hips back and bend your knees to lower into a squat, pushing your knees slightly out to the sides. Aim to descend until your hips go below your kneecaps, or until your lower back wants to tuck under. Keep your chest upright throughout the movement.
Push through both feet to stand back up. That's 1 rep.
3. Barbell modified sumo deadlift
Stand behind a barbell with your feet wider than shoulder-width apart and your feet turned out slightly.
Sit your hips back, bend your knees and press them out to the sides (so that they don't cave in), and lean your torso forward, maintaining a tight core and flat back. Grab the bar, placing your hands exactly shoulder-width apart.
Push your feet into the floor and stand up tall, pulling the weight with you and keeping your arms straight. Bring your hips forward and squeeze your abs and glutes at the top.
Slowly reverse the movement, bending your knees and pushing your butt back to lower the weight back to the floor. Keep the bar close to your body the entire time and maintain a flat back—only your knees should bend.
4. Barbell bent-over row
Grab a barbell with your hands a bit wider than shoulder-width apart.
From there, bend your knees slightly, push your hips back, and lean your torso forward until it’s about parallel to the floor.
Keep the barbell close to your body and pull it straight up toward your chest, bending your elbows as you do, so that they go just past your torso. Squeeze your shoulder blades at the top of the movement.
Slowly straighten your arms to lower the bar, keeping it off the floor. This is 1 rep.
5. Barbell bench press
Lie on a bench with a barbell rack with the bar racked at about wrist height when your arms are fully extended toward the ceiling.
Position your body so that your eyes are directly underneath the barbell. From there, pinch your shoulder blades down and back together, arch your chest up toward the ceiling, and plant your feet firmly on the floor.
Unrack the bar and lower it to your chest while keeping your shoulder blades down and back and your lower body engaged. In this position, your elbows should be bent so that your arm is angled about 45 degrees from your body and your forearms are vertical.
Press the barbell up toward the ceiling until your arms are straight. Make sure to keep your wrists and elbows and shoulders stacked.
6. Angled barbell press
Push one end of a barbell onto a towel in the corner of a room. Make sure the towel is between a wall and your barbell. If your gym has a “land mine” attachment, you can use that instead.
From there, grab the barbell with your right hand and hold it by your right armpit. Stand with your legs shoulder-width apart, with a slight bend in your knees, an engaged core, and a flat back. This is the starting position.
Push into and up on the bar until your elbow locks out.
Slowly bring the bar back to the starting position.
Related:
Originally Appeared on Self

