Every Historical Home Needs This One Element
"Hearst Magazines and Yahoo may earn commission or revenue on some items through these links."
[table-of-contents] stripped
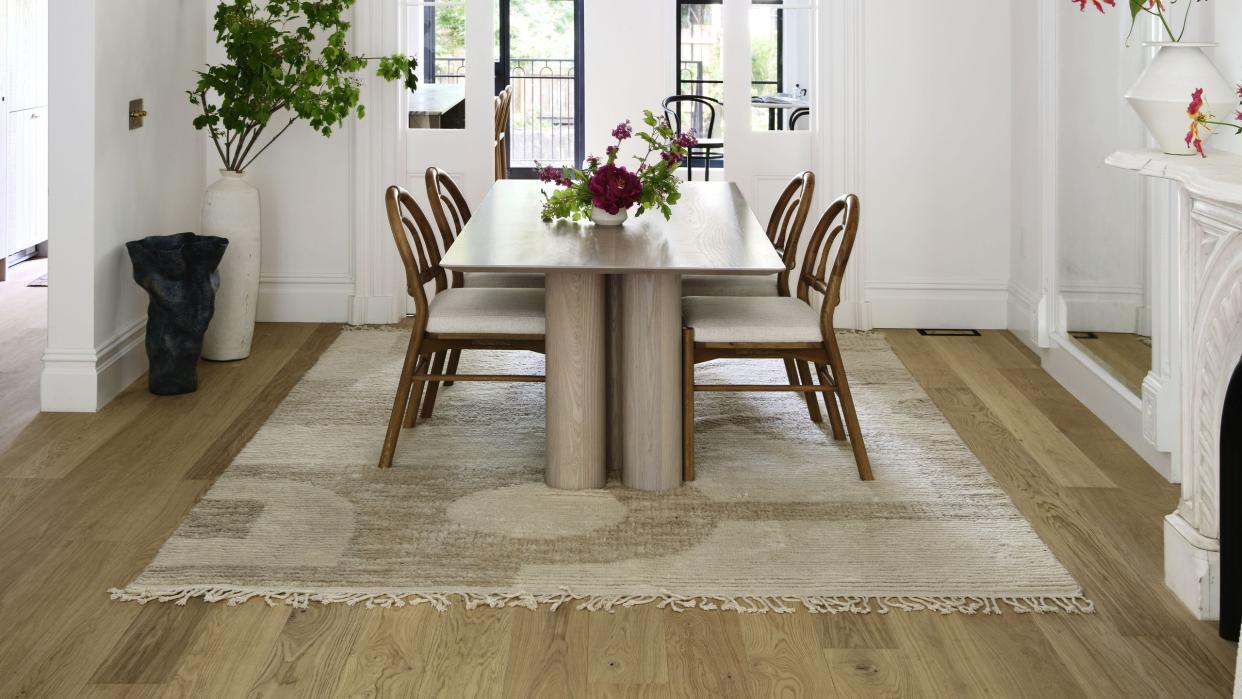
Your ceiling is a blank slate. Often an untapped surface in interior design, the “fifth wall” offers unlimited design potential. From circus stripes to color drenching, incorporating design elements on your ceiling makes the surface feel more intentional and less like a forgotten part of the room. If you’re looking to add architectural detail and character to your ceiling, why not opt for a ceiling medallion?
Originally seen in 19th-century homes, ceiling medallions are decorative moldings that were used to mark the center of the space and coordinate with the intricate woodwork used to bridge the ceiling with the surrounding walls. Because lighting in those times was gas based, ceiling medallions also helped to hide soot marks left on the ceiling from the burning lamps.
These days, ceiling medallions are strictly aesthetic. For historical homes, medallions can be used to bring era-accurate detail back into the architecture or add visual interest to ceiling-based lighting. These accents also happen to be very easy to DIY. To walk us through the process, we’ve enlisted the help of Jerome Bertuglia, owner of Prime Homes, Inc. in West Hartford, Connecticut, which specializes in building custom homes. “The key to a successful installation lies in precise measurement and meticulous attention to the ceiling’s existing features,” Bertuglia says. So as always, measure twice, cut once. Read on for more information about how to install ceiling medallion.
How to Choose a Ceiling Medallion
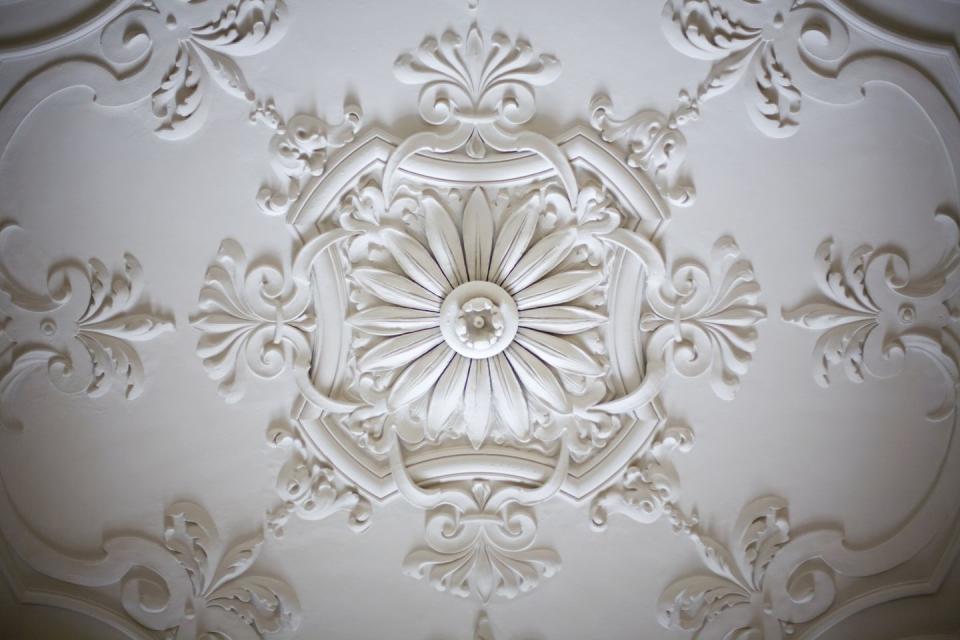
Not all ceiling medallions are created equal. In order to ensure you’re picking the right one for your home, you’ll want to look at the design, the material, and the size. Ceiling medallions come in a variety of sizes and styles according to the architectural period they originated in. They also don’t have to be limited to being placed around lighting. Pre-electricity, a lot of homes had ceiling medallions as a decorative element to mark the center of a room.
Bertuglia prefers high-density polyurethane medallions because they’re lighter than plaster, easier to handle (i.e., less fragile), durable, and highly detailed. Plaster is traditional, but plaster medallions are more expensive and fragile. Modern ceiling medallions can also be crafted from brass, wood, and PVC.
To choose your ceiling medallion’s design, look at your home’s architectural style. If it’s a Victorian home, research and choose a pattern that’s in line with your home’s existing architectural details. For modern homes, there are a myriad of simpler, less ornate ceiling medallions that can add interest while feeling aesthetically consistent.
What You’ll Need
Measuring tape, laser guide, or other measuring tool
Ladder
Screwdriver
Strong adhesive (such as wood glue or molding adhesive)
Screws
Ceiling paint
How to Install a Ceiling Medallion

Step One: Shut Off the Power
Whenever you’re dealing with electrical fixtures, the first step of your process should always be to turn off the power in that room. For larger homes, you can flip the breaker switch for the one room. In apartments or smaller homes, you may have to cut power completely for the time it takes to complete this project. Don’t worry, it won’t take long.
Step Two: Locate the Center of the Ceiling
Using a measuring tape, laser guide, or other measuring tool, you’ll want to find the exact center of your ceiling. (If you’re placing it over a lighting fixture, this work has most likely already been done for you.) Mark the center with a pencil.
Step Three: Remove the Existing Light Fixture
Carefully uninstall the existing light fixture. Remove the lightbulb first, and then look to the ceiling wiring. If you’re the one who has installed the fixture, simply reverse your steps.
Step Four: Secure the Wires
To keep yourself extra safe, place wire caps over any and all exposed wires that were inside the pendant or ceiling light.
Step Five: Install the Medallion
Put a generous amount of adhesive (such as wood glue or Bertuglia recommends molding specific adhesive) on the back of the ceiling medallion. Line up the two center points, and firmly press the ceiling medallion onto the ceiling, holding it there for 15 to 30 seconds. “It’s important to ensure that the electrical wiring from the light fixture aligns with the central hole of the medallion,” Bertuglia says. “This ensures there’s no gaps in the center of the piece.”
Step Six: Secure With Screws
If your medallion came with screws, now’s the time to drill those in with a power drill. Sometimes small or ultra-lightweight medallions can be secured with molding glue alone, but we always recommend an extra level of security just in case.
Step Seven: Reinstall the Lighting
Remove the wire caps and reinstall the light fixture. This is another moment to double check the centering and symmetry of your project before you apply the finishing touches and final seals.
Step Eight: Caulk and Patch Gaps
For a seamless look, Bertuglia recommends caulking any gaps between the ceiling and the medallion and then covering the caulk with paint to match (or contrast!) the ceiling color.
Now you can turn the power back on and enjoy the beautiful results.
Safety Tips

Always: Turn the Power Off
When installing a ceiling medallion over a light fixture, you’ll be dealing with live wiring. This can cause electrocutions and burns. To avoid those painful accidents, always cut the power to the room you’re working in for the duration of the medallion installation.
Never: Install Alone
Ceiling medallions are, well, on the ceiling. And unless you’re eight feet tall, this project will require a ladder. Using a tall ladder without a spot or an extra pair of hands can be more dangerous than necessary. We recommend grabbing a friend, significant other, coworker, etc., to help you out for an hour or two and literally watch your back.
When to Call a Professional
Installing a ceiling medallion is a relatively simple process, but there are a few circumstances where calling a professional to tackle the project is better than you doing it on your own.
Extra-Tall Ceilings
If you’re lucky enough to have incredibly high ceilings—meaning more than 10 feet tall—it’s best to call a professional contractor. They’ll have the proper safety equipment to get up that high and install your ceiling medallion.
Complicated Wiring
Some light fixtures are more difficult to remove than others, perhaps because of the weight or the shape of the design. If you don’t know where to start and don’t want to damage your favorite chandelier, go ahead and call an electrician to take down and reinstall your lights.
The Light Won’t Turn Back On
If you’ve completed the install only to find that your light isn’t working, you may have accidentally messed with the internal wiring. Call an electrician to troubleshoot the issue.
Ceiling Medallion FAQ
What Kind of Adhesive Should You Use for a Ceiling Medallion?
Bertuglia recommends homeowners use a molding-specific adhesive for maximum durability. You can further secure it with screws.
Can You Make Ceiling Medallions Renter Friendly?
Yes! While it’s not as secure as using glue or screws, many renters, including Marco Zamora, use the lighting bracket to hold the medallion in place.
Should Ceiling Medallions Be Wider Than the Light Fixture?
While this is up to personal preference, we say yes. A ceiling medallion center ring must be wider (or the same width) as the fixture in order to install properly. However, the decorative element around the fixture can be as wide or as narrow as you see fit.
Can You Install a Ceiling Medallion Without Removing the Fixture?
While it’s a bit more complicated, yes, technically you can. Find a ceiling medallion that’s split in half, then install each half around the light fixture using the same steps as a traditional medallion. At the end, seal all of the seams with caulk to hide the center line. Take note that this method may not look at “built-in” or seamless.
Working on a design project? Let us help!
Follow House Beautiful on Instagram and TikTok.
You Might Also Like

