How I edit photos with an Apple Pencil and my iPad Pro
Trouble streaming the above video? View/download it here
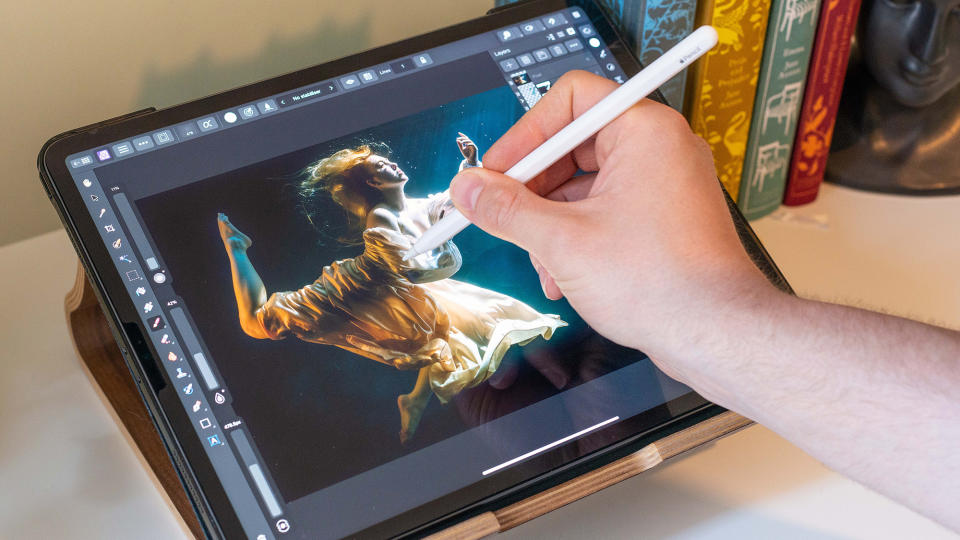
Attempting to usurp the humble mouse and keyboard is a little bit like reinventing the wheel. But if you’ve ever used a mouse to perform delicate dodging or burning, try this digital pen technique once and you’ll never want to go back. The best drawing tablets with screens have become increasingly popular over the years and increasingly affordable too. But even the cheapest options can be difficult to justify, unless they’re going to be getting consistent use.
That’s why tablet styluses, like the Apple Pencil and Samsung S Pen, are so attractive. You may already have a compatible device at home and if you don’t, investing in an iPad or Galaxy Tab will at least provide you with plenty of other benefits, beyond digital drawing. The Apple Pencil (2nd generation), in particular, has received plenty of plaudits and is an excellent tool for artists and photographers alike. It’s pressure sensitive, just like a real pencil, thin and comfortable to use, and a relatively inexpensive investment at £139/$129 (providing you already have a compatible device).
We paired our iPad Pro 12.9 (2021) and second-gen Apple Pencil with Affinity Photo 2 for iPad (£18/$18.50) to create smooth and accurate edits using the Dodge Brush Tool.
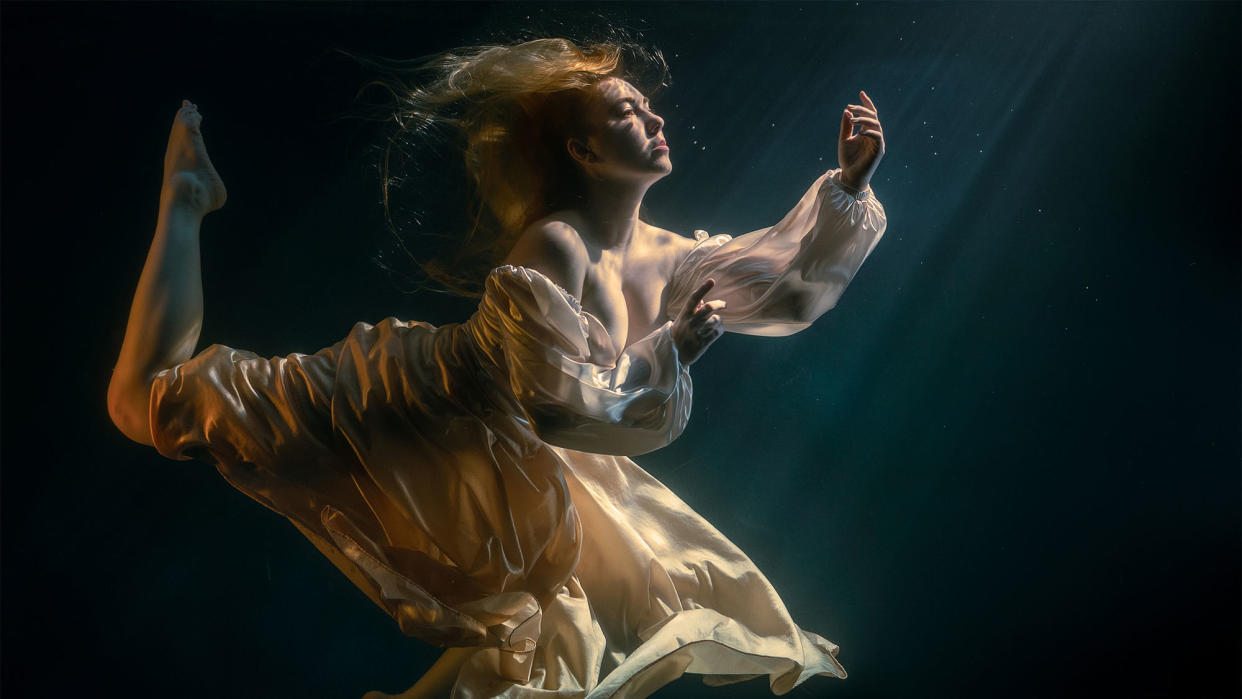
We shot this stunning portrait at TankSpace’s incredible underwater studio.
Download the project file(s) to your Downloads folder of your desktop computer
But I don't own an iPad...
If you don’t own an iPad, you can pick up an entry-level graphics tablet for very little. The One by Wacom retails from just £36/$50 and although you don’t get the benefit of drawing directly onto the screen, it’s still a much more effective method for creating painterly brush strokes than using a mouse. Wacom’s cheapest family of pen displays is the Wacom One and you’ll find even cheaper options out there from brands such as XP-PEN. If you own an iPad and want to pick up an Apple Pencil, there are currently three variants available: Apple Pencil (2nd generation), Apple Pencil USB-C and Apple Pencil (1st generation). Make sure you check what version your iPad is compatible with and which one best suits your purposes before purchase.
01 Add a curve layer
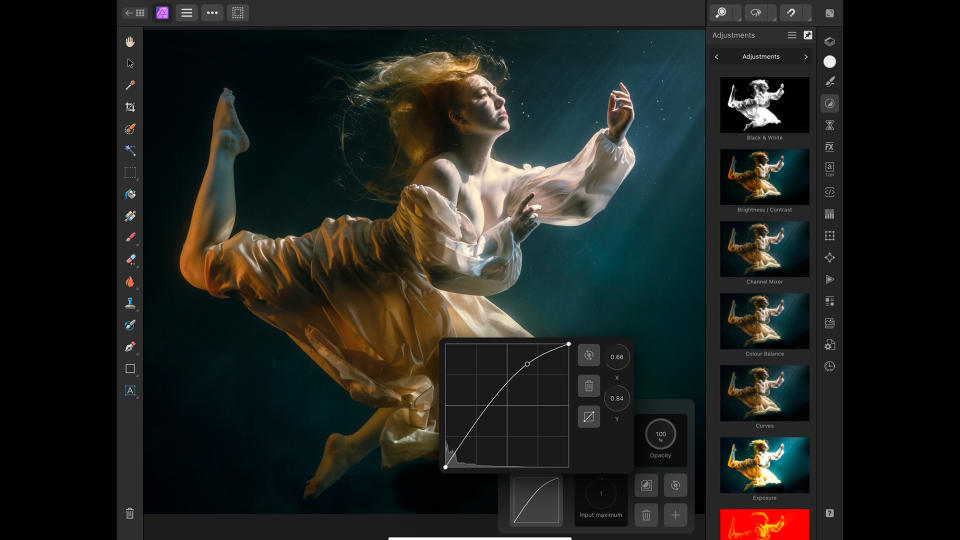
Open your start file in Affinity Photo. Tap the tick icon at the top of the screen to exit the Develop Persona and enter the Photo Persona. Select the Layers icon in the right-hand toolbar and duplicate the background layer by selecting the three-dotted icon in the top-left of the screen. Select Duplicate in the Clipboard menu. With the new layer selected, hit the Adjustments icon in the right-hand toolbar and select Curves. Tap the graph in the Curves Adjustment window to enlarge it and plot a single point (pictured) to boost the highlights.
02 Inverted masks
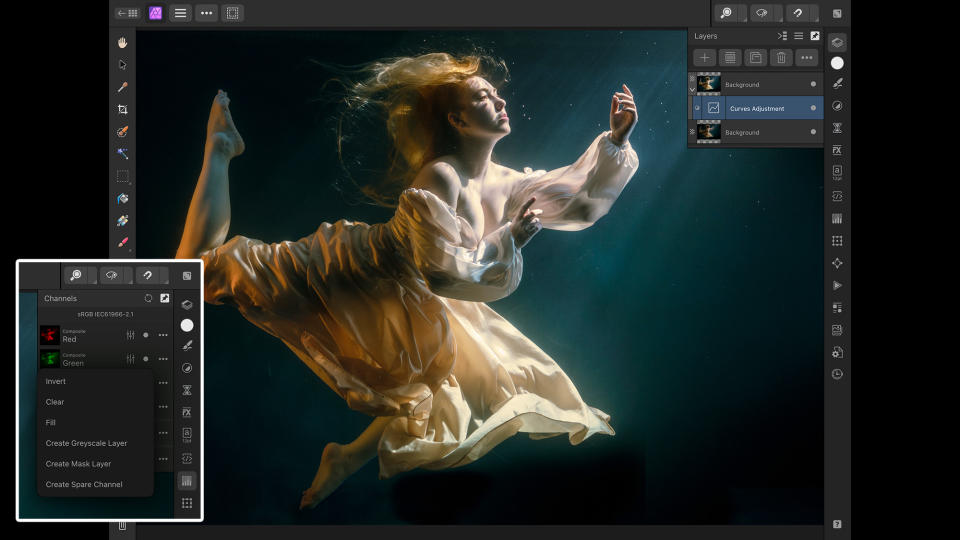
Tap and hold the Curves Adjustment layer in the Layers panel and drag it over the top of the layer you’ve just created. Once released, it will snap to and only affect that layer (this is called a clipping mask). Then hit the plus icon in the Layers panel and select Mask Layer. Select the Channels icon in the right-hand toolbar and tap the dotted icon next to the layer called ‘Mask Alpha’ and select the Invert option. This will instantly hide the curves effect, but don’t worry, we’ll be using a white brush to selectively paint the curves layer back in, later.
03 Build a brush
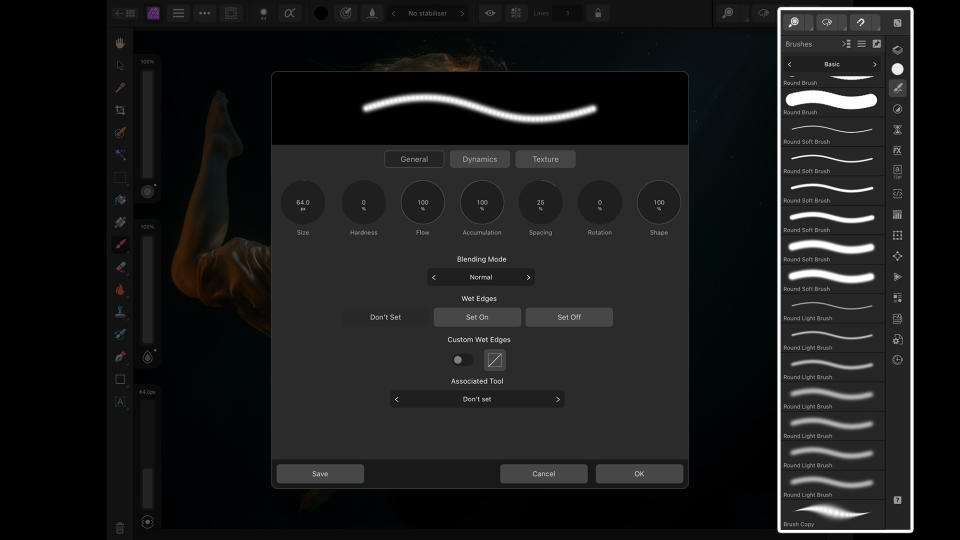
Go to the brush icon and select your preferred brush (we used Round Soft Brush). Then select the brush-size icon in the top toolbar to bring up the brush-editing menu. From here, you can alter a multitude of properties. We set Hardness: 25% and then entered the Dynamics tab to set Size: 100%. If you hit Save, your new brush will appear at the bottom of the Brushes panel. With your brush selected, you’ll notice three vertical sliders on the left-hand side. This allows you to change Accumulation, Flow and Width as you paint.
04 Painted lady
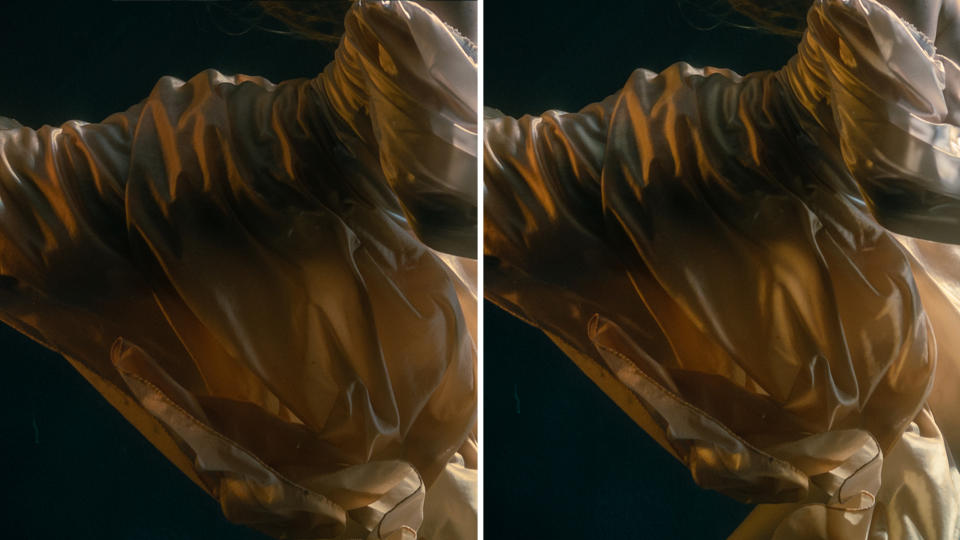
Now you’ve created a suitable brush, you can start painting to selectively reveal the brighter curves layer. Ensure that the inverted mask is selected and that you’re using a white brush, then paint liberally over any raised areas of fabric, avoiding the shadows. If you make a mistake you can simply switch to a black brush to paint the curves layer away again. The effect will look overpowering at first, but this is easily remedied. Once you’re finished, select the three-dot icon in the Layers panel and adjust the Opacity slider to taste, we used 36%.
05 Extreme highlights
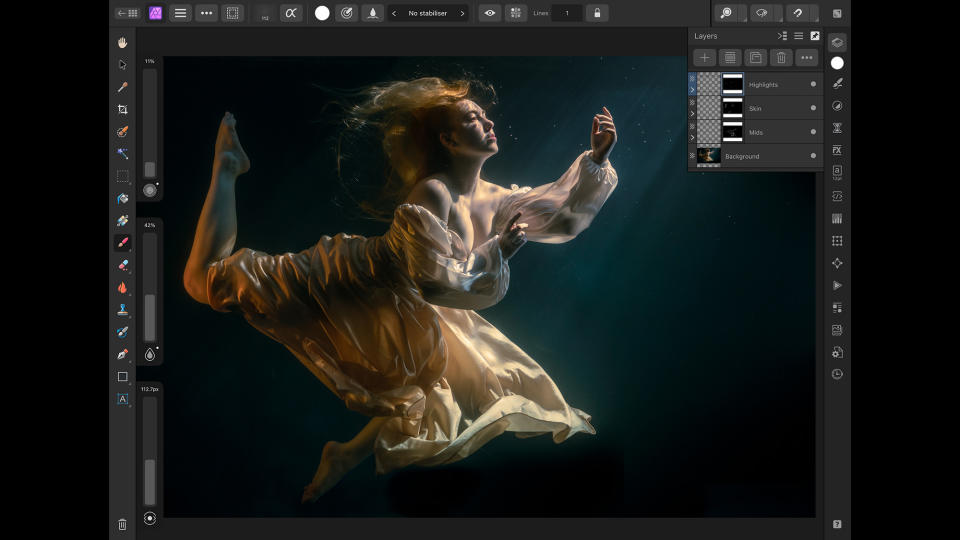
Duplicate the background layer and drag it to the top of the Layers panel. Then duplicate the Curves Adjustment layer and drag it on top of the duplicated background layer to create a clipping mask. Once again, create an inverted layer mask and start painting with your pencil. This time, focus on the skin tones, by brushing over the skin’s highlights before setting the opacity to 75%. Repeat this whole process again, but focus on carefully brushing only the very brightest highlights on the folds of fabric, before setting the opacity to 85%.
06 Underwater rays
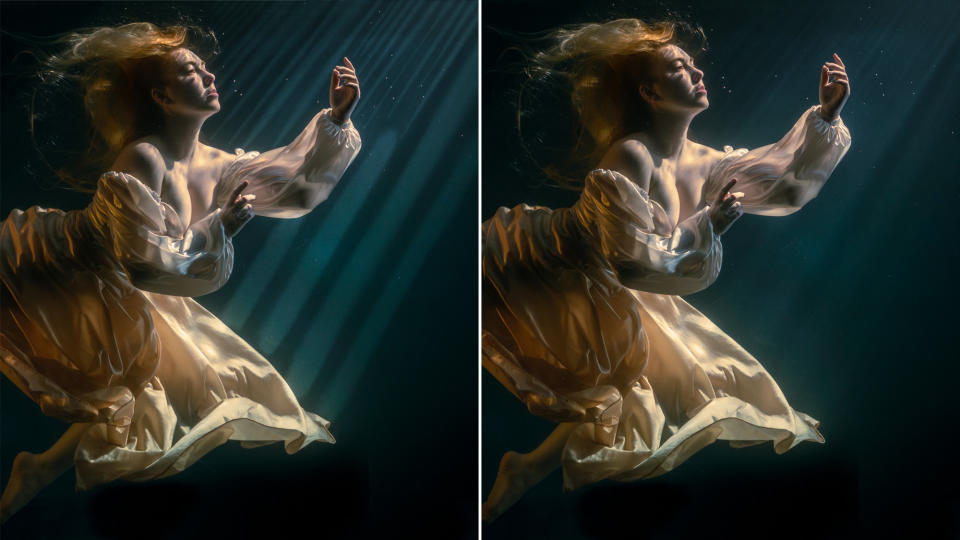
Duplicate the background and a curves adjustment layer yet again to create one final mask, used to tease out the rays of light filtering through the water. The technique is the same as before, but you’ll want to keep your brush strokes smooth and straight. If you make a mistake, tap the screen with two fingers to undo (tap with three fingers to redo). The highlights should be very subtle, so set the opacity to around 9%. Click the three dots in the top toolbar, select Merge Visible to create a merged copy and perform any final tonal edits.

N-Photo is 100% Nikon-devoted, and 100% editorially independent. If you're a Nikon owner and want to improve your images, get the best buying advice and reviews, see some of the world's best Nikon photography, N-Photo is the title for you. View Deal

