DxO PhotoLab 7 review

The newly released PhotoLab 7 is the latest incarnation of DxO’s powerful digital asset manager and photo editor. Like most Digital Asset Management (DAM) apps (see our buying guide) PhotoLab 7 enables you to organize your digital images by assigning color labels, ratings, and keywords to them that you can filter through later to find specific files more quickly.
You can also pick or reject shots in a click. You can even filter files via information in their metadata, such as choosing to display images according to their ISO speed which helps you find the ‘noisiest’ photos to fix for example (and PhotoLab7 is particularly good at smoothing out noise while preserving detail).
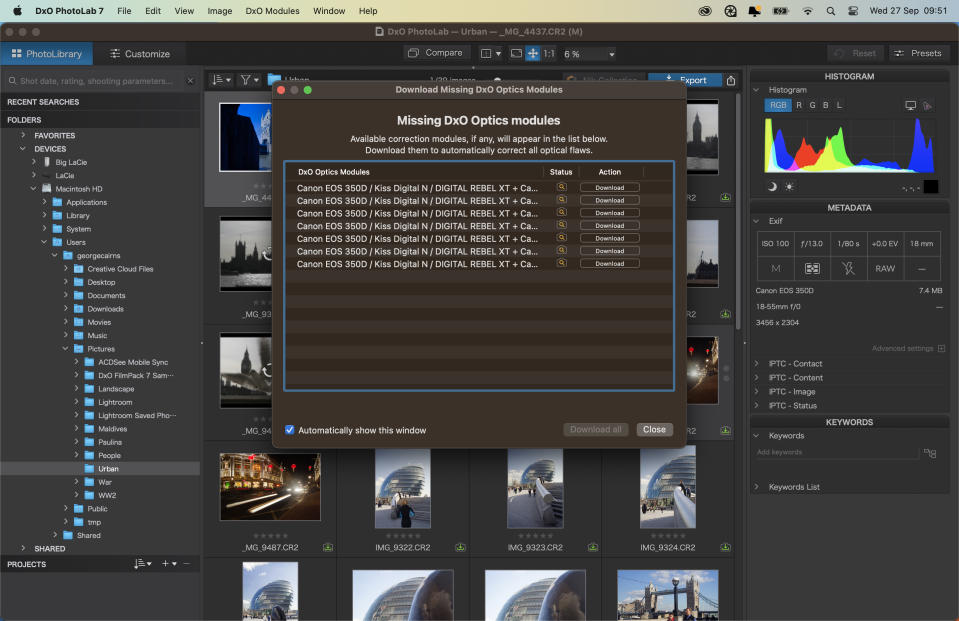
PhotoLab7 is packed full of powerful digital darkroom tools. It uses a comprehensive collection of optics modules to quickly and effectively counteract lens artifacts such as distortion, vignetting, and chromatic aberration (color fringing). These optic modules are particularly useful if you’ve been shooting in RAW formats for years because thanks to the ongoing advancement in AI you can give decades-old RAW files a new lease of life as we’ll explain in this review.
DxO PhotoLab 7: Specifications
DxO PhotoLab 7: Key Features
A key feature that’s on top of the PhotoLab 7 features list is optics modules. Basically, these are thousands of camera and lens profiles that can counteract common artifacts such as barreling or pin cushioning lens distortion automatically. If you open an old Raw file in PhotoLab 7 you’ll automatically be invited to download the appropriate optics module for that photo’s specific camera and lens set-up.
Another powerful key feature is denoising. Thanks to being exposed to huge libraries of images PhotoLab 7’s AI-powered noise reduction tools can smooth out high ISO-induced luminance and chrominance noise very effectively. If you’ve used Lightroom Classic to reduce noise on a decade-old shot try working on the same image in PhotoLab 7. You’ll create a smoother noise-free shot while revealing more detail than you could in Lightroom Classic.
This will encourage you to use PhotoLab 7 to re-visit and re-process old favorites and see them in a new way. Whatever old camera/lens combination you used to snap a Raw shot it should have a downloadable optics module.
However, I must point out now (before you get too excited) that as with its previous incarnations, PhotoLab 7 doesn’t support .dng files captured on an iPhone Pro. These days I shoot exclusively on an iPhone 15 Pro Max and mostly in Raw, so my new Raw .dng images tend to go through Lightroom or Lightroom Classic. However, I can still enjoy processing old Canon.CR2 and Nikon.NEF files in PhotoLab 7 due to the extra power of its Raw editing tools.
Another key feature is an automatically installed plug-in that enables you to export edited files from PhotoLab 7 to Lightroom Classic, so you can apply the superior Raw processing tools in PhotoLab 7 while finishing your edit in Lightroom Classic if you desire.
DxO PhotoLab 7: Interface & Usability
Like Adobe Lightroom Classic you use PhotoLab 7 to browse photos that are stored in folders on your PC (or on an attached external hard drive). This means you don’t create extra space-hogging files by importing them into the app.
PhotoLab 7 has a clean grey and black interface that looks familiar to contemporary DAM and digital darkroom apps such as Lightroom. The interface is organized into two main tabbed workspaces. PhotoLibrary is where you browse images and organize them using classic DAM tools such as ratings, color labels, and keywords.
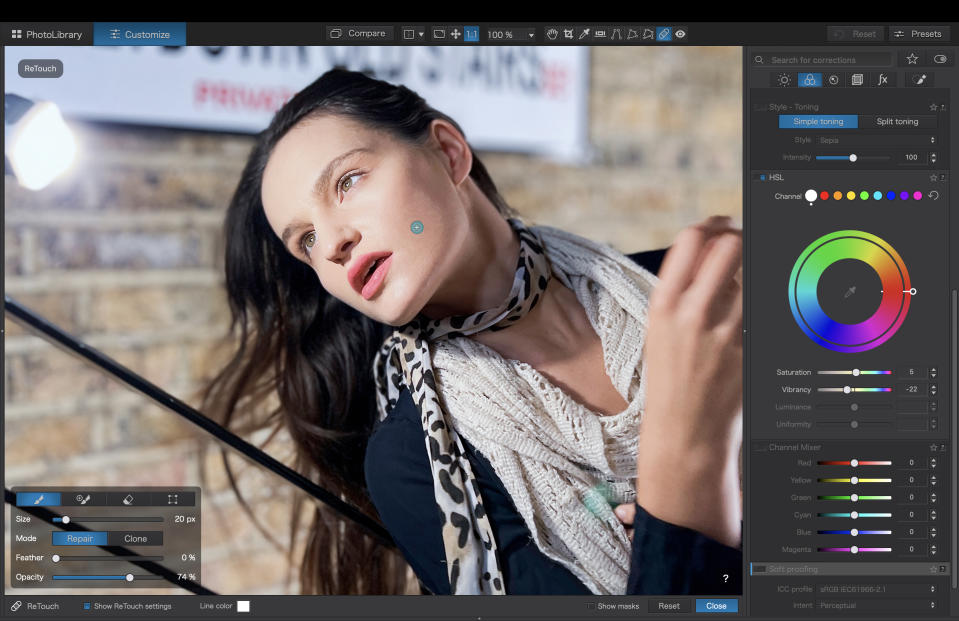
Click on the Customise tab and you have access to a suite of photo fixing tools to help you perform a range of darkroom techniques such as removing noise artifacts, correcting color, and retouching a model to remove spots and blemishes. Popular tools such as the Healing brush can be quickly accessed using a toolbar at the top and you can swipe a slider to compare your edited image with the original.
Other tools are accessible in a panel on the right and this changes content by clicking on icons for Light, Color, Detail, Geometry, and Local Adjustments. What makes PhotoLab 7 really useful is the handy help boxes that pop up when you roll over a panel or tool icon. You can click on these for more information on using a particular tool.
DxO PhotoLab 7: Results
PhotoLab7 continues to excel when it comes to using its AI DeepPrime tools to smooth out noise in old RAW files while revealing details that you’d not be able to see using Lightroom Classic’s tools. This will encourage you to re-visit decades-old favorites and reprocess them to make them look better than they’ve ever looked.
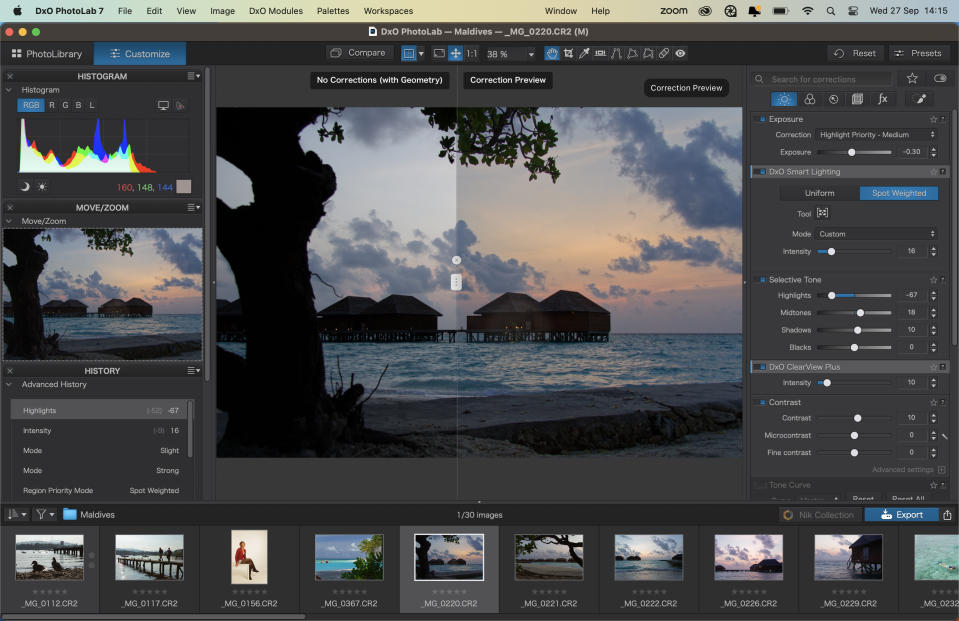
Selective adjustment tools are now easier to access thanks to a dedicated local adjustments palette. Here you can use the Graduated Filter to darken over-exposed skies without under-exposing a landscape or deploy the U-point tool to sample and adjust a specific area’s colours and tones.
The Luminosity Mask tool lets you sample a specific tonal range (such as shadows) and then selectively adjust the exposure of the sampled tones throughout the image.
The Smart Lighting panel helps you reveal missing tonal detail, especially thanks to the Spot Weighted tool which lets you define the areas to prioritize in relation to exposure. This enables you to overcome camera setting mistakes you may have made when shooting the image on location (such as using an inappropriate metering mode).
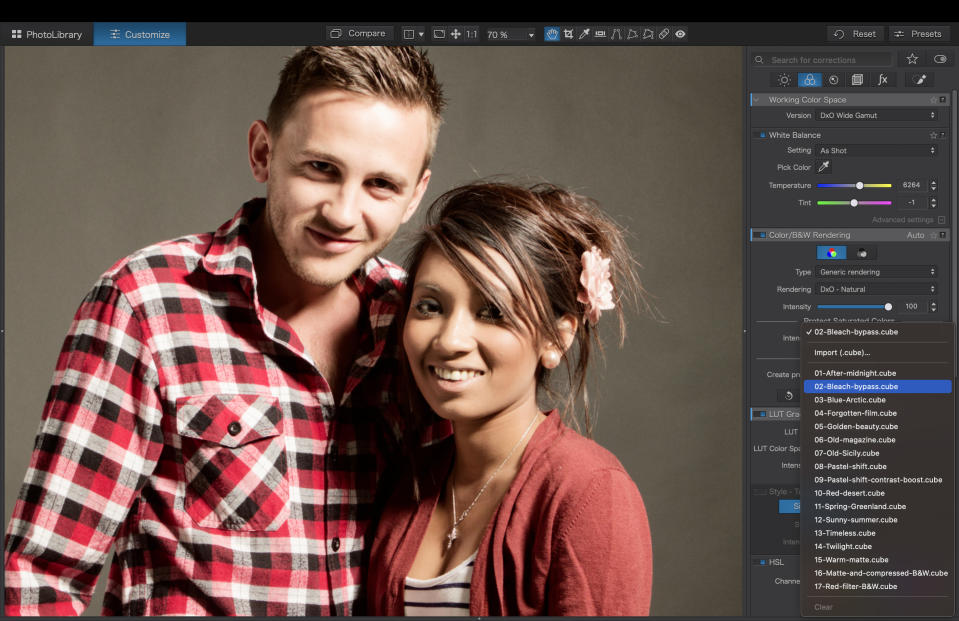
As well as ‘fixing’ problems with color, tone, noise, and composition PhotoLab7 provides plenty of ways to produce creative looks. 17 new LUTs (Lookup Tables) provide a range of creative cinematic looks including Bleach Bypass. This LUT simulates a film-developing technique that blows out highlights and crushes the shadows to detail-free black - a look that was popular in the late 90’s to early Noughties (see the movie Pitch Black for an example).
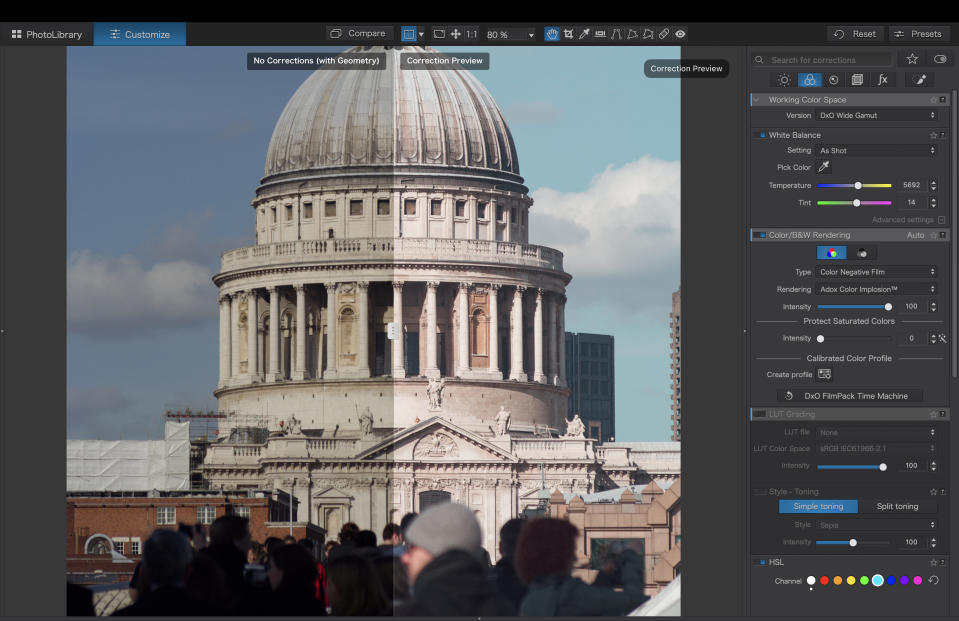
For a retro look, you can access a wide collection of film emulator effects by browsing through categories such as Color Negative or Color Positive film. For more creative looks it’s worth considering DxO’s newly released FilmPack 7 (review to come).
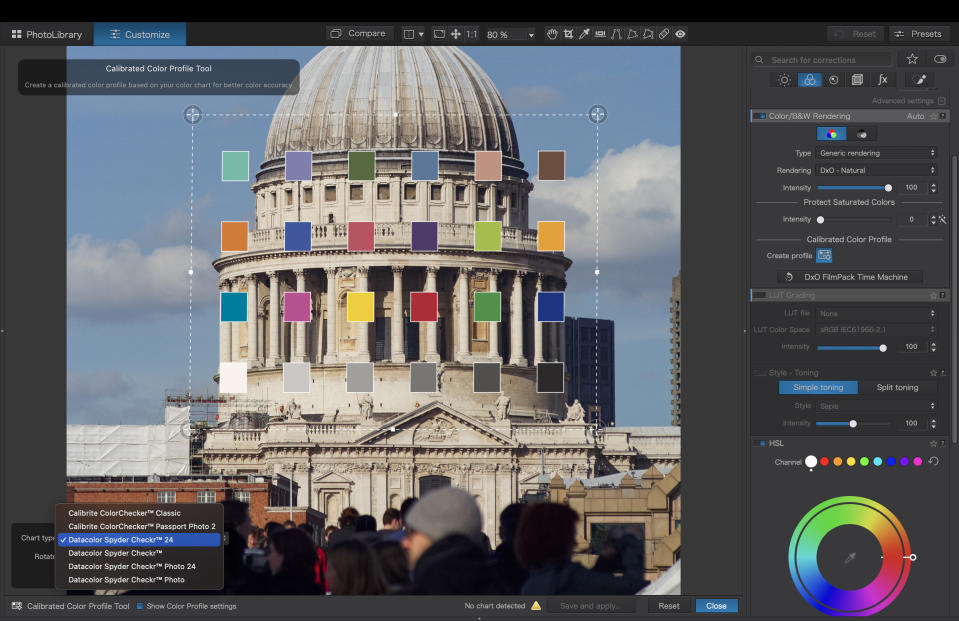
Another area in which PhotoLab7 excels is in color management. The new DxO Wide Gamut color space is a combination of the popular Adobe RGB color space and the wider Display P3 color space used on newer Apple devices.
This ensures you can display (and therefore work with) more color information than in earlier versions of PhotoLab. If black and white is your thing then you’ll enjoy using the new 6 Channel Mixer tool to selectively lighten or darken tones in a mini conversion based on the original color in the shot.
DxO PhotoLab 7: Verdict
If you shoot in RAW then PhotoLab 7 is well worth considering, especially due to its DeepPrime-powered denoising tool. This does an amazing job of smoothing out color and luminance noise while keeping delicate details looking nice and sharp. As well as photo fixing you can enjoy emulating a wide range of classic film stocks to give your Raw files a creative makeover.
My only gripe is the lack of support given to iPhone Pro sourced .DNG files, but at least I have thousands of compatible Canon Raw files waiting to enjoy a trip through PhotoLab 7’s amazing DeepPrime denoising and optical module correction process.
Read more: check out our top choices for the best photo editing software.

