How to draw a dramatic figure in Procreate

I’ve spent most of my life as a traditional artist, working with techniques that range from fine arts to various printing techniques. Moving into digital art was a huge step for me, mostly because using a tablet gives you a different experience compared to pencils and paper.
When I first discovered Procreate I was stunned by the idea of having a portable device that enabled me to paint digitally. Over the years Procreate has transformed from a great drawing app to a professional tool. Nowadays, I do most of my work in Procreate, using an iPad Pro and Apple Pencil. Yet there are a few things I still do in Photoshop, such as cropping, resizing and preparing the image for publishing.
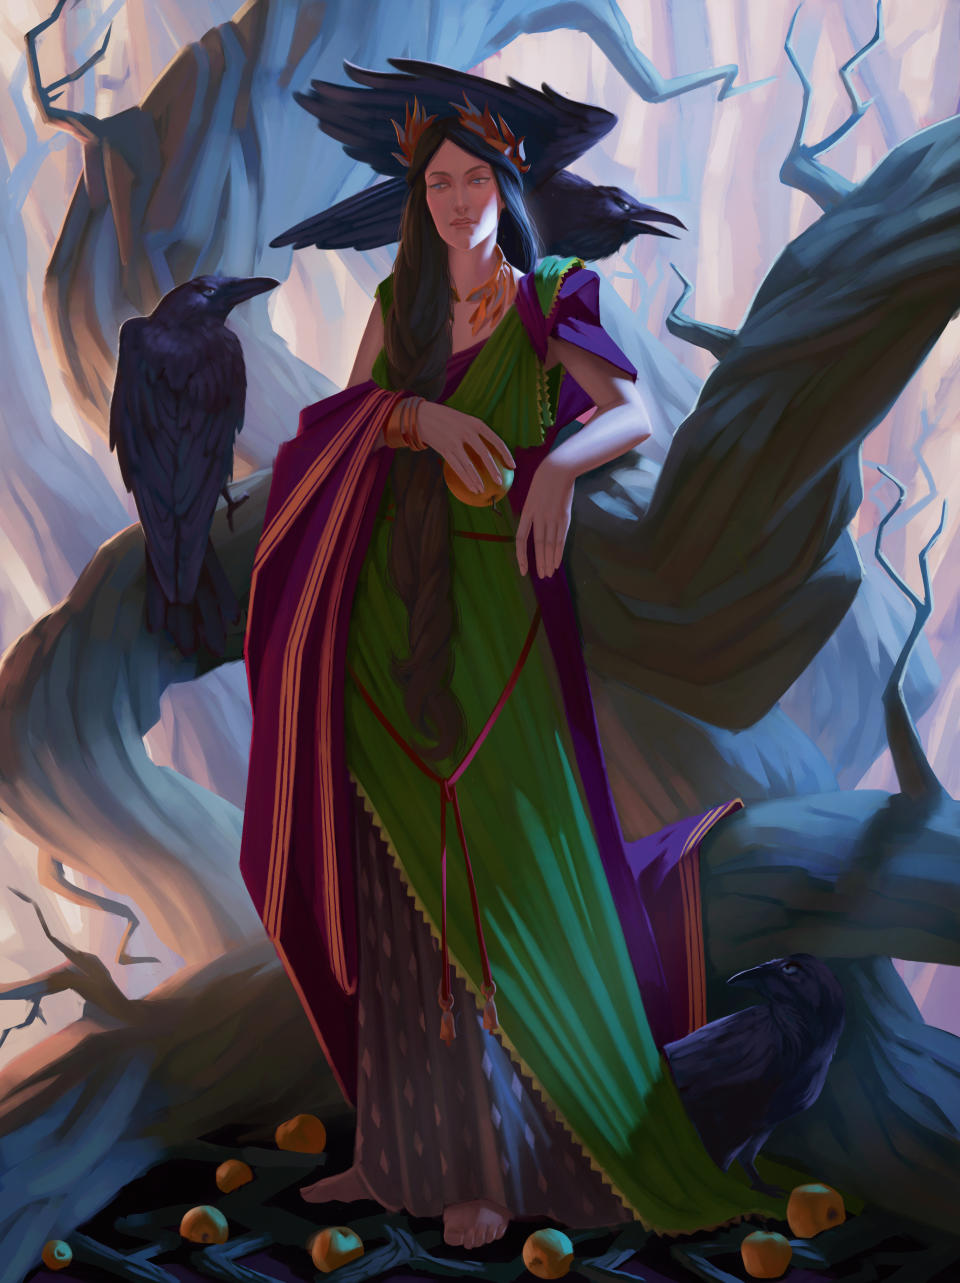
In this workshop, I’ll be drawing a Roman-inspired woman in her garden accompanied by three ravens. I’ll show you the full process of how I produce paintings using an iPad and Procreate. I believe this workshop will be of interest for people who have moved from traditional to digital art, but also for those artists who are keen to see what can you achieve using modern tablets.
If you like this tutorial and want to learn more, read some of our other Procreate training; learn how Procreate can help you master colour and light, use Procreate to create a fantasy character, and discover how to use Procreate to analyse master artworks.
Procreate tutorial: my brushes
These are the Procreate brushes we will be predominantly using for this workshop.
Default brushes: Niko Rull
Default brushes: Niko Rull Wet Mix

I use these brushes most of the time. The first is a default Procreate brush; the second is the same brush with Wet Mix – a feature introduced in Procreate version 4 – turned on.
Procreate tutorial: draw a dramatic figure
If you want to learn more about Procreate, read the full Procreate review where we put the software through its paces. I hope you get a lot out of this tutorial – you can scroll to the bottom of the page to see the final finished piece.
01. Sketching an idea
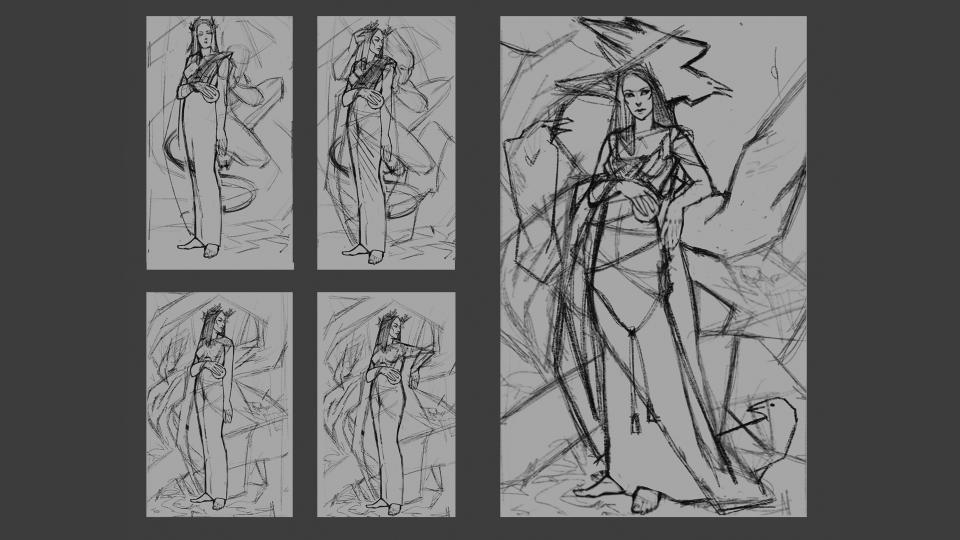
(Image: © Tatiana Svistunova)
I create a few rough sketches, trying out different ideas, compositions and poses of the character. Once I produce a sketch I’m happy with, I set up a new canvas filled with medium-dark grey and copy the sketch on to it. Then I resize it slightly to ensure that the proportions work better on the canvas.
02. Putting in the solid lines
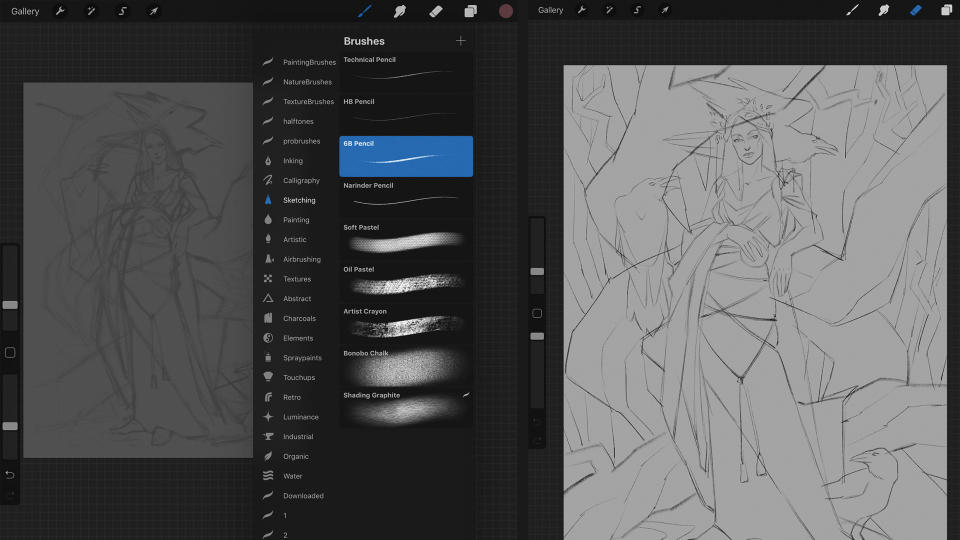
(Image: © Tatiana Svistunova)
I start the painting by drawing solid lines on top of the chosen sketch. Then I create a new layer and draw the outlines using a standard Procreate 6B pencil brush. I don’t think about any details – I’m only drawing on the character and main objects in the painting.
03. Introducing a local colour
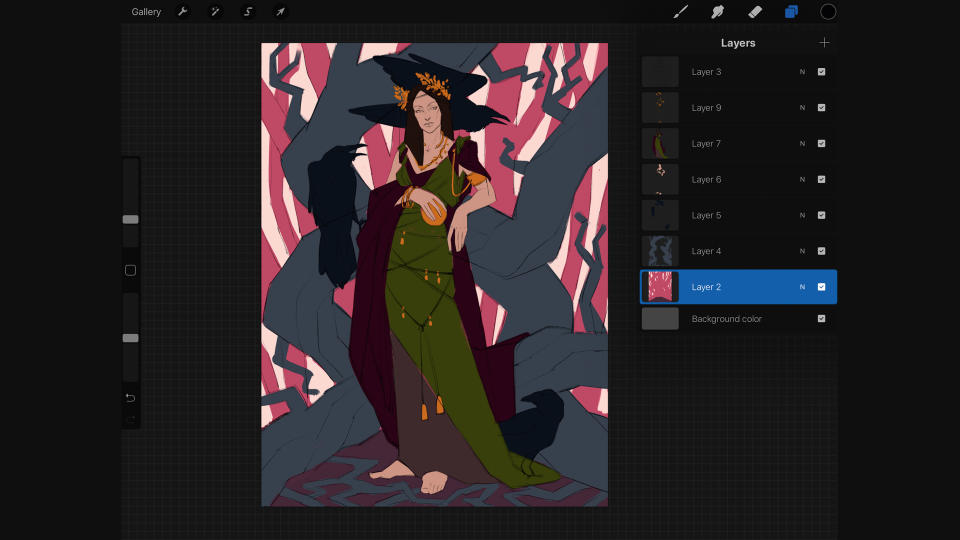
(Image: © Tatiana Svistunova)
I want to apply local colour – the real colour of objects not affected by lighting or shadows. Having a local colour will help me to correctly apply light and shadows later on, while retaining my intended colour of all objects. I create a new layer for each group of objects (main character, ravens, tree and the background) and add colour in each layer.
04. Setting up a Wet Mix
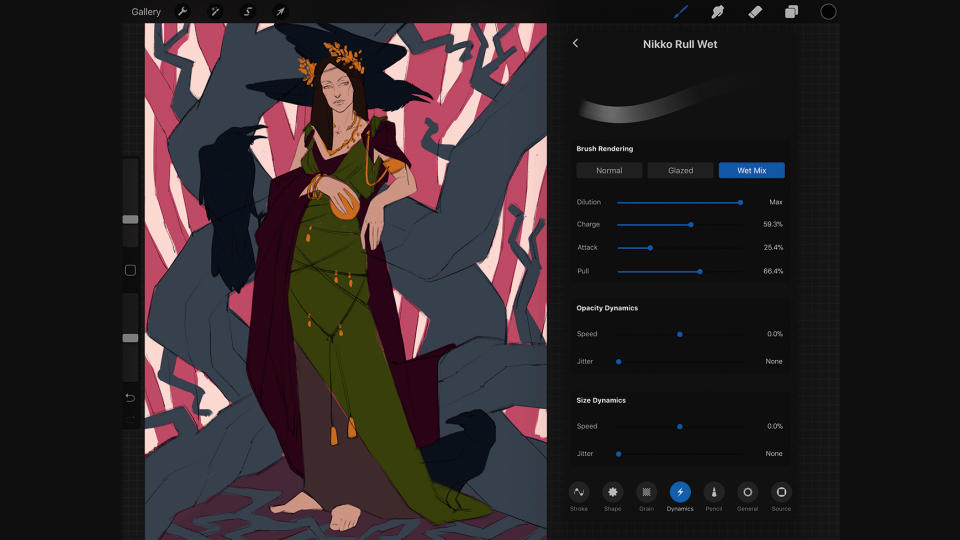
(Image: © Tatiana Svistunova)
Most of the time, I only use two or three brushes. A feature that was introduced back in Procreate 4 is Wet Mix, which makes any brush look like it was used on a real wet painting. I think that using it will make the painting look soft and more realistic, especially in the background. To enable Wet Mix I tap on the brush and in the Settings menu select Dynamics and Wet Mix.
05. Harnessing light and shadows
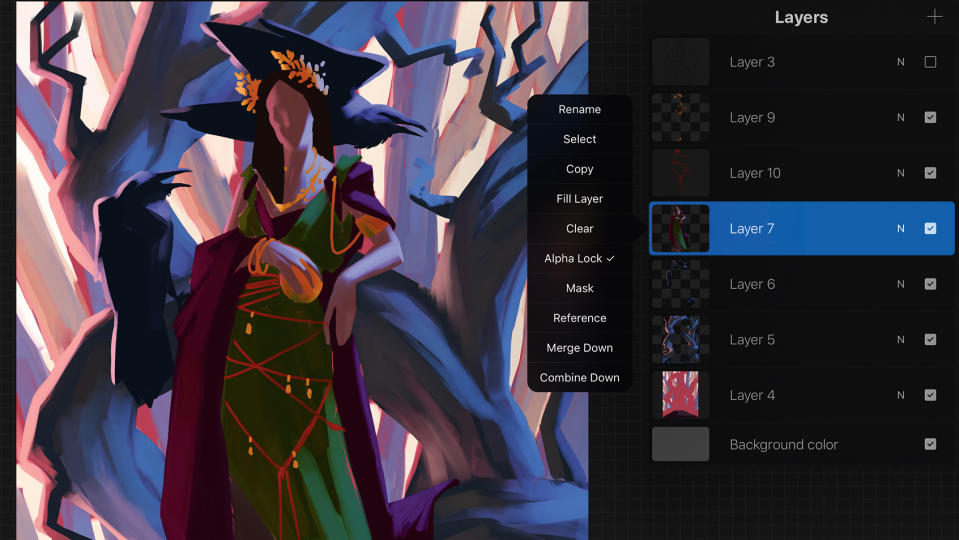
(Image: © Tatiana Svistunova)
I want to have two light sources: a cold blue as the main light and warm light as a secondary. This will help me to show off the shape and structure of all my objects. I enable alpha lock on each of layers that I’ve painted a local colour on, then start quickly drawing the light and shadows without too many details. Using alpha lock prevents me from drawing outside of the layer’s content.
06. Learning to spot anatomy mistakes
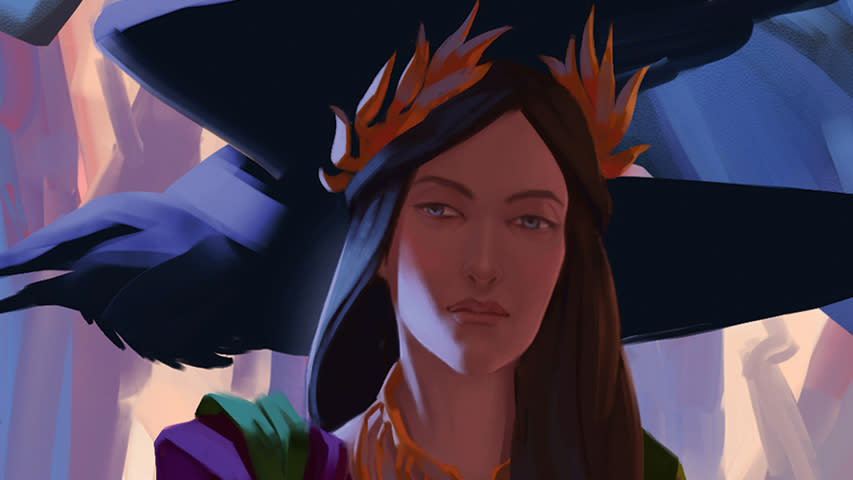
(Image: © Tatiana Svistunova)
I move on to the main character and start drawing her face and clothes. I mirror the picture so that I can control the proportions of her face and correct any early anatomy mistakes. Always try to take advantage of your digital art tools. For example, instead of drawing the character’s second eye from scratch, I just copy the first one and use it as a base.
07. Adding a pattern to the character’s clothes
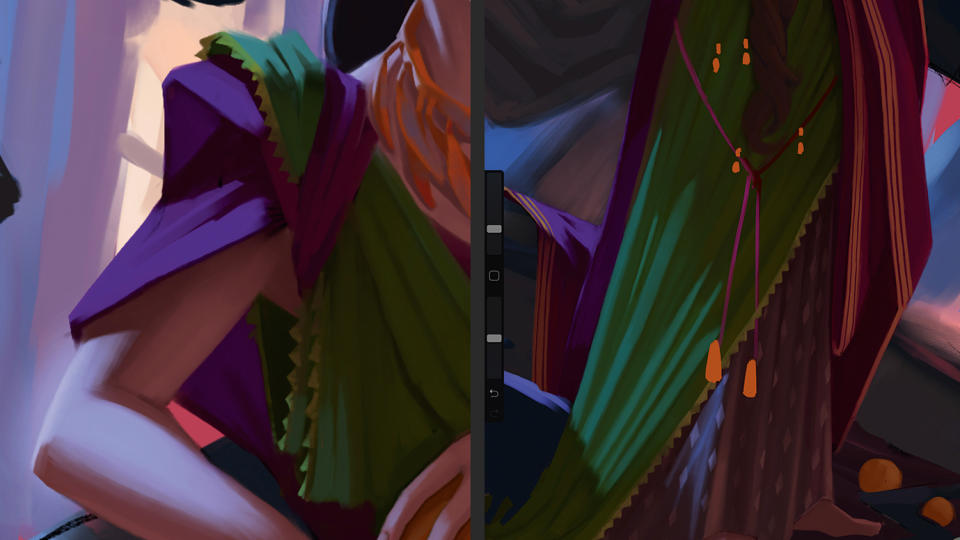
(Image: © Tatiana Svistunova)
I create a new layer and start drawing the pattern without light and shadows. After I’m happy with the pattern’s look, I tap on the layer, choose Select and create a new layer with the selection preserved. Now I start to paint over the selection, bearing in mind light and shadow. When working with the patterns, you should always keep in mind that a pattern will follow all folds and creases on the fabric.
08. Moving on to the ravens
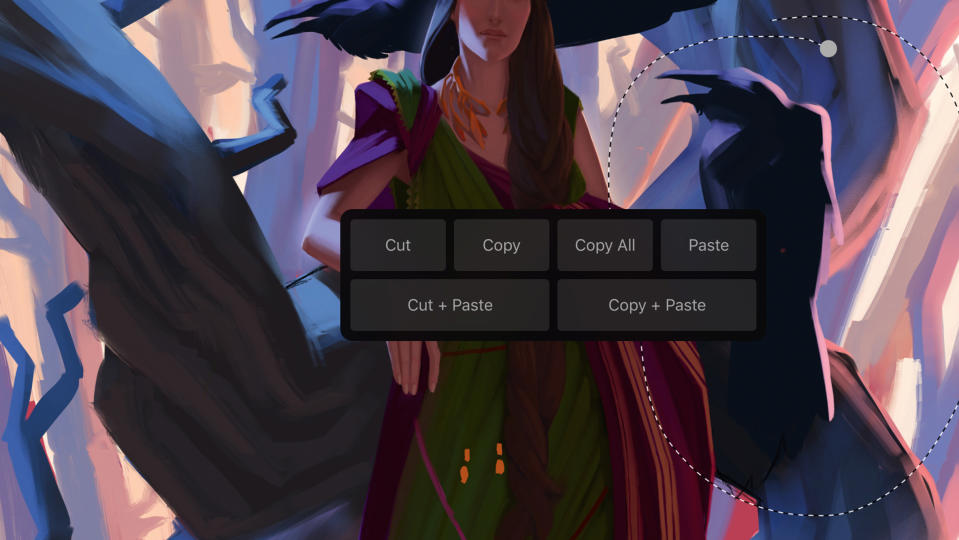
(Image: © Tatiana Svistunova)
All three ravens are on the same layer, so I need to move each one on to separate layers. I select them using the Selection Tool, open the Transformation toolbar, and cut and paste the selection to a new layer. I move and resize them until I’m happy with the composition.
09. Making use of raven references
(Image: © Tatiana Svistunova)
I assemble some raven reference photos into a single image, open the reference board image in Photos and keep it open using the iPad’s Slide Over mode. Previously, you could only put a secondary app on the right-hand side, which was uncomfortable for right-handed users. iOS 11 enables you to rearrange the position of the secondary app.
10. Adjusting curves
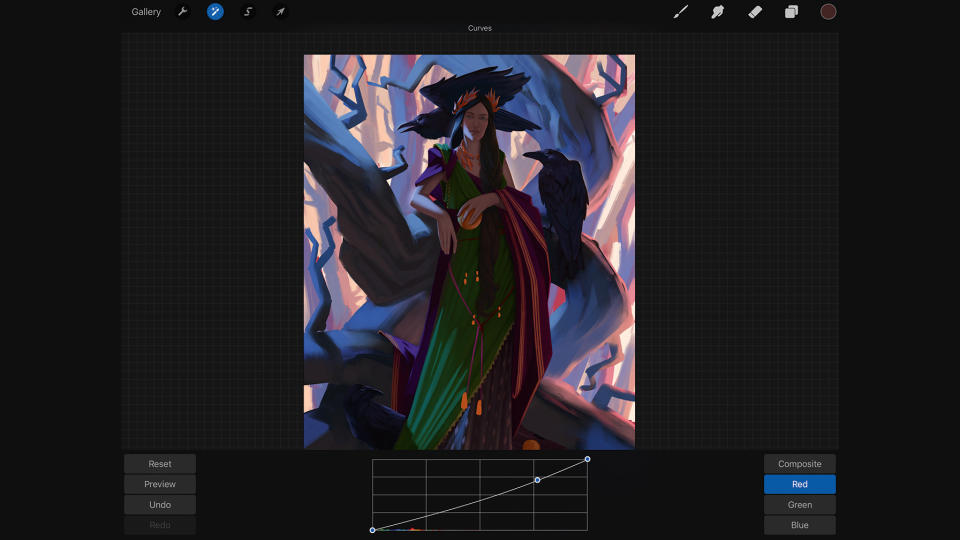
(Image: © Tatiana Svistunova)
I zoom out of the picture to check I’m happy with the progress I’ve made. I think that the main character is too bright for this type of lighting and her skin tone is too pink. I tap a Magic Wand icon on the top-left corner of the screen and choose Curves. I select Red channel and slide the curve down to reduce the red.
11. Developing background depth

(Image: © Tatiana Svistunova)
The background is a forest in the golden light with no sharp edges but only a silhouettes of trees. I think it’s the perfect part of the painting to use the new wet brushes. First I draw the background. Then I add a few branches between the background and the main tree to create a mid-ground and give the image even more depth. I use lighter values for the mid-ground to show the distance.
12. Rendering the tree
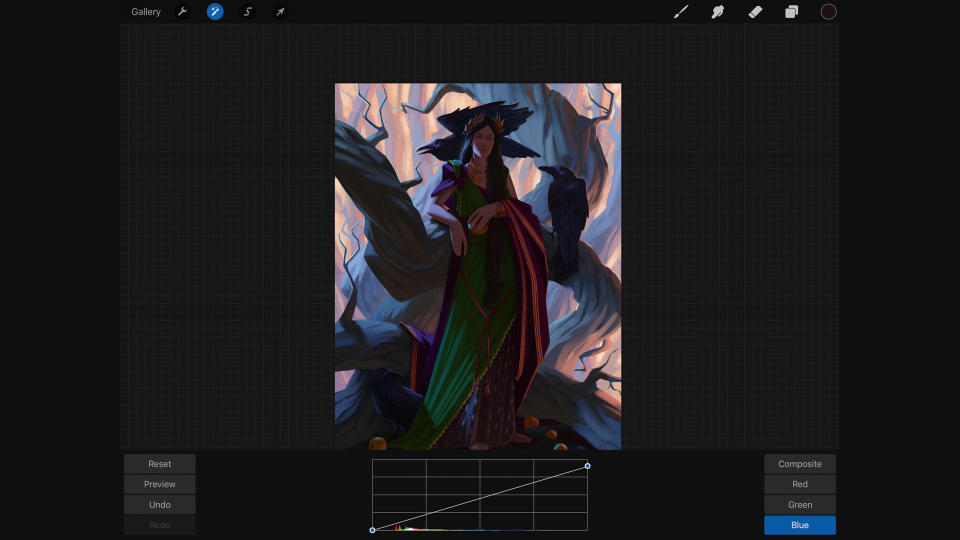
(Image: © Tatiana Svistunova)
The last part of the illustration is the tree that the main character leans on. After rendering the tree, I feel that it looks too cold compared to other objects in the scene, so I duplicate the layer with the tree and reduce the blue colour cast using Curves. The tree trunks in the midground should be lighter than the main tree, so I remove all changes made to mid-ground trees from this layer.
13. Finishing with the lighting
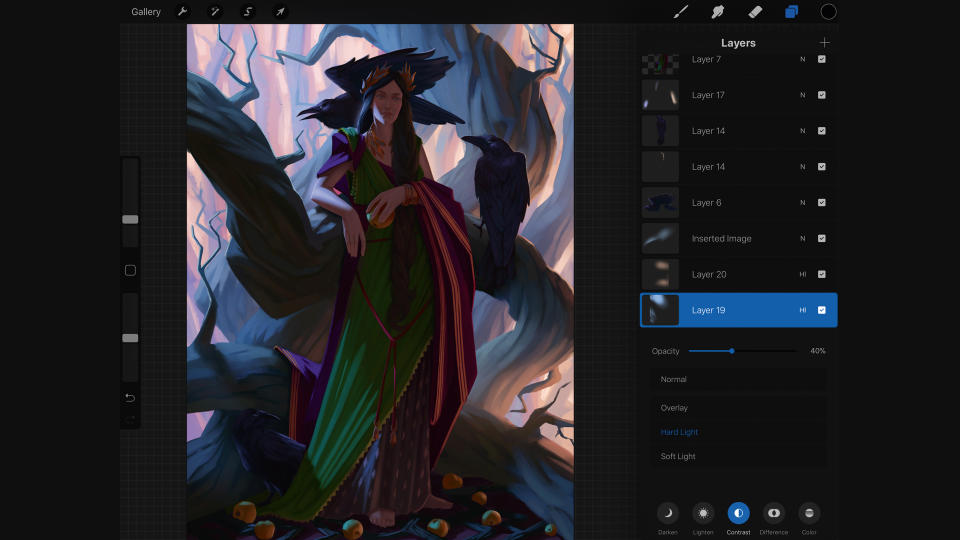
(Image: © Tatiana Svistunova)
Now I want to make the light more intense. I create two layers and switching them to use Hard Light mode by tapping the “N” character near the right-hand side of the layer, then choose Contrast. Using a soft Airbrush I add a few rays of light. I then lower the opacity of these two layers to enhance the realism.
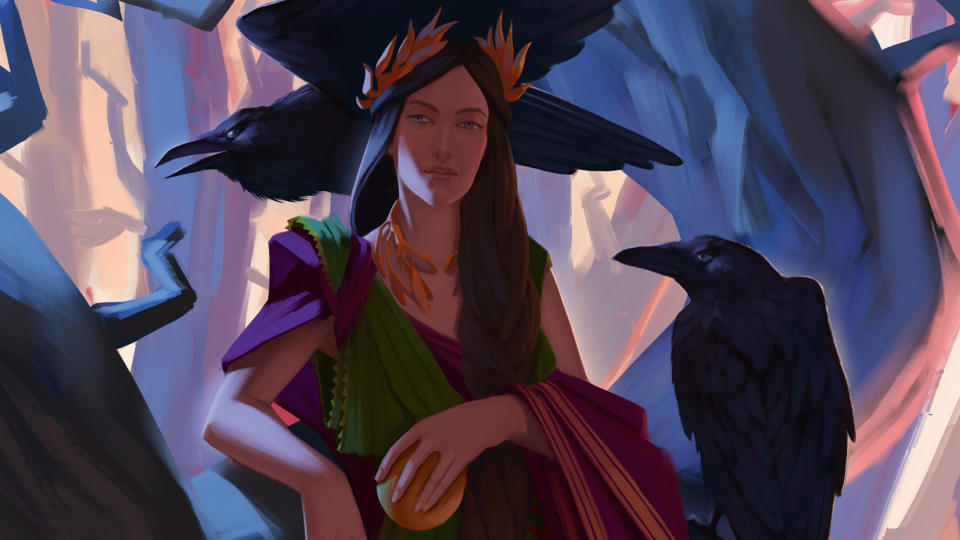
14. Adding final details
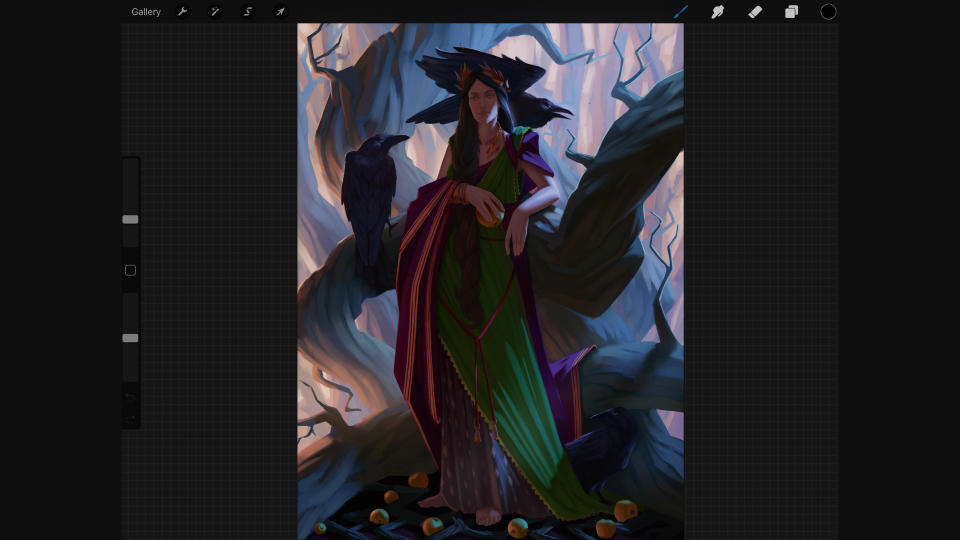
(Image: © Tatiana Svistunova)
After I’ve finished my painting, I leave it for a few hours before I add any final touches. This helps me to look at it with fresh eyes. It’s even better to come back to it the following day. I decide to add a few strokes to the main character’s tiara, bring in more details on the tree and make the background a little bit less saturated and bright.
Procreate tutorial: pro tips
Here are some key tips to keep in mind when you're working in Procreate.
How to spot mistakes
Flip your canvas (click Adjustments > Canvas > Flip Canvas Horizontally) to highlight anatomy or perspective mistakes early on. It’s even simpler to do if you’re working traditionally – just put a mirror in front of your work-in-progress.
Keep your references handy
It’s handy that Procreate enables you to create reference boards in the same app that you use for drawing. However, you can also open a web browser in the iPad’s Split View mode and drag and drop images from the browser on to your Procreate canvas. You can also use this when drawing patterns or matte painting.
Learn to control your tonal values
Sometimes it becomes difficult to choose the correct tones of colours, so consider tonal values instead. Create a new layer filled with black and place it at the top. Tap on the “N” letter next to the name of the layer and choose Color mode. Now you can simply display and hide this layer to see tonal values in your image.
Get more Procreate tutorials in ImagineFX
This content originally appeared in ImagineFX magazine, the world's leading digital art and fantasy art magazine. ImagineFX is on sale in the UK, Europe, United States, Canada, Australia and more. Limited numbers of ImagineFX print editions are available for delivery from our online store (the shipping costs are included in all prices)
Alternatively, you can access us instantly through our digital options:
• Apple app (for iPad or iPhone)
• Pocket mags (multi-platform app, great for Android users)
• Zinio (multi-platform app for desktop or smartphone)

