How to draw an anime character in Procreate
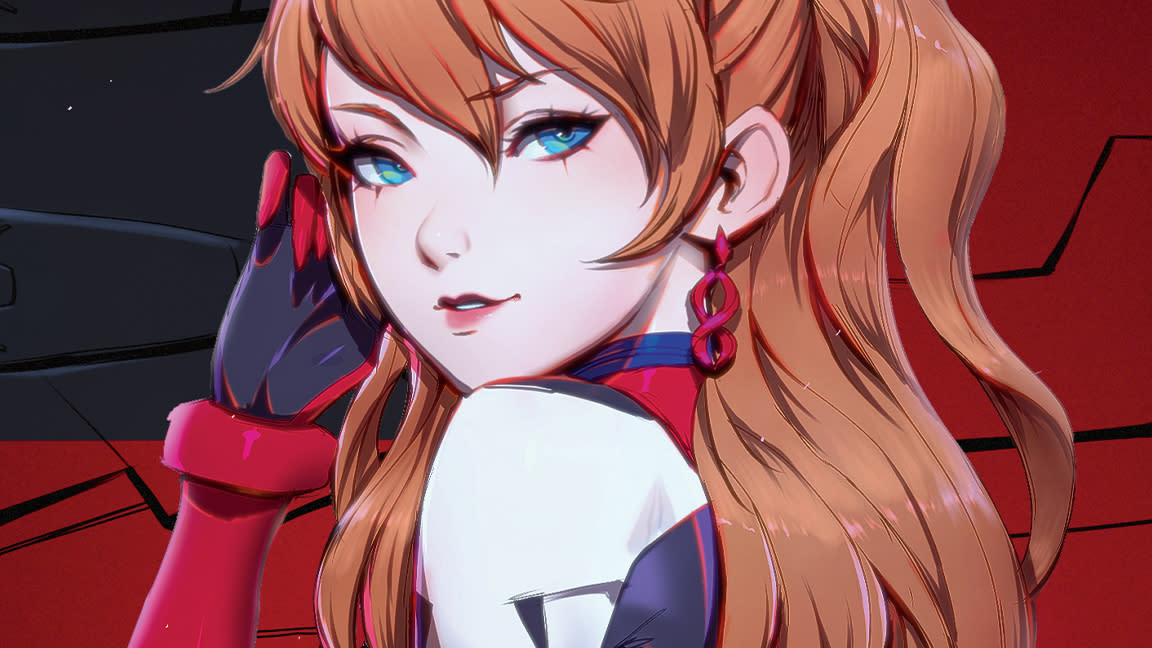
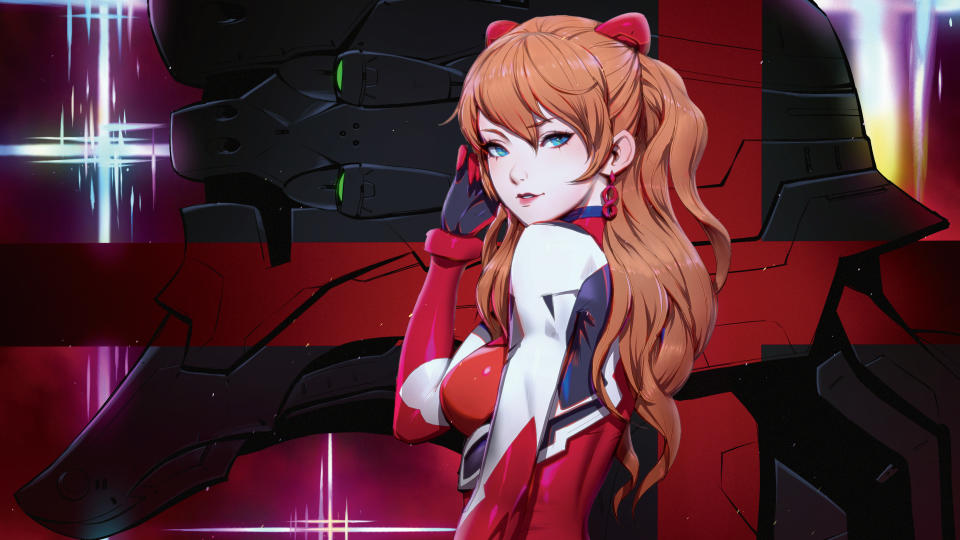
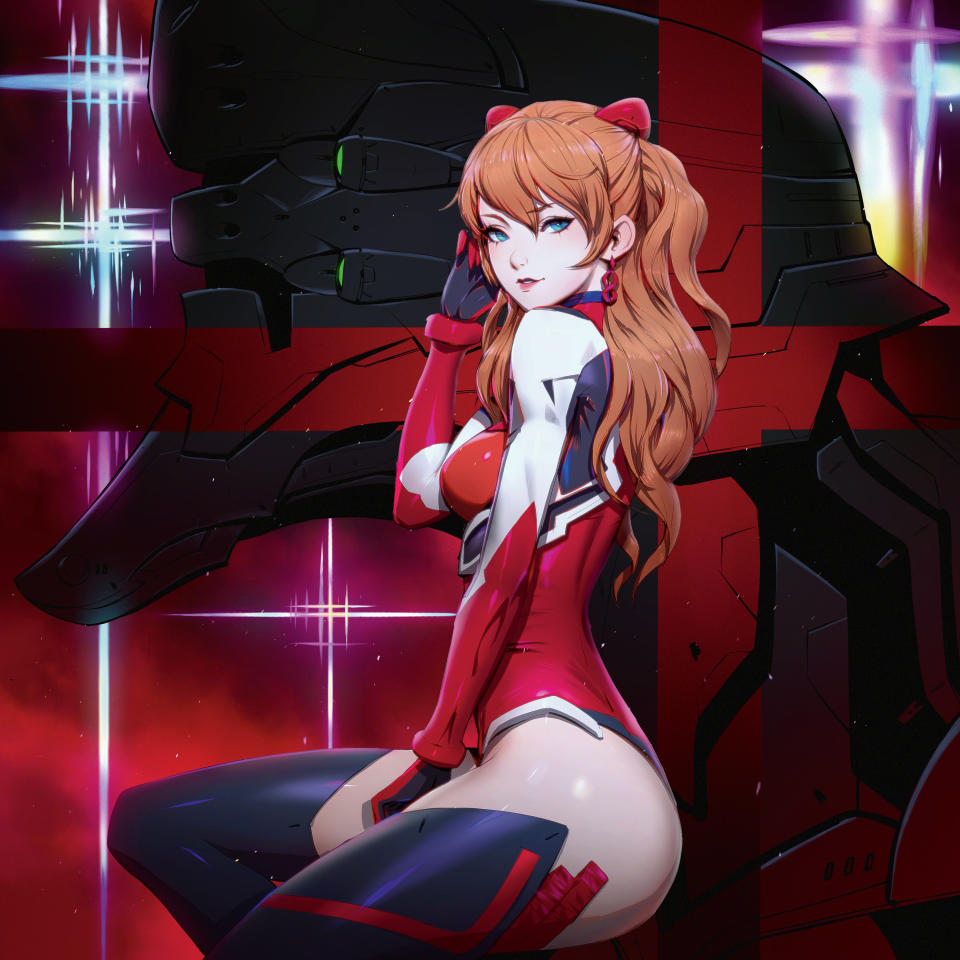
How to draw an anime character in Procreate is a question many new artists ask themselves, and here I'll share my process. For this Procreate tutorial, I'm subtly reinterpreting Asuka from the Neon Genesis Evangelion franchise, and give her a bit of an anime twist.
I'll be using Procreate on my iPad Pro – I love this creative combo! If you want to get a similar setup them read this site's guide to the best iPad for drawing, as well as the Apple Pencil 2 review to get an idea of how this works. Follow my advice below or scroll down for the final artwork.
In my spare time, I try to soak up trending visual references and expand my mental library as much as possible. From looking at amazing photographs to watching videos that tell compelling stories, to studying anime characters, mobile phone games, and of course browsing through amazing illustration and concept art online. After work, I wind down by painting fan art of characters that are either trending or are genuinely iconic in nature – which was the inspiration behind this tutorial!
Draw an anime character in Procreate: my brushes
These are the main brushes I'll be using as we recreate Evangelion's Asuka using Procreate for iPad.
Custom brushes: Brush Pen

I love this brush, especially without using the stylus. It creates the perfect sharp shape.
Technical Pen

I use the Technical Pen with the StreamLine setting at a mid-value for going over my lines.
Procreate tutorial: how to draw an anime character
It's time to get started! I hope you enjoy this tutorial; you can scroll down the page to see the finished result after the step-by-step. If you're new to Procreate and want to know more, check out the tutorial on 'How to use Procreate to create a detailed illustration'.
01. Keeping things light while sketching
(Image: © Paul Kwon)
To start I keep the Opacity of the default Round brush pretty light to help me see where I put down the brush strokes and how they will establish the direction of the whole image.
I try to imagine what the figure will look like before putting down any strokes. This is an important skill to learn and is something that I still struggle with. I believe that comic book or manga artists are trained to do this, so this is worth bearing in mind if this is your career goal.
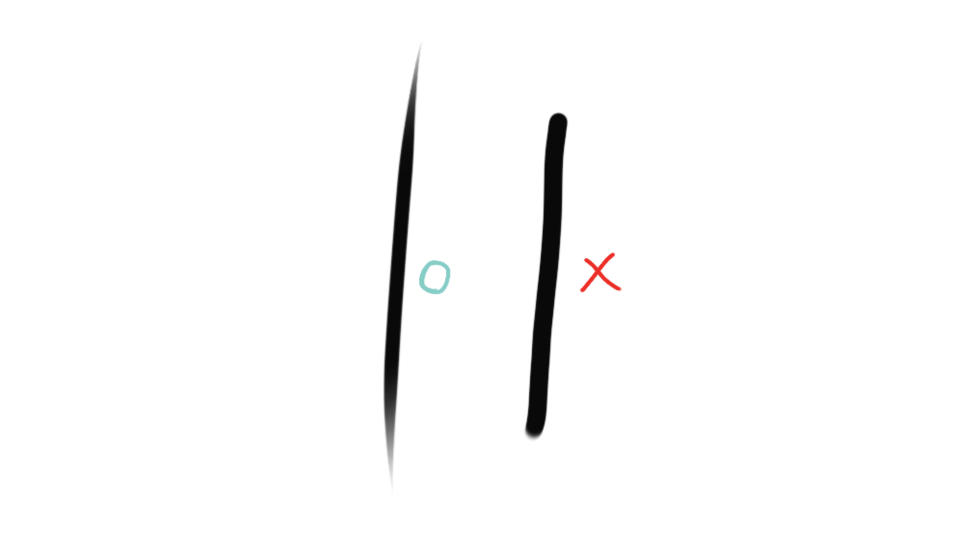
02. Using your finger
(Image: © Paul Kwon)
The stroke on the left is the result of using my finger with the default Round brush. Notice the varying shape of the stroke. The Streamline brush setting keeps the strokes clean and steady, much like using a lazy mouse setting.
Oddly, I can't replicate this stroke using the stylus with Pen Pressure active (right). It took time to work freely this way, but now it feels natural. I'll be using my finger to paint Asuka. (Experiment by creating your own Procreate custom brushes.)
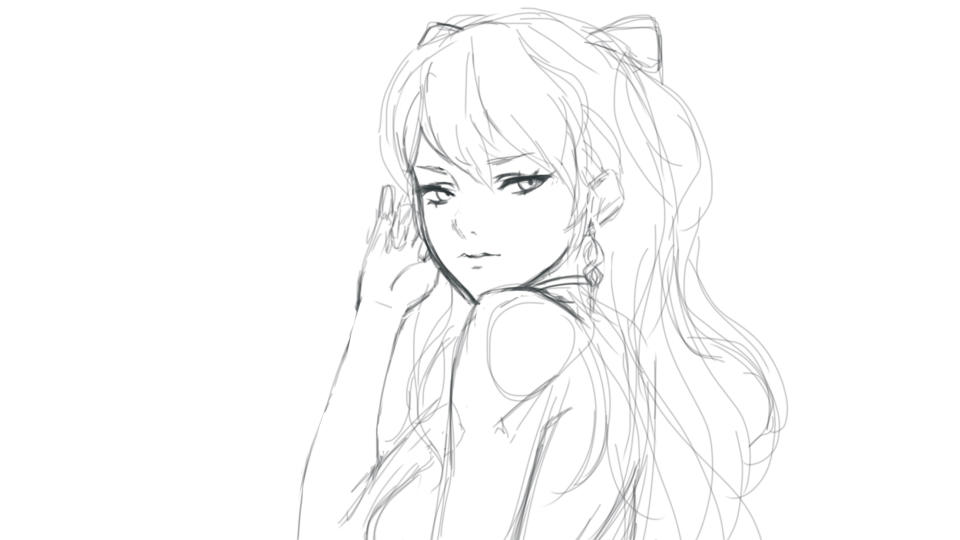
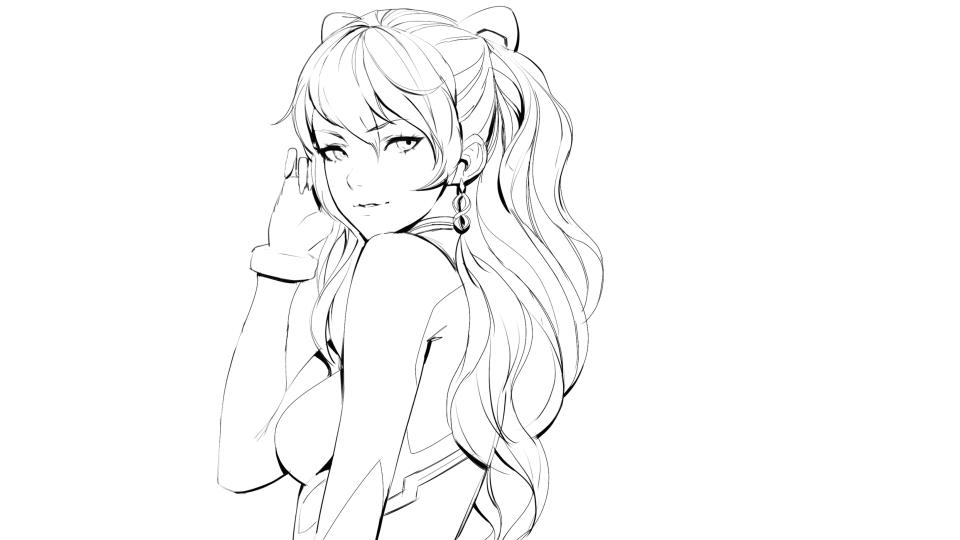
03. Cleaning line art
(Image: © Paul Kwon)
This is mid-way through the sketch process. In the dark bold lines and ambient occlusion areas you can see the effect of the Brush pen and its distinctive brush stroke.
I have to be careful about not adding too many stroke for the hair, otherwise it starts to look unnatural. I recommend regularly flipping the image during these early stages, looking for errors. It's easier to correct them now rather than later on in the painting process.
04. Masking techniques
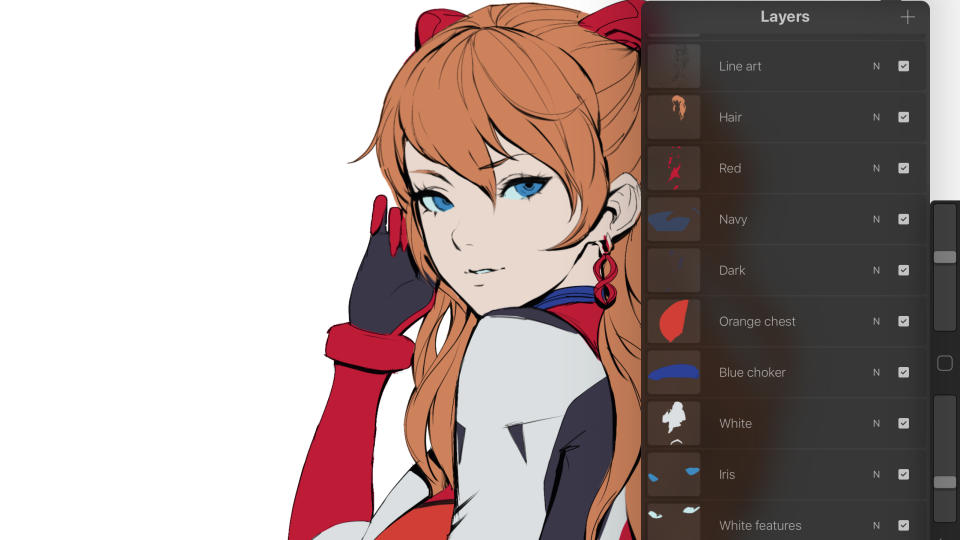
(Image: © Paul Kwon)
I use the Magic Wand equivalent tool in Procreate to select around the character, then I invert this selection to isolate the character. Next, I mask off specific parts of the character: her hair, suit, gloves, eyes and skin. This makes it possible to apply a consistent colouring technique to the image, and enables your unique painting style to come to the fore.
05. Customise the iPad workspace
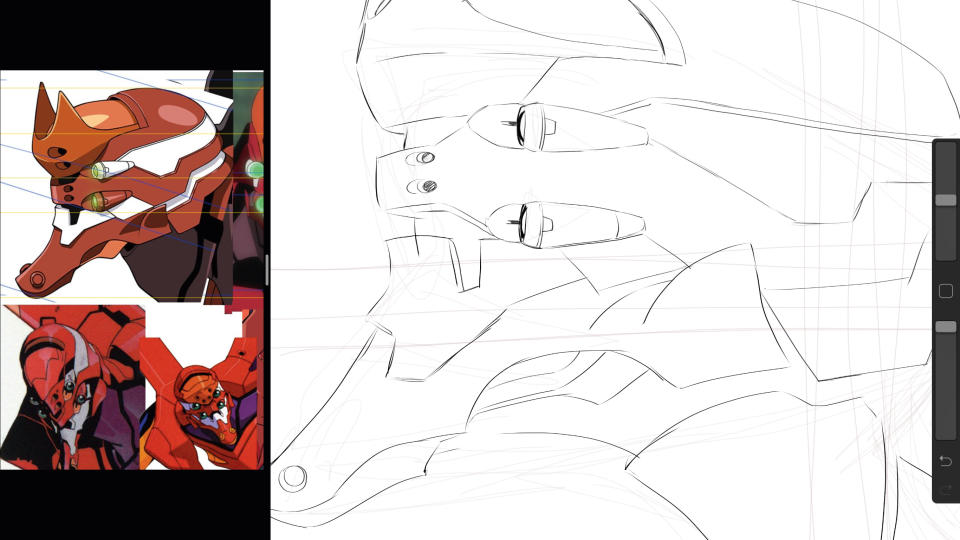
(Image: © Paul Kwon)
Here, I've split the screen to display reference material right next to the art work – pretty handy, eh? I have reference open at all times from artworks that I've saved on to my iPad and iPhone, or from Pinterest. I also have Netflix minimised in the corner for background noise or just for listening to music.
06. Starting on the background
(Image: © Paul Kwon)
I'm adding the Evangelion Unit in the background to create more visual interest and contrast. I roughly put down strokes to create its overall composition and look, before committing to clean line art. I think it’s good practice to work on the entire image at a steady pace.
07. Defining a simple yet powerful graphic shape
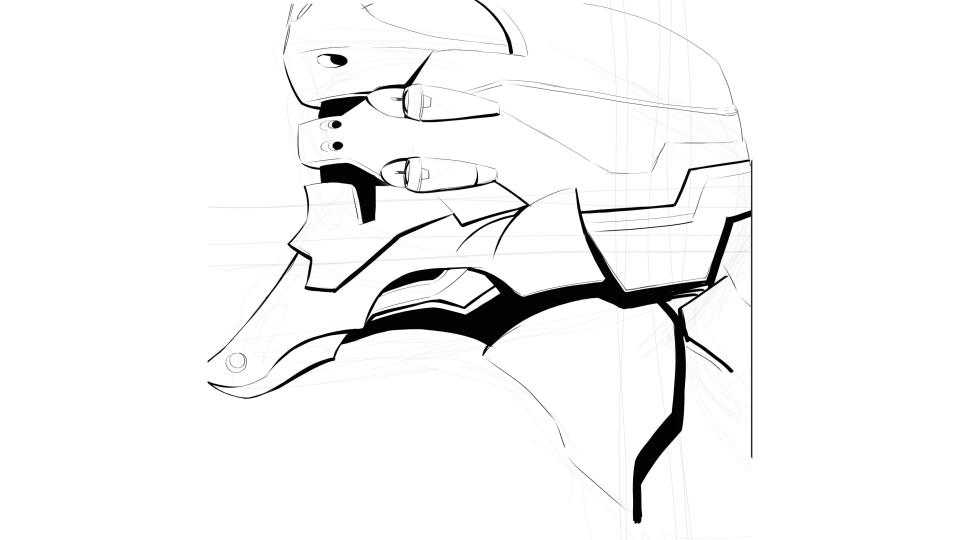
(Image: © Paul Kwon)
Using the same Brush pen, I'm focusing on making the Eva Unit's head clear and graphically engaging. This is because its purpose is to act as a tertiary element to keep the viewer within the scene.
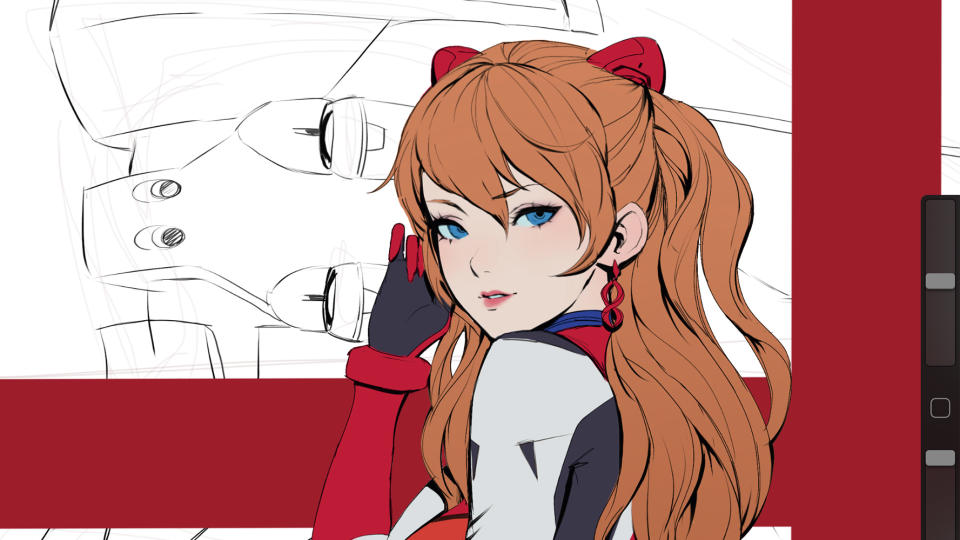
08. Accentuating the composition
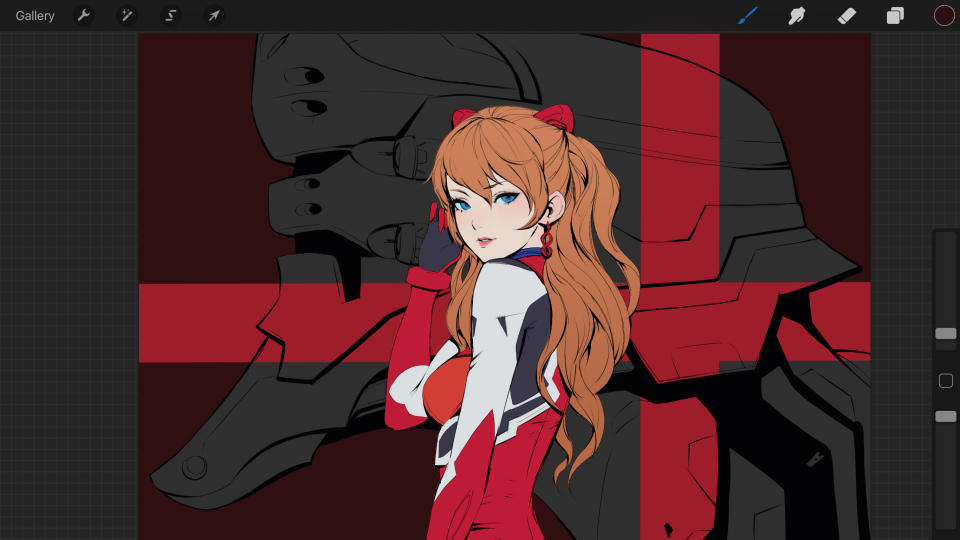
(Image: © Paul Kwon)
I'm exploring this composition approach, where the focal point is around the pilot's face and upper half of her body. The cross shape acts as the secondary interest behind the pilot, while Eva Unit becomes the tertiary background element blending gently into the red background.
09. Using a Multiply layer for shadows
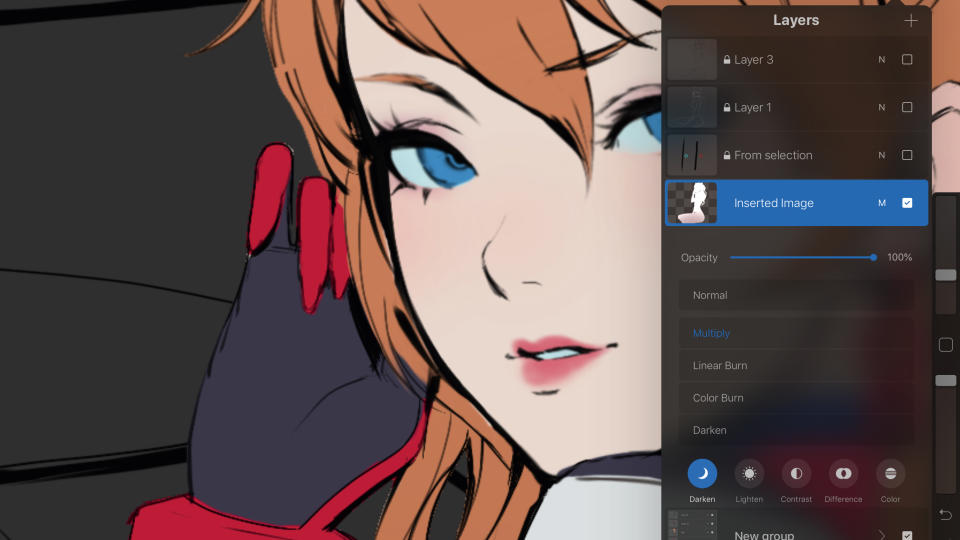
(Image: © Paul Kwon)
I place the original mask of the character above all the other layers and turn it to white. I swipe two fingers and flick the layer to the right, which layer masks it. I then change the layer type to Multiply. This enables me to add a subtle grey colour without it bleeding out of the character. This is a simple process that enables you to focus on one thing at a time and gradually build up consistent shadows.
10. Painting over my lines

(Image: © Paul Kwon)
After the shadows are painted over the character, I decide to experiment by adding some warm oranges over some lines, giving the character a stylised subsurface scattering appearance. This also enables me to blend the line art with the colours of the character. I'm happy with the results – it's good to try out new techniques!
11. An explosion of art
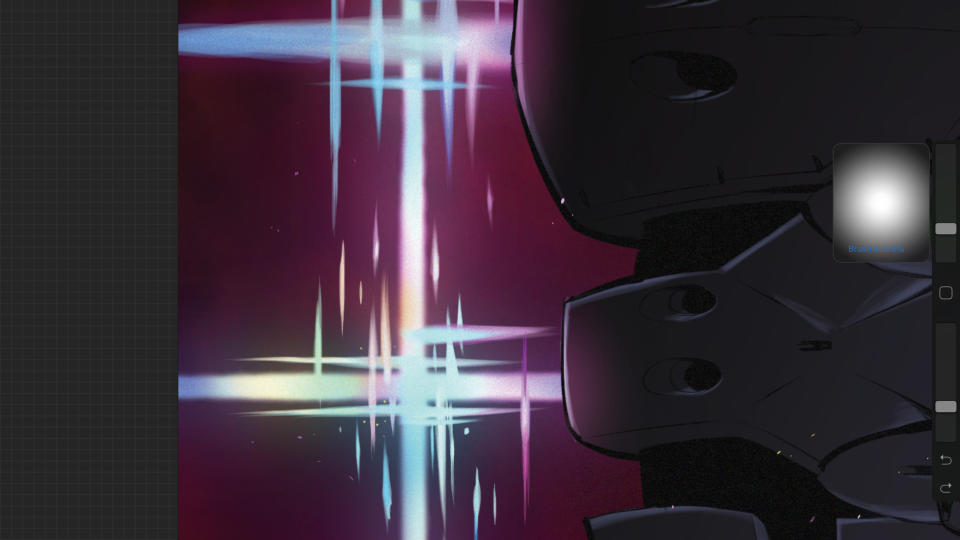
(Image: © Paul Kwon)
I add some explosion shapes, which I interpret and stylise in my own way. I want to emphasise the contrast here through shapes, size, value and colour.
12. Applying post-processing to the character
(Image: © Paul Kwon)
When the image is around 85% finished, I turn my attention to post-processing. I use blurring, sharpening, duplicating and merging techniques, experiment with many different types of layer and adjust the Opacity.
I don't want to overdo the processing. The idea is to harmonise the values and colours, and help the image have the correct balance and pop in the focal areas. I'm trying to make Asuka blend in with the rest of the image naturally.
13. Adding background details
(Image: © Paul Kwon)
I decide to add a little more subtle details on the red background by painting in some red cloud and smoke shapes using Procreate’s default Smoke brush. I also carefully apply the noise filter on many parts of the image to generate extra depth without it becoming a distraction.
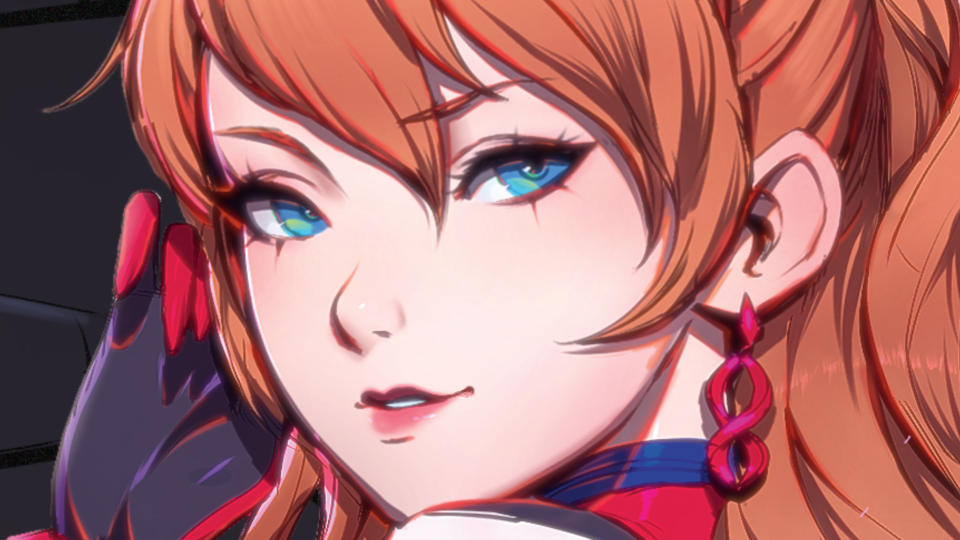
14. Running a final polish pass over the image
(Image: © Paul Kwon)
This is near final and I’m happy with how the painting's turned out. I add a lot of vignette steps to redirect the focal point to her face and upper torso. I carry out a little more colour balancing using a combination of Screen, Lighten, Overlay, Color Dodge and Add layers, bringing more vibrancy to the image’s colour and values. (Read our guide to the 5 Procreate tips we love.)
Doing this also enables me to mask out the initial dark lines and blend everything more naturally. I also hit the edges of the character with the big soft Round brush, painting subtle rim lighting to add more three-dimensional forms to her.
Get more Procreate tutorials in ImagineFX
This content originally appeared in ImagineFX magazine, the world's leading digital art and fantasy art magazine. ImagineFX is on sale in the UK, Europe, United States, Canada, Australia and more. Limited numbers of ImagineFX print editions are available for delivery from our online store (the shipping costs are included in all prices)
Alternatively, you can access us instantly through our digital options:
• Apple app (for iPad or iPhone)
• Pocket mags (multi-platform app, great for Android users)
• Zinio (multi-platform app for desktop or smartphone)

