Double trouble! Create impossible images and duplicate people in Affinity Photo
Watch video (above): Clone in a crowd in Affinity Photo
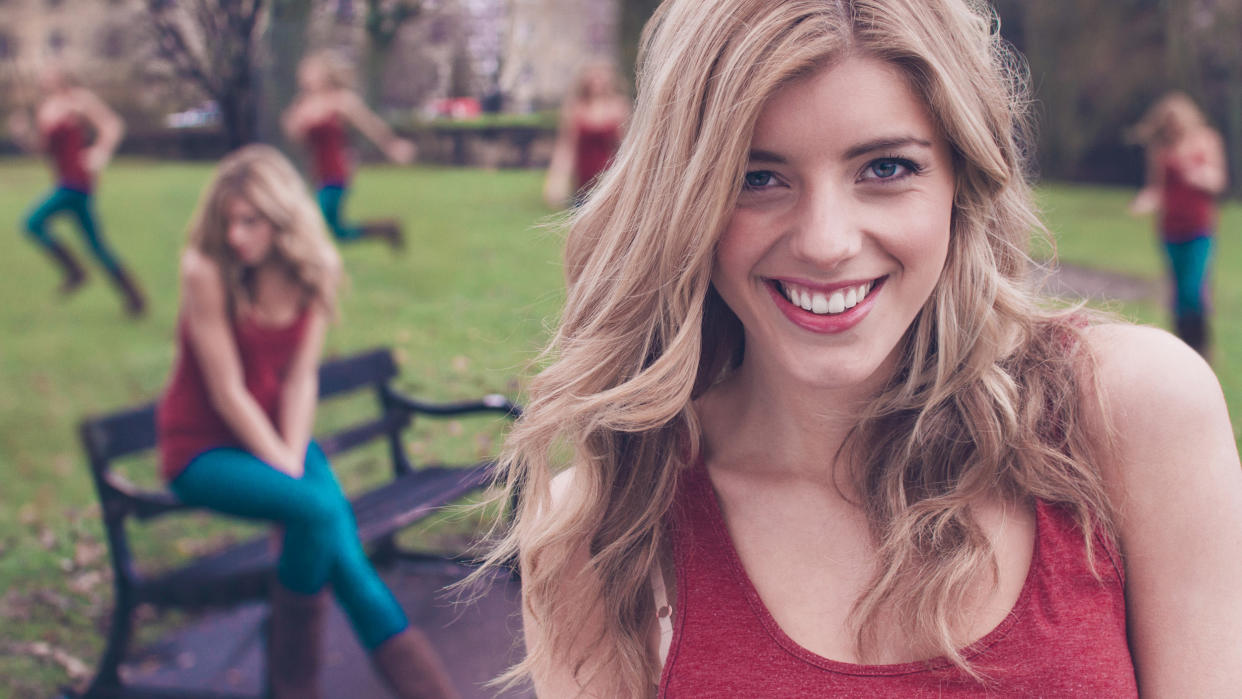
The multiplicity effect is a fun way to combine several different portraits into one. It’s a great one to try out with your own set of portraits, and the shooting technique is very simple. All you have to do is use a tripod to keep all the frames in alignment and capture your subject in different positions around the frame.
Keep the camera settings, focus and light consistent throughout, and try out different poses. You can take it further by having your ‘clones’ interact with one another, or by experimenting with a shallow depth of field as we’ve done here, so that the figures behind our main portrait become more and more blurry.
Begin by downloading the Start Images as a stack into Affinity Photo. There isn’t a dedicated feature that lets us do this automatically, but we can use a simple hack with the ‘New Stack’ command. The command is designed primarily for removing objects from multiple images, which is sort of the opposite of what we want here. To get around this all we have to do is ungroup the stack, and we’ll have a set of layers to work with (handily aligned for us).
From here, we paint simple layer masks. If you’re new to layer masking, it’s a gentle introduction to this essential editing feature in Affinity Photo. By painting a few layer masks, it takes mere moments to blend our six start images into our final ‘impossible’ image. Let’s get to it...
1. Load the files into a stack
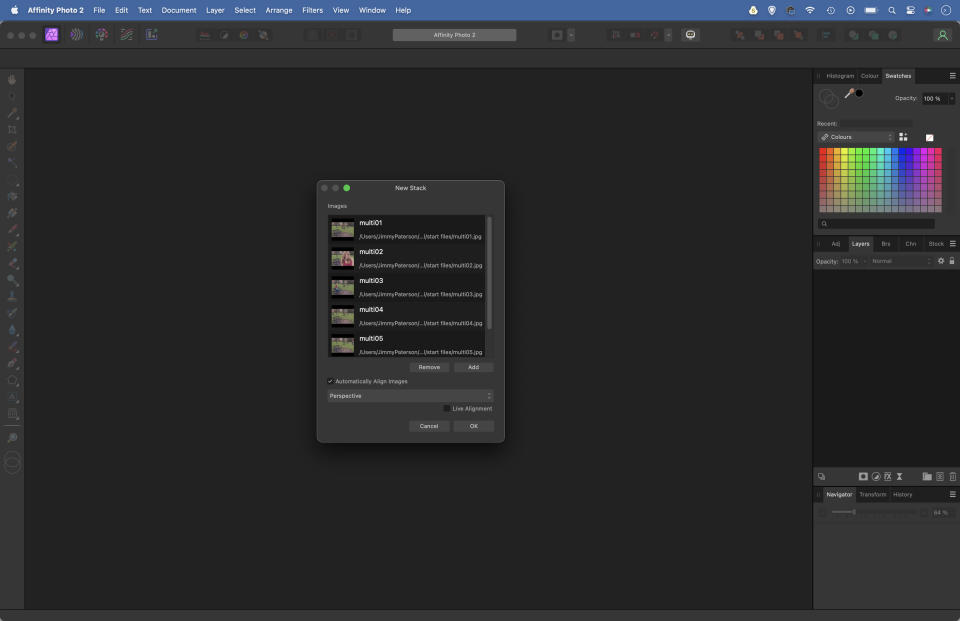
Open Affinity Photo and go to File>New Stack. Click Add and navigate to your set of photos or download and use our Start Images. Ensure Automatically Align is checked to correct any slight misalignment and hit OK. Once loaded, go to the layers panel, right-click the stack and choose Ungroup.
2. Arrange your layers
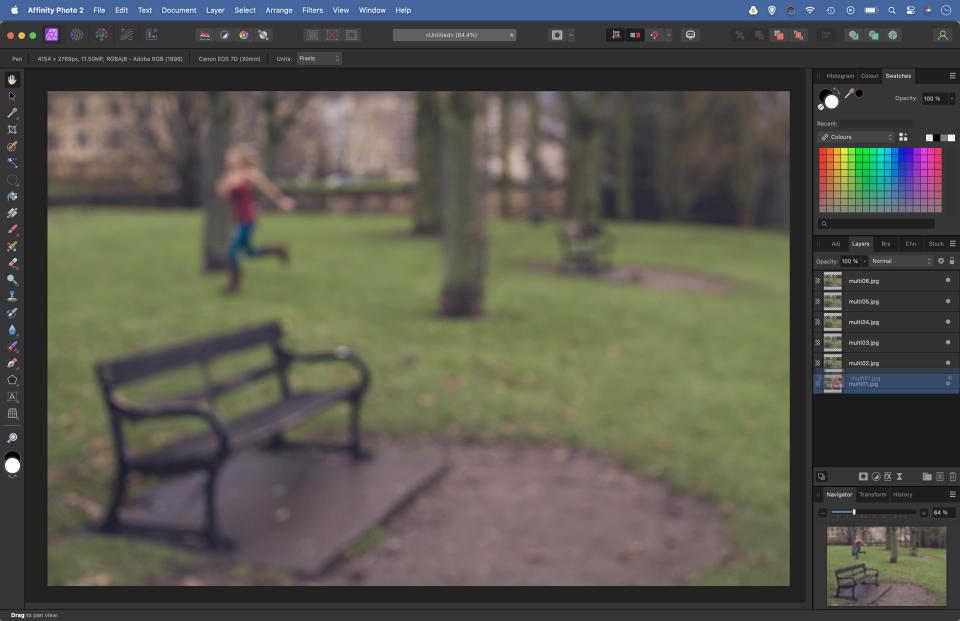
Each image will now occupy a separate layer. Identify your main image and drag it to the bottom of the stack. Highlight the layer above it, hold Shift and click on the top layer to highlight them all, then click the dot icon on the layers to hide all but the bottom layer.
3. Add a black mask
Reveal the layer directly above the bottom layer, then click the Mask icon in the layers panel to add a white mask. Next go to Layer>Invert (or simply hit Cmd/Ctrl+I) to invert the mask from white to black, to make a full black mask that hides everything on the layer.
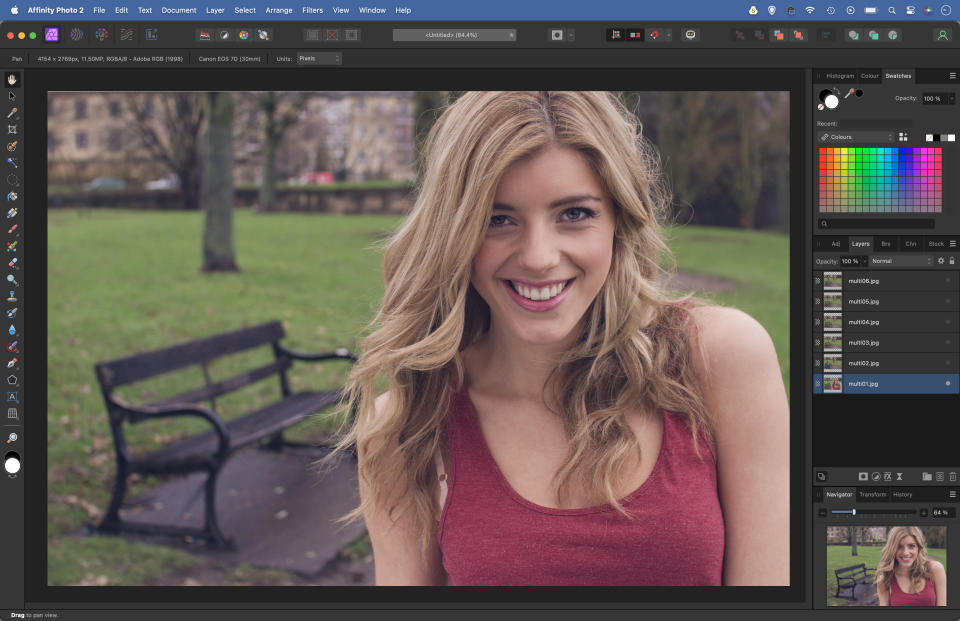
4. Paint white to reveal

While the black mask thumbnail on the layer is highlighted, we can paint white in the image to reveal parts of the layer, or black to hide them again. Grab a soft-edged circular brush tip. Hit D then X to set the brush colour to white, then paint to reveal the figure.
5. Blend overlapping figures
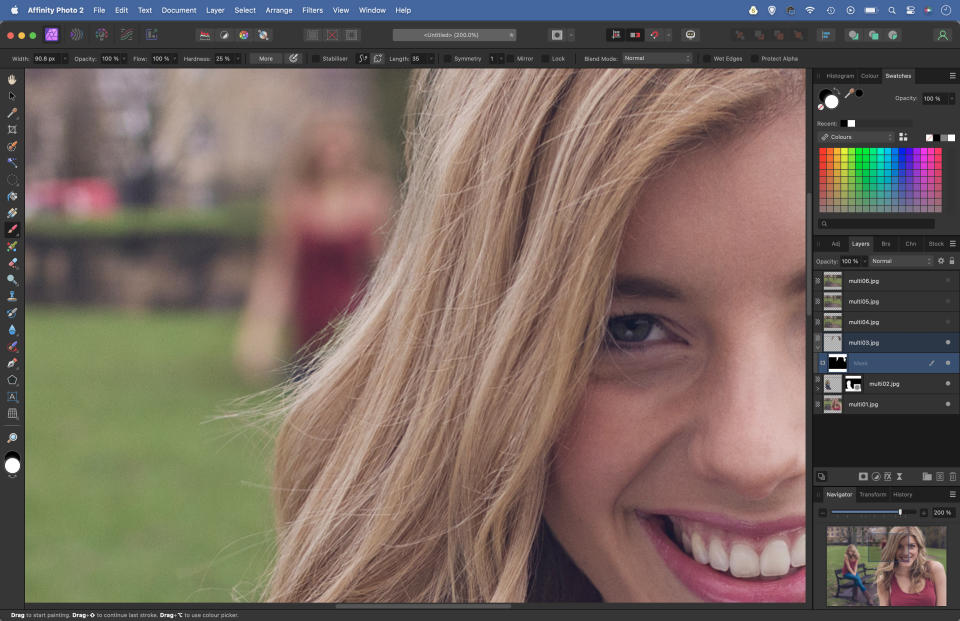
Reveal the next layer up and repeat the process to add a full black mask then paint white to reveal the areas you want. If subjects overlap like this, you need to be more precise with your painting. Alternatively, use the Selection Brush to select the area.
6. Make the finishing touches
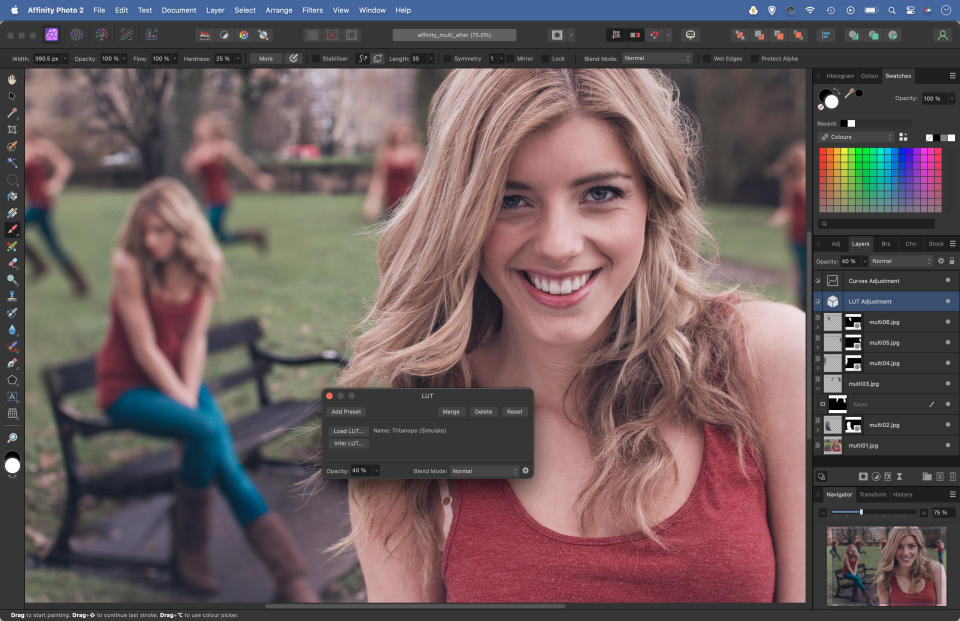
Work your way up the stack layer by layer, adding and painting masks until all the frames are blended. Finish by adding an Adjustment layer on top of everything to enhance the colours and tones. We’ve used the Tritanope LU adjustment at 40% layer opacity.
If you enjoyed this tutorial but want a bit more power from your laptop, why not look at the best photo-editing laptops? And do check out our other Affinity Photo tutorials

PhotoPlus: The Canon Magazine is the world's only monthly newsstand title that's 100% devoted to Canon, so you can be sure the magazine is completely relevant to your system. View Deal

