This DIY Recipe Box Is the Heartfelt Homemade Gift You're Looking For
It's a homemade gift that keeps on giving.
Annie Campbell
There’s something so magical and beautifully sincere about an old-fashioned wooden recipe box. The back-to-basics kitchen staple is a novelty in our digital world of blogs, Pinterest, and recipe sites (hi!).
Some people might even say it’s unnecessary.
But I am not one of those people. I love how quaint and homespun a recipe box looks sitting on a counter, and I love the sentimental value of tried-and-true handwritten recipes even more.
I’m not the only one: Like vinyl records and bellbottoms, recipe boxes have experienced something of a cultural resurgence in the last few years.
So, if you’re looking for a way to show a loved one you care, I can think of no better gift for a home cook with a fondness for rustic treasures than a DIY recipe box.
This homemade gift is about as sweet and personal as it gets. The best part? The whole thing comes together for less than $20.
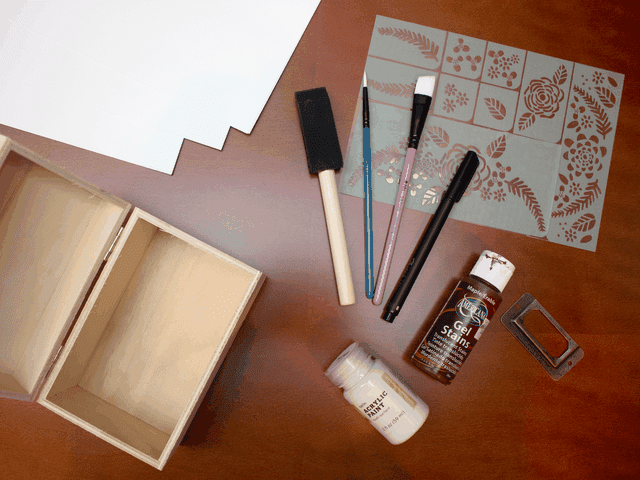
Here’s what you’ll need:
Annie Campbell
Unfinished Recipe Box (3x5)
Wood Stain
Acrylic Paint
Foam Brush
Paint Brushes
Stencil
Label Holder
Pen
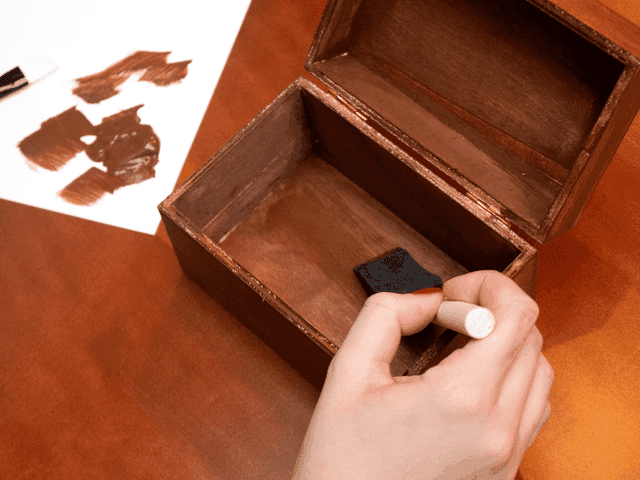
Step 1: Stain the Box
I used a foam brush to apply the stain, but you can use a regular ol’ bristled brush if you don’t have one laying around. I also used a smaller brush to get the stain into the hard-to-reach nooks and crannies.
The stain I used (Americana Gel Stain in Maple) dried super quickly, but others may take longer—make sure your box is completely dry before moving on to the next step.
Annie Campbell
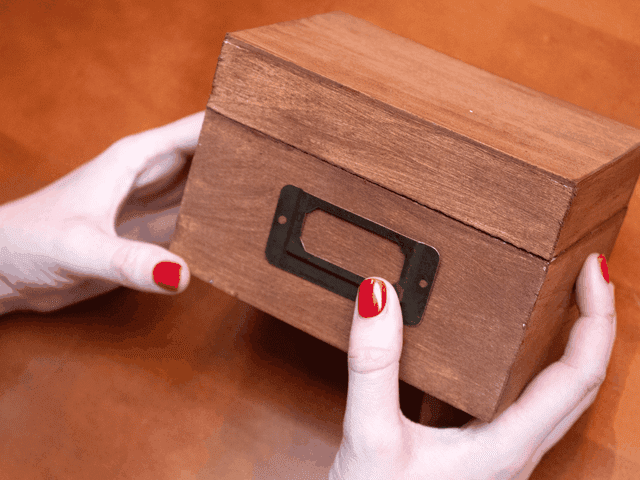
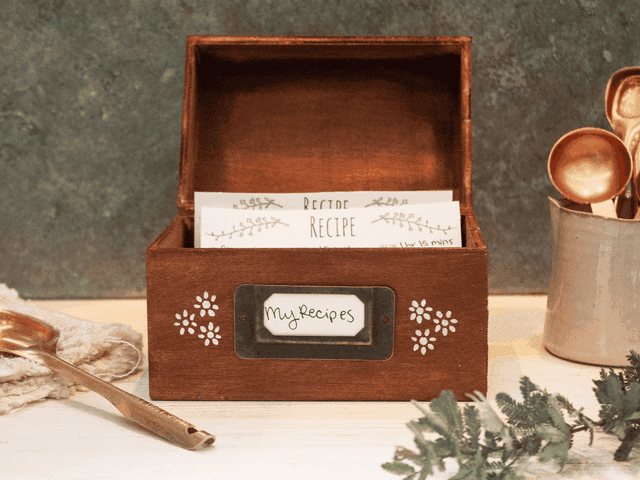
Step 2: Attach the label holder and label to the front of the box.
The cheap and wonderfully vintage-looking looking label holder I bought at Michael's came with two tiny screws for easy attachment. However, I was ill-prepared and found myself without a tool set (or any carpentry skills to speak of). Instead, I used super glue to fasten the metal to the wood.
You can attach it any way you want—just make sure it’s secure.
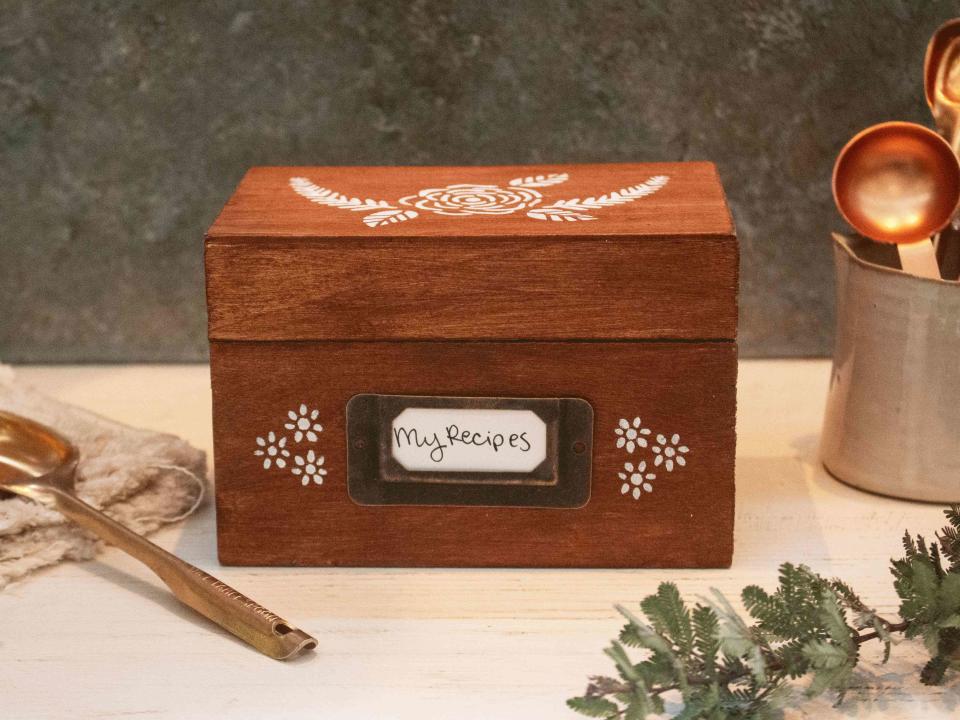
Once the glue is dried (if you used glue at all), you can insert an appropriately sized label. I chose to label my box “My Recipes, but what you choose is up to you.
Annie Campbell
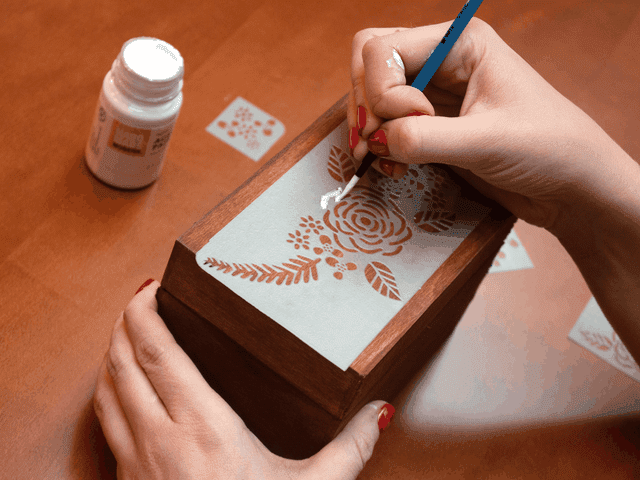
Step 3: Use the stencil and acrylic paint to add designs to the box. Get creative!
Here’s where things get fun: Once you’re really, really sure that the stain and the glue has completely dried, it’s time to break out the stencil.
If you’re artistically inclined or have a gentle touch, you can totally paint freehand or use a plastic stencil with no adhesive backing.
Since I possess neither of those qualities, I went with one that sticks securely to surfaces. I didn’t want to worry about the stencil sliding around and ruining my delicate design.
Annie Campbell
That's all there is to it. Happy gifting!
Annie Campbell
Get more DIY gift ideas:
Plus, explore our entire collection of Gift Guides for the best gifting inspiration.
Read the original article on All Recipes.

