This DIY Greenery Garland Will Be the Star of Your Holiday Table
Turn simple greenery into a gorgeous tabletop garland with our easy step-by-step instructions.
Adam Albright
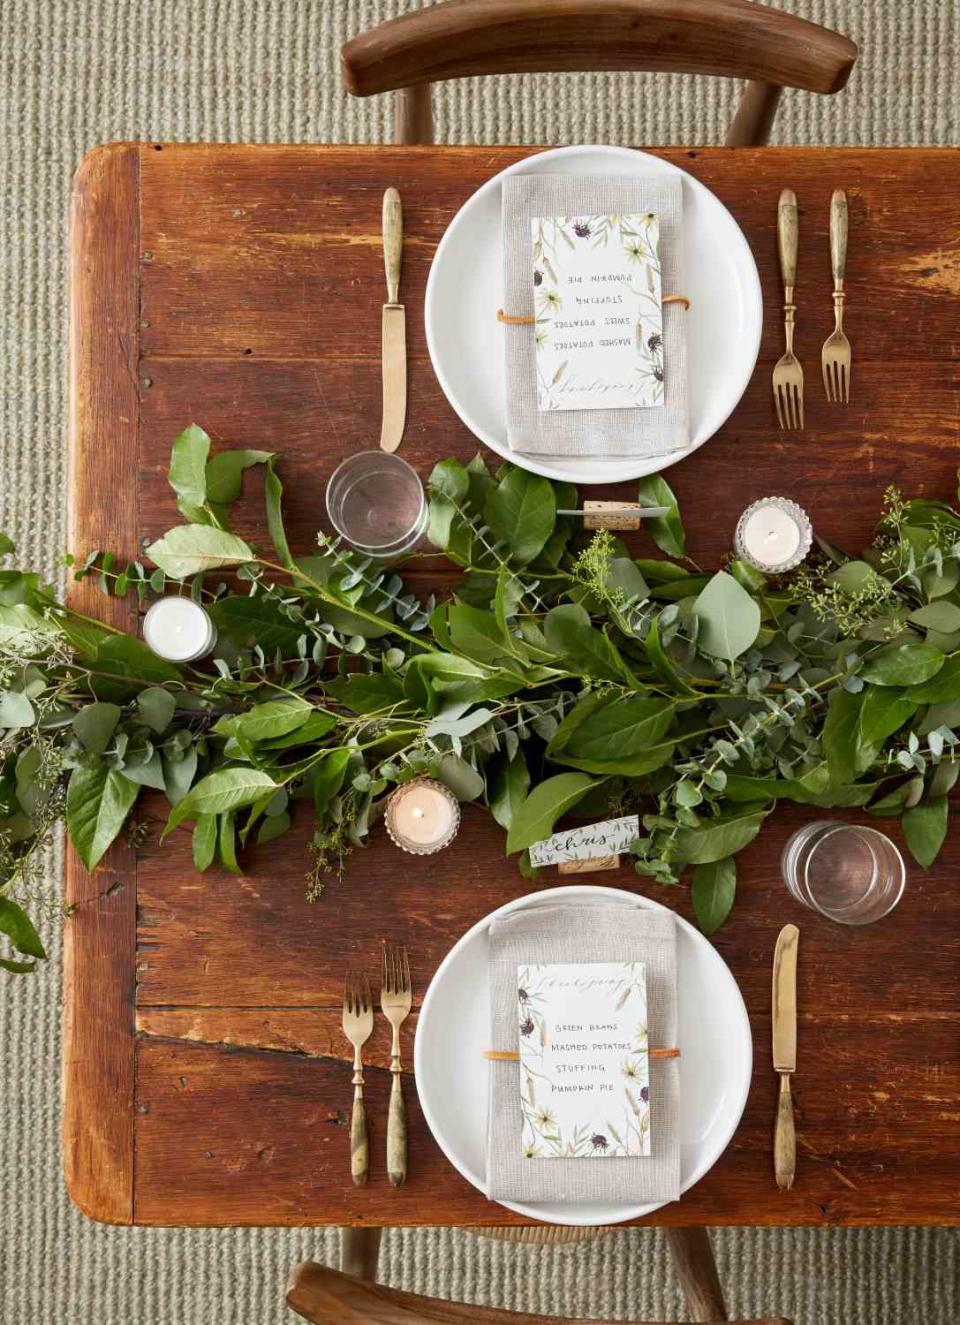
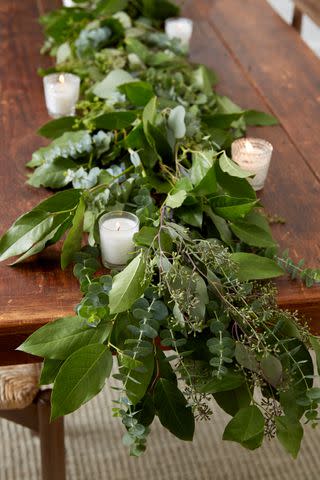
This isn't your typical Christmas garland. Bring your holiday meal together with a centerpiece that includes eucalyptus, plumosus, and other types of fresh greenery. This custom table runner makes for a photo-worthy spread as well as something you can leave out for decoration beyond mealtime.
Drape this DIY greenery garland down the center of a table to create a stunning tablescape, or add it to a mantel to add a rustic charm to your living space. For an added pop of color, tuck in a few fresh flowers to tie the centerpiece to the rest of your decor.
Adam Albright
How to Make a DIY Eucalyptus Table Runner
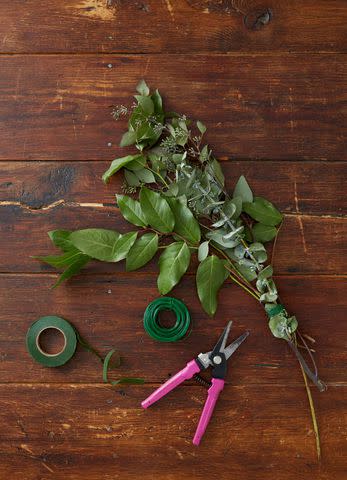
What You Need
Floral wire
Eucalyptus
Plumosus
Pittosporum
Salal
Adam Albright
Step 1: Gather Greenery
Create bundles that incorporate all of your greens, and use floral wire to attach the stems. The size of the bundles depends on how wide you want the finished garland to be. You'll want to make thicker bundles for a garland that will sit on a wide dinner table. Make long, thin bundles if the garland will sit on a narrow mantel. Place a bundle or two on your surface before finishing all of them to test the length and thickness.

Adam Albright
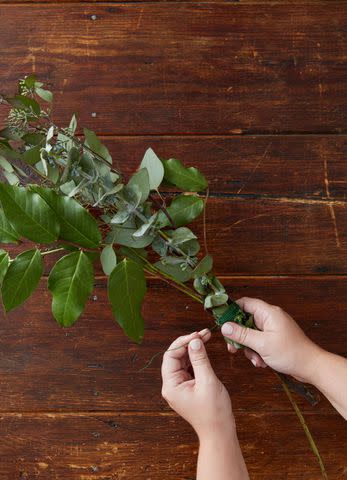
Step 2: Combine Greenery Bundles
To create the garland, overlap two bundles and tie them together with floral wire or green floral tape. The second bundle should sit about halfway down the first bundle, covering its wire and stems. You'll attach the bundles by wrapping both stems, so the top bundle must sit high enough on the bottom to secure a good portion of its stems. Continue this process until the DIY greenery garland is almost as long as you plan for the finished piece.

Adam Albright
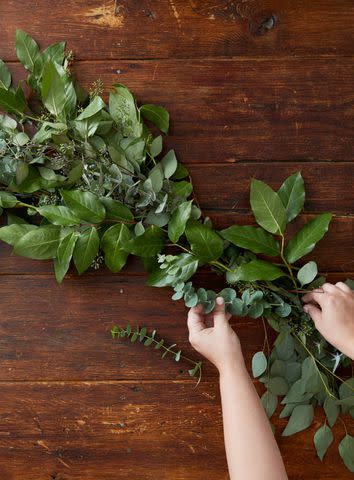
Step 3: Finish DIY Eucalyptus Garland
Attach 2-3 remaining bundles using wire or tape to create one final grouping. This will become the end of the garland. Place the group of bundles over the end of the garland, with stems in the opposite direction of the line you've created. Tuck the stems as far under the leaves as you can so the greenery looks as seamless as possible. Bind the stems with wire or tape.
Adam Albright
Step 4: Add Sprigs as Needed
Add single sprigs of greenery to the garland, paying particular attention to where the opposite-facing stems meet, so you cover any exposed stems. Use this process to fill out the rest of the garland, adding new pieces to fill any holes and cover exposed wire or tape. Continue filling with individual pieces until you're happy with the fullness. Use longer pieces to add width to the garland if it's thinner than you like. Or use shorter sprigs to cover areas without adding extra width.
Adam Albright
Step 5: Display Garland
Add the garland to your tabletop or display location. Because the bundles are attached at the ends, the DIY greenery garland is best displayed on a flat surface, so no pieces fall out of the formation. Keep a few extra bits of greenery in the refrigerator to freshen up the arrangement if you plan to keep it out for an extended time.
:42 Beautiful Centerpiece Ideas That Are Perfect for Thanksgiving

