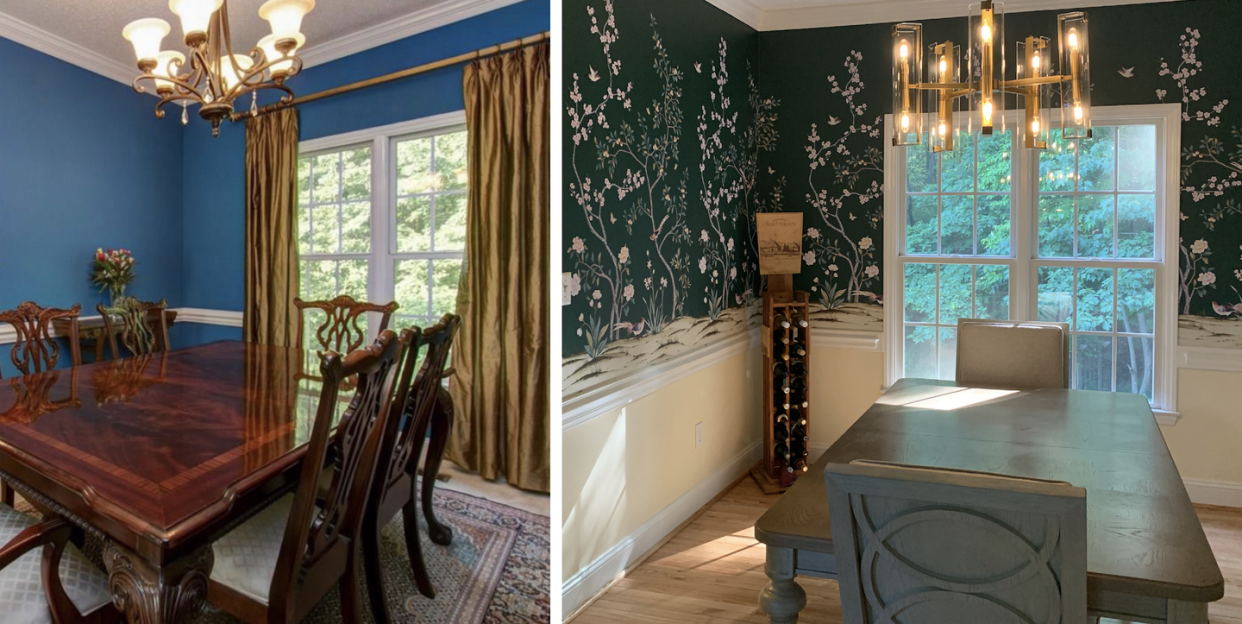
How I transformed My Dining Room With Temporary Wallpaper
Sometimes you just fall in love with a pattern. That was me with Chinoiserie. The interpretation of this centuries-old style has found its way into wallcoverings in some of the most elaborate and gorgeous applications you’ve ever seen. But, the hand-painted technique is laborious and therefore often costly, so traditional Chinoiserie wall panels are often out of reach of many homeowners. Enter Tempaper.
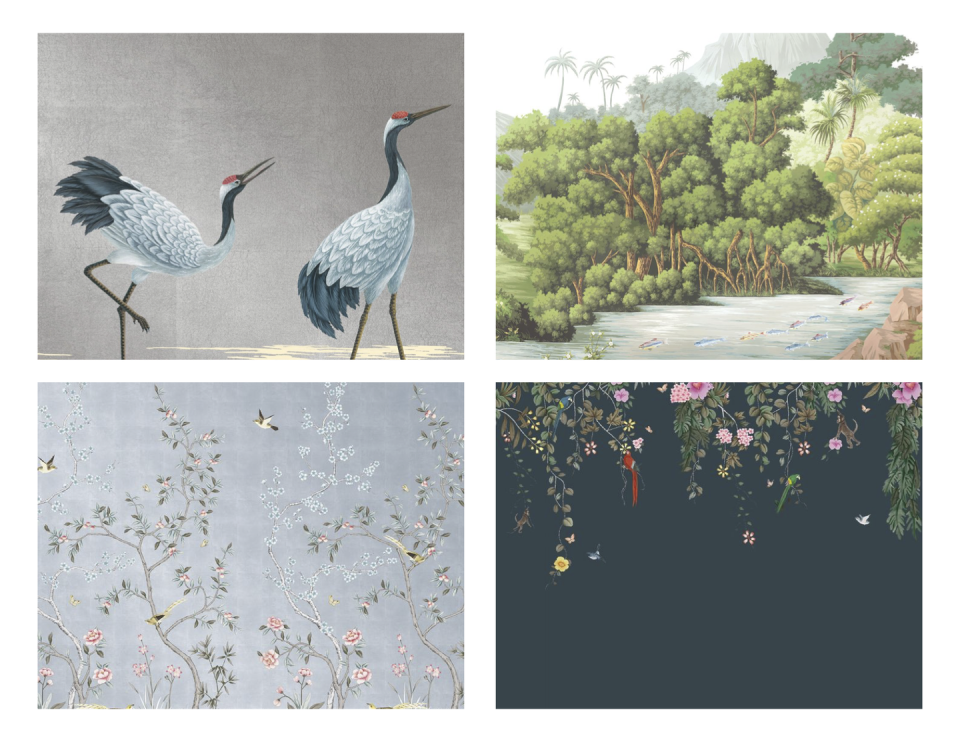
A couple of years ago, the wallpaper company, known for its fanciful and sophisticated removable papers, launched a line of Chinoiserie customized to your space, sold by the square foot, and mailed in easy to install panels (with numbers so you can easily apply the panels in the right order). They’ve continued expanding this line with canopies of flowers coming down from the ceilings, gardens fully in bloom with birds and butterflies filling the space, cranes prancing through a meadow, and a jungle utopia with fish moving swiftly through the river. Admittedly, these designs take a certain boldness of spirit and a true understanding that a room wrapped in an exquisite mural will be the showstopper space of your home.
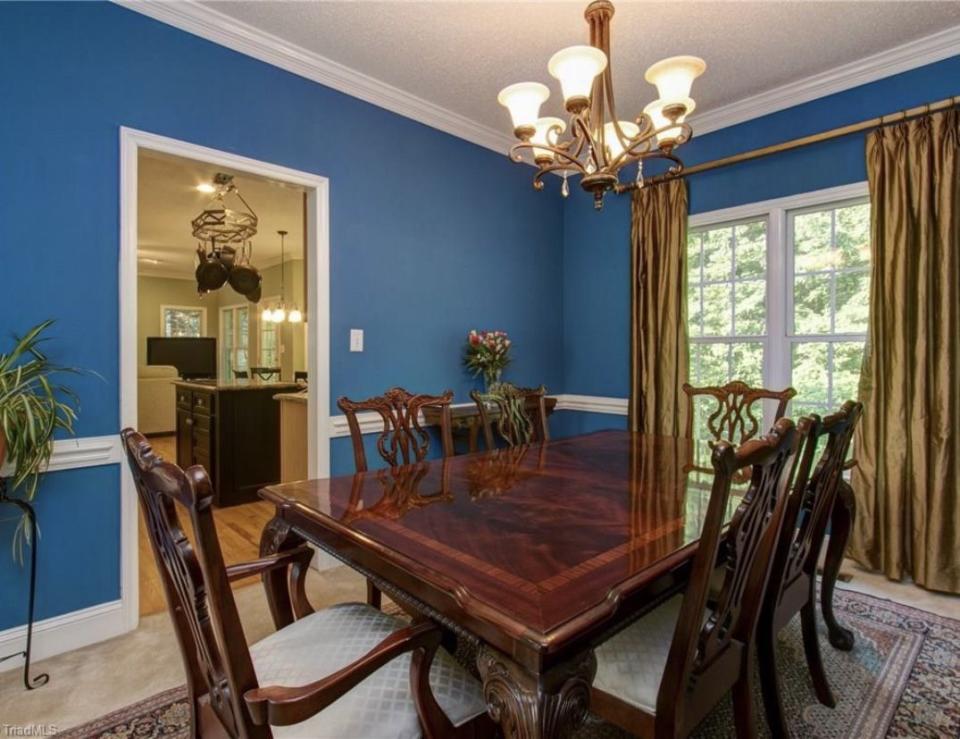
So I went for it. We’d purchased this house a year ago and the dining room was still untouched and unloved. With a hideous light fixture that needed to go and blue walls that were just a shock to a home that was bathed in color-forward neutrals. We measured once, then twice, and then a third time. Because the order is customized for your space, you need to get it right. Our space had two openings into other rooms, a wall with a window and one unobstructed wall. It also had a chair rail that we were planning on stopping the pattern at, and painting the base the same Cream Puff from Behr that was in the adjoining living room for a touch of continuity.
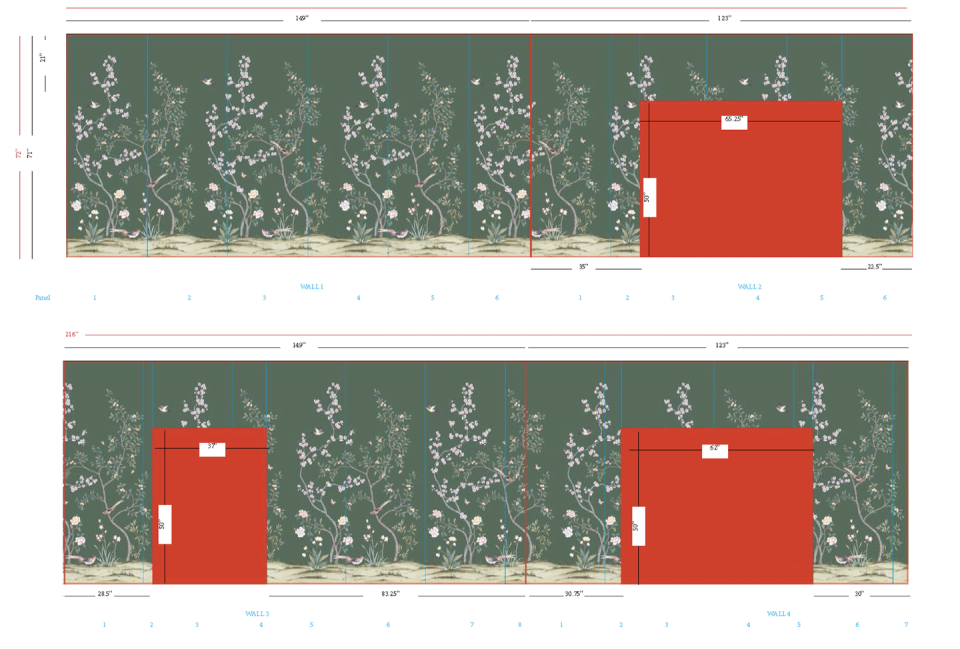
It's a pretty simple process made easier by Tempaper's step-by-step ordering instructions. You send all the measurements over and Tempaper mocks up the pattern, with the panel application numbered and sends you back the template for a sign off. You want to really review this! In my case, two walls were switched which would have totally thrown off the pattern, so I sent it back with corrections, they sent me a revision, I measured for the fourth time (hyper paranoia) and then signed off on it.
A short time later my custom wallcovering showed up in four cylinders all labeled wall 1 through 4, aligning with my cheat sheet for hanging. Now it was time for the install. So, while Tempaper is a DIYers best friend, you can hire someone to do this for you. If it's just you, find a patient helper. Tempaper recommends starting from the top of each panel and using their squeegee to slowly apply it to the wall releasing all air bubbles along the way. The perfectionist in me ALSO recommends using a level, marking a line and following that to make sure you’re going straight down. *For the record, we did not follow the guidelines, we did the opposite of the recommendation because we wanted everything from the chair rail up to be even. The top of the paper gave us more room to cut away and we want the entire “floor” of the paper to be seen.*
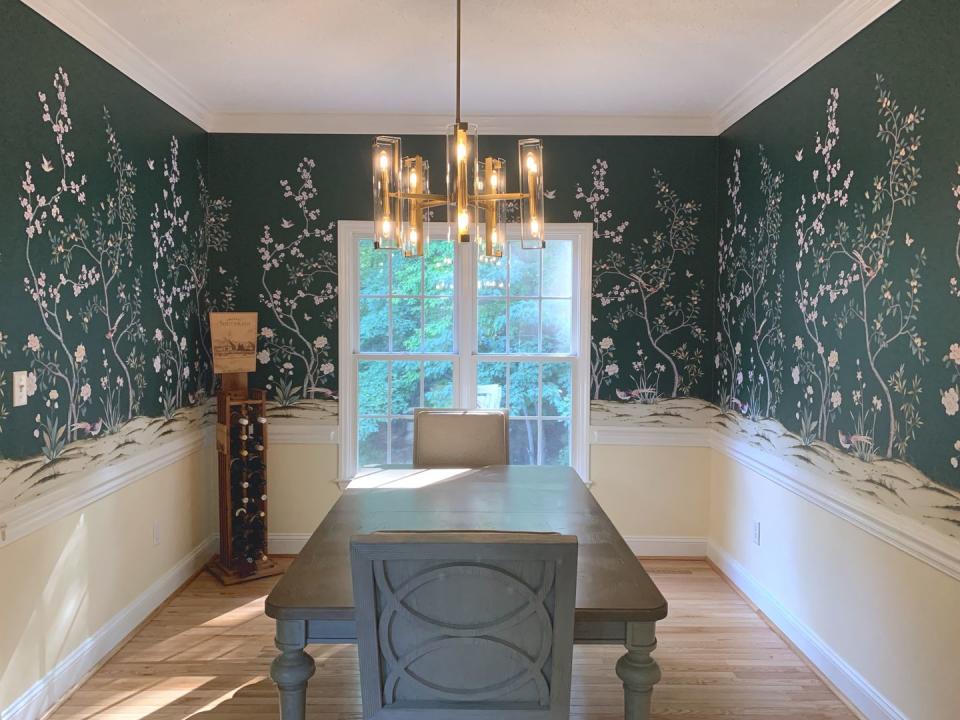
So since I’m not naturally a DIYer I took breaks and what for normal people would take a weekend took me a couple of weekends, but the end result makes me feel like I spend a million bucks on a custom wallcovering when I know I didn’t. Everyone that’s seen the paper loves it and it truly has become the most special room in the house. Now, if the rest of my dining chairs ever make it here (delays, delays, delays) I’ll truly have a fully complete dining/garden room.
Follow House Beautiful on Instagram.
You Might Also Like

