Decoupage Just May Be the Best Quarantine Activity
For those seeking a useful way to spend their time during social distancing—or anyone simply interested in forging a deeper connection with their homes—HB has launched Home Love, a series of daily tips and ideas to make every minute indoors more productive (and gratifying!).
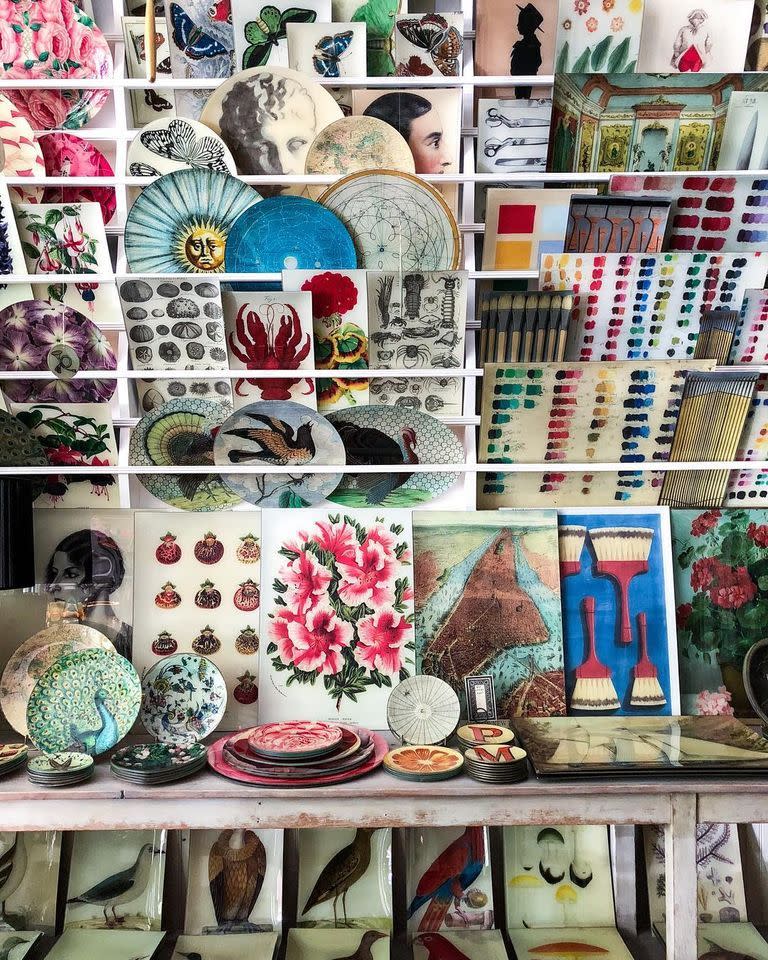
No one does decoupage like John Derian. The founder of his eponymous company (and trio of stores in Manhattan's East Village) built his brand by repurposing historic prints, papers, and book pages into plates and decorative objects using everyone's favorite childhood craft technique. The resulting pieces have earned Derian a loyal cult following as well as collaborations with Target, Chilewich, and French ceramics manufacturer Astier de Villatte.
Derian has even published a book of some of his best paper finds—which he sources from estate sales, flea markets, and bookstores around the world—and has said he doesn't mind if people pull the photos from it to frame or decoupage with at home. Now, he's showing us how to attempt his technique, and chances are you already have all the supplies you need. Call it the perfect stuck-inside activity. Read on to learn how to do it.
Supplies:
Paper scraps (think magazine clippings, old wrapping paper, unused books, or anything paper you have lying around!)
Scissors
Bottles, cans, or other vessels you'd like to beautify
Elmer's glue
Paintbrush
Step 1: Cut paper
Cut your paper into small shapes that you can paste on your vessel of choice. If you're a planner, lay out a scheme for your decoupage pattern, or go more improvisational and plan as you go.
Step 2: Make paste
Mix a little Elmer's glue with some water to make a spreadable substance that you can easily paint on with a paintbrush.
Step 3: Apply paper
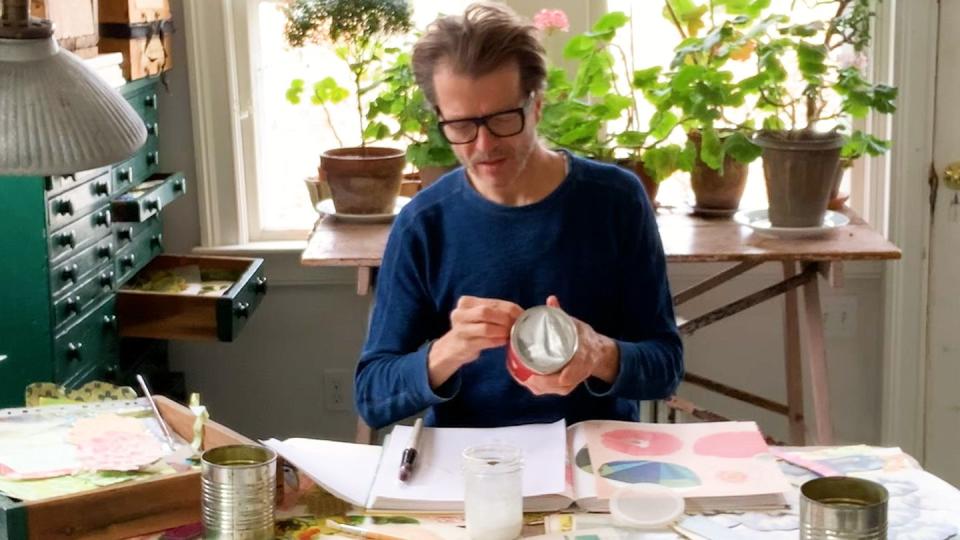
Paint a thin, even coat of the glue mixture onto the back of your paper cutout and attach it to the vessel, smoothing it over with your hands. Depending on the shape of the vessel, there may be some wrinkles—that's ok! The glue is forgiving enough that you can move the paper around until you're happy with the placement.
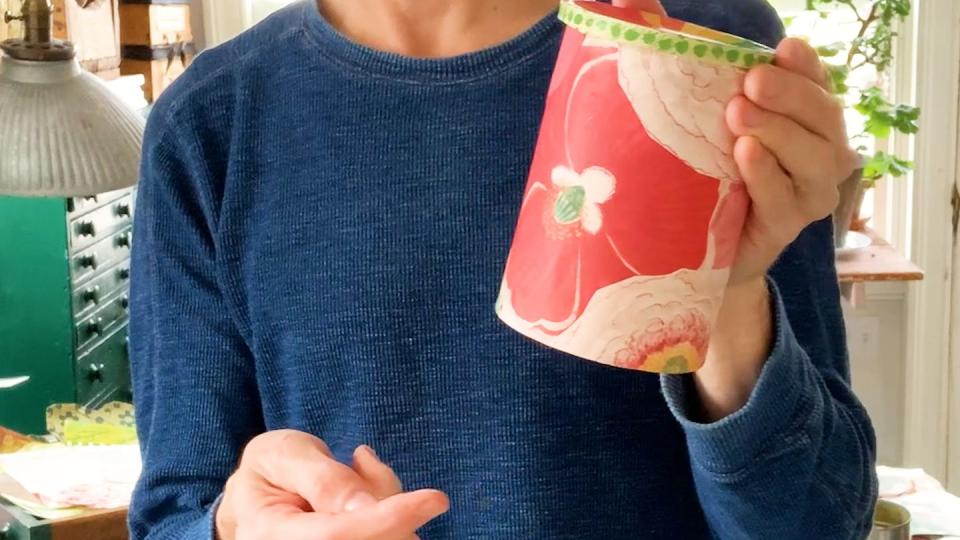
Step 4: Continue as desired
Keep adding layers of paper until your vessel is entirely covered—or you're happy with the design! The great thing about decoupage is that there's no right look. It's up to you.
Step 5: Let dry
Let the glue dry for a few hours. For a more high-shine and protective finish, you can also paint on a top layer of glue and let that dry to form a seal. Now place your new decoupage item on your bookshelf, coffee table, or wherever you need a little color.
Follow House Beautiful on Instagram.
For more Home Love ideas, head here—we'll be launching a new one every day until April 1st. And tag your own home project photos #homelove for everyone to enjoy.
You Might Also Like

