I Tried the “3-Second Rule” and I Can’t Believe How Fast I Decluttered
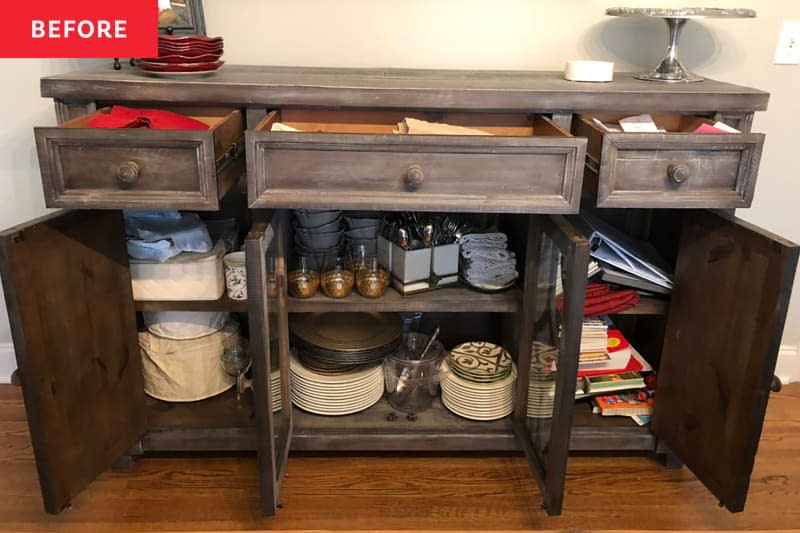
The buffet in my dining room pulls double duty — especially when I’m entertaining. It houses all the essentials I need for a meal with family and friends, such as tablecloths, chargers, dinner plates, and glasses. And it’s also full of serveware items and linens that we don’t use (and maybe not ever).
Created by professional organizer Kayleen Kelly, the three-second rule for decluttering requires you to decide in three seconds if you’ll keep or get rid of an item. If you hesitate for more than three seconds, then the item stays.
Lately, I’ve noticed that even non-dining room items have ended up stuffed inside it. Open a cabinet door and beware of tumbling books, picture-hanging supplies, and even an extension cord. It was time to tackle the buffet table and dedicate some time to reorganizing to remove the junk that didn’t belong.
I didn’t want to spend much time on this project, although the overwhelm was already creeping in about the anticipated time it would take to go through and overhaul everything completely. Then I came across professional organizer Kayleen Kelly’s three-second rule for decluttering, and I knew this would be the best technique for me.
In this TikTok video, Kelly, who’s known for her decluttering methods, like the Core 4 Method, and tips, explains that the three-second rule helps people make “quick and confident decisions when they are decluttering.” When applying her method to an item, you decide in three seconds to either “yes, you keep it” or “no, it goes.” She says that if you hesitate for more than three seconds, then the item stays, which takes the pressure off of you to discard items immediately.
How I Used the 3-Second Rule to Declutter
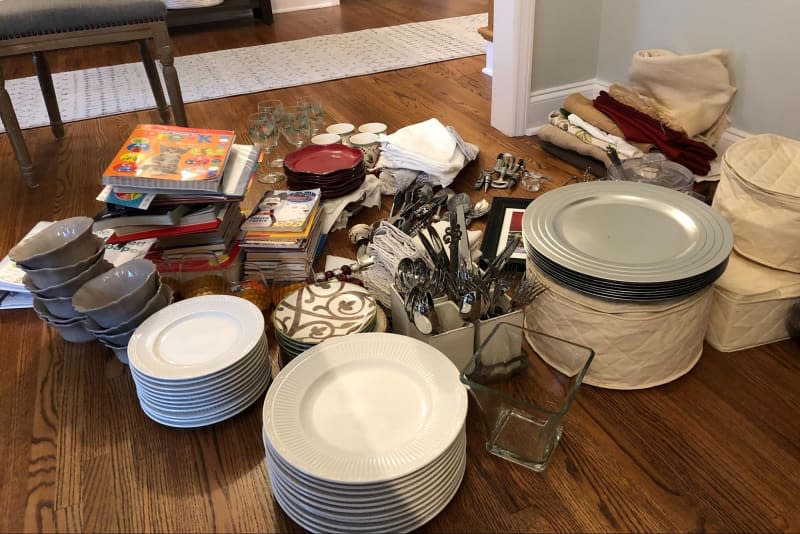
I applied her three-second rule to each item in my buffet. First, I pulled everything out like she suggested to see everything. With my son’s help, we emptied every last item of the dining room buffet cabinets and drawers. I placed the entire lot of dinner party essentials on my floor and resisted the urge to start grabbing and stuffing items back in.
I went piece by piece. There were items that I immediately placed in the “no pile,” but some items gave me pause, such as holiday napkins and glasses. I still liked them, but I only used them once a year. Kelly’s advice was to keep it if I hesitated, so I was glad I didn’t have to toss my beloved holiday mugs and cherry red dessert plates. During this process, I realized I needed a designated spot for my holiday items, so I began grouping them on one cabinet shelf. I came across six cheese spreaders and decided to discard two mismatched ones and keep a set of four matching ones. I found some unused, discolored serving utensils in the back of a drawer and quickly placed them in the no pile.
After I had gone through every item, I had a box of items to donate or discard, a collection of items I planned to keep, and a small stash of items that needed to be returned to their rightful place in my home. The lone extension cord was returned to its rightful place in the basement with other extension cord friends.
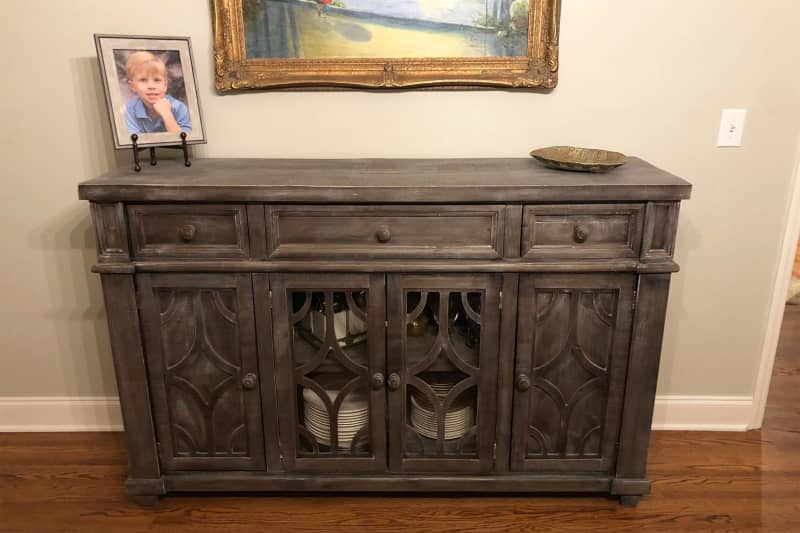
Last, I returned all of my “yes” items to the buffet. I was amazed at how tidy everything looked and how much extra room I had on the shelves and in the drawers. This whole process took less than an hour, most likely because I couldn’t waste any time. I only had three seconds to decide if I was keeping or tossing an item!
My Final Thoughts
I loved this technique because it took the guilt of not getting rid of enough and made it OK for me to keep an item if I hesitated. The best part of applying this technique was the result of an organized dining room buffet and a feeling of accomplishment for discarding, and celebrating the relief of keeping items that I loved.

