Before & After: Dark Wood Cabinets Get a Bright White Mid-Century Redo
After 10 years of renting, new homeowner Laura Temple was excited to finally have a place she could make her own. And when it came to the kitchen in her 1959 ranch, she knew exactly how she wanted it to look: bigger and brighter, with a mid-century spin that felt appropriate for its roots.
At the same time, Laura didn’t want to sink tons of money into the renovation — she was aiming for a budget of about $1,000, not including the appliances — so she knew she had to get creative. So she called in reinforcements: a super-handy friend willing to show her the ropes, and lots and lots of YouTube videos.
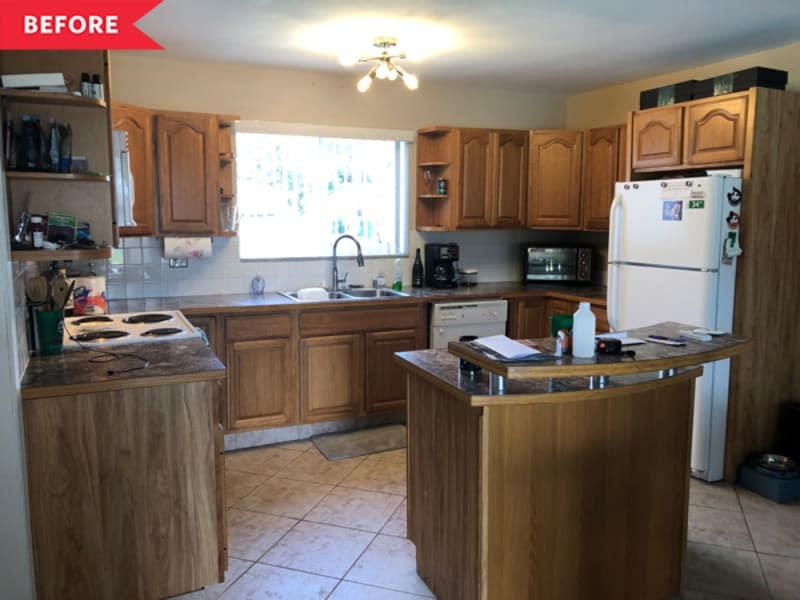
On the reno list: the cabinets (too dark), the lighting (too dim), and the counters (too laminate).
One thing Laura loved, though, was the layout of the kitchen, which put the sink right under the window and next to the dishwasher, with the fridge and range on either side. A small island offered lots of welcome prep space for cooking, too.
First up, Laura and her friend planned to add molding to the bottoms of the cabinets and island to give them a high-end, custom look. But that came with some unexpected challenges: “The base cabinets were off by two inches from one side of the kitchen to the other,” says Laura. “And a previous broken pipe had caused flooding some years back, so there was water damage to the baseboards.” She and her friend took out the baseboards, replaced all the rotting 2x4s to re-level the cabinets, then installed decorative molding.
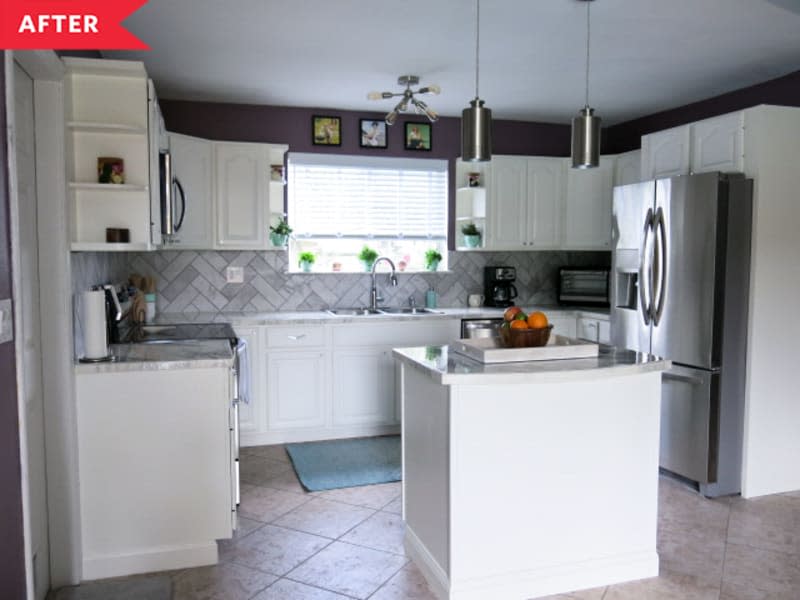
For a brighter look, Laura chose a creamy white for the cabinets (Greek Villa by Sherwin-Williams). Plenty of sanding and priming was required to get the paint to adhere evenly to the glossy wood cabinets. Laura then drilled holes in the knobless cabinets to install both knobs (for the doors) and pulls (for the drawers); she picked mid-century-style conical knobs and V-shaped pulls from Rejuvenation to suit the house’s 1950s roots.
Related: How To Paint Your Kitchen Cabinets So It Looks Like You Totally Replaced Them
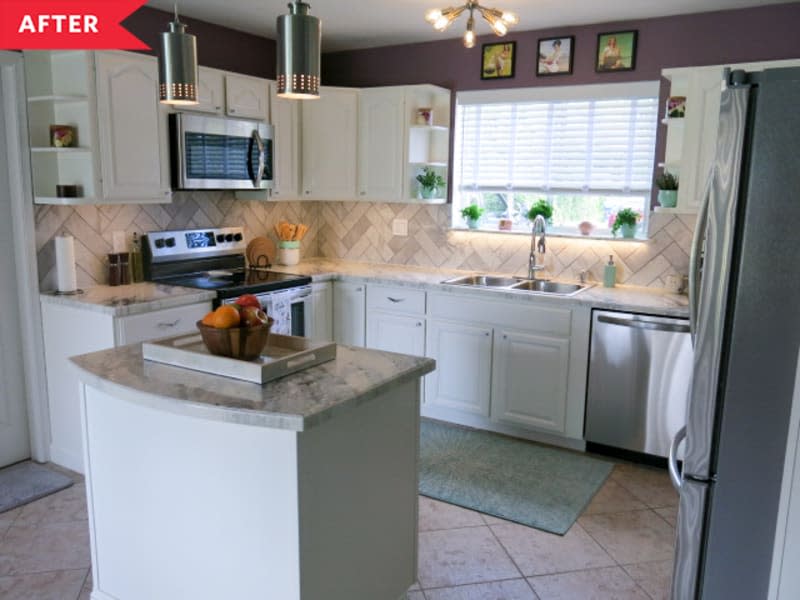
Next, Laura looked skyward, installing new pendant lights from Amazon over the island. (She’d previously installed a Sputnik-like fixture from Lowe’s near the sink. And yes, both were DIY jobs!) Laura also installed LED lights under her windowsill and cabinets to give her cook space a soft glow at night.

With the help of her friend, Laura installed a new marble-look ceramic subway tile, laid in an offbeat chevron pattern. And that may look like a new counter, but surprise: it’s the same old laminate, re-surfaced with epoxy. Powdered pigment in two colors helped Laura achieve the marble-y effect. “I love the way the countertops came out,” Laura says. “Epoxy is such a budget-friendly way to upgrade any outdated countertop surface, and it’s much more durable than any natural stone.” Removing the second level of the island countertop made the space more functional.
The finishing touches: purple-y gray paint for the walls (Soulmate by Sherwin-Williams), framed images from a favorite book above the window, and new appliances purchased as a package deal for a song. Total cost for tools, materials, finishes, fixtures, and brand-new appliances? Just $4,615 — plus plenty of sweat equity, but that’s one of Laura’s favorite parts. “I love that it was completely done with no professional help and at the end of the day I can say, I did this,” says Laura.
This post originally ran on Apartment Therapy. See it there: Before and After: This Dark Wood Kitchen Got a Bright White DIY Redo

