How to create surreal art in Procreate
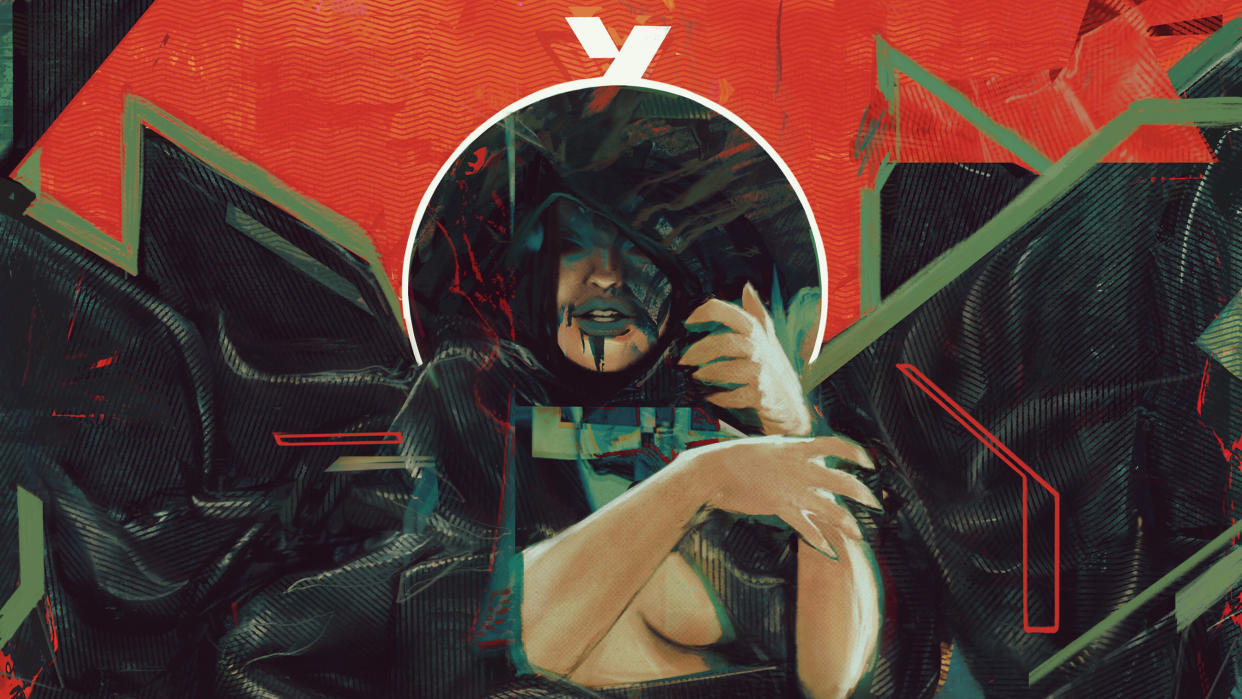
When I was invited to do this Procreate tutorial, to explore how to create surreal art in Procreate, I immediately knew it wouldn’t be an easy task. Revisiting the work of a surrealist artist was both a daunting and exciting quest! I was asked to choose the artist, and Zdzisław Beksinski was the obvious choice for me. His atmospheric, often sinister baroque paintings are like windows on landscapes of relentless characters, striving to survive within forgotten worlds.
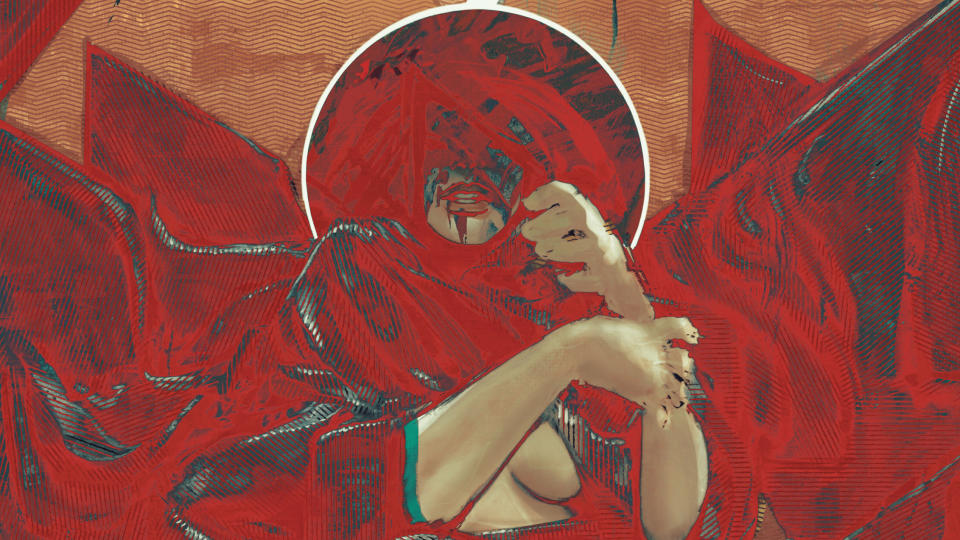
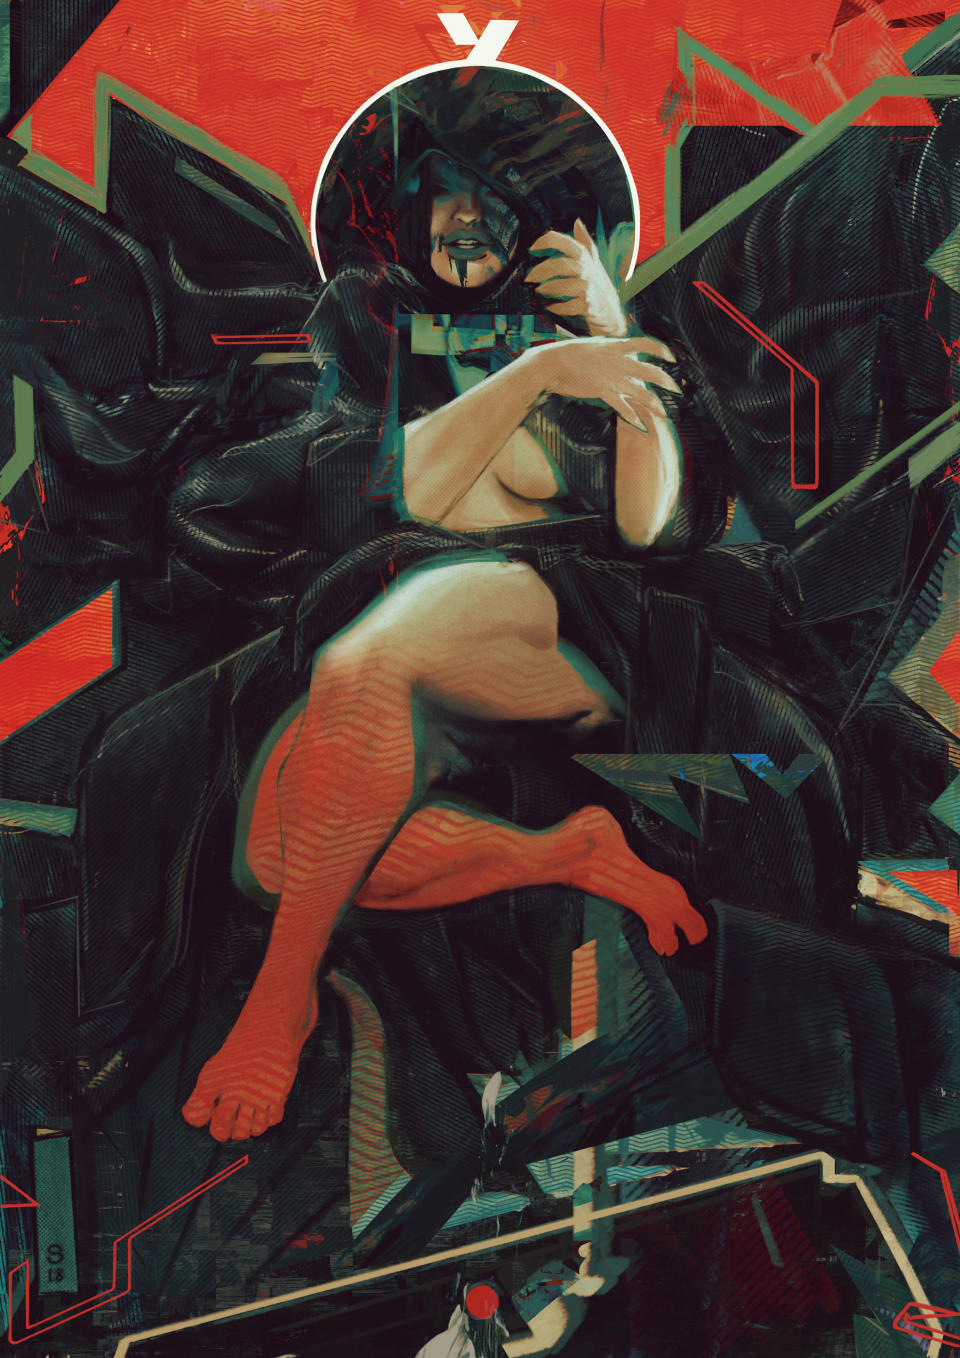
Read our Procreate review for a quick grasp of what Procrete can do, and keep in mind it's an Apple exclusive, so you'll need one of the best iPads for drawing. My chosen painting is AE85, a spectacular and emotional piece that has an enigmatic character at its core, whose body is involved in (perhaps) the very fabric of time.
Since I’m obviously not a genius like Beksinski was, I decide to approach the task as an ode to that visionary mind, especially considering we’re talking about reinterpreting a masterpiece of fine art, which is embedded with meaning and content that are totally subjective. I need to be as objective as possible, even if I’m filtering the original art through my own sensibilities, in order to pay homage to the late surreal master in a illustrative, graphic and fun way
How to create surreal art in Procreate
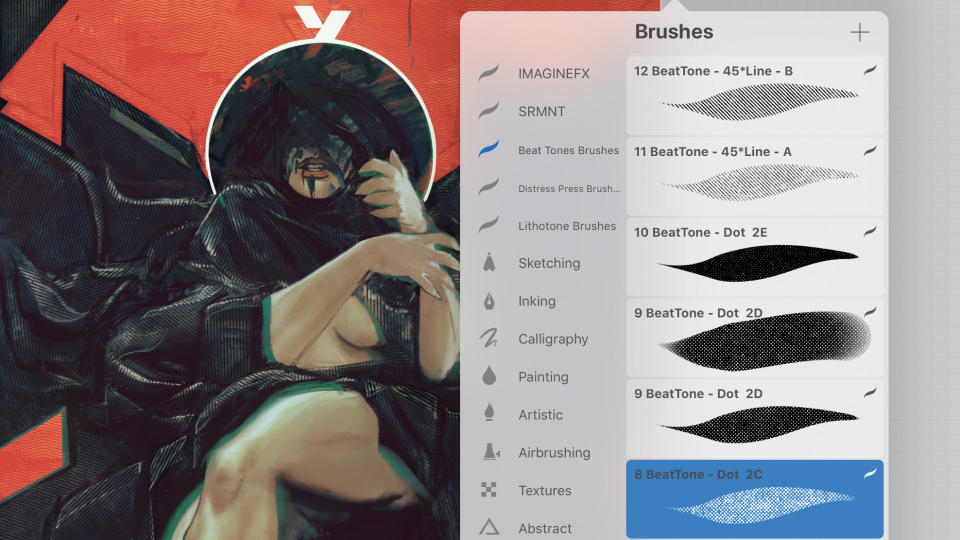
Procreate tutorial: my brushes
Here are the brushes we'll be using for this Procreate workshop.
Custom brushes: The Freaking Brush

I use an altered version of Procreate’s default 6B Pencil in Procreate for most of the illustration. I only need to change its size to take it from a drawing pencil to a thick painting brush.
Spatter brush
To add a bit of grain to the character’s skin, I take the Spatter (also a standard brush in Procreate) and then work it on a low Opacity layer, with the brush mode set to Overlay.
Procreate tutorial: recreating a surrealist painting
I hope you have as much fun with this workshop as I did! For more on Procreate, you can read the full Procreate review for a breakdown of the software's pros and cons.
01. Finding the frame

(Image: © Rafael Sarmento)
I always begin a painting by doing small thumbnails (usually four) based on my initial research. Keeping the original painting as the base, I explore different combinations of compositions, poses and mood.
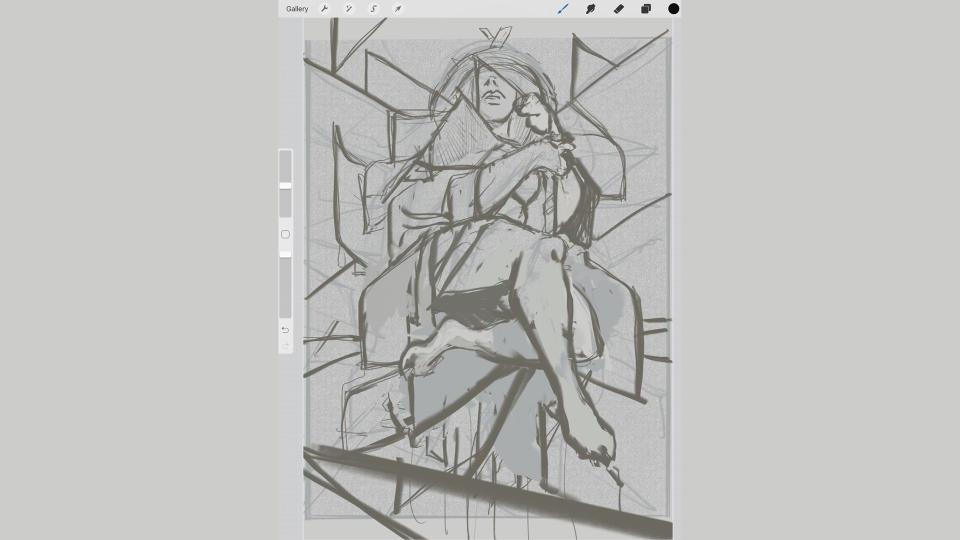
02. Reshaping the masterpiece
(Image: © Rafael Sarmento)
After deciding on a preferred composition, I enlarge the loose sketch to the size of the canvas, and start finding the shapes and lines. This early stage is pretty intuitive, mostly guided by the mood I’m searching for rather than trying to refine specific forms.
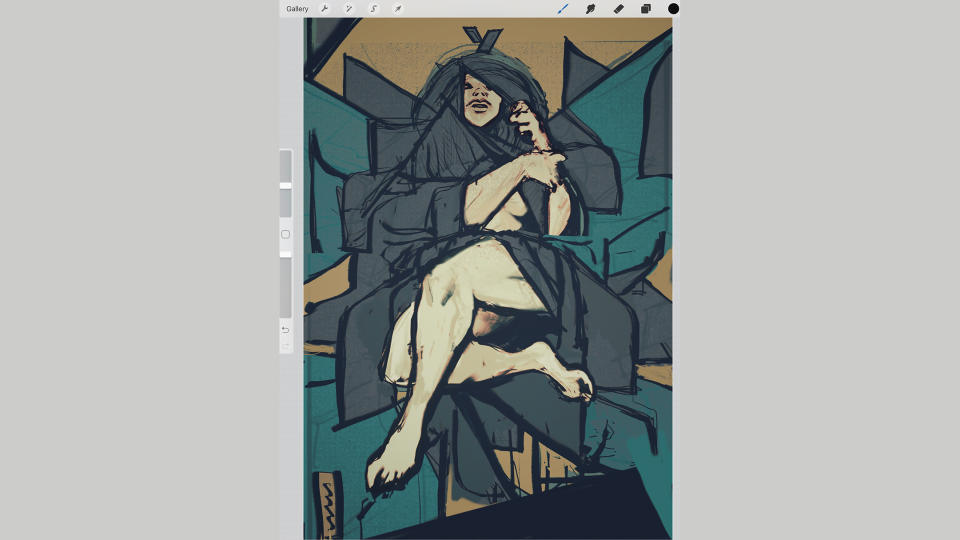
03. Playing with geometry
(Image: © Rafael Sarmento)
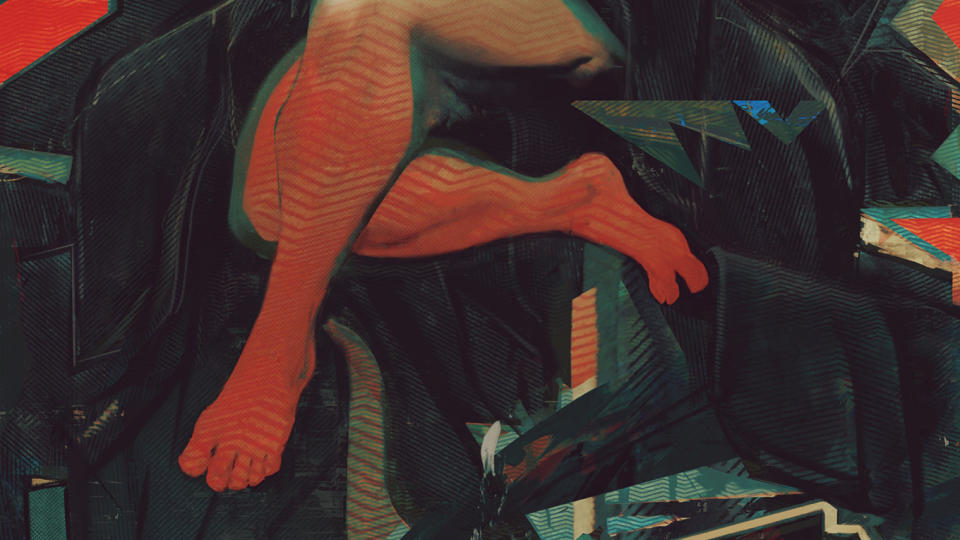
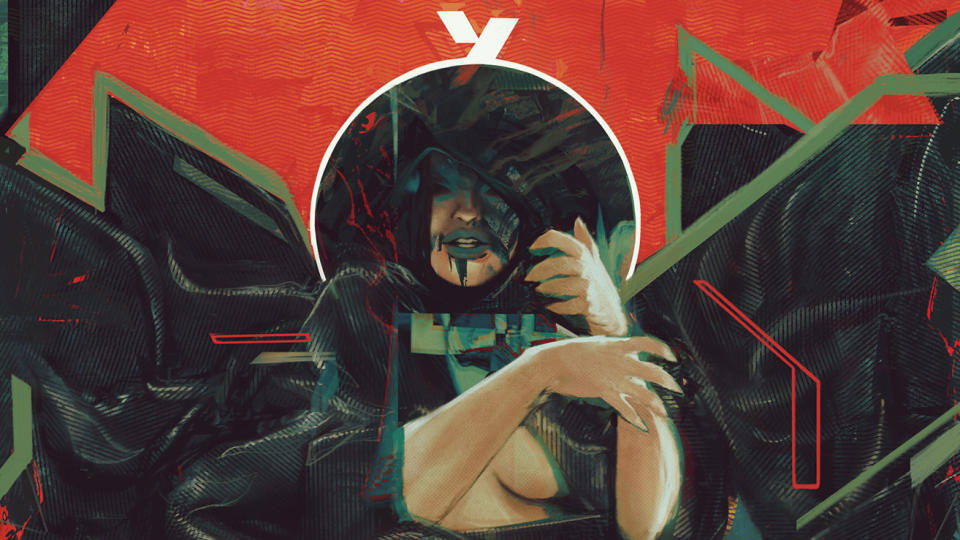
One of the most striking things about Beksinski’s artwork is how he uses the fabric seamlessly to involve the character, giving it a dream-like quality. I aim to take a similar approach, using geometric shapes as unfolding parts of the cloth. I want to leave it up to the viewer to decide if it’s the figure’s clothing or part of her body.
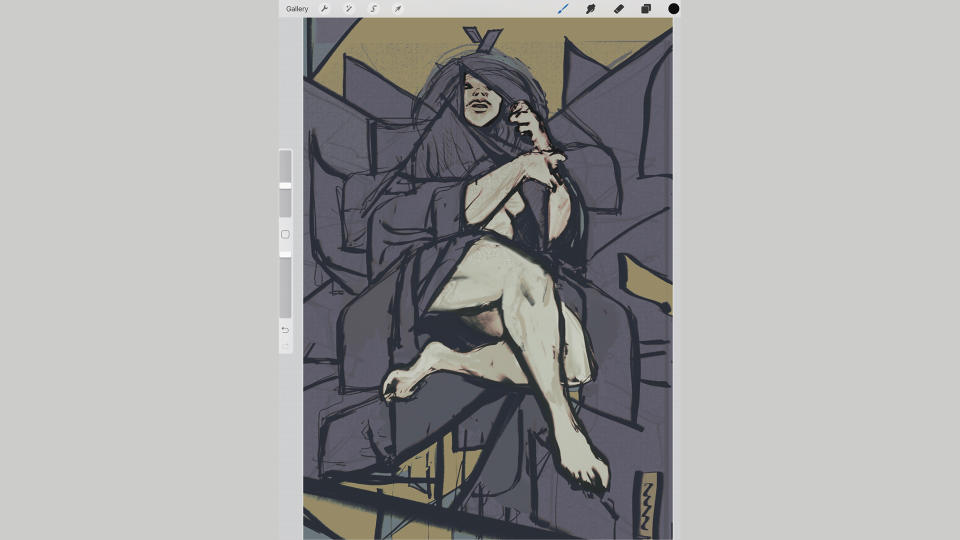
04. Folding and unfolding
(Image: © Rafael Sarmento)
Now this is the beginning of the tricky part – making the folds work as the vessel for her body, conceptually speaking. Whether the fabric is unveiling or hiding her, a big part of the composition’s weight will centre around the main figure.
05. Portraying the figure
(Image: © Rafael Sarmento)
I’m working intuitively during this stage, and need to ensure that any decisions I make now won’t be hard to modify at a later stage, as I adjust/update the composition. At this stage I’m certain she’ll have a stylised appearance, to keep to the premise of making this artwork look and feel surreal, while tangible at the same time.
06. Applying texture
(Image: © Rafael Sarmento)
One of the key elements I usually work in my illustrations is texture. For this piece I’m using a mix of custom brushes created by True Grit Texture Supply and some old paint textures that I rustled up myself ages ago.
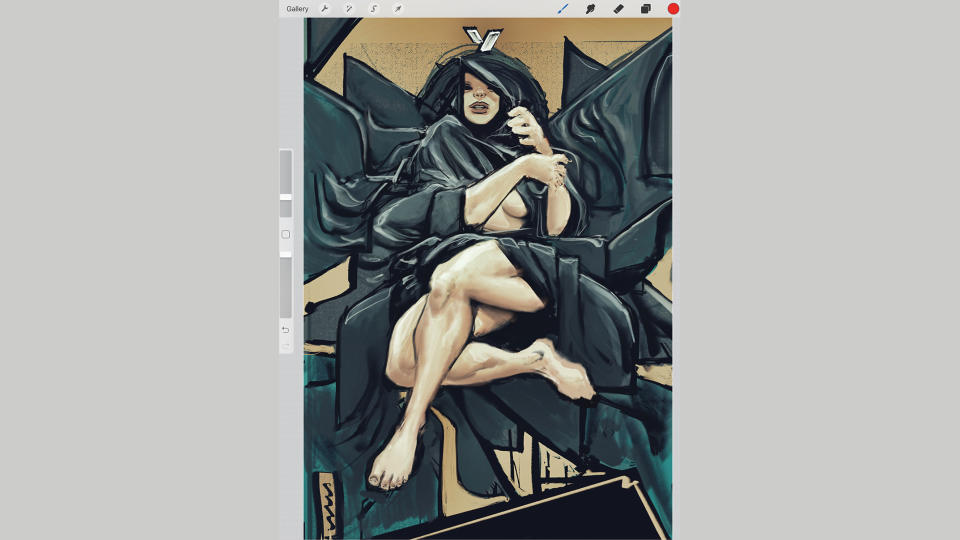
07. Adjusting my values and colours
(Image: © Rafael Sarmento)
Procreate is, in my mind, the best-designed program for drawing and painting. Unfortunately, it lacks certain colour settings and adjustment tools, so I move the image back and forth between some apps to adjust the colours and mood. Apps such as Snapseed and VSCO provide more than enough control over the atmosphere that I’m trying to achieve in the painting, and are ridiculously fast to use, too!
08. Colouring the shapes within the piece
(Image: © Rafael Sarmento)
One of Procreate’s great features is the Color Drop tool. You “grab” the colour you’re using with the Pencil and drag it over the part you want to colour (there’s a threshold control after you drop it). I start using this to colour different parts of the fabric’s shapes as I seek to achieve a balance of contrasting colours while creating the tension that will help drive the viewer (along with the shapes and lines) through the piece.
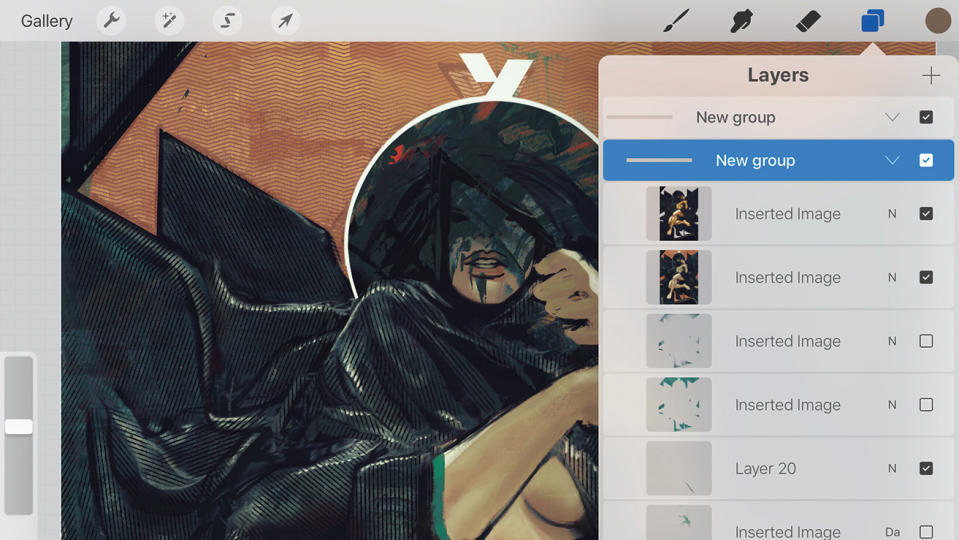
09. Keeping things organised
(Image: © Rafael Sarmento)
Since I’m essentially creating visual chaos with elements that I can play with during the painting process, I try to at least keep things (slightly) organised. I place some of the texture layers apart from each other, as well as some elements of the painting that, at this point, I’m not sure how I’m going to finally place.
10. Having fun with layers

(Image: © Rafael Sarmento)
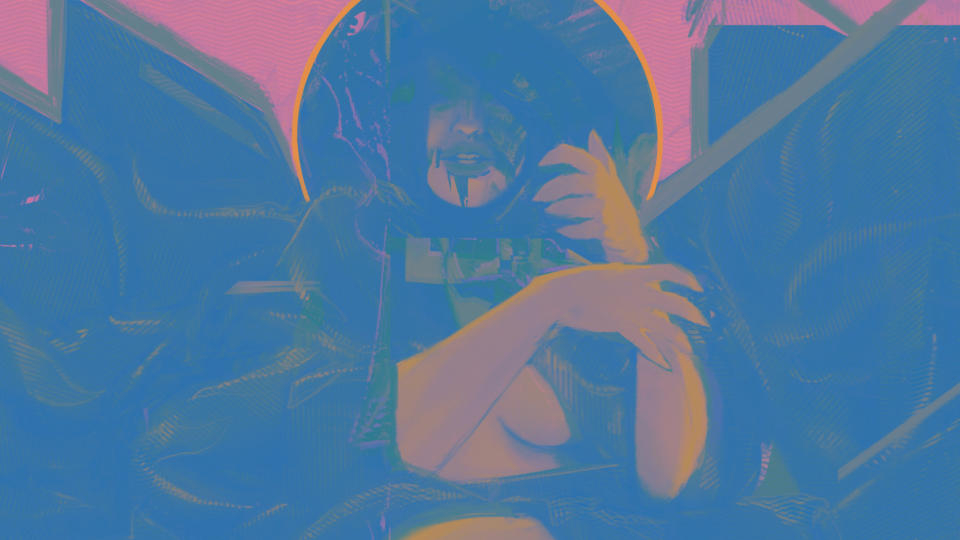
A fundamental part of how I create the overall mood and colours of a piece has a lot to do with experimentation, especially using layer properties. An example of what I do is creating a flat colour layer on top of everything, set it to Exclusion and then reducing the Opacity to around 50 or 60 per cent.
11. Selectively mixing and matching
(Image: © Rafael Sarmento)
Now that I’ve got my Exclusion layer established, I open the Cut/Copy/Paste menu, press Copy All and then Paste. This creates a flattened image with the altered colours, which I set to Lighten or Darken. Then I move, cut and paste elements from this flat layer, and add them to my work-in-progress artwork.
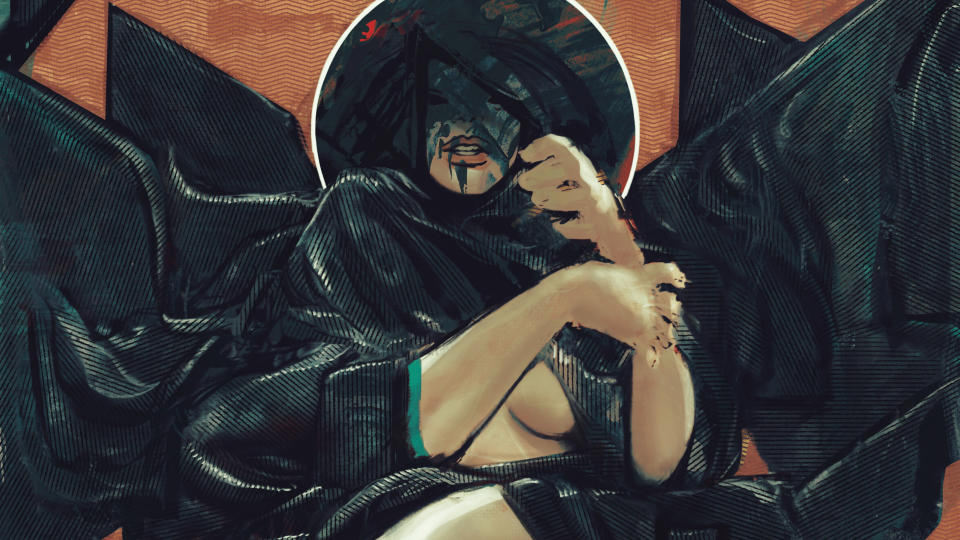
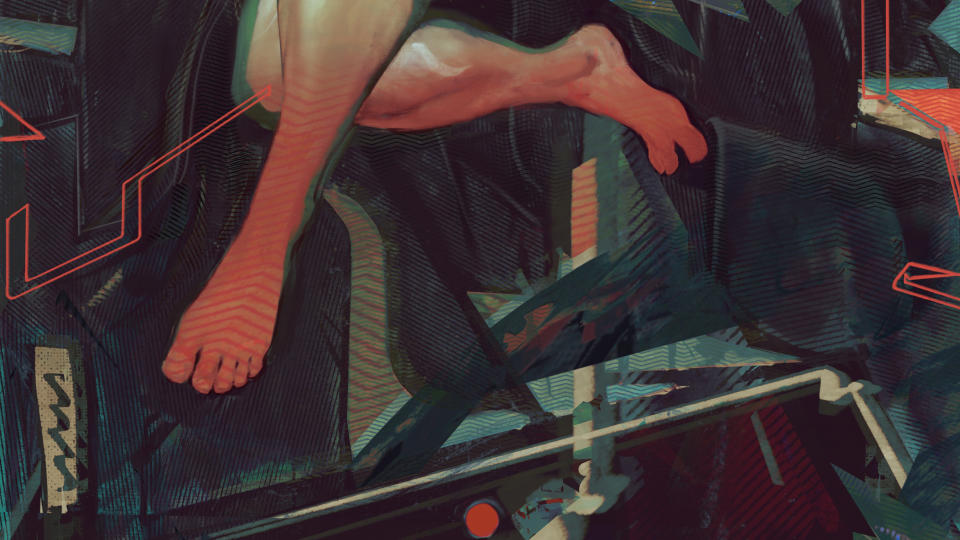
12. Designing the symbols
(Image: © Rafael Sarmento)
Graphical elements enable me to balance and contextualise the narrative within an illustration. I can juxtapose the organic forms and lines, creating a layer of abstraction that I think acts as a fun bridge between the atmospheric, dark worlds of Beksinski and the contemporary approach that I’m taking.
13. Fine-tuning the art
(Image: © Rafael Sarmento)
Now that we’re nearly at the end of our journey, it’s time to double-check everything and make sure the elements in the composition complement each other. This is where I make use of the layers I kept separate earlier (such as some textures or design elements) to be sure they’re working together, before flattening everything so I don’t end up with a large, unwieldy image file.
14. And it’s a wrap!
(Image: © Rafael Sarmento)
Here we are! Before calling it a day, I make sure to keep some earlier steps for comparison, export the Time Lapse process video (one of the coolest features of Procreate), and we’re done. Hope you’ve enjoyed this workshop. I can’t match the mastery of Beksinski, but I hope I can honour him at least just a little bit. See ya!
Procreate tutorial: professional tips
Here are a few quick tips if you're going to embark on your own surreal journey in Procreate.
Keep things lean and mean
Maintaining a streamlined workflow with only Procreate as my main tool and a few other apps for colour tweaks) drastically improved my painting process. It took me out of my comfort zone and forced me to paint more, and better. Having to rely on fewer art gimmicks ended up boosting my skills.
Dual screen it up
One of the iPad Pro’s coolest features is the Dual Screen, which enables you to keep your browser or references open on one side of the screen, and Procreate at the other! Since I’m using the 12.9-inch model, it can perfectly accommodate everything at a comfortable size, whenever I need it.
Use the Quick Menu
Procreate has, among its many other features, a very effective Quick Menu that is activated with a simple touch on the screen. You can customise it to contain whatever items you want, and this makes it a real time-saver that’s sure to boost your productivity levels.
Get more Procreate tutorials in ImagineFX
This content originally appeared in ImagineFX magazine, the world's leading digital art and fantasy art magazine. ImagineFX is on sale in the UK, Europe, United States, Canada, Australia and more. Limited numbers of ImagineFX print editions are available for delivery from our online store (the shipping costs are included in all prices)
Alternatively, you can access us instantly through our digital options:
• Apple app (for iPad or iPhone)
• Pocket mags (multi-platform app, great for Android users)
• Zinio (multi-platform app for desktop or smartphone)

