Create stunning 3D scans with photogrammetry
From VFX to video games, developers and artists are always looking for ways to achieve virtual realism, and one of the most-used methods nowadays is that of creating 3D-scanned models. The process behind this is called photogrammetry, and it’s a powerful and versatile technique that has revolutionised the capture and reconstruction of the real world into the virtual one.
Photogrammetry uses the principles of optics, geometry and computer science to transform two-dimensional photos into accurate and realistic 3D models. By taking multiple overlapping pictures of a subject from various angles, photogrammetry software develops and analyses the visual data to triangulate points within space, constructing detailed and life-like representations of landscapes, objects, or potentially even entire environments.
The discipline finds applications in diverse fields, from architecture and cartography to archaeology, virtual reality, and entertainment including movies, TV shows and video games. In this tutorial, I’ll guide you step-by-step in the production of your first 3D-scanned model, from taking photos through to polishing and rendering your scene with 3D software.
The process is always a journey and getting better will only happen with time, patience, and most importantly trying and failing, and learning from your mistakes. Now let’s get started!
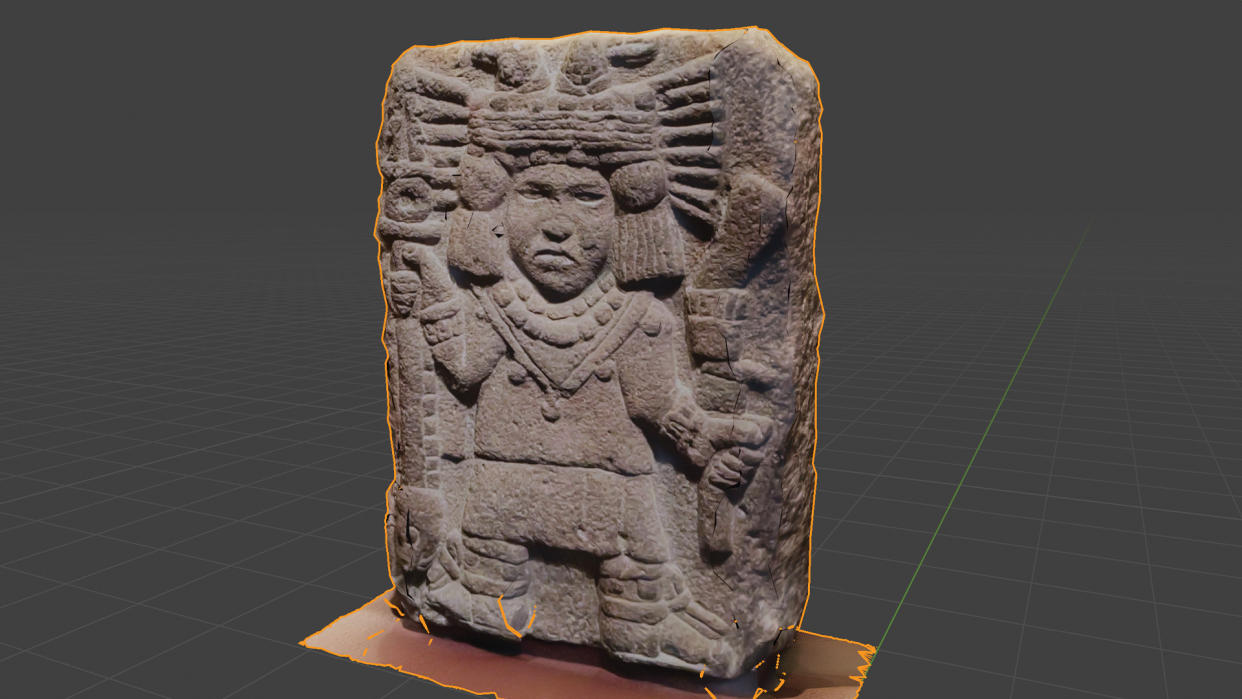
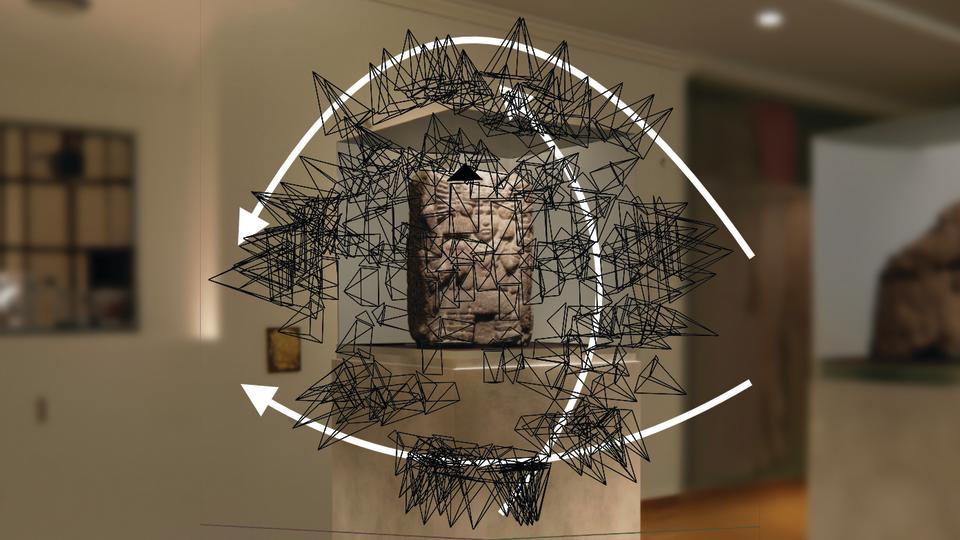
01. Understand the basics
(Image: © Pietro Chiovaro)
Photogrammetry is a process that uses overlapping photos to reconstruct either 3D models or scenes. It relies on the principle of triangulation, where software such as Capturing Reality or Metashape identifies common points across multiple images and calculates their 3D locations.
These points, known collectively as a point cloud, are then used to generate the 3D model of the object. Understanding the fundamentals of this technique are essential to start working on photogrammetry scans with the confidence to finalise the process.
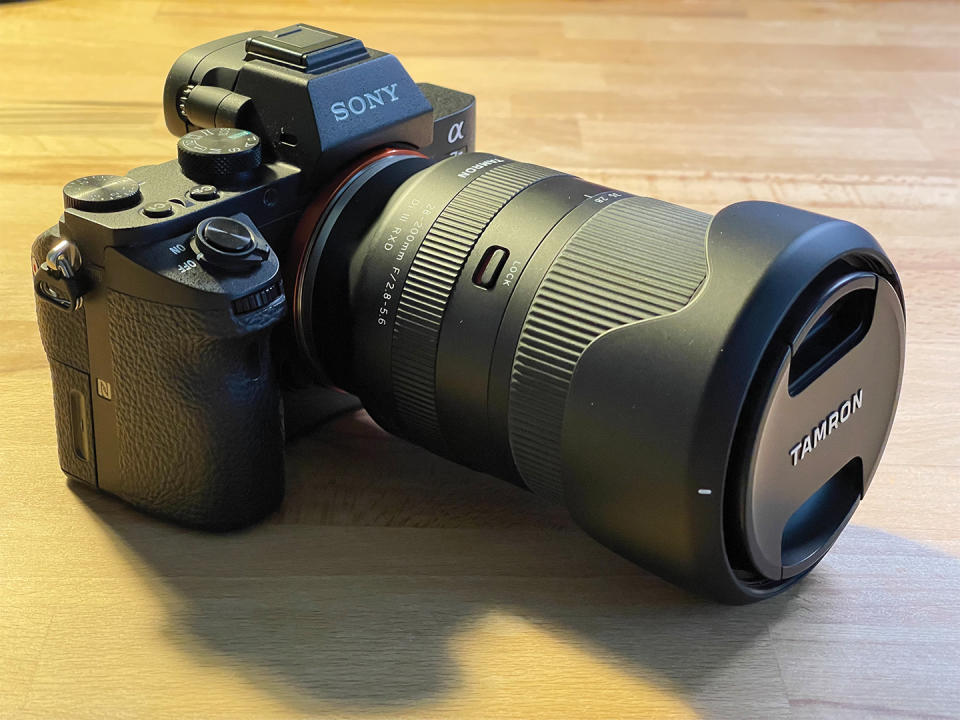
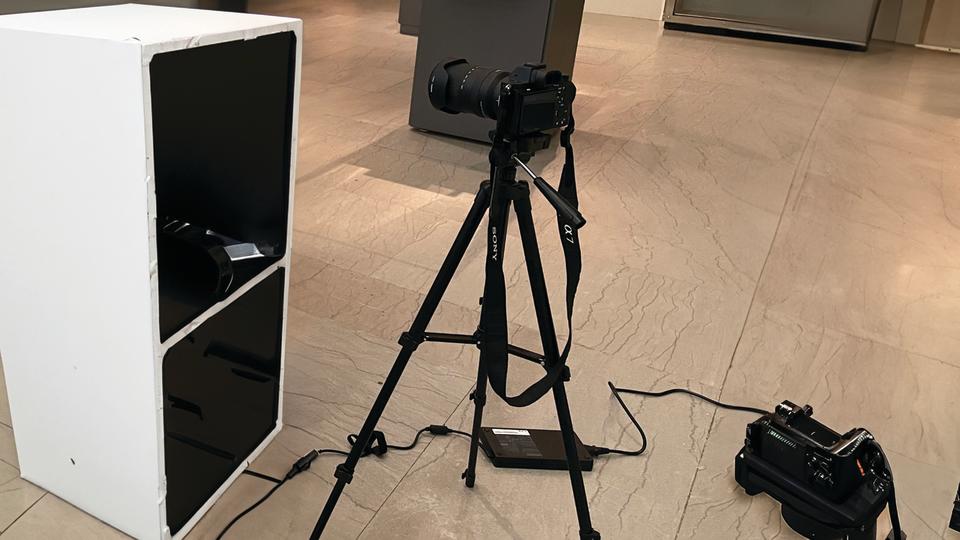
02. Pick your camera
(Image: © Pietro Chiovaro)
The first step is to choose a camera that lets you capture high-quality images suitable for photogrammetry, as the level of the final scan depends on the quality of the images taken. Look for a camera with a high-resolution sensor to capture fine details, and a good lens that can help you work even in low light.
For the same reason, it’s preferable for you to use a full-frame camera. Manual settings such as ISO, aperture and shutter speed are the basis for controlling the exposure across all your photos, and avoiding artifacts and weird textures during the software processing stage.
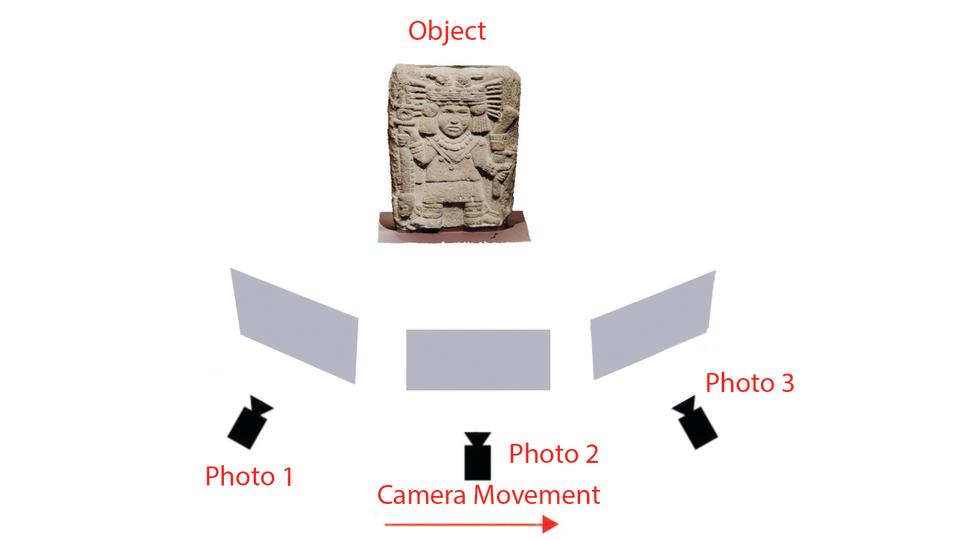
03. Plan ahead
(Image: © Pietro Chiovaro)
Your scene deserves the proper lighting, so it’s crucial that you plan out everything to ensure a successful photogrammetry project. Choose the subject and, if possible, the location carefully, including factors such as lighting, accessibility, and the size of the subject.
Consider the subject’s complexity and determine how many photos you’ll need to capture from different angles to have full coverage. Proper planning here will save time and help you obtain high-quality results without the risk of needing to repeat the process due to a lack of photos. I personally suggest taking a minimum of 60 photos for a small object.
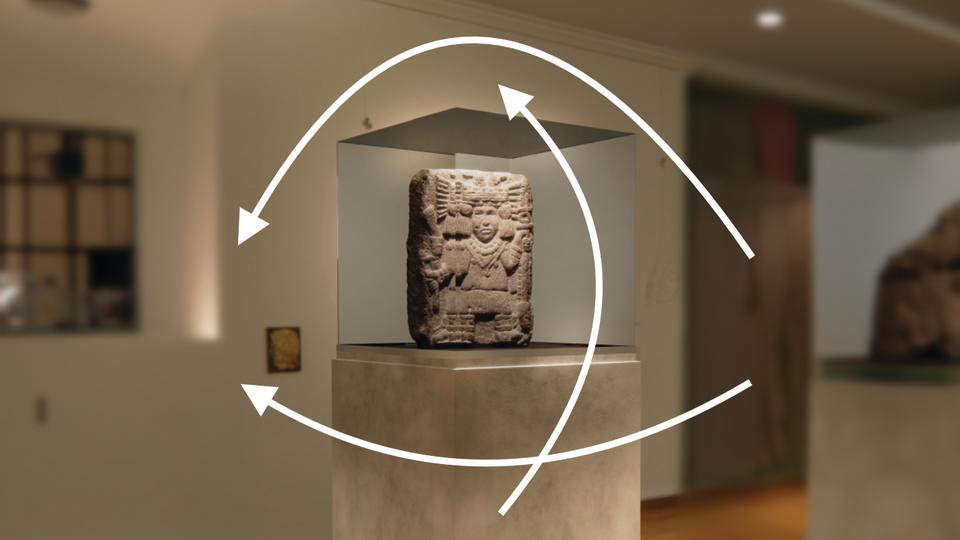
04. Take pictures
(Image: © Pietro Chiovaro)
During the photography part of the process, make sure to take a series of overlapping photos of the subject from different camera angles and heights. I usually start from the bottom up, as if I was using a LiDAR laser, which is an alternative method of photogrammetry.
The more photos you take, the easier it will be for the software to identify any common elements and align them properly to create the point cloud during processing. Once again, it’s essential to keep the scene in a bubble, trying to not change the lighting, using a consistent shooting technique and most importantly never moving the subject from its initial location.
05. Use a tripod
(Image: © Pietro Chiovaro)
The use of a tripod to stabilise your camera is important to maintain consistent positioning throughout the photo-capture process. A steady camera prevents unwanted blur, incorrect focus and misalignment between images, ensuring better results during the photogrammetry processing.
For the camera, it’s important to invest in a tripod and use it in situations where handheld photography introduces shake or unwanted movements, for example in dark places where you need to decrease the shutter speed.
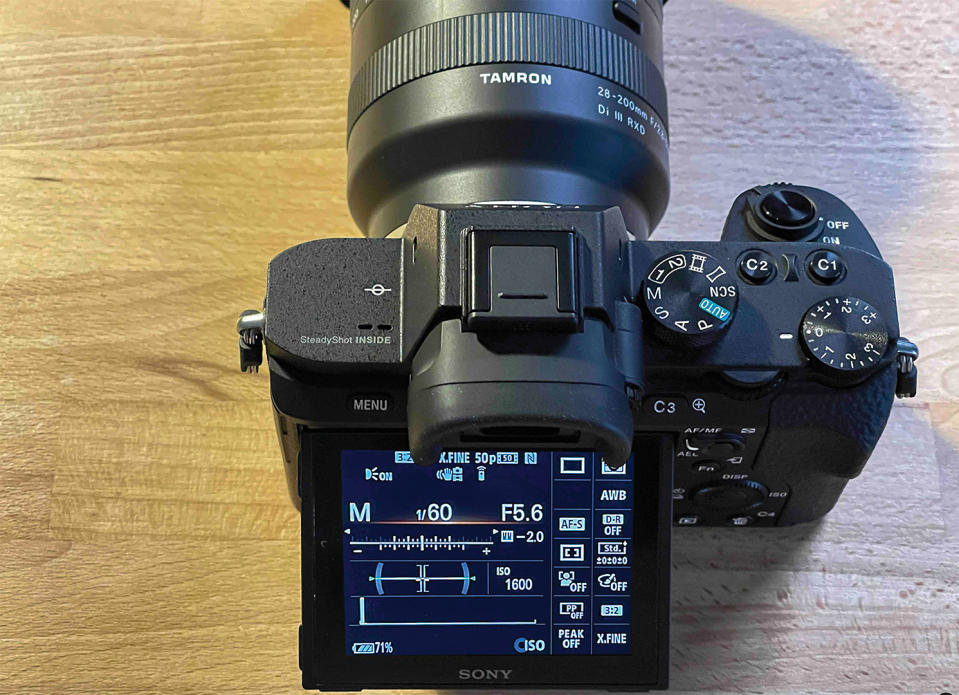
06. Use manual settings only
(Image: © Pietro Chiovaro)
I previously mentioned ISO, shutter speed and aperture, options that aren’t common to most mobile phone camera users. But for photogrammetry, setting these camera properties manually is an essential part of maintaining consistent exposure throughout the captured images.
Use a low ISO value to minimise noise, and choose a narrow aperture (a high f-number) to increase depth of field. Manual settings ensure the camera’s exposure remains consistent during the capture process from different angles and lighting conditions.
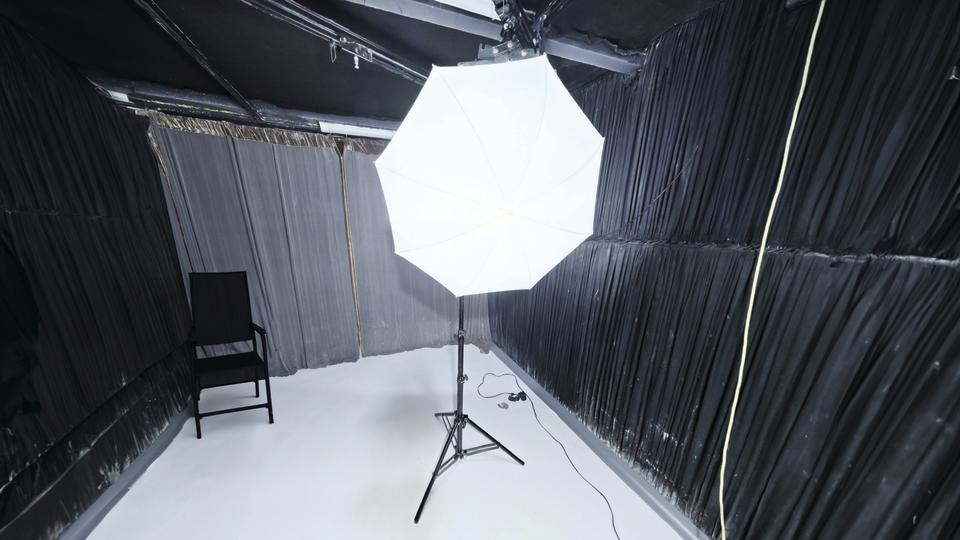
07. Consider the lighting setup
(Image: © Pietro Chiovaro)
Lighting plays a fundamental role in photogrammetry, so make sure to have adequate lighting that’s evenly distributed across the subject to minimise strong shadows or highlights. Diffused lighting, achieved through a softbox or natural light on a cloudy day, helps detect all the details and textures without creating strong contrasts that might result in poor models.
For this reason, it’s important to avoid times of the day like sunrise and sunset, where the position of the sun, and consequently the lighting, can quickly change.
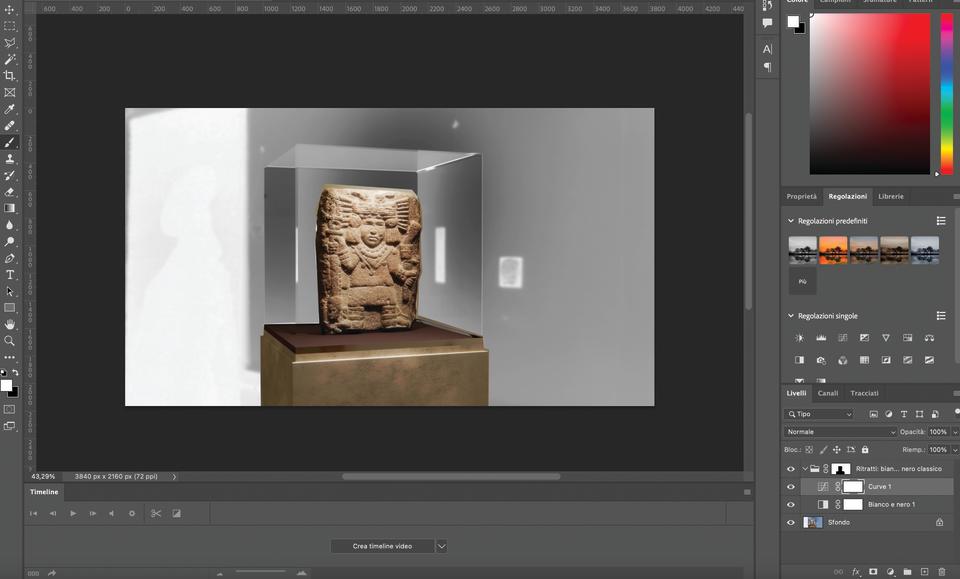
08. Add a scale reference
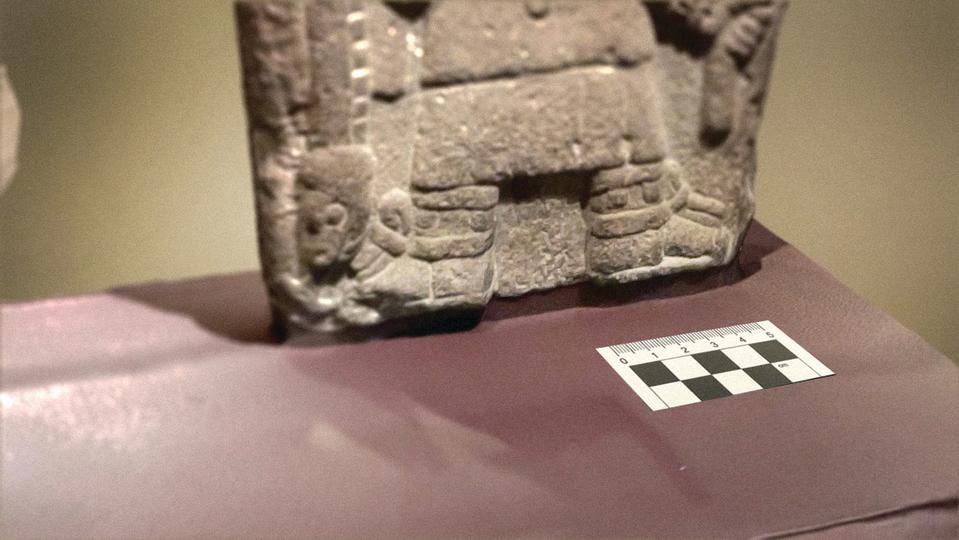
(Image: © Pietro Chiovaro)
Introduce objects with known dimensions into the scene as scale references. These could be a mobile phone or a pencil. This will help you to establish accurate measurements and scale in the final 3D scan. And let’s suppose you want to 3D print it; you’ll get the exact same replica of your scan. But there are more reasons why including a scale reference is essential, for example when you need precise measurements of the subject, especially in architecture, engineering, archaeology and medical applications.
09. Capture more photos
(Image: © Pietro Chiovaro)
Although I said a minimum of 60 photos is needed, why not take additional images from various heights, distances and perspectives? You might need to retake photos due to a change of lighting, holes in the scans, missing parts, or the worst situation, being out of focus.
In this case it’s always worth taking a few extra photos, so if needed you can add the new images to the photogrammetry software and get the model done. In most cases, taking just 5-10 more photos can improve the quality of your final scan.
10. Use a colour calibration chart
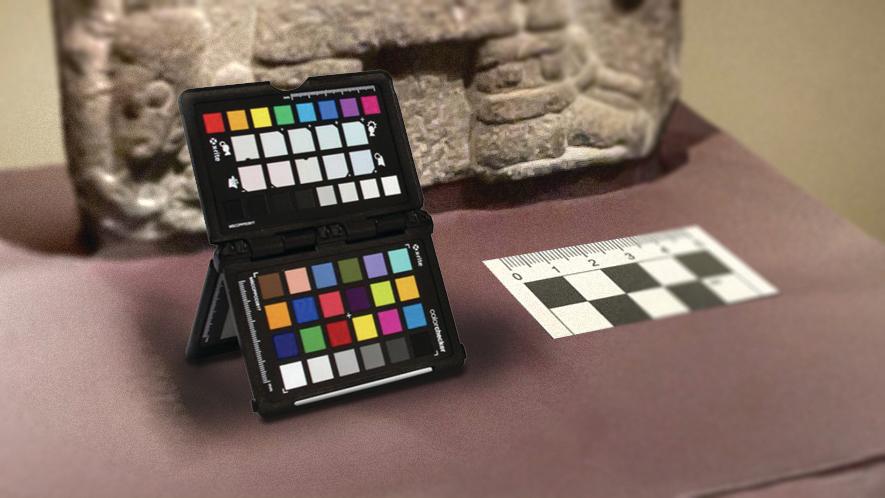
(Image: © Pietro Chiovaro)
Another worthwhile investment is a colour calibration chart, also known as a colour checker, which is an essential tool for ensuring accurate colour reproduction in your models. Before proceeding with your scan, capture a set of images of the colour checker under the same lighting conditions as the landscape.
During the post-processing stage, compare the colours from the calibration chart images to the colours rendered in your model. Adjust the colour settings as needed to maintain fidelity between models.
11. Place ground control points
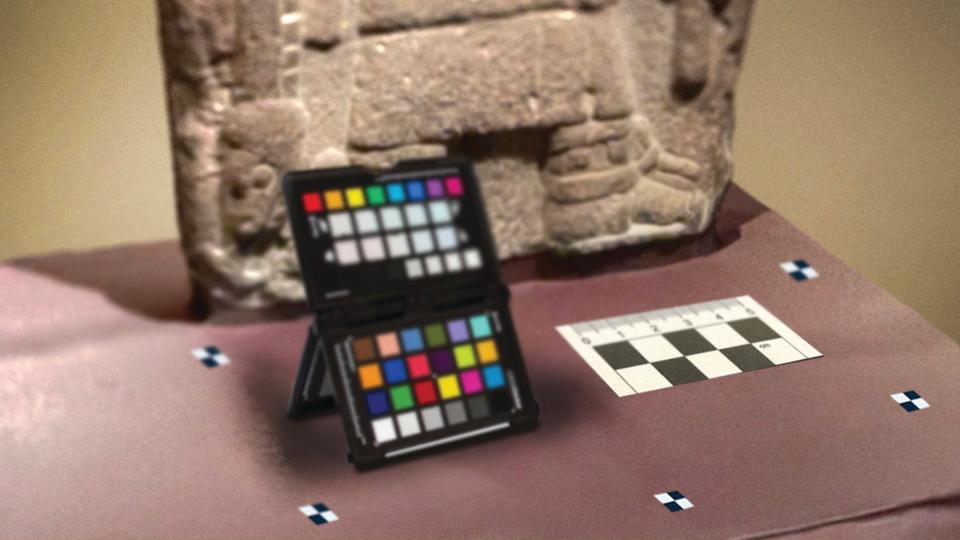
(Image: © Pietro Chiovaro)
The next tool I suggest you use are ground control points, or GCPs for short. These are physical markers that you can place in relevant spots around your scene to improve and simplify the alignment of the photos within the photogrammetry software.
They’re not necessary for all of your scans, but in particular cases where the background is not detailed and the floor is a plain surface, for example smooth concrete, the GCP markers can help the software to identify the location, distance and orientation of the scene.
12. Organise data
Once you’ve finished the photography, it’s time to import the files onto your computer. Properly organising your photos in a specific folder structure is vital for maintaining order and easy access during the photogrammetry processing.
First create subfolders for each project, and inside those create a subfolder for each 3D model that you want to generate. Last but not least, it’s always a good idea to save a copy of the file onto an external drive.
13. Begin photo processing and lens distortion

(Image: © Pietro Chiovaro)
As soon as the images are divided in their subfolders, we can start the processing. The first element to fix is the lens distortion. The difficulty here depends on the kind of lens you used; I usually suggest a 30-50mm lens where the distortion isn’t high. If you used a 14mm or similar lens, then you’ll need to fix the lens distortion.
This step is easily solved in software such as Photoshop or Lightroom, which provide lens profiles or calibration tools to correct any distortion. Fixing the distortion ensures that the 3D scan has the correct proportions and dimensions.
14. Finalise photo processing
(Image: © Pietro Chiovaro)
Another important step required before importing the images into the photogrammetry software, we need to crop or resize the images to remove irrelevant parts and reduce their resolution for faster processing.
While true that it’s important to have the best quality images, it’s also important to mention that these files are heavy to manage – usually you can get around 30GB of raw files – and generating the 3D model requires a lot of calculation from your machine. For this reason I suggest you optimise the photos to include just the essential elements.
15. Choose photogrammetry software
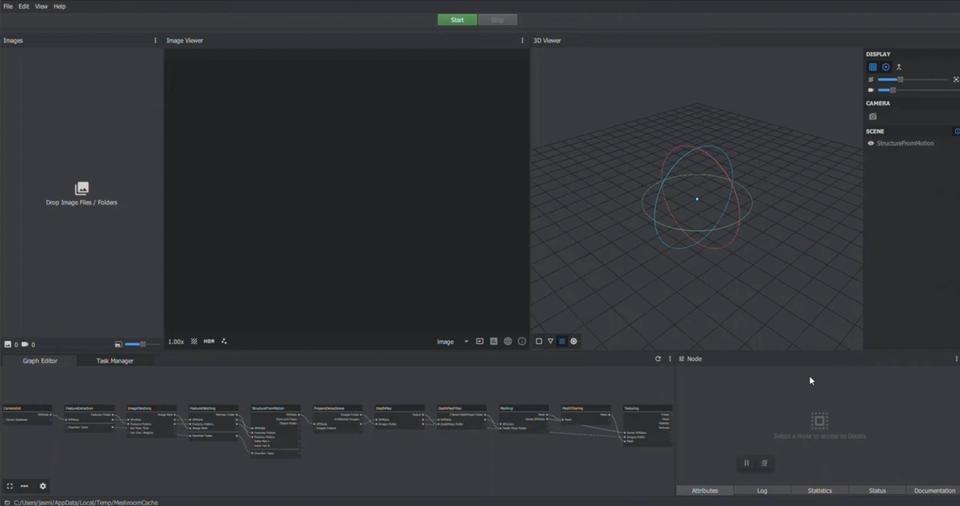
(Image: © Pietro Chiovaro)
Selecting suitable photogrammetry software is crucial for achieving both accurate and efficient results. Different software packages offer various features, processing capabilities, and user interfaces. There are four main softwares that I consider for photogrammetry: Reality Capture, Metashape, 3DF Zephyr and Meshroom.
All of these are strong software, some better than others, but it’s important to know that Meshroom is the only free and open source solution (available only for Windows and Linux).
16. Import images
Once you’ve chosen your photogrammetry software, import the photos. Pay attention to the correct order and orientation of the images. The software will use this information to align the photos accurately during the processing stage. You don’t usually need to rename the files since they are numbered in order while shooting.
17. Align photos
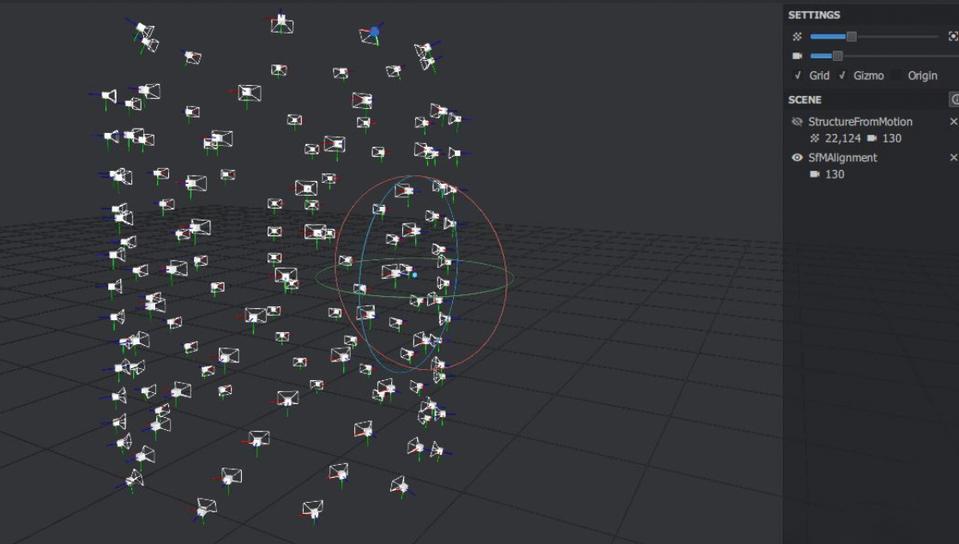
(Image: © Pietro Chiovaro)
During this step, all you need to do is press the button and the work will be done by the photogrammetry software, which will analyse the imported photos looking for common elements between them.
By matching these elements, the software aligns the images precisely in the 3D space to generate the point cloud. That’s the process I mentioned before, where it’s essential to have the right amount of photos to get as much detail as possible.
18. Generate the point cloud
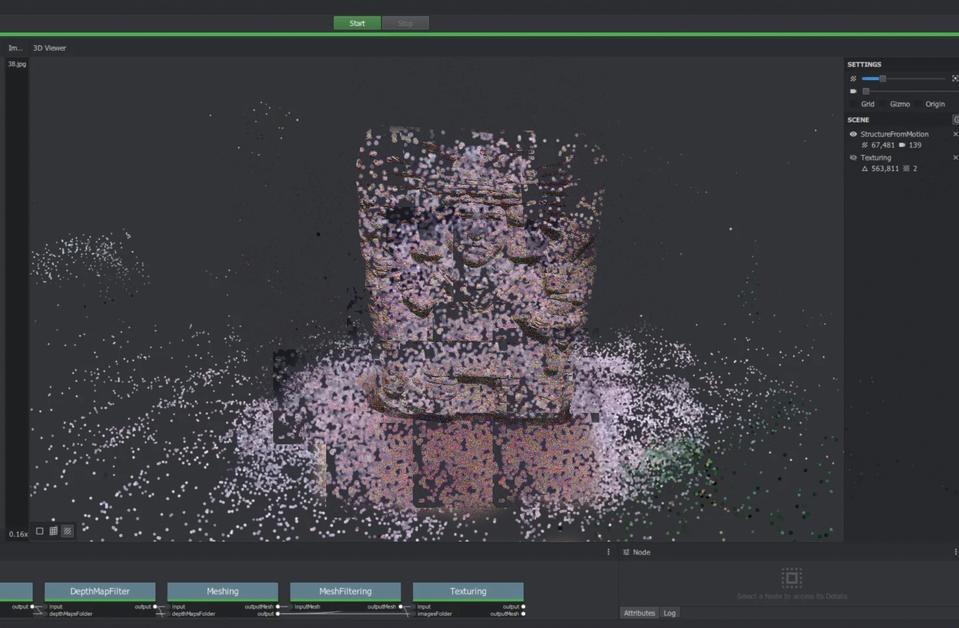
(Image: © Pietro Chiovaro)
After aligning the images, the software will calculate the 3D co-ordinates of the common elements found during the alignment process to create a point cloud. This point cloud represents the spatial distribution of points of the object’s surface, so the more points you have, the more detailed the scan will be. This stage provides the base data for the next step.
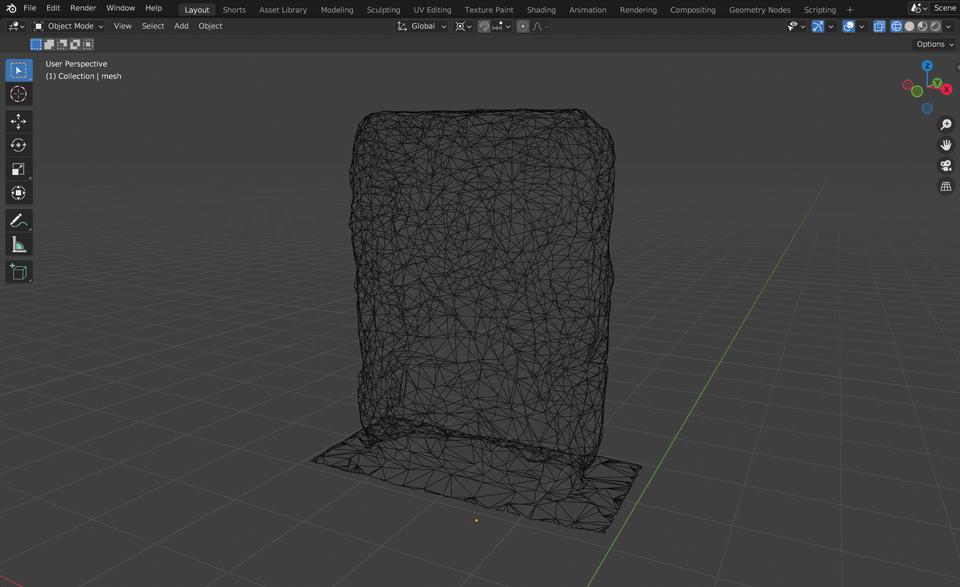
19. Refine the mesh
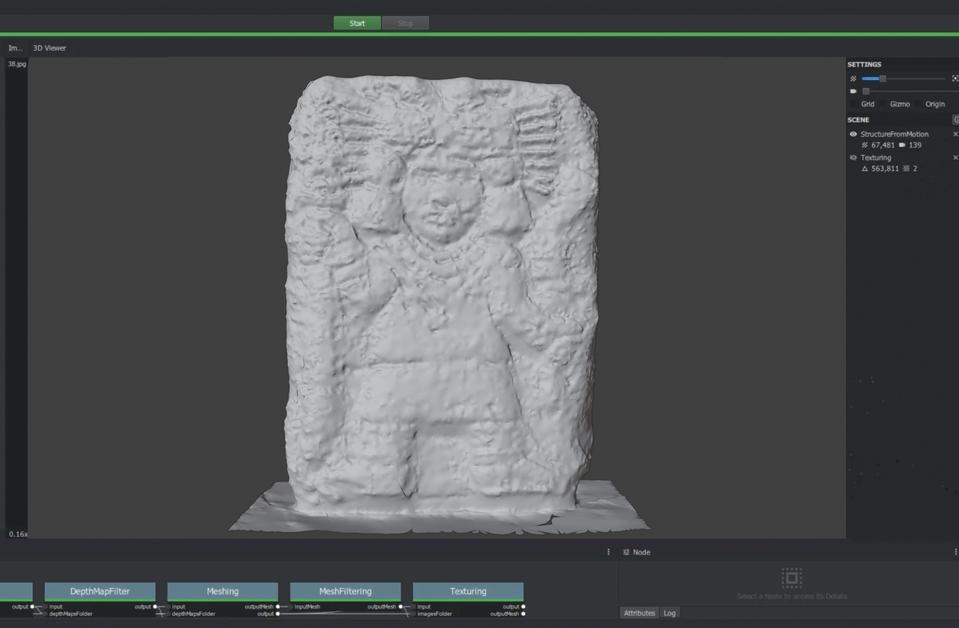
(Image: © Pietro Chiovaro)
Once completed, we’ll get an intricate shape resembling the object we scanned. If we zoom in, we can see that there’s still an empty area between all the points, so once again we need to click on the option to generate the mesh from the point cloud. During this process the photogrammetry software will create the mesh, connecting all the points that will generate the faces of the model.
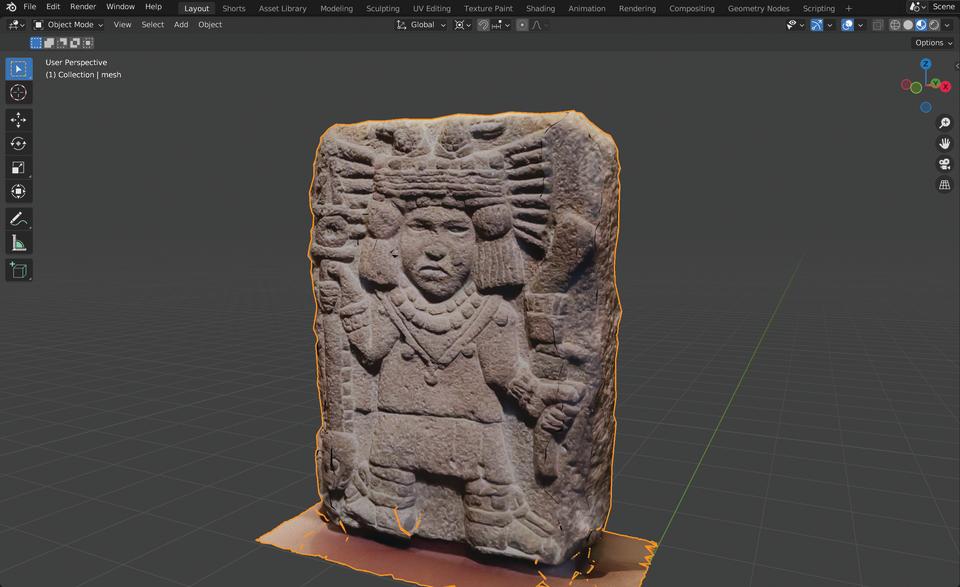
20. Begin texture mapping
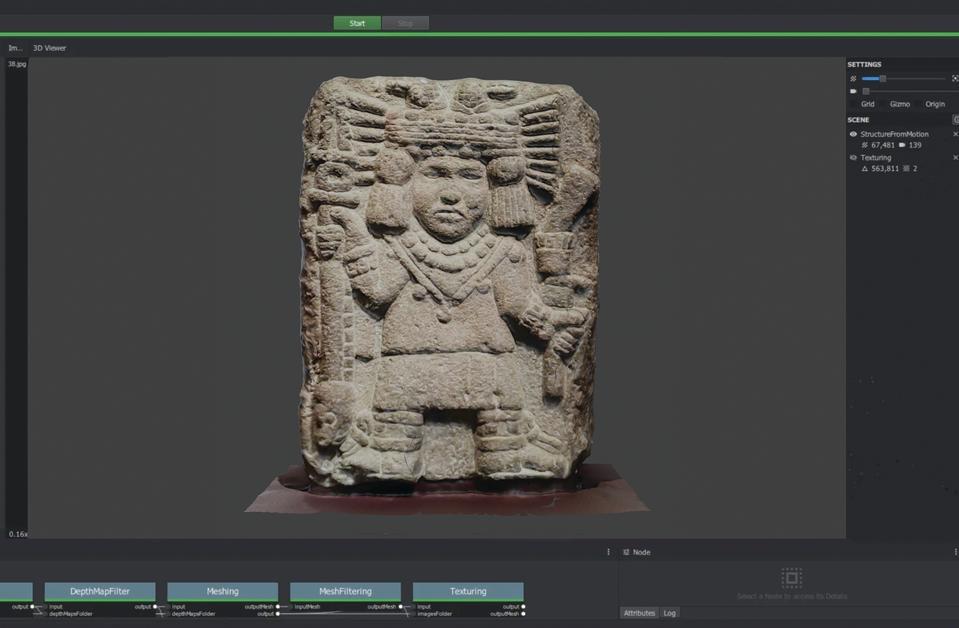
(Image: © Pietro Chiovaro)
With the previous step finalised, we now have 3D geometry resembling the real-life model we scanned. However, with some software there’s an extra step we need to do before we can export the model to our 3D program: generating the textures.
In this step, the photogrammetry software projects the original photos in the model’s geometry based on the UV coordinates, which it creates on its own. Once again, we just need to wait until the process is complete.
21. Export the model
(Image: © Pietro Chiovaro)
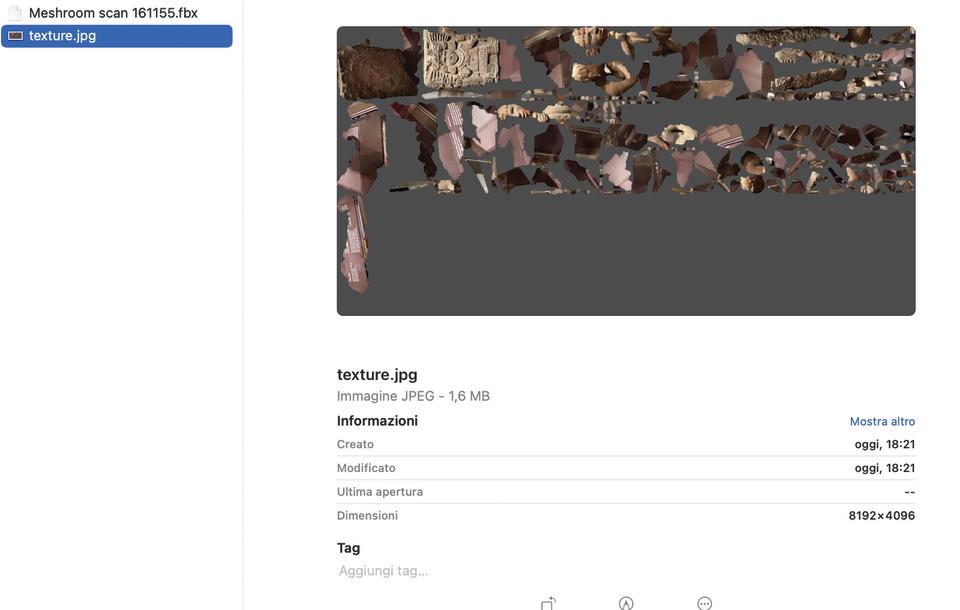
After completing these steps, we can now finish up with the photogrammetry software by exporting the final model in a suitable format. The most used include FBX, OBJ, STL and GLB/GLTF, depending on the application or software you’re planning to use the model in.
In general, for software such as Blender or Unreal Engine 5, FBX is perfect. Along with this, you’ll want to export the texture. In this case, I highly suggest choosing PNG in order to avoid the compression of formats such as JPG.
22. Begin post-processing
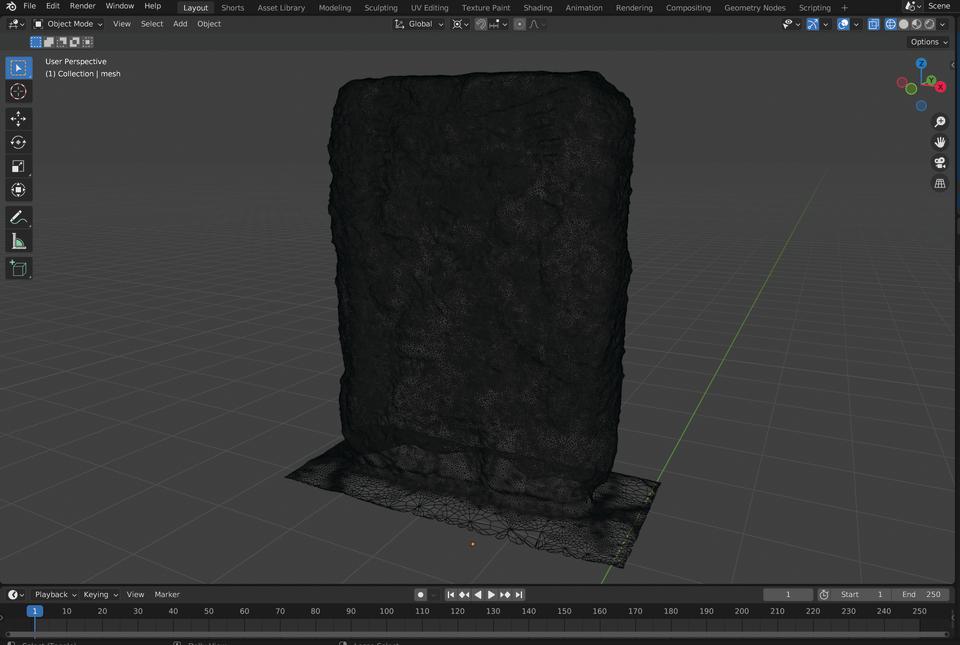
(Image: © Pietro Chiovaro)
As soon as you import the model into your editing software, you’ll notice the heaviness of the geometry, and the unnecessary complexity of the materials and textures that have been generated. In the previous steps the work was done by the software, but now is the time to manually fix the model. The steps are essentially retopology and UV map generation, with baking of the textures.
23. Retopologise the 3D scan
(Image: © Pietro Chiovaro)
The first task is to optimise the scan’s geometry. By default a 3D photogrammetry scan can have something like three million polygons, or in certain cases more than 70 million depending on its complexity and the software used for the scan.
As you can imagine, it’s hard to deal with the models on a project like this. The best way to resolve the problem is to retopologise the 3D scan to create a new, clean version of the model following the existing geometry.
24. Complete UV maps and texture baking
(Image: © Pietro Chiovaro)
When we complete the retopology, we can move on to UV mapping. This workflow is the same as you’d do for any mesh, unwrapping the 3D model as a 2D surface. Once the UV map is ready, all we need to do is bake the details of the geometry and texture of the scanned model to the retopologised model. This way we’ll have all the details of the scan in a model that can run smoothly on any device.
This interview originally appeared in 3D World magazine, the world's leading digital art, CG and VFX magazine. 3D World is on sale in the UK, Europe, United States, Canada, Australia and more. Limited numbers of 3D World print editions are available for delivery from our online store (the shipping costs are included in all prices).

