Create a head-turning pixel-stretch effect in the budget-friendly Affinity Photo

Watch video (above): Create a pixel-stretch effect in Affinity Photo
The Column tool in Affinity Photo lets you take the merest sliver of an image, which can then be stretched out to form a vibrant band of colour. You can specify a number of pixels for the width, so you can go for a single row of pixels or – as we’ve done here – make it a few pixels wide. Once expanded, we get an eclectic mix of colour to match the palette of our portrait.
We’ll show you how to use the technique here to craft a vibrant effect. It may look complicated, but it’s a simple matter of copying and stretching our selections, then using a distorting filter to transform the colourful strips into circles. Along the way we’ll explore key Affinity Photo skills, such as layer masking and outer shadows. As is often the case with an effect like this, the real skill comes not in the basic technique, but in fine-tuning it so that everything works together. We can do so by using subtle shadow effects so that the figure and colours feel more real. Finally, we can add variety to our colourful circles by duplicating and reusing them in different ways around the image.
You can download the Stretch.jpg start image for you to experiment with here, but why not use your own photo? All you need is a shot of a person on a plain backdrop. A jump or similar action pose can lead to dynamic results.
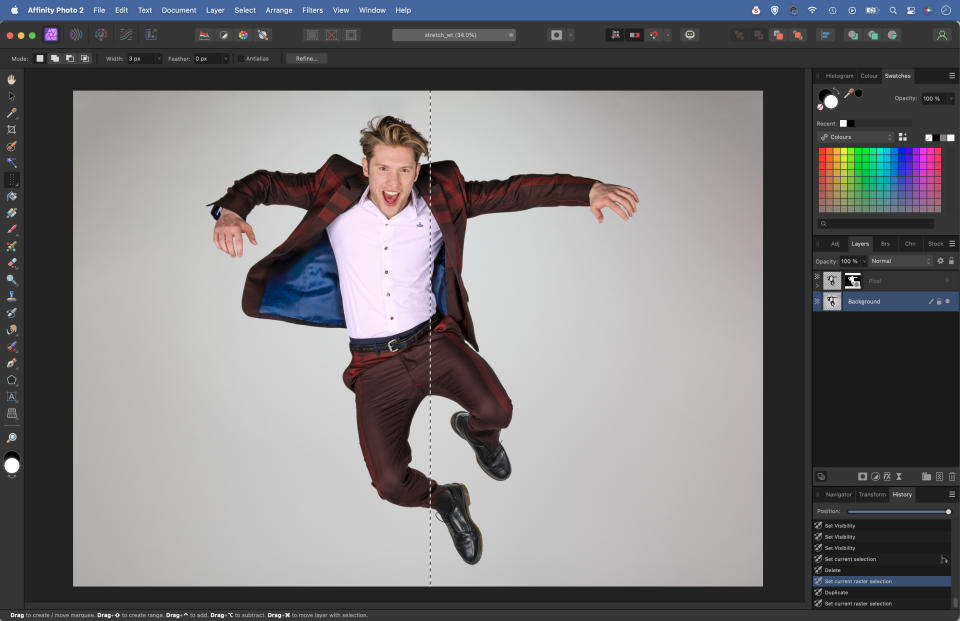
1. Select the person

Grab the Selection Brush, check ‘Snap to Edges’ then paint over the subject to select them (hold Alt and paint to subtract if necessary). Click the Refine button. Increase Border Width to improve the edge, then paint over gaps in the hair and fingers with the Matte brush to get a better result.
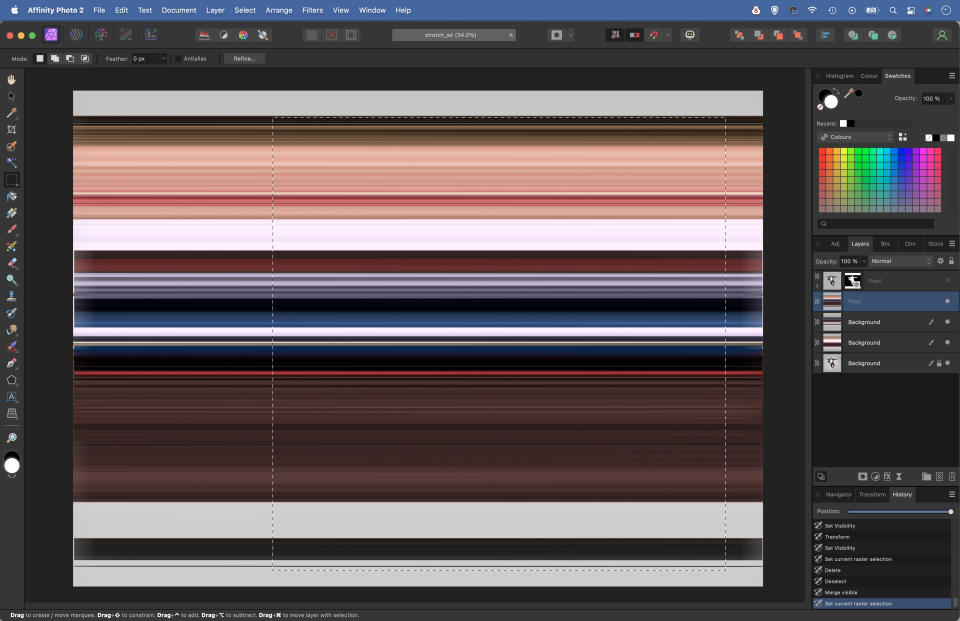
2. Make a column selection
In the Refine Selection box set Output: New Layer with Mask and hit Apply. Reveal and highlight the bottom layer, then grab the Column Marquee tool from the toolbar. Set Width 3px then drag to make a vertical selection (you won’t see the marching ants unless you zoom in very close).
3. Stretch the selection

Hit Cmd/Ctrl+J to copy the selection to a new layer then grab the Move tool. Drag the bounding box outwards to each side to stretch out the line until it covers the whole frame. Next highlight the bottom layer and repeat the process, picking out the best colours from the portrait.
4. Blend the best colours
Hide the top layer. Use the Rectangular Marquee tool to select unwanted sections of the colour bands and hit delete to remove them, revealing colours on the other banding layer below. Once you’re happy with the array of colours hit Cmd/Ctrl+Shift+Alt+E to merge a new layer. Hold Shift and drag a square selection.
5. Use Rectangular to Polar
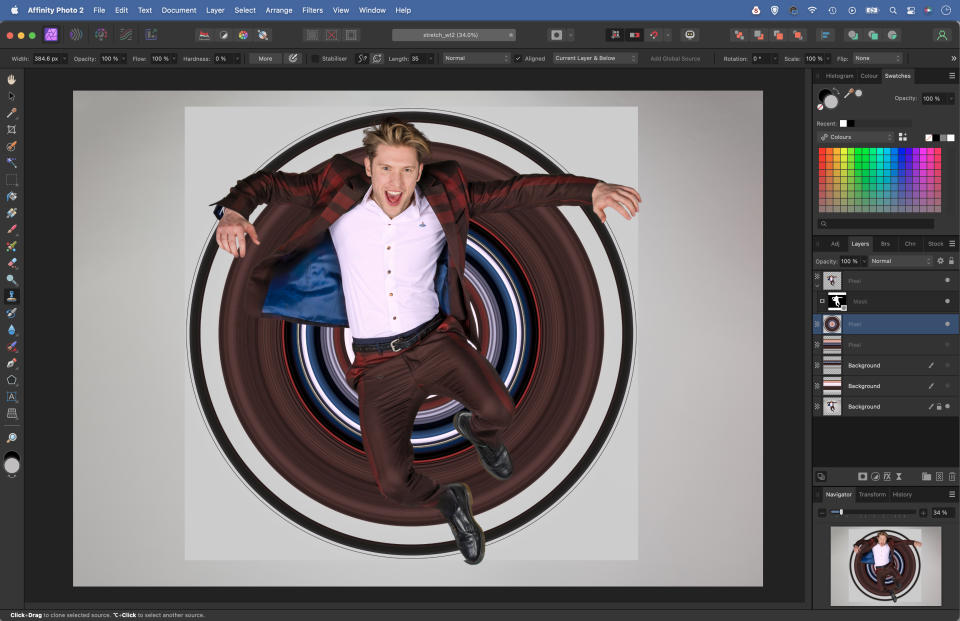
Grab the Crop tool and double-click to crop to the selected area. Go to Filter>Distort>Rectangular to Polar. Hit Cmd/Ctrl+C to copy the circle, then hit Cmd/Ctrl+Z twice to undo the crop. Hit Cmd/Ctrl+V to paste the circle into the uncropped image. Hide all the other colour layers and reveal the portrait layer.
6. Mask the circle
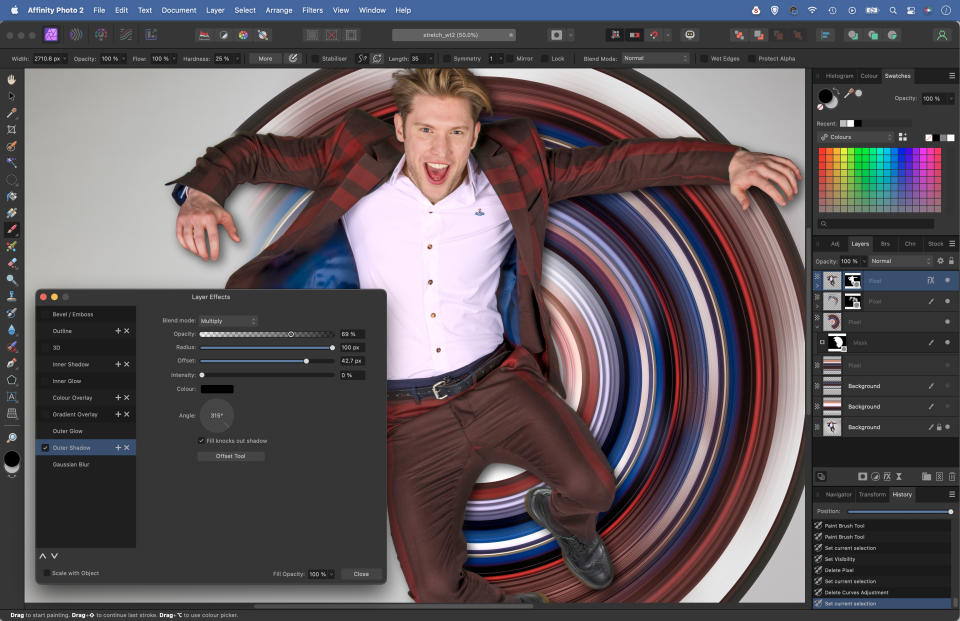
Click the Add Layer Mask icon. Grab the Brush tool and paint black to hide sections of the circle. Next duplicate the layer, enlarge, and rotate, then paint a mask to add variation to the circles. Finally highlight the top layer, click the FX icon and use the settings to add an Outer Shadow to add depth.
• See more of our Affinity Photo tutorials
PhotoPlus: The Canon Magazine is the world's only monthly newsstand title that's 100% devoted to Canon, so you can be sure the magazine is completely relevant to your system. View Deal
If you enjoyed this tutorial but want a bit more power from your laptop, why not look at the best photo-editing laptops? If you're really keen to improve your skills further then online photography courses could be the way to go.

