Create a fun snow globe composite in Photoshop this Christmas with these free start images

Watch video: Festive fun portraits
Here’s a fun project to try over the festive break, and a great way to learn new camera and editing skills. Over the next few pages we’ll show you how to make a Christmas snow globe composite. We’ll shoot two separate images for this – first the children then the snow globe, and blend the two together in Photoshop.
To add a little extra depth and colour to the composite, we have also supplied a collection of lovely bokeh images for you to use (download here onto your computer's hardrive), either in this project or to add an atmospheric glow to any festive photo. The key is to match up the details in both photos. The more consistency between the two, the easier they’ll be to blend together.
So we need to think about consistent lighting, camera angle and depth of field. As the aim is to place our kids behind a glass globe, we can recreate the situation by shooting them through a window while they press their hands and faces to the glass. As such, many of the camera skills demonstrated here can be used for many different sorts of festive photos.
When it comes to blending our photos, we can use simple Photoshop masking skills to cut out the kids and combine them with the globe, then use blending mode tricks to add snowflakes on top of the figures. It’s easier than it looks and, like the best Photoshop projects, relies more on your in-camera skills then digital wizardry.
1. Cut out the kids
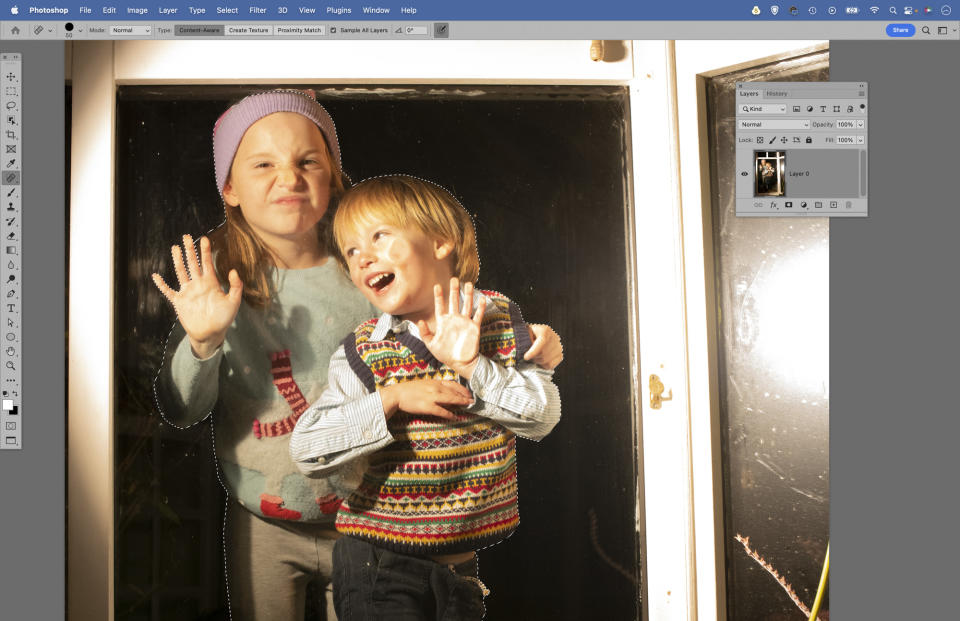
Open the image of the children (download here). Mask the background with Select > Subject and click the Add Layer Mask icon in the Layers Panel to hide background. Zoom in to check the edges and paint black on the mask to hide or white to reveal areas.
2. Position the layer
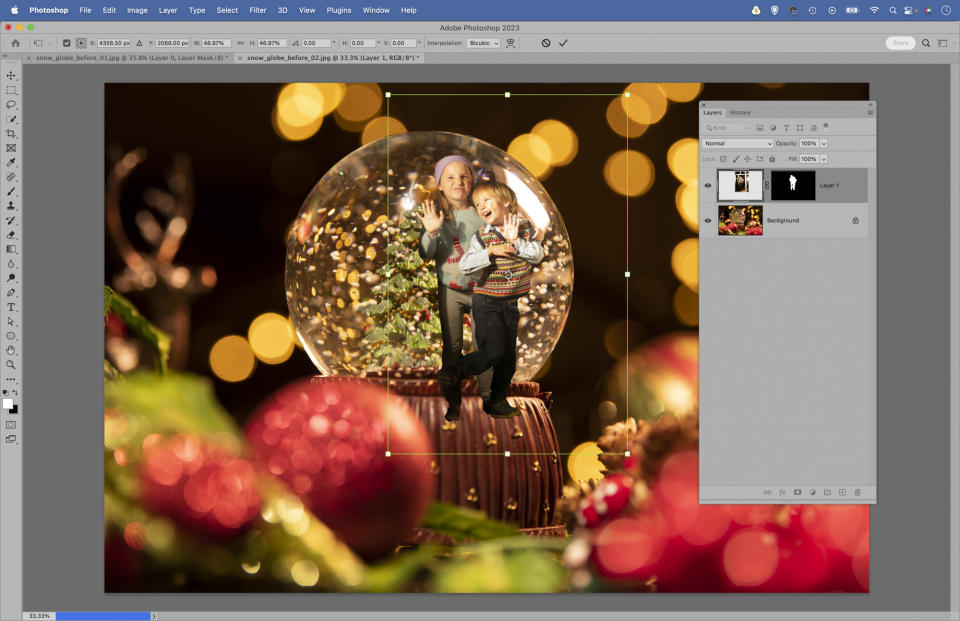
Open snow globe image from the download. Grab the Move tool and drag the cut-out layer up to the tab of the snow globe image, then down and in to copy it over. Hit Cmd/Ctrl+T for Free Transform and use the box to resize and position the kids inside the globe.
3. Mask the layer
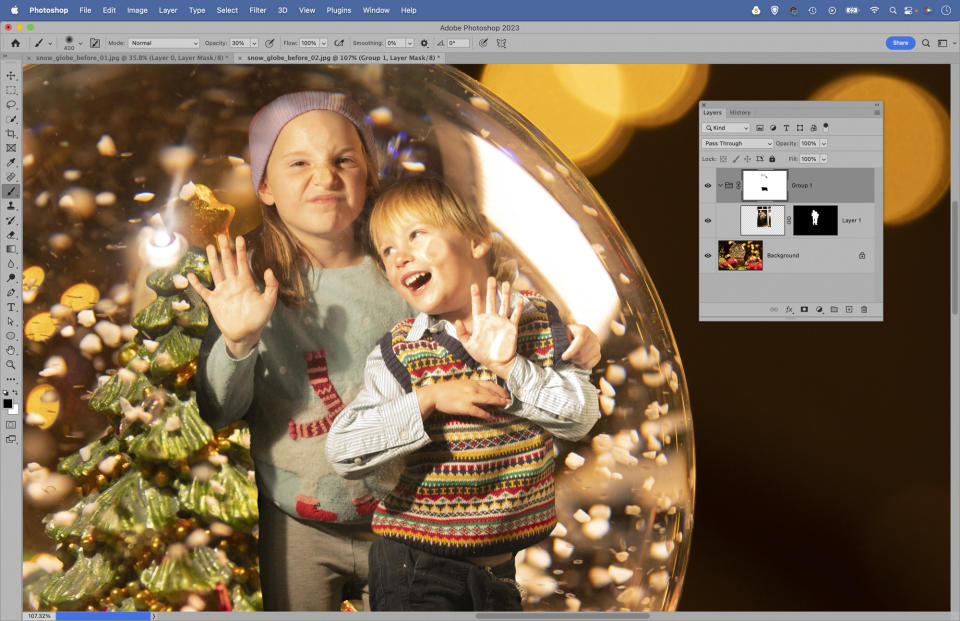
Hit Cmd/Ctrl+G to convert the layer into a group, then click the Mask icon to add a mask (this lets us ‘nest’ a second mask and keep the first). Grab the Brush tool and paint black over parts that obscure reflections. Hide any other areas to blend it with the globe.
4. Blend the snow
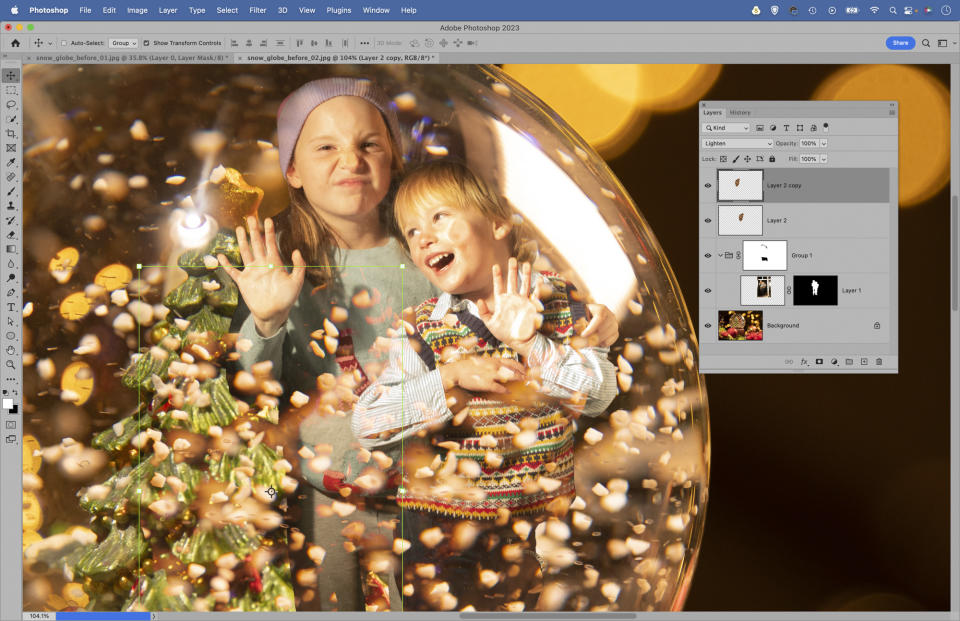
Highlight the bottom layer and grab the Lasso tool. Select some of the snowflakes and hit Cmd/Ctrl+J to copy to a new layer. Drag the layer to the top of the stack and change the Blend Mode to Lighten, use the Move tool to position it on the kids. Copy to add snow.
5. Add more bokeh
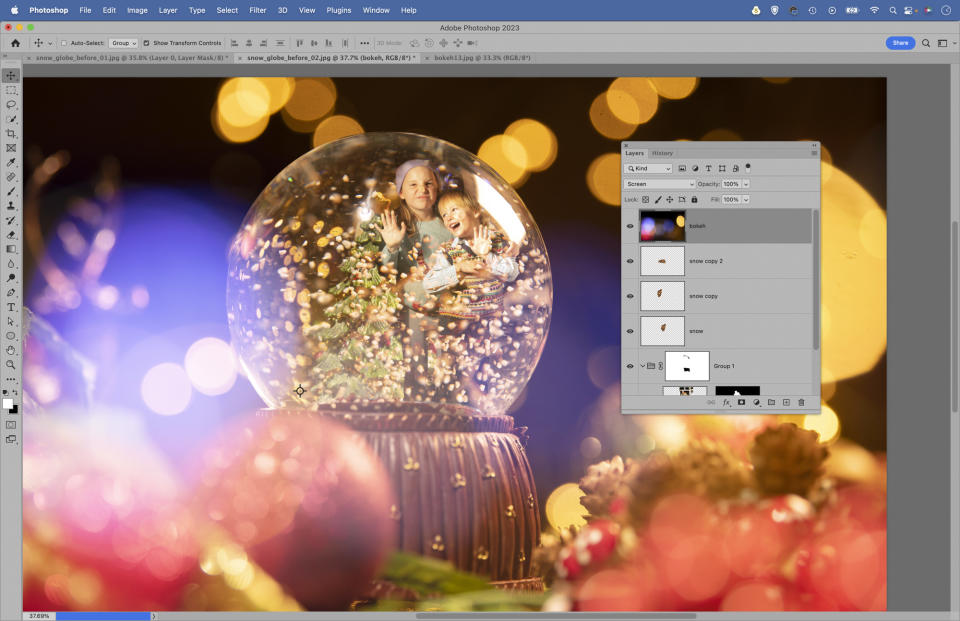
Open a bokeh image from the download, drag it in with the Move tool and set the Blend Mode to Screen, then position it over the scene. If needed, add a layer mask and paint black to hide any parts of the bokeh. You can add more bokeh images in the same way.
6. Enhance the colours
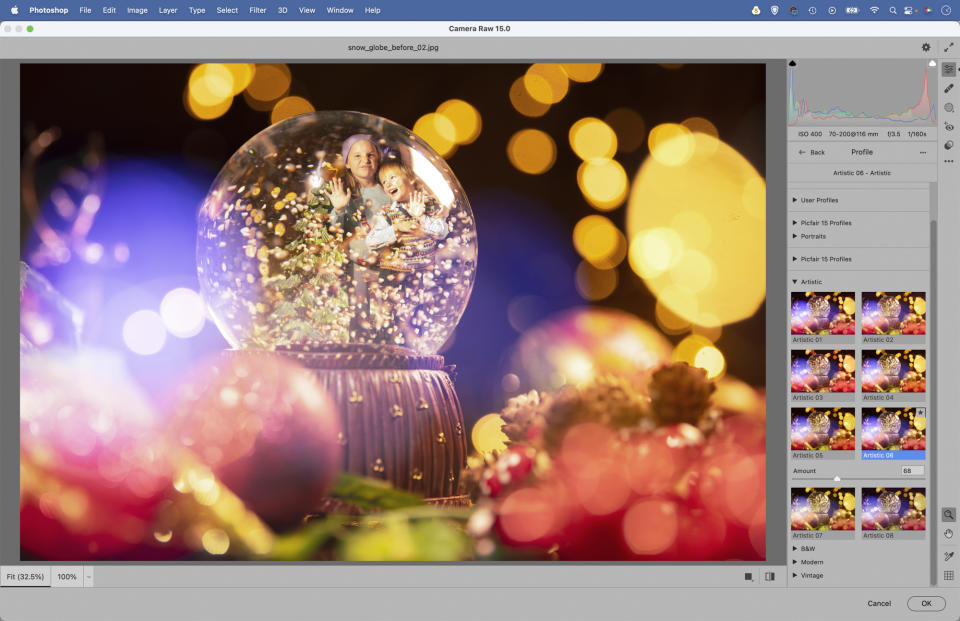
Highlight top layer and use Cmd/Ctrl+Shift+Alt+E then go to Filter > Camera Raw filter. A colour shift will help everything to gel together, so use the tonal sliders to adjust and enhance the tones, and try out different profiles in the Profile Browser.

PhotoPlus: The Canon Magazine is the world's only monthly newsstand title that's 100% devoted to Canon, so you can be sure the magazine is completely relevant to your system. Every issue comes with downloadable video tutorials too.
If you're serious about scenery, take a look at the best cameras for landscape photography along with the best lenses for landscapes.

