How to create dynamic action scenes in Clip Studio Paint
Action scenes can be daunting, as these illustrations tend to lean on the more complex side with so many factors to consider. Developing an understanding of movement and anatomy, coupled with framing and lighting, can help bring a scene to life, even in a 2D still. Together, they can create a suspenseful atmosphere.
At a young age, I tried to draw a couple of action scenes, but quickly realised it was not as simple as I thought. The character’s pose had to be impactful enough, and it ended up looking lacklustre and lacking any action at all. I realised I needed to study movement, and how real people or animated characters moved in battle in films, cartoons, anime or games. Breaking down the movement frame-by-frame helped me understand how the human body functioned in those scenes.
With that in mind, do note that you may need to do some posing yourself! Studying poses or watching action scenes may be helpful, but your artwork will need a personal touch. Often we try to look for stock images online, but sometimes they don’t seem to fit our needs. You can be your own best model, especially with dynamic poses as it can be tricky to find someone executing the same pose and angle you need.
This tutorial will be fun as we dive into creating a dynamic action scene. While we’ll focus on a more anime art style, these tips and tricks will still apply to other art genres.
01. Practise your posing
(Image: © Jolene Yeo)
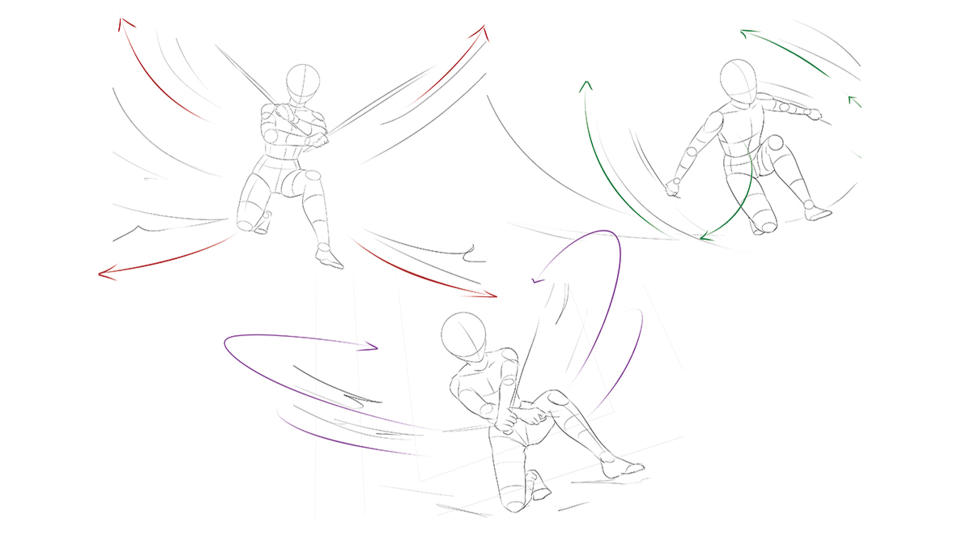
Having an interesting pose is key to capturing the viewer’s attention, as well as expressing the action. Most importantly you need to have a base story, scenario, or setting. Here I want to draw a dual-wielding girl fighting off some marionette enemies, so I start sketching action poses with this in mind. It’s important to try a few poses to warm up and explore.
For these, I use myself as a reference. With the self-timer on my phone camera, I take a photo of myself doing the action. This helps me understand the action and anatomy and gives me a reference point.
02. Find the right pose
(Image: © Jolene Yeo)
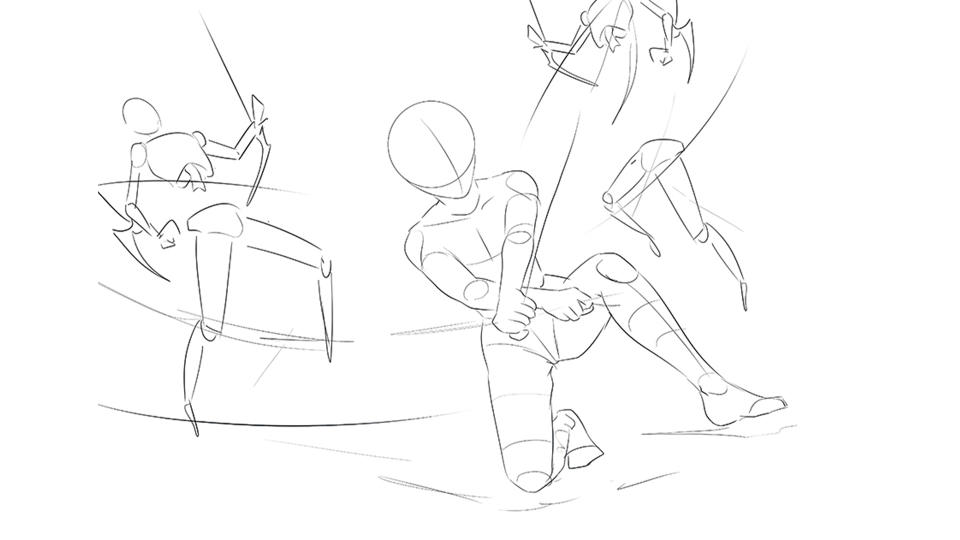
After selecting your favourite pose, start to roughly sketch the scene’s other components. It’s great to have an idea of what the enemies look like, as sketching a human is different from a fantasy creature. Think about how the actions of the main character affect these enemies. Are they falling back from a punch? Getting impaled by a spear? Or perhaps being sliced in half?
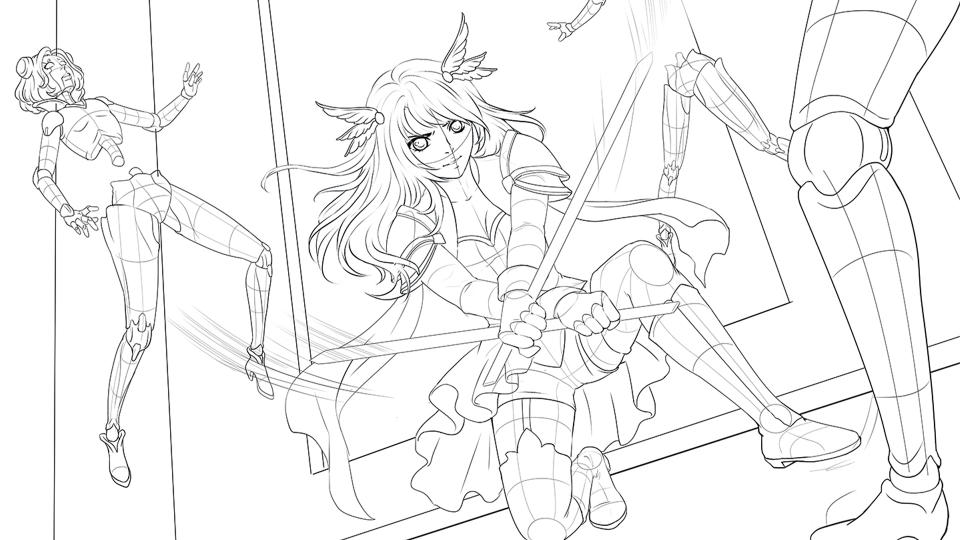
03. Begin to refine the sketch
(Image: © Jolene Yeo)
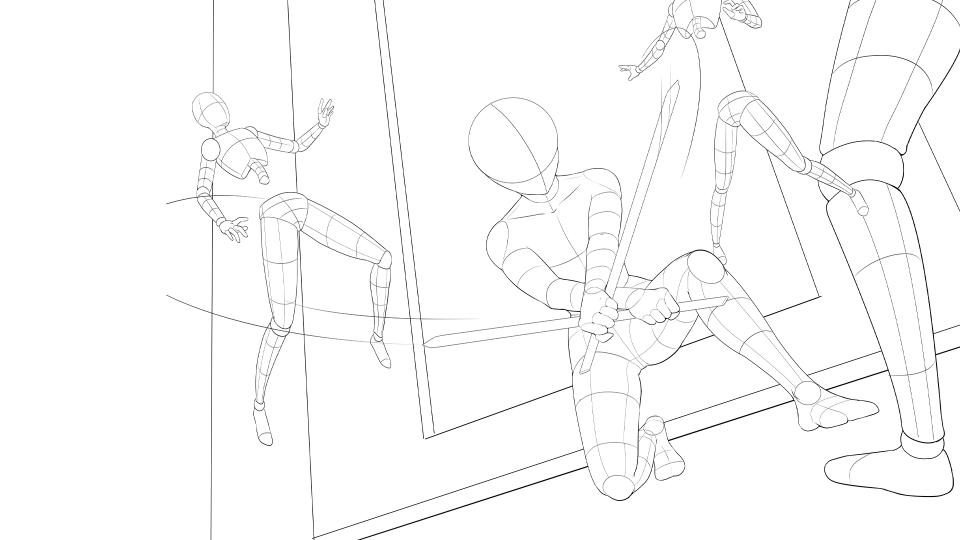
As this scene can be quite complicated, it’s always good to refine your sketch and ensure that the anatomy and perspective work. You’ll notice that I’ve drawn some guidelines for the bodies and cleaned up the sketchy lines to make them more readable.
For the background, I utilise the Perspective Ruler in Clip Studio Paint. I do this by using the Perspective tool and then tweaking the Vanishing Points to fit my scene. In this example, I use a three-point perspective, but you can use any other option that applies to yours. Also note that while my character is leaning forward slightly, she still somewhat follows the perspective grid that I’ve used.
04. Create the base design
(Image: © Jolene Yeo)
Now that we’ve drawn our pose, let’s move on to basic designs for the characters. You’ll want to start with simple clothing ideas before diving into any of the more complicated details such as armour trimmings. Keeping the guidelines on will also be useful to ensure the clothing follows the forms and curves of the body.
05. Plan out the details
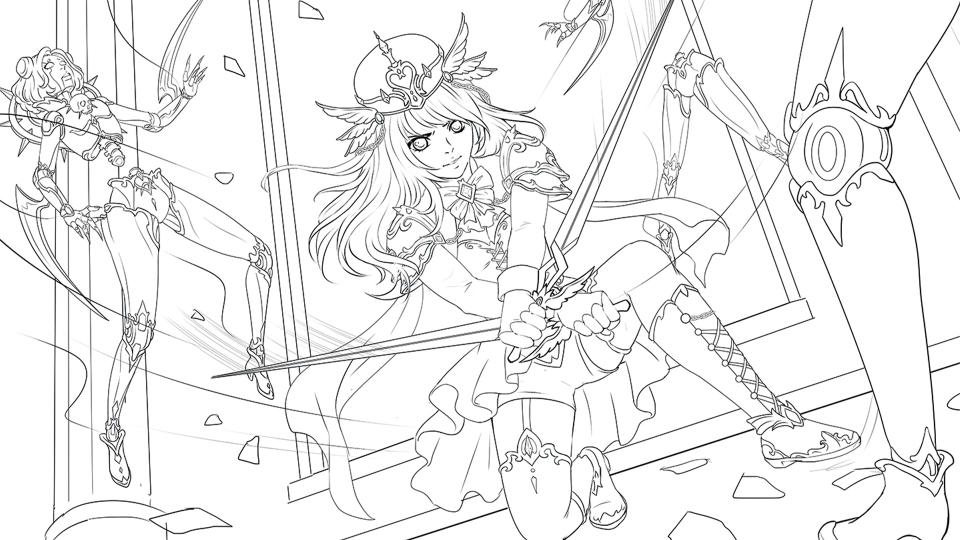
(Image: © Jolene Yeo)
Once you have a clean base, you can start to add design elements onto the characters and setting. This can help convey the theme and style direction of the piece as well.
I enjoy ornate details, thus I add filigree details to the armour, as well as the enemies, so they’re not just plain marionettes. This is also a form of visual storytelling, as now viewers will have an idea of what the people in this setting dress like and what type of creatures may dwell in this place.
06. Choose the lighting of the sketch
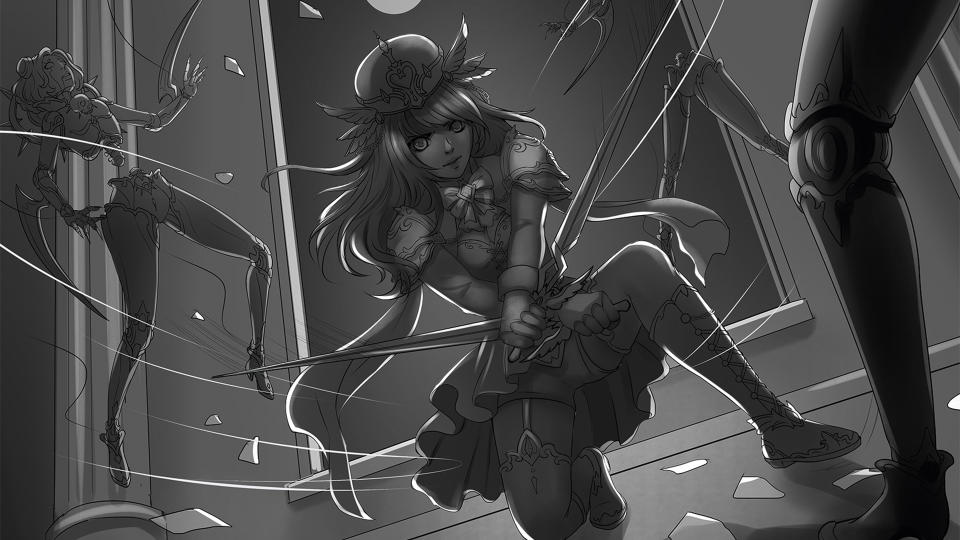
(Image: © Jolene Yeo)
For more complex pieces, I like to do a rough lighting sketch in black and white. It doesn’t need to be perfect, just a rough idea as a busy scene can become overwhelming due to the amount of elements that need painting. It’s good to use this as a reference point, even if the final piece ends up looking different, as it’s great to have a starting point for reference.
07. Fill flat colour and manage layers
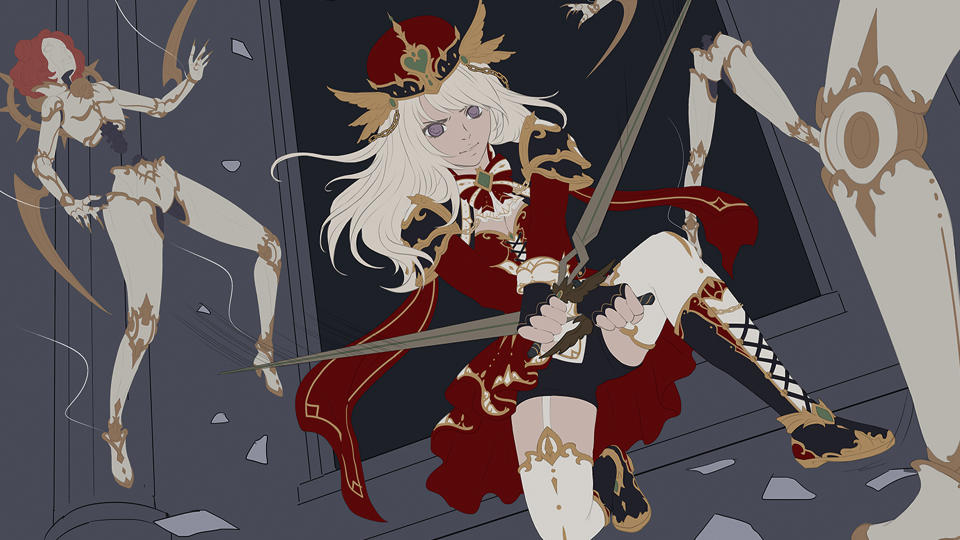
(Image: © Jolene Yeo)
When it comes to filling in flat colours (or base colours) I prefer to sort them out by folder, while I also break down parts individually, particularly when I’m dealing with a lot of details. I like to keep each part organised and separate in the event that something needs to be altered.
However, if you find this too much for you, the most important thing is to separate the foreground, the main focus (the character), the other background characters (if necessary), and the background itself. You don’t want to have them all on one layer, as it keeps it easier to edit and move elements around, as well as add special effects between these layers.
08. Start the colouring process
(Image: © Jolene Yeo)
As this tutorial focuses more on setting up the scene and adding in other effects, I won’t go into too much detail about my rendering process as it can vary from person to person. This is a breakdown of my process up to this step.
I tend to paint each of these steps in their separate layers within the folder, as that is what feels best for me and aids in my work process, however please feel free to do it in your preferred method. I use mostly brushes that come with Clip Studio Paint, though I do also utilise some brushes available from Clip Studio Assets that are free to download and use.
09. Create the movement
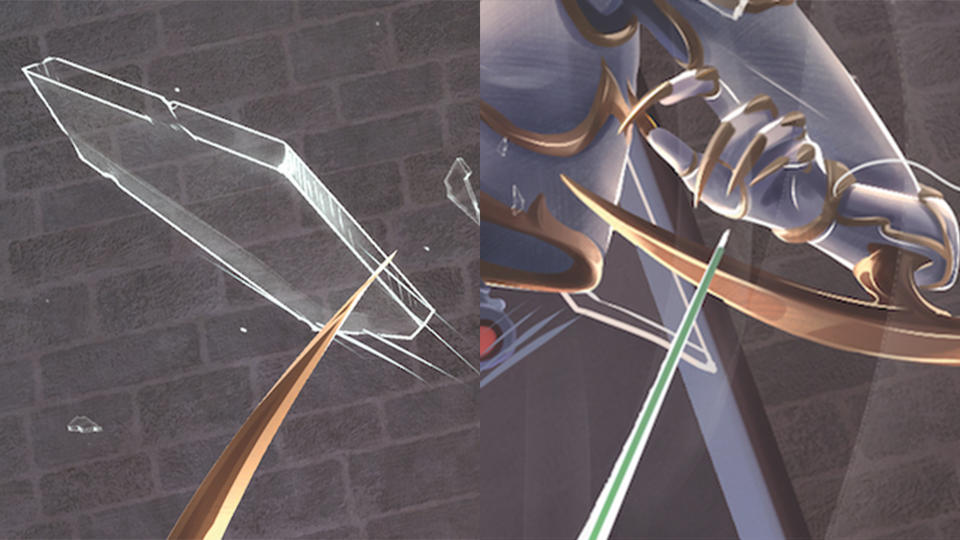
(Image: © Jolene Yeo)
To give a sense of movement, we must add motion lines. For the sword, lower the opacity of your brush and draw the movement arc. Do this quickly and fluidly, and don’t worry about trying to make it perfect, as that will look stiff. Don’t draw movement lines for everything, as it will look messy.
10. Apply motion blur
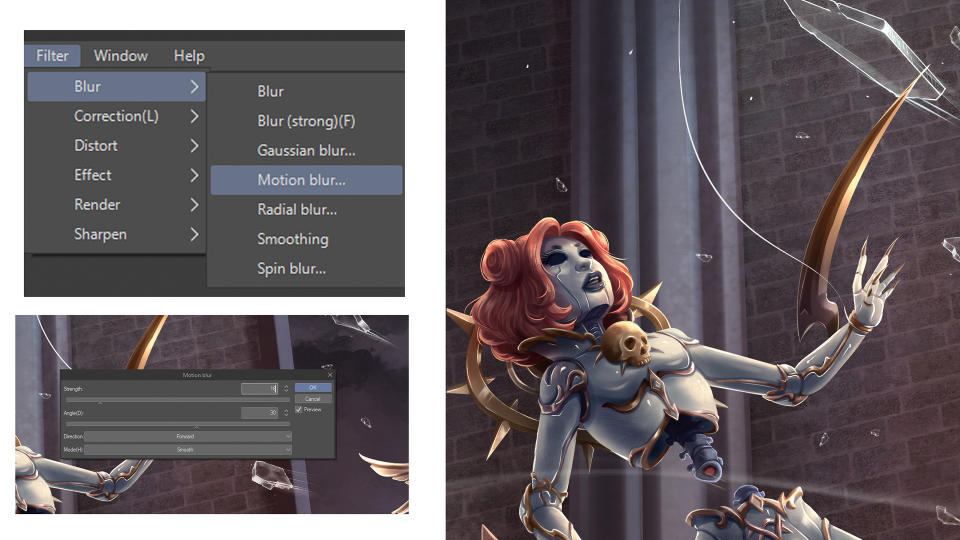
(Image: © Jolene Yeo)
Now that we’ve drawn the basic motion lines, we can take it a step further and add some movement blur. This filter can be found by going to Filter>Blur>Motion Blur. Play around with the values and settings, as these will differ according to your illustration.
11. Use elemental effects
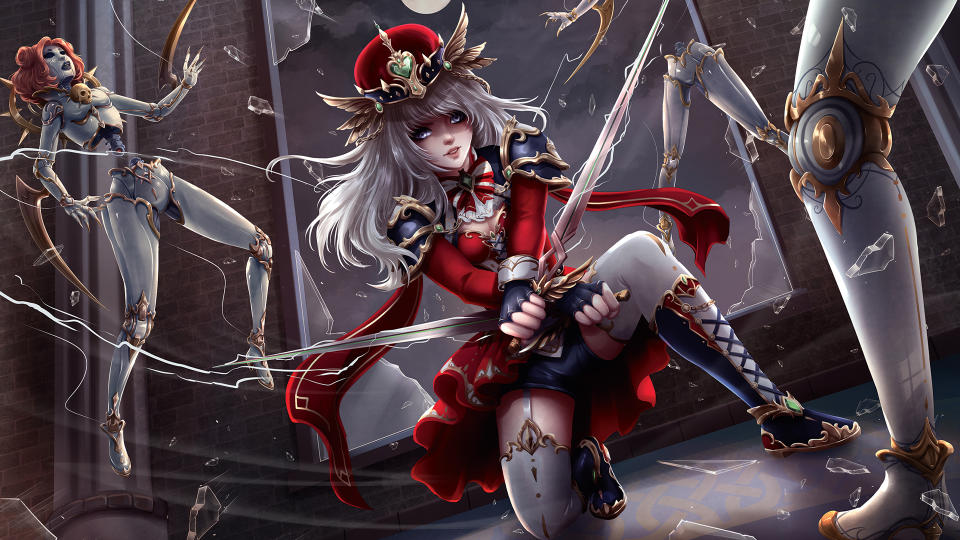
(Image: © Jolene Yeo)
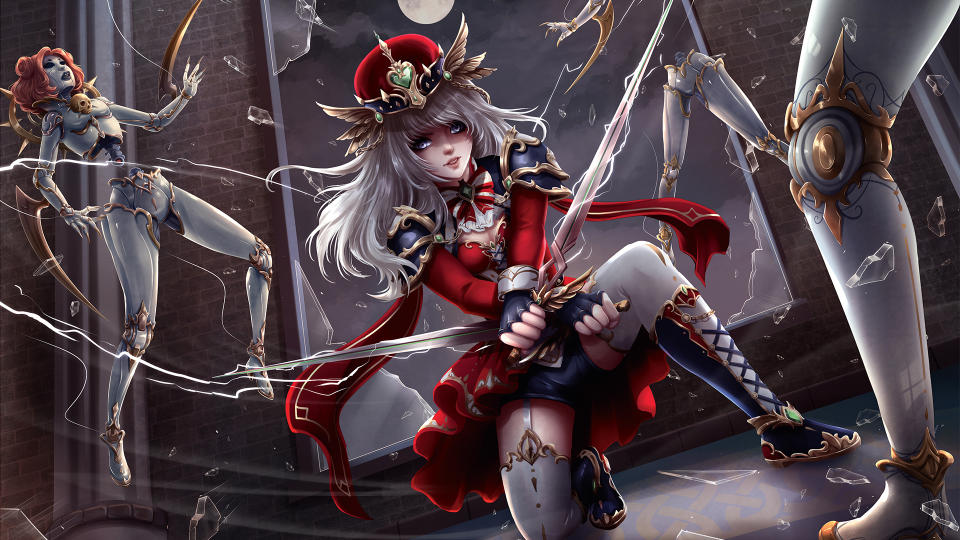
Your illustration should be quite close to completion now, but I like to amp it up a little and add some elemental effects. You can go as flashy or as subtle as you like, and I’d also recommend drawing them on a new layer. I want to add some lightning bolts emitted by the swords.
I do this using the G-pen, however you can find brushes that give a similar effect as well. If using the G-pen, draw in slightly jagged lines, all in one go and jerking your pen sporadically, and putting emphasis on corners to make it look more natural.
12. Provide glow elements
(Image: © Jolene Yeo)
The effect doesn’t quite look complete without a little glow. Duplicate the effect layer and set it to Glow Dodge, then go into Filter>Blur>Gaussian Blur and set it at around 6-10 for a nice glowy effect. You can also do this for some motion lines to make the action look more interesting.
13. Enhance atmospheric effects
(Image: © Jolene Yeo)
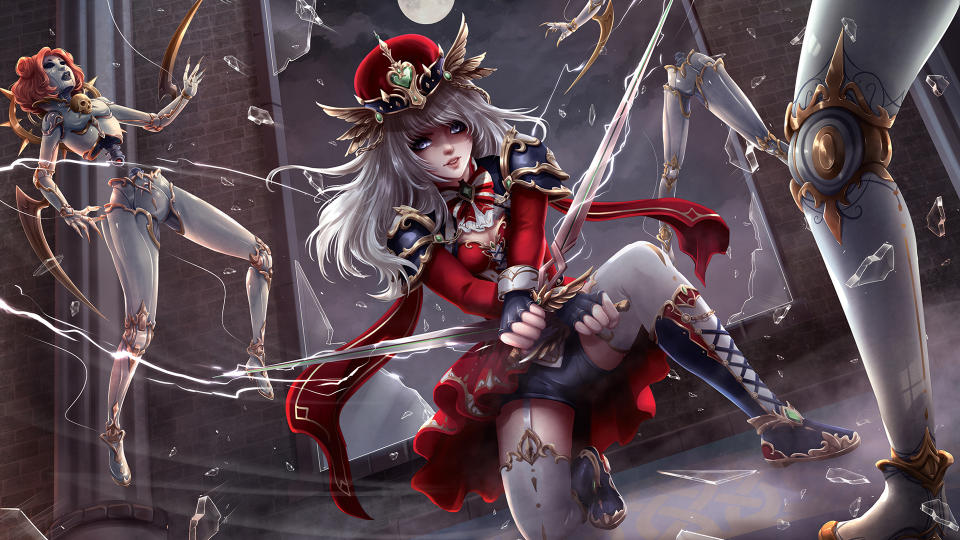
It’s good to separate the foreground, midground, and background for more visual clarity and depth of field. To do this we can add some atmospheric fog by creating a layer between them and gently brushing with an airbrush set to a low opacity. In this image, I painted in some puffs of smoke and dust settling from the impact of the main character’s landing.
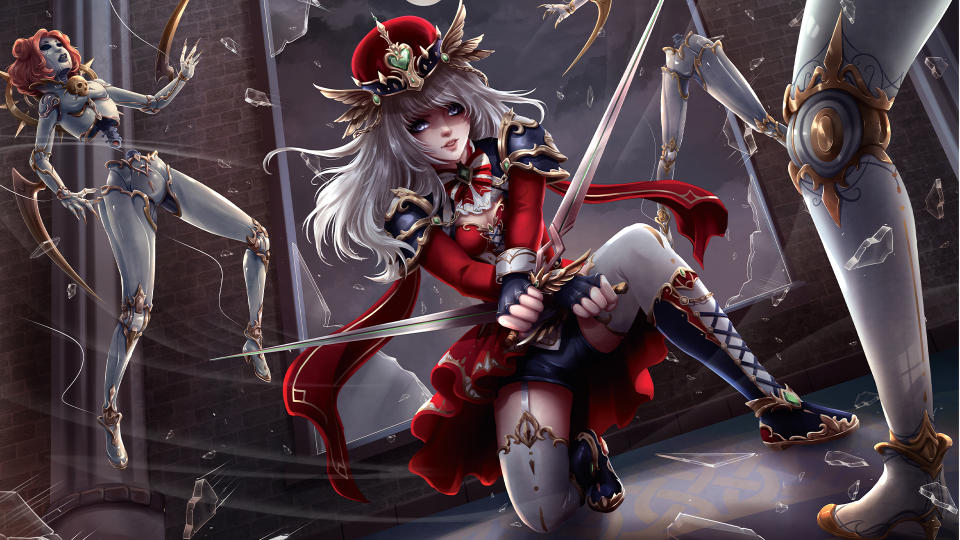
14. Finish the final touch ups
(Image: © Clip Studio Paint)
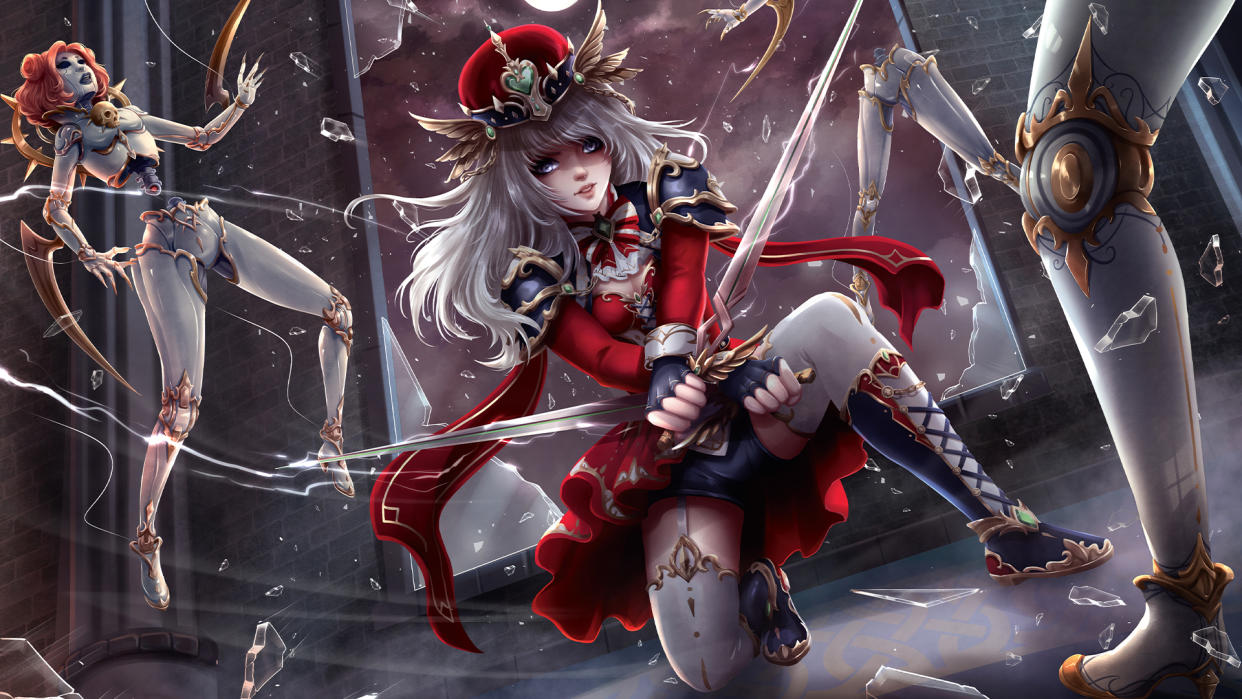
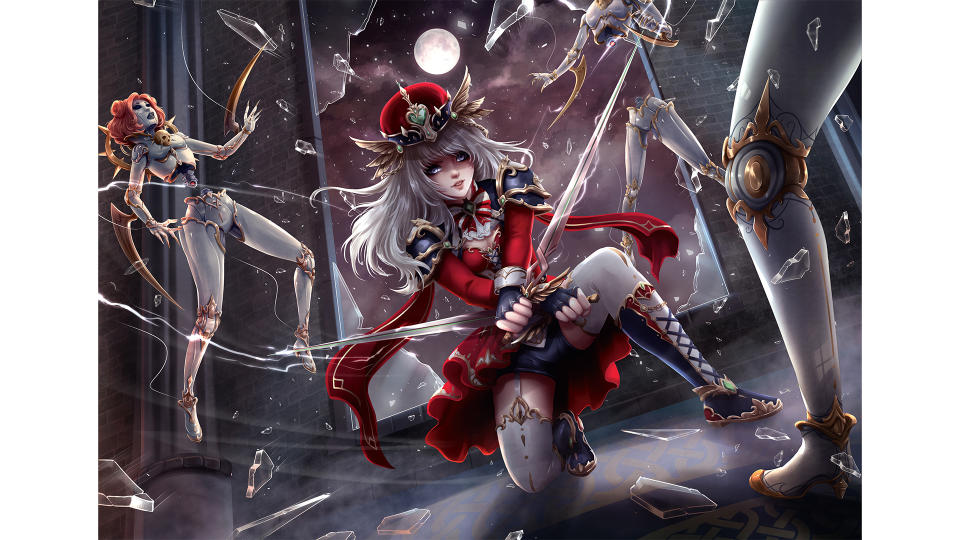
Once I’m mostly done with the image, I’ll go back in to clean up more of the details and edges. I also add some particle flecks for more drama and tweak the colour balance a little. Now our dynamic action scene is complete!
This article originally appeared in ImagineFX. Subscribe to the magazine at Magazines Direct.

