How to create concept art for VFX
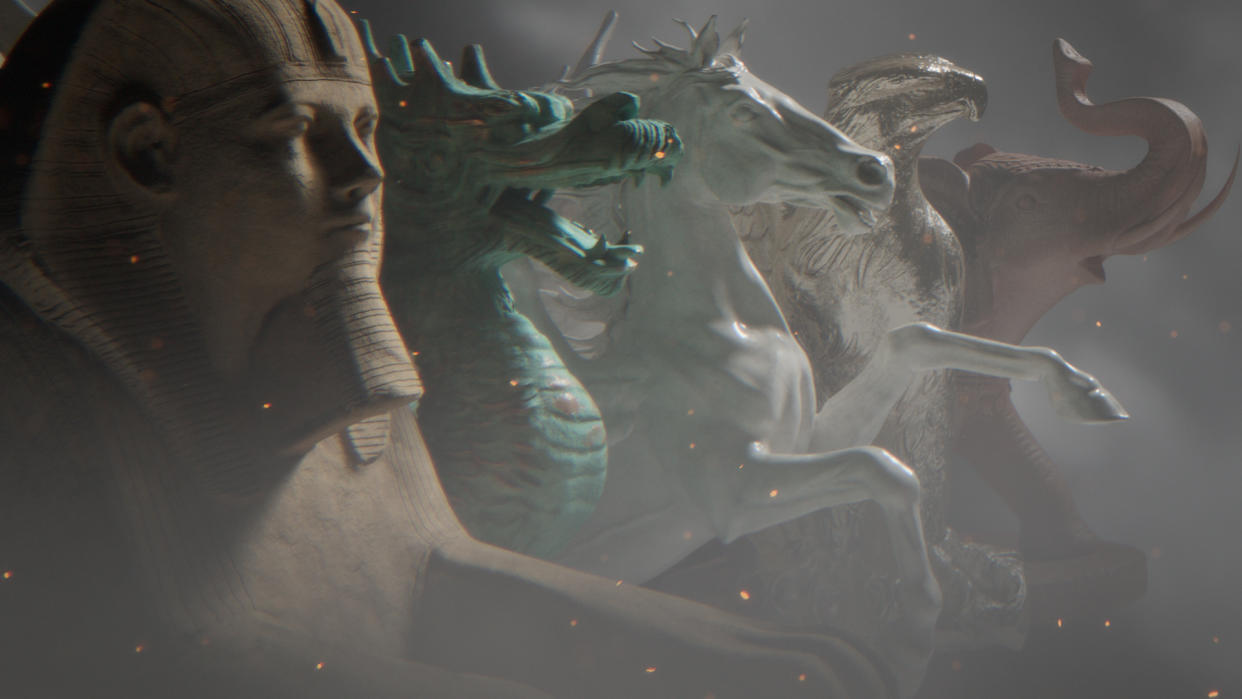
Working for Bristol-based VFX studio Lux Aeterna, concept artist and illustrator Tom Morton created the concept art for history documentary Ancient Powers. Collaborating closely with Composting Director Steve Burrell, Tom worked on the 300 shots that the studio delivered. Over five months he created a wide variety of concepts for each of the ancient powers, including everything from Roman baths to the distinctive onscreen icons used to denote each of the bygone civilizations.
Concept art is the first step in the VFX pipeline, and often one of the most crucial. Not only does it help to get everyone on board with the same vision from the start, but it also gives VFX artists a solid foundation to build on, saving significant time further down the line. On this project, Tom’s concept art helped the team deal with the sheer volume of shots needed, within the given budget and time frame. In this tutorial, Tom talks through the various steps involved in creating concept art for Ancient Powers.
01. Briefing from the client
The very first step was receiving the initial brief from the client. The team received a lot of information about the show and its content, giving us all a strong steer in terms of what certain historical artifacts should look like. Getting us much information as early as possible is a really important step for kicking off the creative process.
02. Defining the brief
I sat in on script meetings, where the team ran through the whole show to define exactly what needed to be delivered. During those meetings I made rough biro sketches, gradually getting a better idea of what the story was, and what the shots could look like. On some elements, the client had a very specific idea of what they wanted, and on others, I had lots of freedom to come up with my own ideas.
03. Research for historical accuracy
Once the brief was more clearly defined and I had a good idea of what was required, I went away and began researching reference images. This was the first time I’d worked on a project that required this degree of historical accuracy, so it was really important to find references to help me build a clear picture of what the ancient world looked like.
04. Plan the pipeline
Defining a fast and efficient pipeline for the concept images was the next step. I began by painting directly onto a XP-Pen tablet graphics tablet in Photoshop — I work mostly in 2D because my background is in fine art, so I prefer to paint if I can. I then moved onto Blender for 3D work. To keep track of everything and ensure easy feedback, I collated all of the images into ShotGrid.
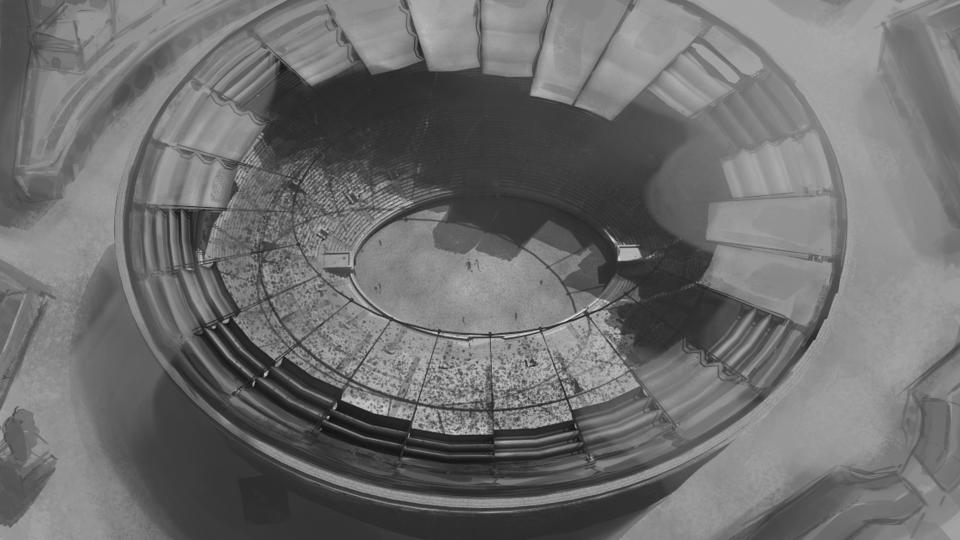
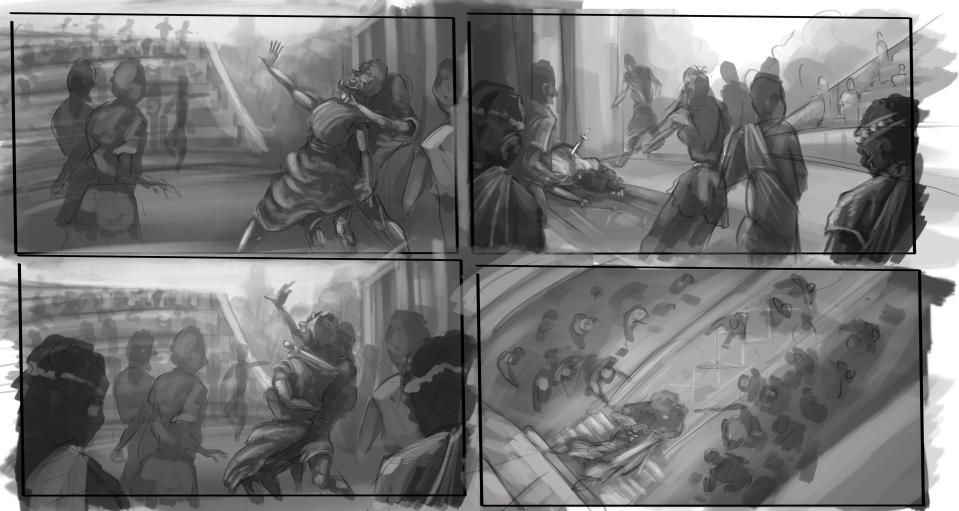
05. Create the 2D sketches
Based on my early biro sketches and research, I painted rough greyscale 2D concepts in Photoshop. If the concept was more complex, like a temple interior where there were likely to be changes, I made a quick and simple 3D blockout with Blender. I tried to get the feeling for the shot down at this stage, as this would speed up the later steps.
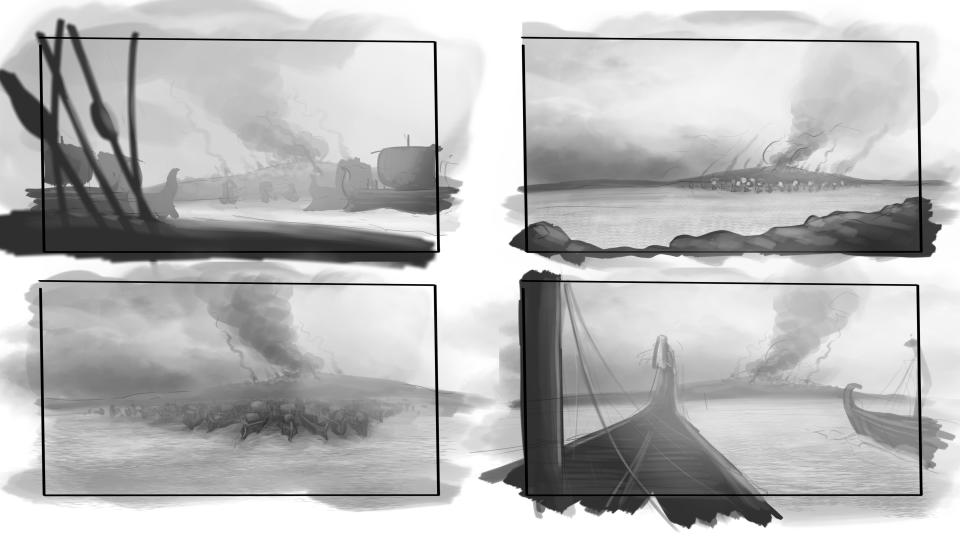
06. Share your rough concepts
Next, I put the rough concepts onto ShotGrid, which was really important for managing so many shots. For example, on the earlier concepts, like the ones I created for Rome, I produced lots of different ideas for the same shot to experiment with the different camera angles and context.
07. Get early feedback from client
It’s really important that the client can sign off on the look of the concepts at a really early stage, as it saves a lot of time further down the line. I received a first round of feedback from the production’s historial experts, and the team at Lux Aeterna, particularly on the camera angles. For example, my early sketches were quite close-up, but the client wanted wider angles for the screen.
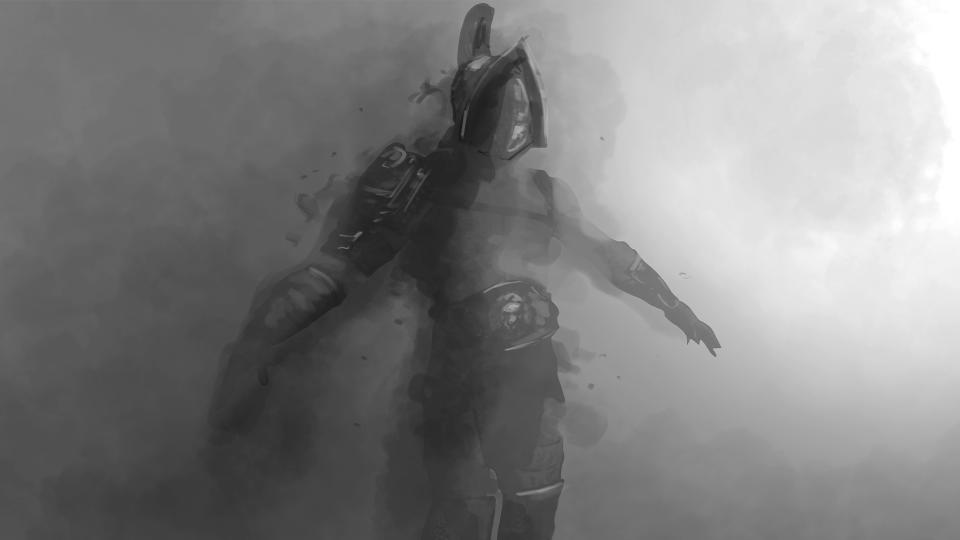
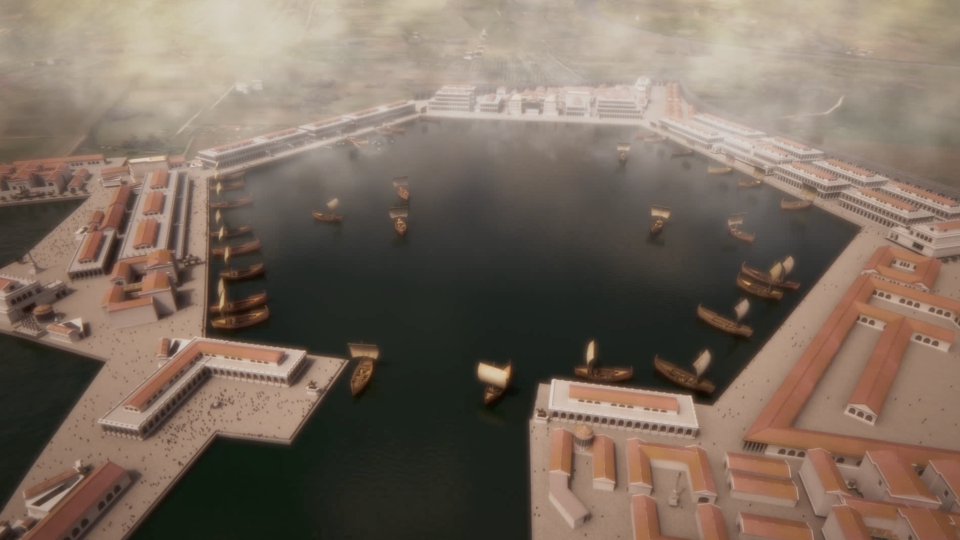
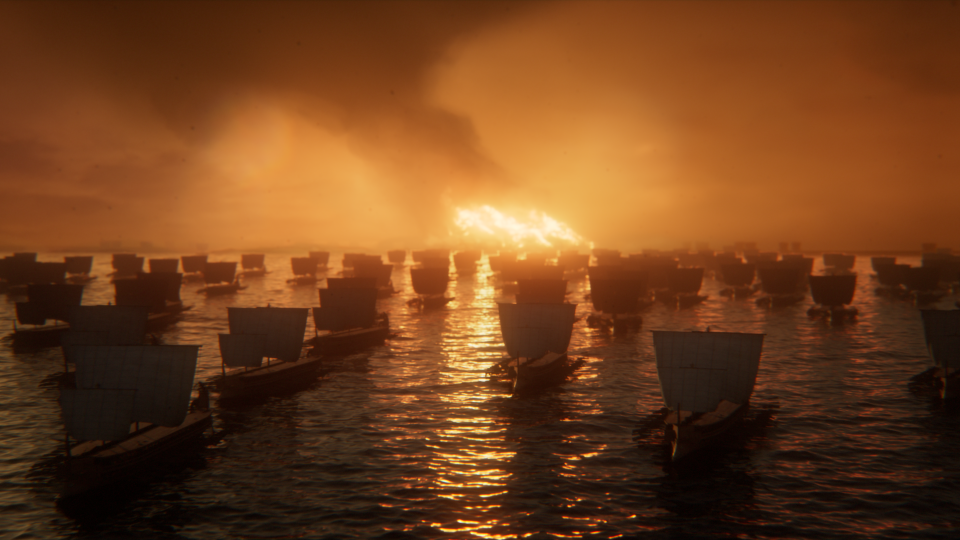
08. Create colour concepts
If requested, either by Steve at Lux Aeterna, or the client, I would then create a colour version of the early sketches. It took longer to create colour concepts, but it helped to illustrate the lighting and overall mood. This was really beneficial for the client, giving them a clearer idea of how the final shot would look.
09. Develop early concepts
Next, I put the developed concepts onto ShotGrid for further feedback before moving on to the next step. 3D wasn’t necessary for all of the concepts at this point, but I did use it to speed up some of the earlier greyscale concepts, making the 2D stage easier and more efficient.
10. Develop 3D concepts
Based on the feedback, I further tweaked the concepts, either in greyscale or colour, and developed the 3D where needed. I used Quixel Mixer for adding textures to the 3D environments, which really sped up the process, as it meant I didn’t have to paint all the texturing in myself. This was particularly useful on the more complicated scenes, like interiors.
11. Recieve final feedback
I then added the developed concepts to ShotGrid for any final feedback from the client, as well as further checking for historical accuracy from the experts. Much of the feedback was focused on colour, lighting, angle, and camera width.
12. Render final concepts
After going through several stages of feedback, iterating on the concepts at each stage, I was then able to finalise them. I rendered the final concepts mostly in 2D, using a variety of brushes, sometimes painting over 3D blockouts with some colour and textures.
13. Make final adaptations for final shots
The team at Lux Aeterna asked me to complete some extra work on some of the concepts so that they could actually be used in the final shots. This involved studying the shots that had already been completed by other artists in the studio so that I could match the angle and lighting.

