Create botanical photo art with microscopic insights
In the period preceding the invention of photography, visualizing botanical subjects carried a huge significance. Detailed drawings of various plants allowed people from all cultures to identify plants that were useful for healing purposes and those that were toxic plants and communicate the differences without a common language.
This was crucial during the time of explorers, such as Christopher Columbus, as they ventured to foreign lands. These drawings served as the basis for pharmacists to develop and teach medical techniques and craft the necessary medication for people worldwide, ultimately saving millions of lives in the fight against fevers and pandemics.
Plants have been a recurring symbol in both painting and photography. In the 17th century, for example, artists used plants extensively in still-life paintings to convey profound symbolic meanings to their audience. In photography, plants have been a source of inspiration and exploration, often used to create striking contrasts with the human body or other organic forms.
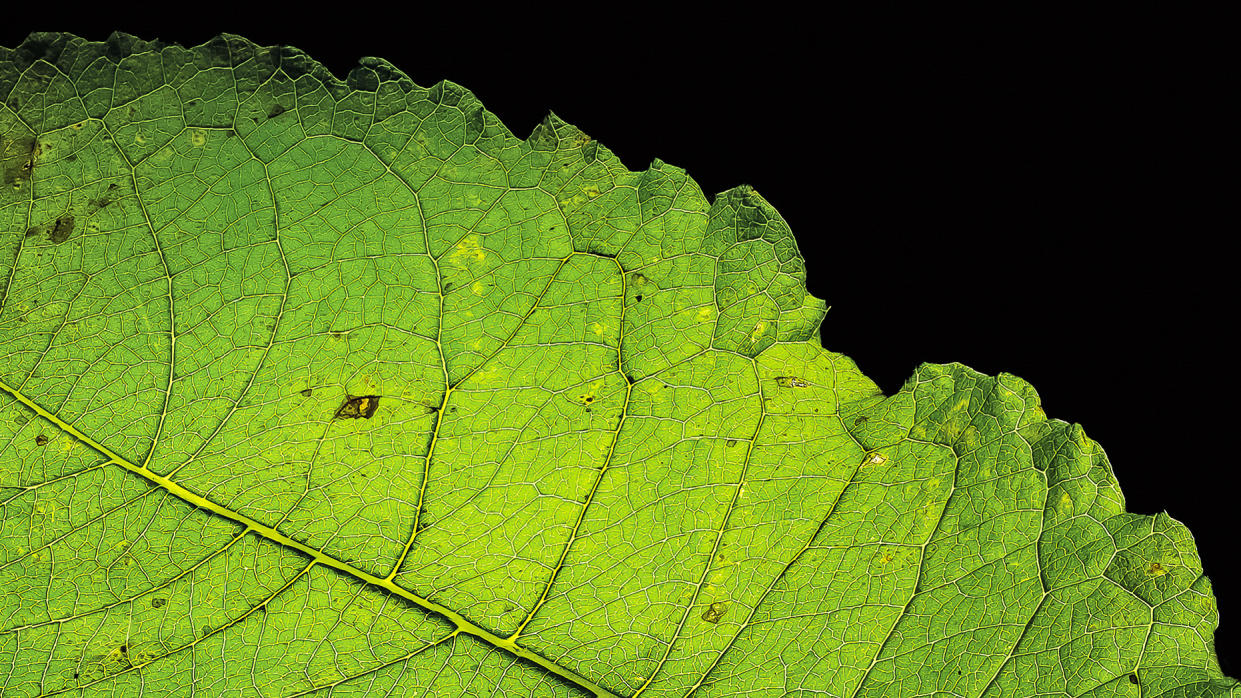
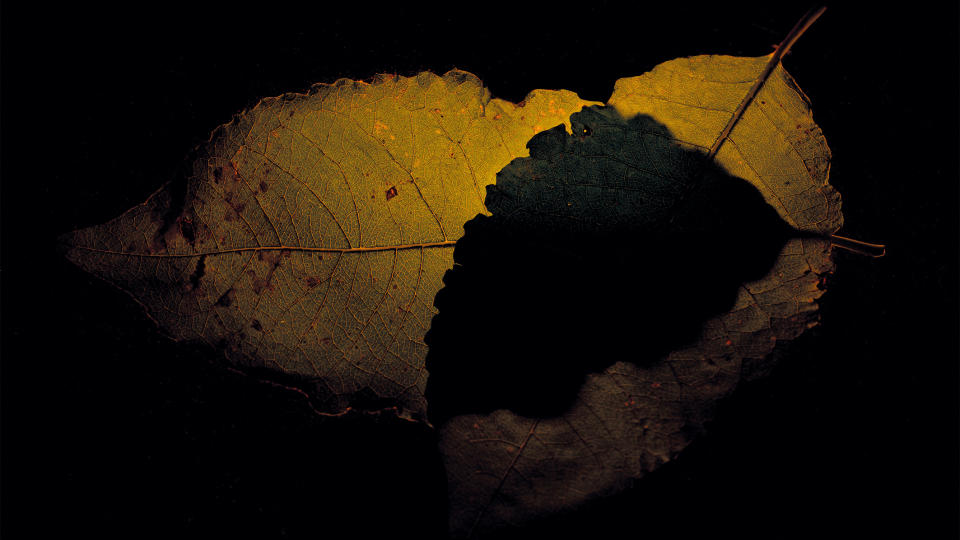
Photographing plants with backlighting is a fascinating subject, as it allows you to capture the intricate veins and distinct characteristics of each species with vivid hues and structures. It is possible to use this technique outdoors when the strong mid-day sun filters through the leaves, or indoors. Shooting indoors comes with some benefits, including full lighting control for exquisite plant compositions.
Set up

1. Manual camera - Any mirrorless or DSLR camera is suitable for this botanical photographic project, as they will all offer manual exposure and manual focus
2. Zoom lens - A great, versatile lens choice that allows easy framing adjustment without tripod changes
3. Tripod - Allows you to have your hands free to adjust the position of subject, camera, and exposure settings
4. LED light source - This neutral and strong backlight makes details
in the subject’s texture and structures visible
5. Boxes - Ideal for lifting the glass top and placing an LED light underneath, other items can also be used
6. Clear panel - To let the backlight through and keep the leaf in place, use a picture frame glass or a clear sheet of plastic
Shooting steps
1. Create backlight
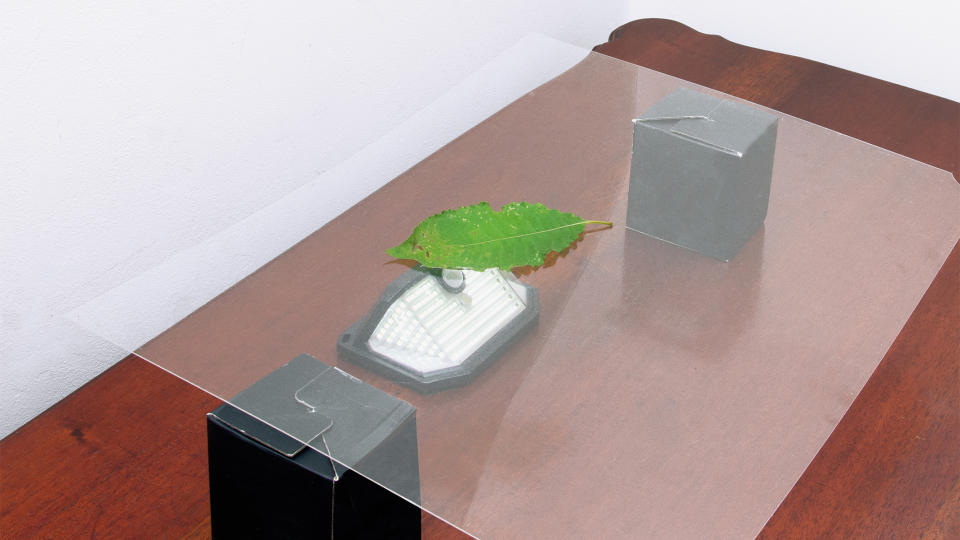
Arrange two boxes or items of equal height on either side of the table. For optimum illumination, place an LED light source in the centre between them. To complete the setup, simply place the glass or plastic panel on top of the boxes.
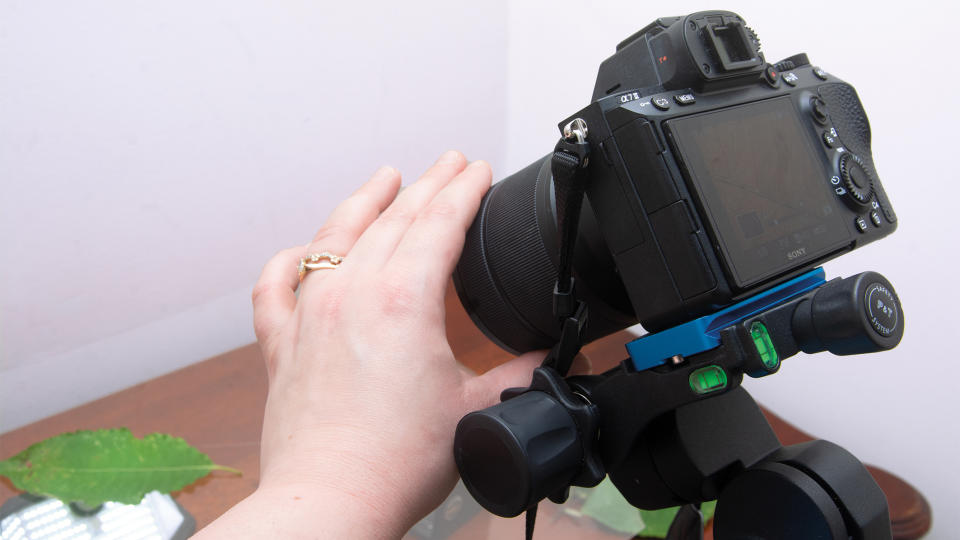
2. Position your camera

Securely attach your camera to the tripod, ensuring that the tripod’s legs are adjusted to your desired height and that the camera is level. Adjust the camera’s angle so that it faces downward, allowing for a better view of the leaf’s surface.
3. Switch to M F

For complete control over the exposure settings, shoot in manual mode. Choose a low ISO value, for example, 100, and a crisp aperture of approx. f/9. We are using a tripod so can counteract the low light by working with longer shutter speeds.
4. Deactivate AF
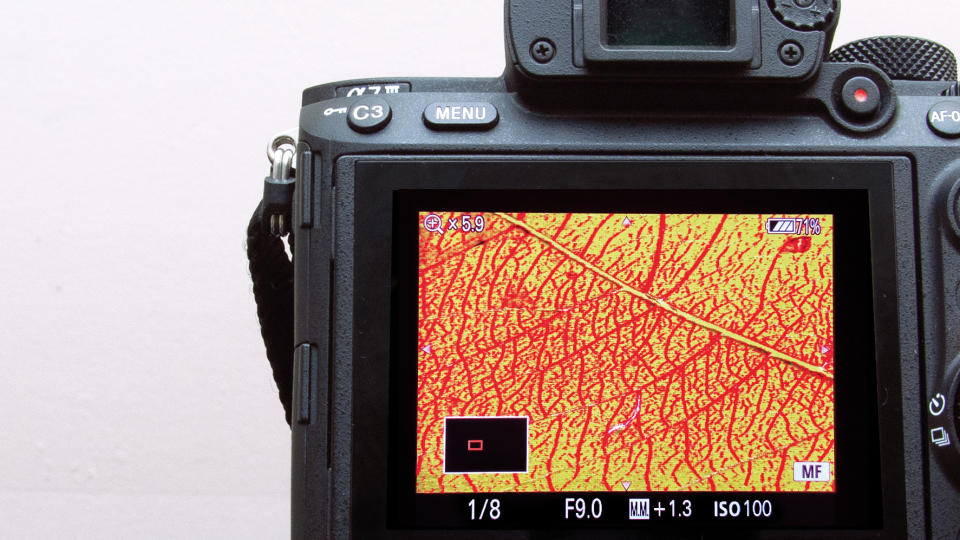
For the best results, focus manually on the leaf’s structure. To facilitate focusing, navigate to your camera menu and select the Focus Peaking setting option. Choose a bright colour, such as red, to bring attention to the sharp details and ensure a clear image.
5. Select self-timer

When using exposure times of 1/60sec or above, it is recommended to activate the self-timer function in your camera menu. This is especially important for projects where sharpness is a priority, as it minimises camera movement.
6. Create multiple frames
To highlight the structures, take multiple pictures with different focus points so we can combine them later. Control the focus area by selecting the Flexible Spot setting. Start by manually focusing on all areas of the leaf, then capture the shot.
Pro tip
Experiment with layers
Reveal new shapes and patterns by layering the translucent leaves
For a more creative approach, experiment with different types of leaves, fresh and dried, and diversify the subject matter. Dried leaves undergo significant changes in their structure, making them more interesting to work with. However, they are more breakable than fresh leaves, which can add to the visual appeal, especially when layering different subjects to create transparent combinations.
When working with natural, outdoor dried leaves, their form changes and shadows may appear, adding to the composition’s overall structure. Another method is to dry flowers by placing them under heavy books, ensuring that they stay flat.
Editing steps
1. Prepare stacking

To merge multiple images in Photoshop, navigate to the File section and select the Scripts option. Then, choose the Load Files into Stack function and select all necessary files. Even if you are using a tripod, remember to tick the Automatically Align box to correct any discrepancies.
2. Enable merge
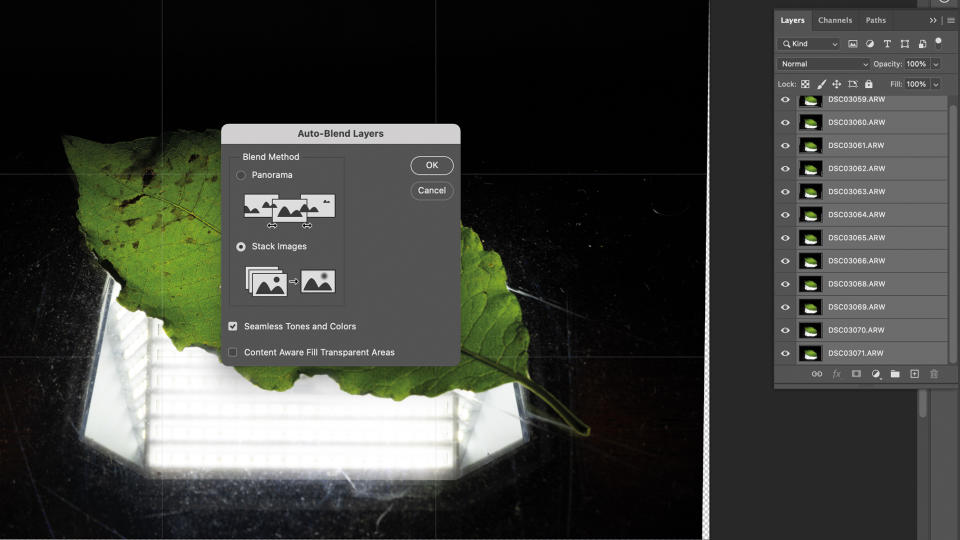
Select all layers and navigate to the Edit option. Here choose the Auto-Blend Layers function. A dialogue box will appear where you should select the Stack Images option. To achieve the best results, make sure to enable the Seamless Tones and Colors option.
3. Flatten image
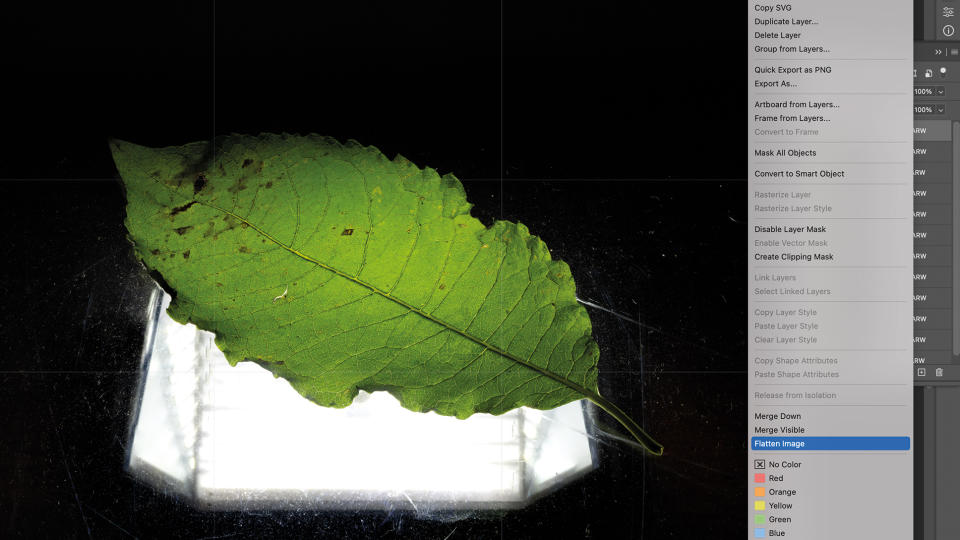
The software program merges the sharpest components of the subject in each image. The visibility of each layer can be toggled to reveal the selected image parts. To work on further adjustments, select the Flatten Image function to work with only one file and copy the original layer.
4. Clear background
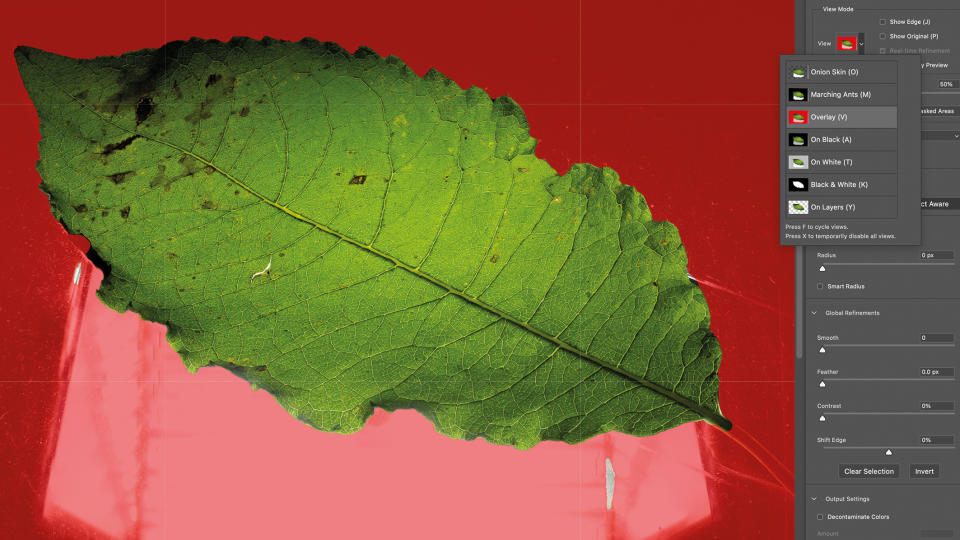
If the light source is larger than the subject, open Select to find Select and Mask. To save time with masking, use the Select Subject function. Refine the mask with brush tools. Inverse the selection, add a layer mask and eliminate elements with colouring, healing or stamp tools.
5. Fine-tune structures
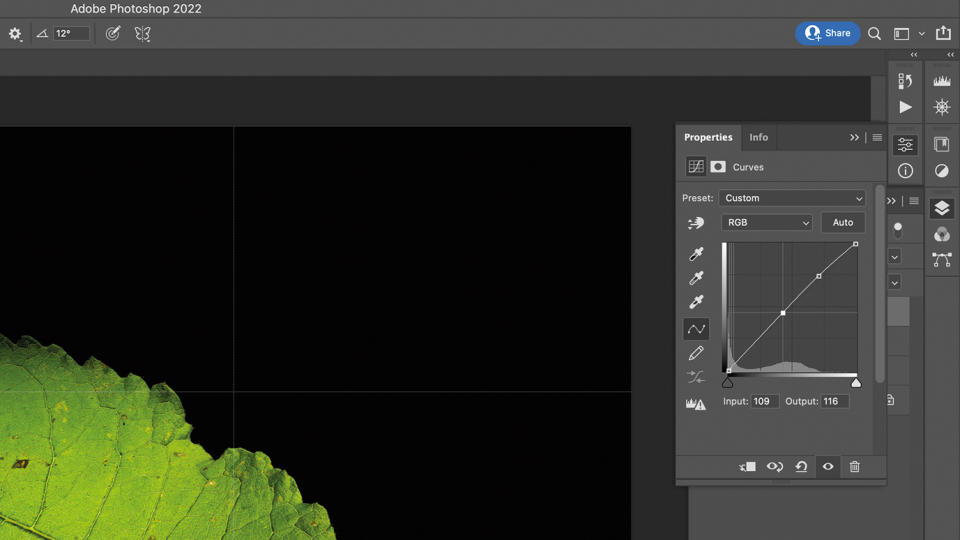
Enhance the contrast via an Adjustment Curve Layer and optimise colours with a Color Balance layer. Remember to avoid extremes in the settings to achieve a realistic outcome. To enhance the structures and outlines of the leaf, use the Dodge and Burn tools.
6. Try different crops
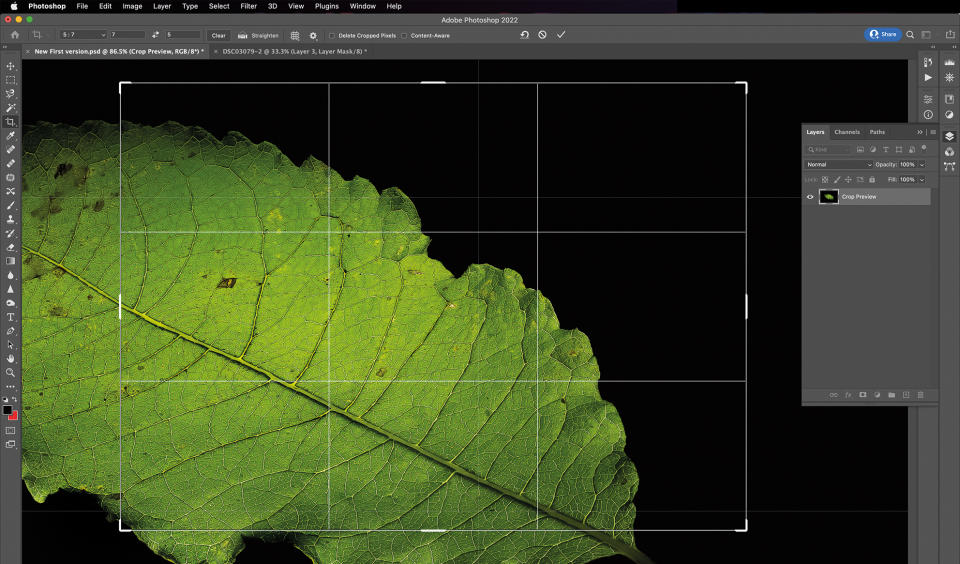
The crop feature assists in transforming the visual representation. Displaying the leaf in its entirety adds clarity and provides the viewer with a better classification. However, cropping nearer to the veins and structures of the leaf shifts the emphasis to those particular features.
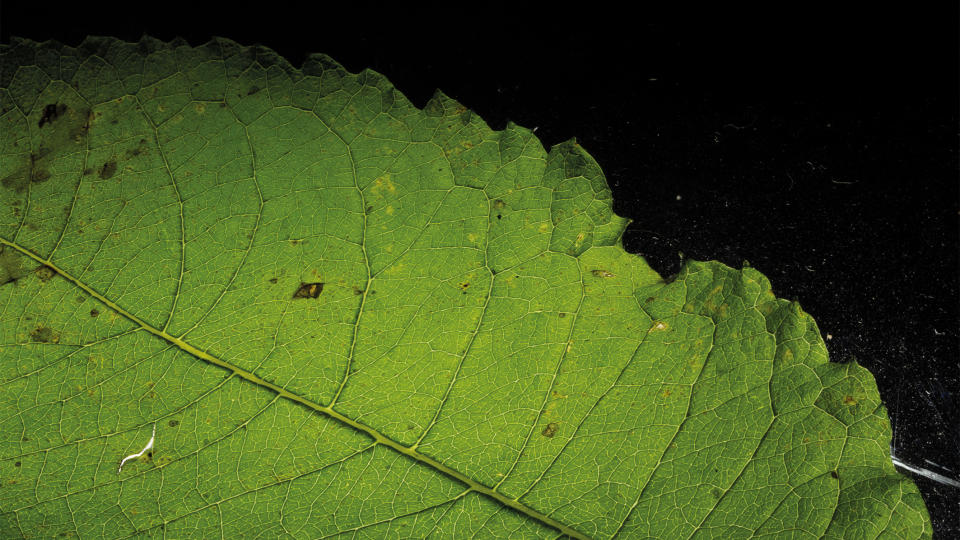
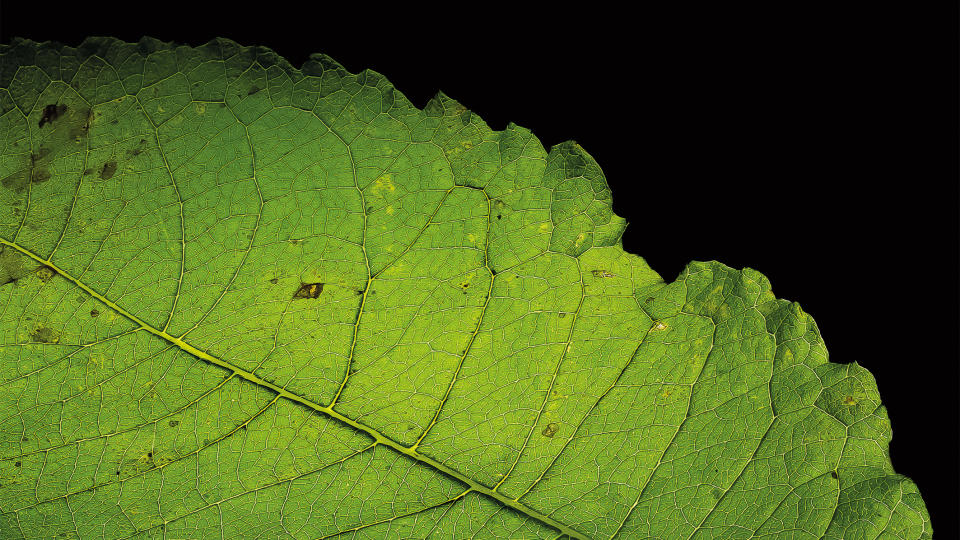
Before/After

This article originally appeared in Digital Photographer, a monthly magazine, and the kitbag essential for pros, enthusiasts, and amateurs alike!
Inside, you'll find practical guides, shooting tips, and techniques from working photographers, plus all the latest industry news.View Deal

