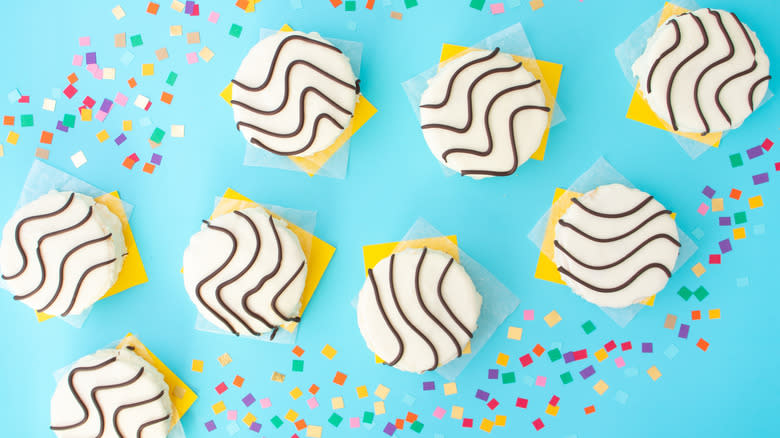
Copycat Zebra Cakes Recipe
If you get a hankering for a Zebra Cake, the easiest way to satisfy that craving will probably involve heading to your nearest grocery or dollar store snack aisle and picking up a box of Little Debbie's finest, plastic-wrapped creations. What you'll get is a few mouthfuls of somewhat dry, possibly stale cake with frosting that is sweet and sturdy, but not something that could be described as delicious.
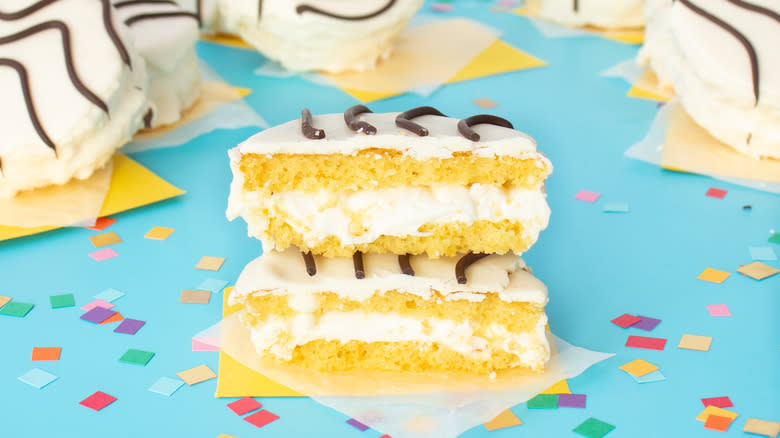
If you want to put in the time and effort, though, you can DIY homemade Zebra Cakes that retain the black-and-white-striped color scheme and circular symmetry of the original but are far fresher and more flavorful. Recipe developer Patterson Watkins says she wanted to make her Zebra Cakes "as close to authentic as possible, from the marshmallowy frosting filling to the candy coating and the tell-tale chocolate stripes." The result, while somewhat labor intensive, is something she describes as "a damn fine ZebraCake."
Read more: 13 Store-Bought Ice Cream Bars Ranked From Worst To Best
Collect The Ingredients For These Copycat Zebra Cakes
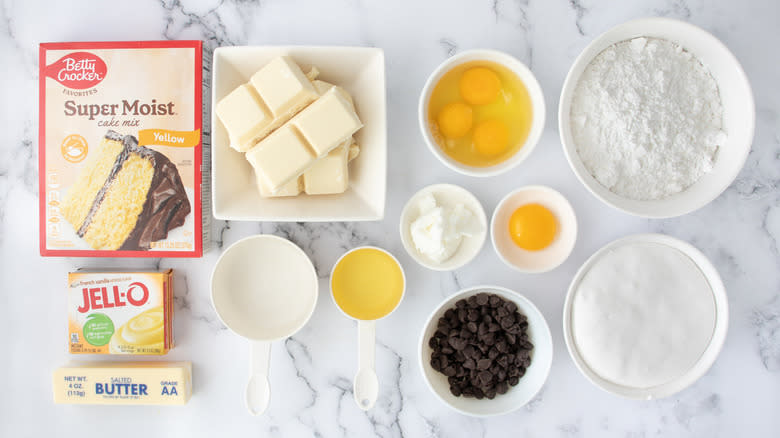
There are three different components to these copycat Zebra Cakes -- the cakes themselves, the filling, and the frosting. For the cake batter, you'll need a box of yellow cake mix, some vanilla pudding mix, vegetable oil, and eggs (several whole ones plus an additional yolk). The filling is made of butter, marshmallow fluff, and powdered sugar, while you will need white chocolate, semisweet chocolate chips, and shortening or coconut oil for the frosting.
Step 1: Heat Up The Oven
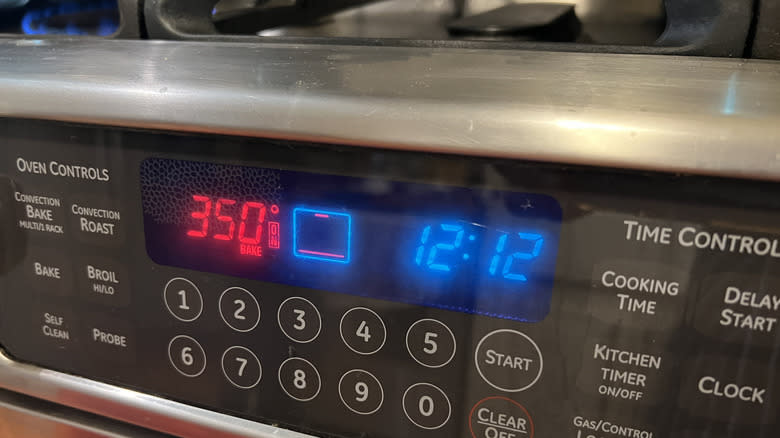
Preheat the oven to 350 F.
Step 2: Prepare A Pan
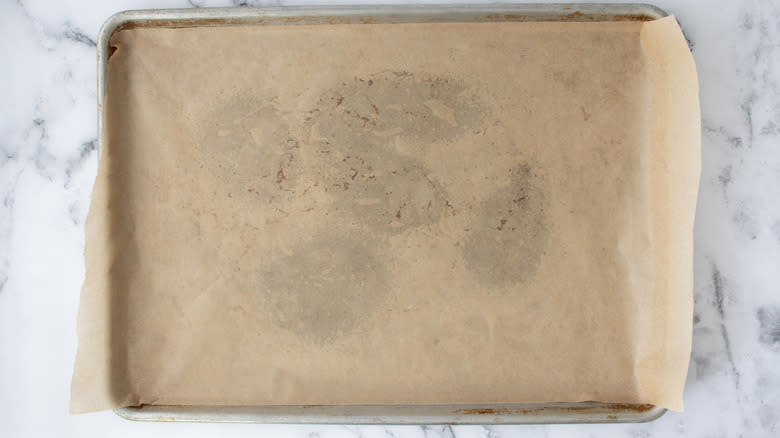
Line a large baking sheet with parchment paper. Lightly spritz the parchment with cooking spray.
Step 3: Mix The Dry Cake Ingredients
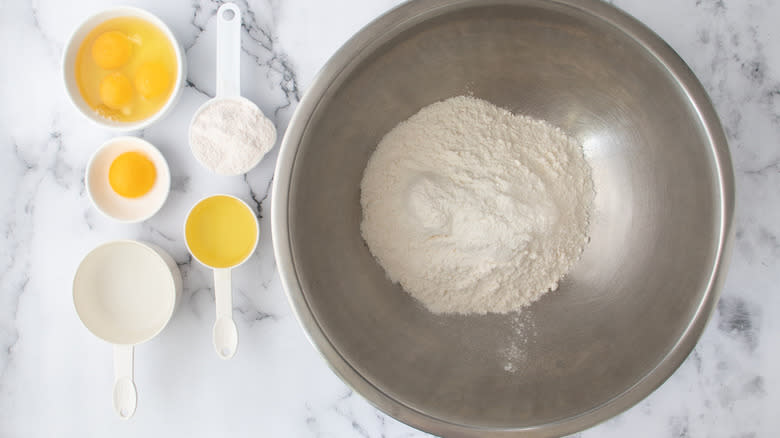
Place cake mix and vanilla pudding mix in a large bowl and whisk to combine.
Step 4: Stir Up The Cake Batter
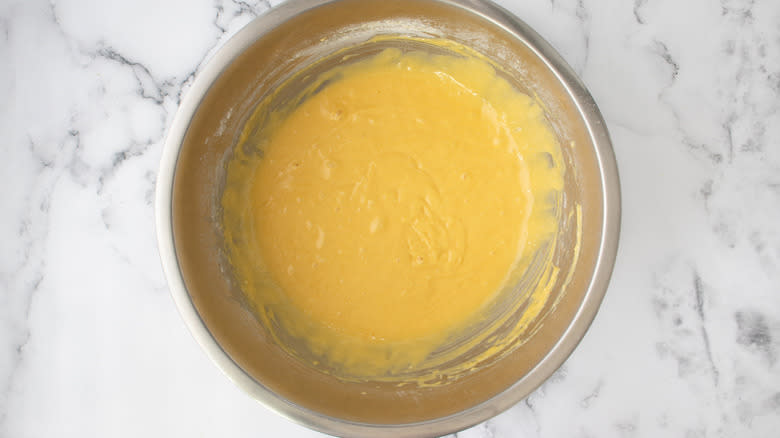
Add water, oil, eggs, and egg yolk to the bowl, and whisk to form the cake batter.
Step 5: Put The Batter In The Pan
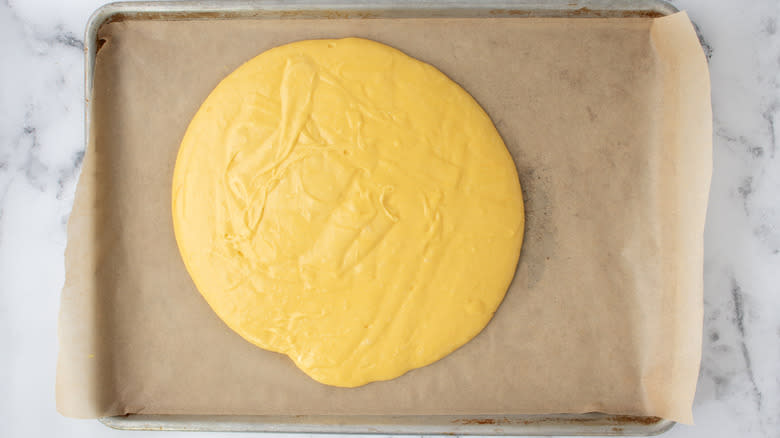
Transfer the batter to the prepared baking sheet.
Step 6: Bake The Cake
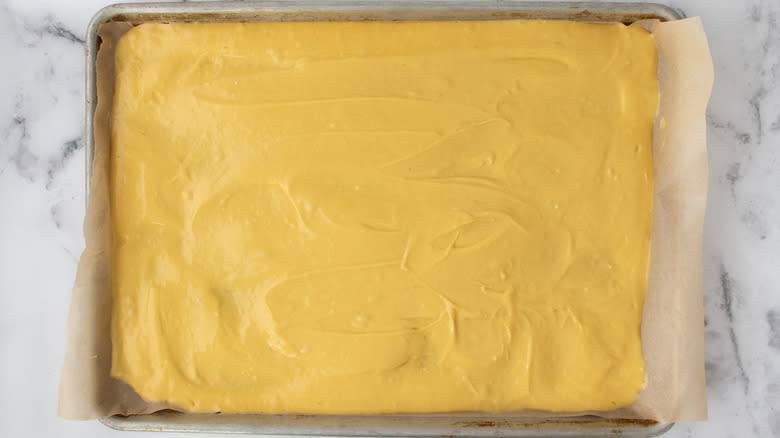
Spread the batter out in an even layer and place in the oven. Bake for 20 minutes, or until cooked through.
Step 7: Cool The Cake
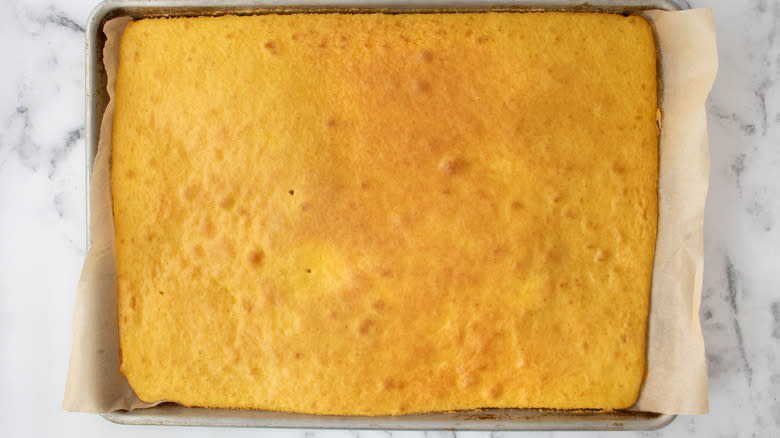
Remove the cake from the oven and set aside to cool at room temperature.
Step 8: Beat The Butter
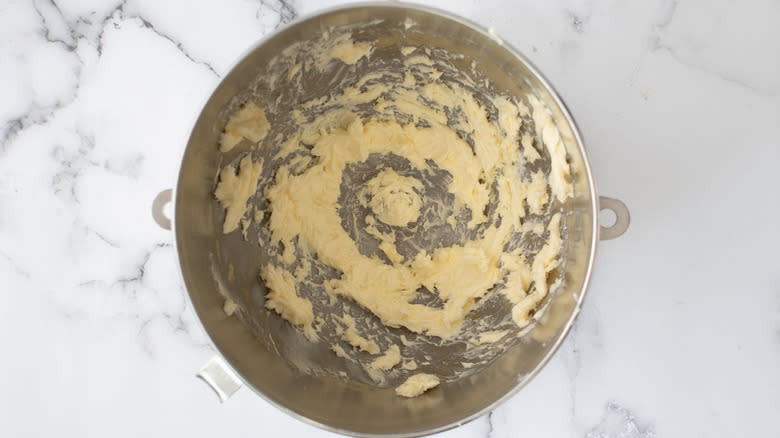
Meanwhile, place the butter in the bowl of a stand mixer fitted with the whisk attachment. Whisk until fluffy.
Step 9: Mix In The Marshmallow Fluff
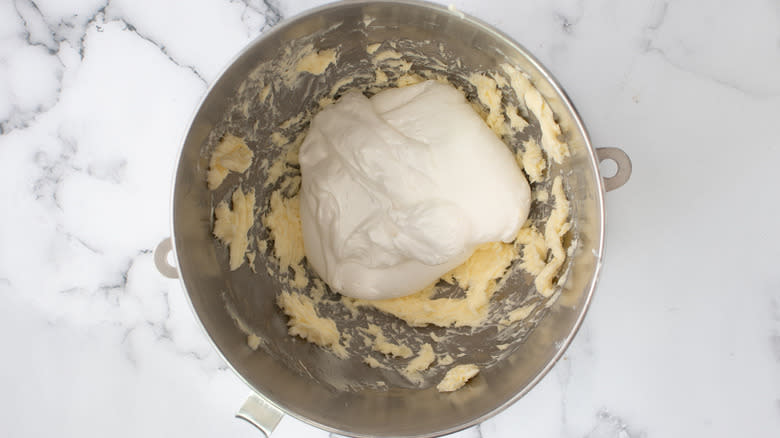
Add the marshmallow fluff to the bowl and whisk to combine.
Step 10: Mix In The Powdered Sugar
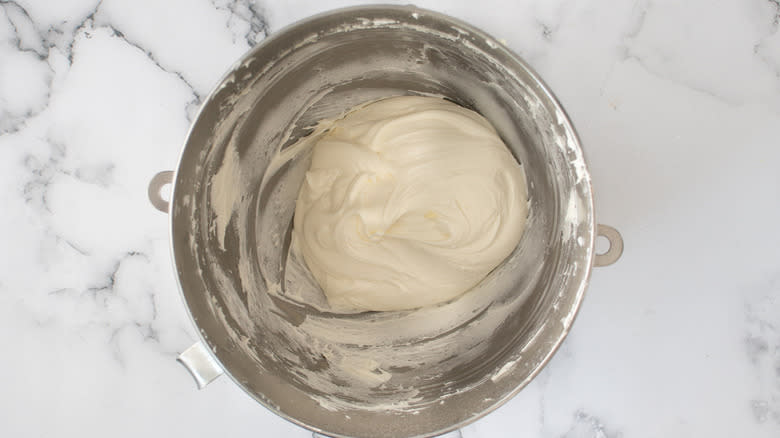
Working in batches, add the powdered sugar to the bowl, and continue to whisk until thick and fluffy. Cover and refrigerate until ready to use.
Step 11: Cut The Cake
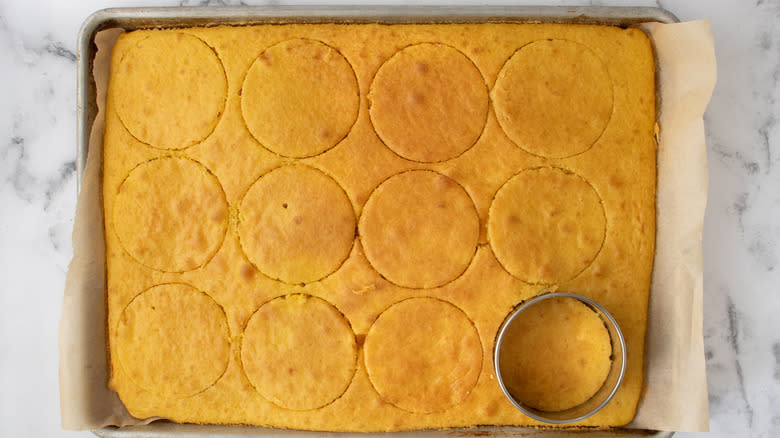
Once the cake has cooled, cut into circles (about 3 inches wide), and remove the excess cake from the baking sheet.
Step 12: Halve The Circles
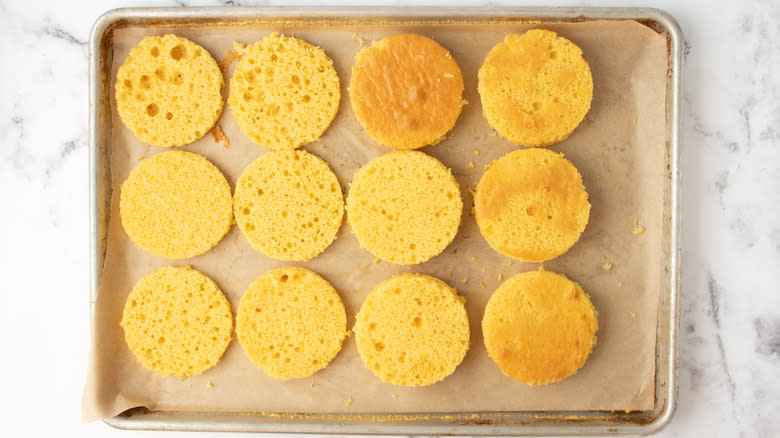
Carefully slice those circles in half through the center.
Step 13: Frost Half Of The Cakes
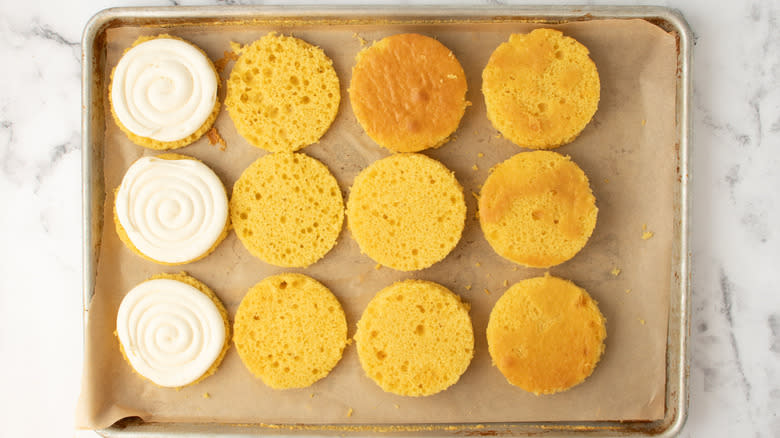
Transfer the filling to a piping bag and divide between half of the circles.
Step 14: Make The Sandwich
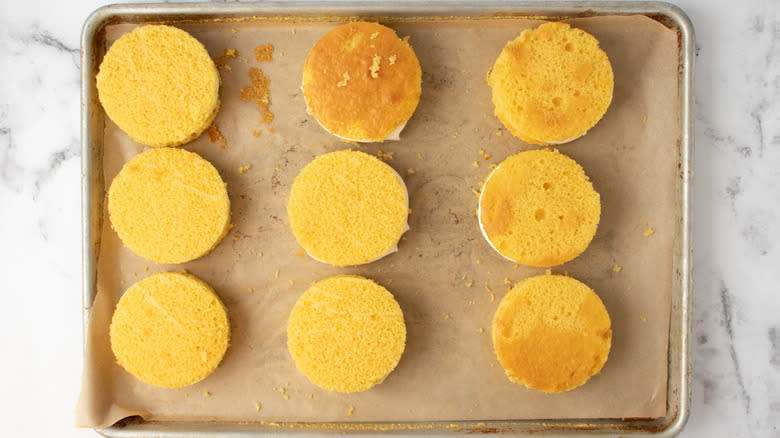
Cap the filled cakes with the reserved circles to form a sandwich and place the entire sheet, uncovered, in the freezer for 2 hours, or until firm.
Step 15: Combine The White Chocolate And Shortening
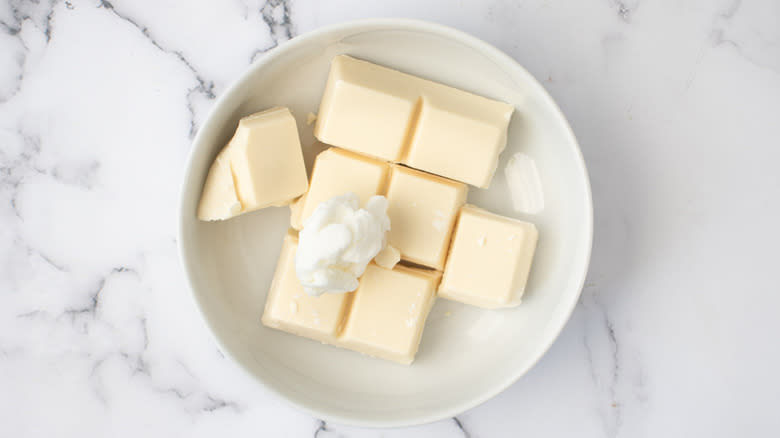
Once the cakes have chilled, place the white chocolate and shortening in a microwave-safe bowl.
Step 16: Melt The Chocolate
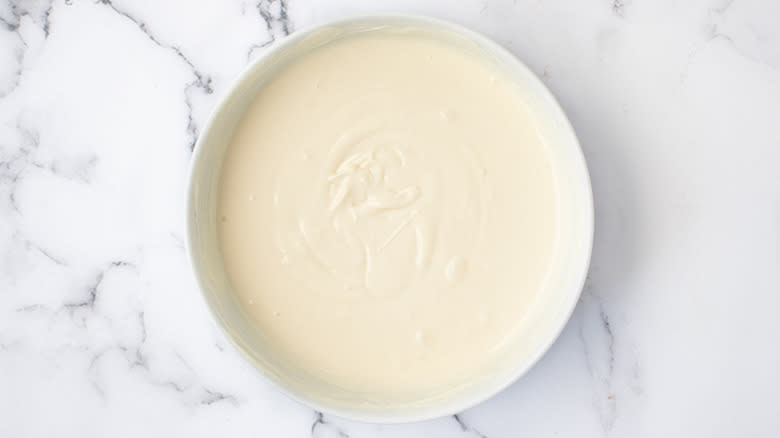
Melt in the microwave in 30 second increments, stirring in between each turn, until melted and smooth.
Step 17: Divide The Chocolate
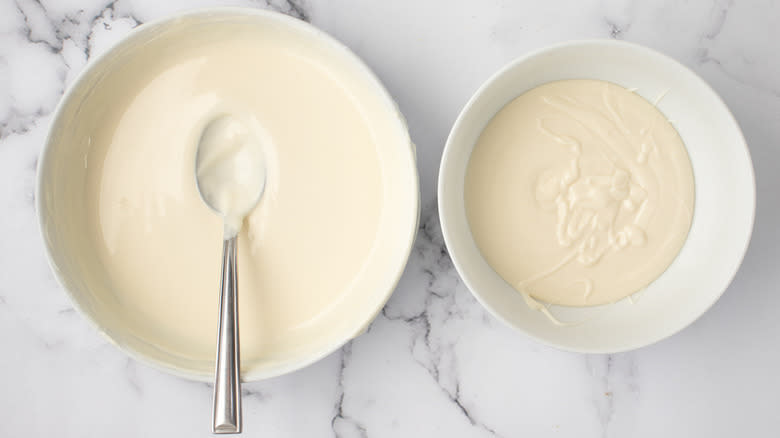
Divide melted white chocolate between two bowls.
Step 18: Dip The Cakes In Frosting
Dip and coat just the sides of the cakes in one of the bowls of chocolate, then place on a wire rack–lined baking sheet to drain.
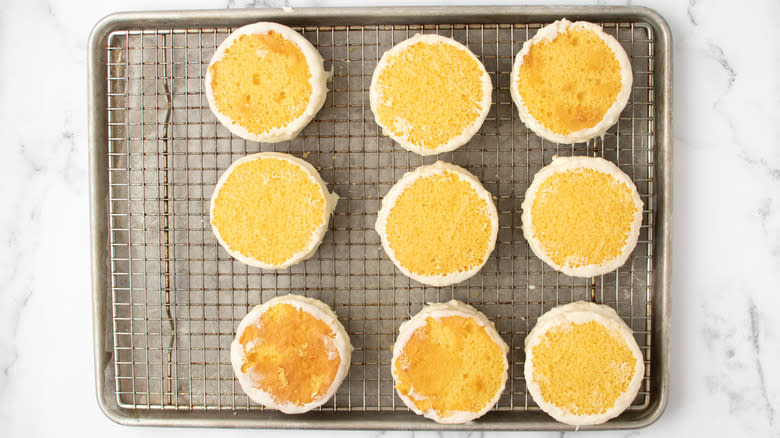
Step 19: Cover The Cakes

Using the second bowl of melted chocolate, spoon the chocolate over the tops of the cakes, spreading to evenly cover. Set aside to cool and harden for about 30 minutes
Step 20: Gather The Chocolate Chips
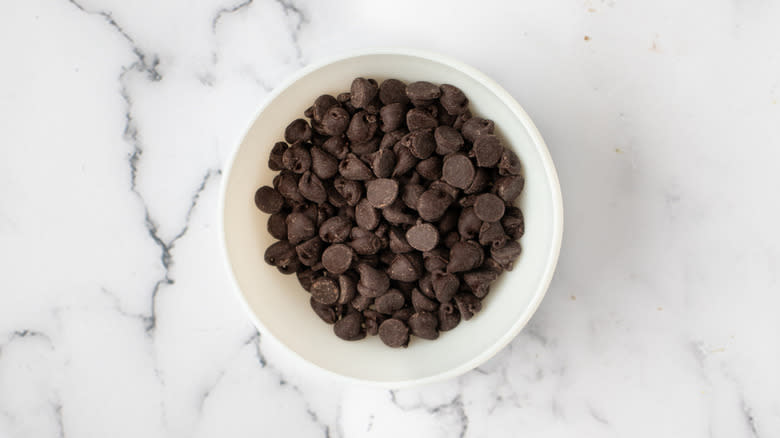
Place the semi-sweet chocolate chips in a microwave safe bowl.
Step 21: Melt The Chocolate
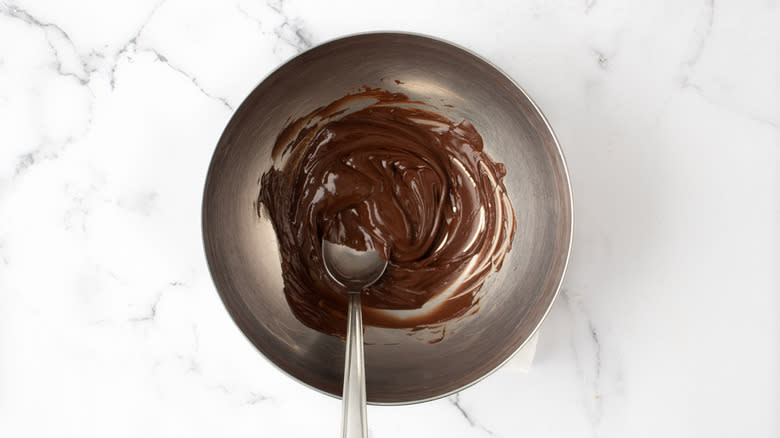
Melt in the microwave in 30 second increments, stirring in between each turn, until melted and smooth.
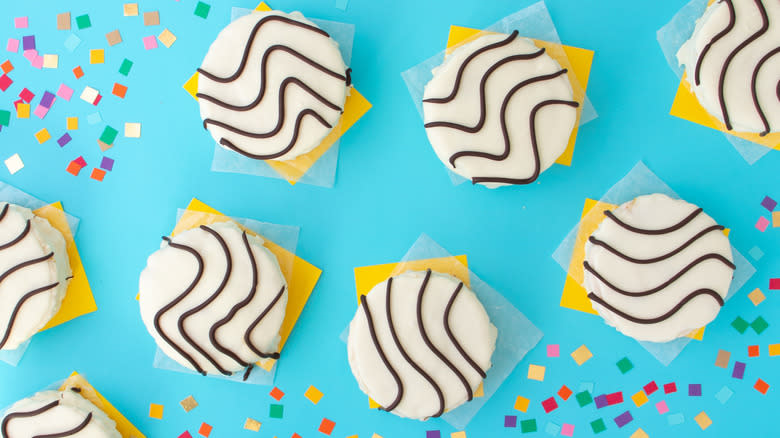
Step 22: Make Zebra Stripes
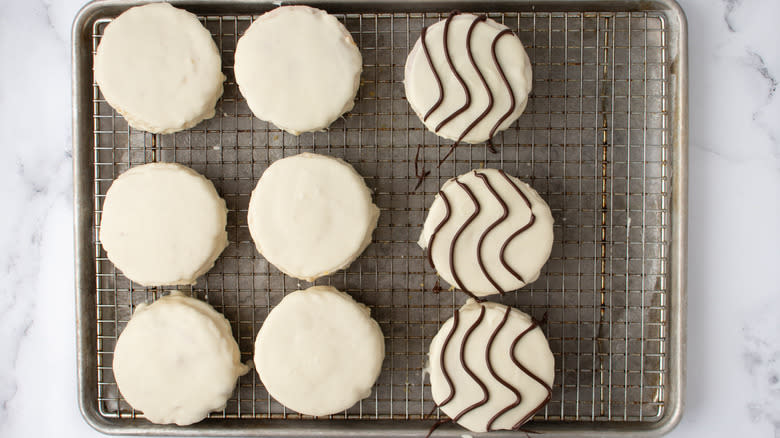
Drizzle or pipe the melted chocolate over the cakes in wavy stripes. Set aside to harden and cool for 10–15 minutes.
Step 23: Serve The Copycat Zebra Cakes
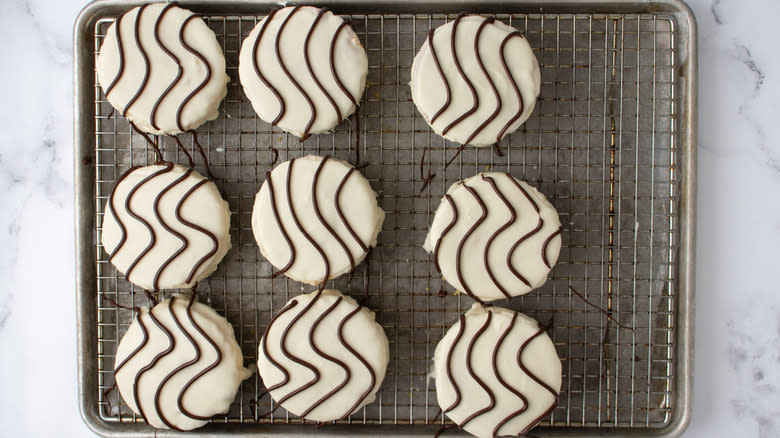
Once the cakes have cooled and set, serve and enjoy!
How Close Does This Copycat Recipe Come To Little Debbie's Zebra Cakes?
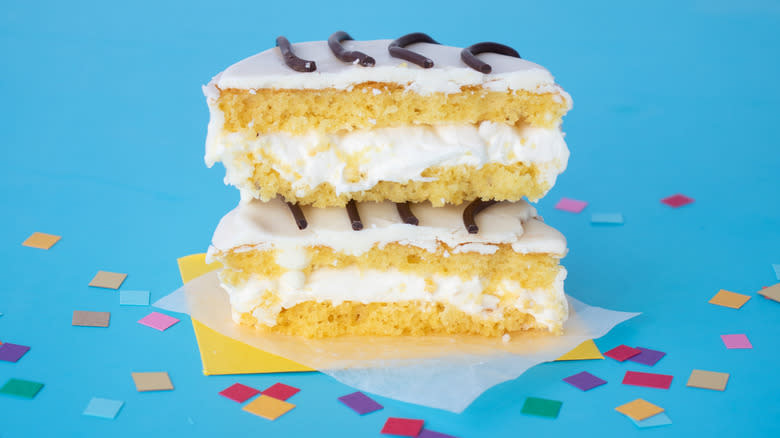
In her quest to duplicate Little Debbie's Zebra Cake recipe as closely as possible, Watkins says she "deployed a couple of science hacks." Since she felt that boxed cake mix alone would be too fluffy and crumbly, she added pudding mix plus an extra egg yolk, As she explains, doing so "create[s] a more dense final product [with] less crumbs [and] less fluff."
For the filling, Watkins mixes marshmallow fluff with butter and powdered sugar to recreate what she calls the "almost Moonpie-esque marshmallow filling" of Little Debbie's Zebra Cakes, while she says white melting chocolate mixed with shortening or coconut oil makes for "a more biteable cake with that desirably thin coating." Using all of these tips and tricks, she feels, creates "a Zebra Cake as close as humanly possible to the original article," only without all of the unpronounceable preservatives, coloring agents, and other mystery ingredients found only in a food lab.
How Should These Copycat Zebra Cakes Be Stored?
If you prefer to eat your Zebra Cakes at room temperature, they should be good for up to 3 days. Watkins went with another option, though, saying, "I kept mine in the refrigerator just to extend my snack-cake snacking sessions." The refrigerated ones, she says, will last for about a week. If you want to keep them fresh for a longer period, she notes that they can also be frozen. If you do so, it's best to wrap them up snugly to keep out the air, then store them in a Tupperware-type container as opposed to a resealable plastic bag. The reason for so doing, as Watkins explains, is that this will "reduce the risk of them getting smushed."
If you're thinking of giving homemade Zebra Cakes as holiday gifts, Watkins cautions that, unlike the Little Debbie kind, they're not shelf-stable enough for mailing, most likely due to their lack of preservatives (although this certainly benefits the overall flavor and texture). Instead, her advice is to "wrap them up pretty and pass them out in person."
Copycat Zebra Cakes Recipe
Prep Time: 5hCook Time: 30mYield: 9 snack cakesIngredients
:::For the cake batter:::
1 box (13.25-ounce) yellow cake mix
½ pack (3.4-ounce) vanilla pudding mix (⅓ cup of dry mix)
1 cup water
⅓ cup vegetable oil
3 eggs
1 egg yolk
:::For the filling:::
½ cup salted butter, softened
2 cups marshmallow fluff
1 ½ cups powdered sugar
:::For the topping and coating:::
1 pound white melting chocolate
3 tablespoons vegetable shortening or coconut oil
½ cup semi-sweet chocolate chips
Directions
Preheat the oven to 350 F.
Line a large baking sheet with parchment paper. Lightly spritz the parchment with cooking spray.
Place cake mix and vanilla pudding mix in a large bowl and whisk to combine.
Add water, oil, eggs, and egg yolk to the bowl, and whisk to form the cake batter.
Transfer the batter to the prepared baking sheet.
Spread the batter out in an even layer and place in the oven. Bake for 20 minutes, or until cooked through.
Remove the cake from the oven and set aside to cool at room temperature.
Meanwhile, place the butter in the bowl of a stand mixer fitted with the whisk attachment. Whisk until fluffy.
Add the marshmallow fluff to the bowl and whisk to combine.
Working in batches, add the powdered sugar to the bowl, and continue to whisk until thick and fluffy. Cover and refrigerate until ready to use.
Once the cake has cooled, cut into circles (about 3 inches wide), and remove the excess cake from the baking sheet.
Carefully slice those circles in half through the center.
Transfer the filling to a piping bag and divide between half of the circles.
Cap the filled cakes with the reserved circles to form a sandwich and place the entire sheet, uncovered, in the freezer for 2 hours, or until firm.
Once the cakes have chilled, place the white chocolate and shortening in a microwave-safe bowl.
Melt in the microwave in 30 second increments, stirring in between each turn, until melted and smooth.
Divide melted white chocolate between two bowls.
Dip and coat just the sides of the cakes in one of the bowls of chocolate, then place on a wire rack–lined baking sheet to drain.
Using the second bowl of melted chocolate, spoon the chocolate over the tops of the cakes, spreading to evenly cover. Set aside to cool and harden for about 30 minutes.
Place the semi-sweet chocolate chips in a microwave safe bowl.
Melt in the microwave in 30 second increments, stirring in between each turn, until melted and smooth.
Drizzle or pipe the melted chocolate over the cakes in wavy stripes. Set aside to harden and cool for 10–15 minutes.
Once the cakes have cooled and set, serve and enjoy!
Read the original article on Mashed.

