How to Cook Scallops

Scallops are, technically speaking, one of the easiest proteins a person can cook—they’re fast and fantastically unfussy—and yet many home chefs shy away from them. It might be because this medallion-shaped seafood is often perceived as fancy restaurant fare and seems, in kind, like it would be hard to master. Or it could be because the relative price is pretty high (especially compared to chicken), or because seafood is a hard at-home sell across the board. But if you’re a home chef who wants to impress guests without learning a whole new skill or spending your evening chained to the stove for hours, scallops are a great option. There are a few tiers of choices you’ll have to make while shopping, before you get to the cooking part, though.
Bay Scallop or Sea Scallop?
Most grocery stores these days have a really impressive selection of seafood, no matter how landlocked you are. But sometimes choice makes dipping your toe into a new food experience harder. Where do you begin? In the case of scallops, you’ll most likely find yourself staring down two varieties: bay scallops and sea scallops.
Bay scallops are quite small—about the diameter of a dime—and sometimes very faintly orange or pinkish. By comparison, sea scallops are much larger and whiter (more of an off-white than a snow-white—we’ll get to why that matters later). Beyond their visual distinction, they also tend to come from slightly different regions of the world: Bay scallops are native to the Gulf of Mexico and the northwest Atlantic Ocean—but are also sometimes now commercially farmed in Florida—while sea scallops are more ubiquitous and are found in the wild throughout the world.
In selecting which scallops you want to cook and serve, the last difference to consider is taste. Bay scallops are the infinitely sweeter between the two, while sea scallops have a more subdued oceany taste.
Fresh or Frozen?

Once you’ve settled bay vs. sea, the next choice to make is fresh vs. frozen—although this one is a bit more deceptive. Frozen foods get a bad rap, and are often seen as a lower quality option. But when it comes to seafood, you might be surprised to know that almost all of what you see at the counter at a grocery store has actually been frozen! It’s being presented thawed out for your convenience—so you can buy shellfish, crustaceans, or fish and then go home and immediately cook them without waiting for them to thaw—not because it’s actually “fresher.” (This is similar to liquor stores that sell white wine from both the shelf and the fridge; patrons looking to take an already-chilled bottle home for immediate drinking can grab from the fridge.)
In fact, the fish from the freezer section is often fresher by a little bit. It was frozen almost immediately upon being caught and cleaned, which means by the time you thaw it from your home freezer and are ready to cook, it hits the pan in a state about as close to when it was first caught as possible. In contrast, the fish at the counter has been thawed and sitting in a refrigerated case all day—especially if you stop by to pick up dinner after work. As I was developing this how-to, I did my own taste test between frozen sea scallops and sea scallops I picked up at the seafood counter, and actually found the scallops from the freezer section were slightly firmer, browned better in the pan, and had a slightly better taste (more briney-oceany than fishy-oceany).
Dry Packed or Wet Packed?
The last choice you have to make isn’t so much a choice as a label to look out for. Scallops generally arrive at the store in one of two ways: dry packed, which means they were shipped on ice, or wet-packed, which means they have been injected with a preservative (sodium triplophosphate) that extends their shelf-life, but also makes them retain a lot of water. This not only matters if you’re someone who is looking to avoid certain preservatives but also because the water retention means that no matter how hard you try, wet-packed scallops will never properly brown in the pan.
You can simply ask the fishmonger whether their scallops are dry- or wet-packed, but if they or you aren’t sure, another way to tell is by sight. Wet-packed scallops are a bright white where dry-packed scallops are more off-white. If you’re still not sure, and have already purchased your scallops, you can microwave one on a paper towel for about 10 seconds—if it’s wet-packed, a ring of water will emerge around the scallop.
Once you’ve waded through all of these choices, here is how to cook scallops so they’re perfectly browned:
Step 1: Clean Them
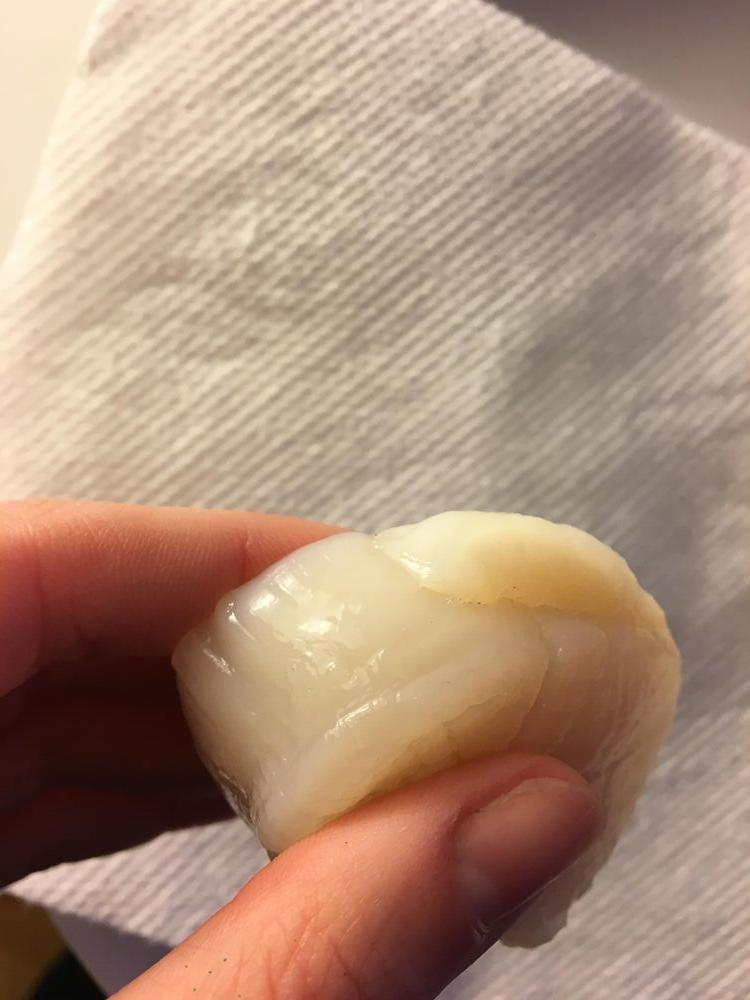
You don’t need to wash scallops, so not much is required of you here. But some scallops come with what is called a “foot” still attached. It’s a bit of a misnomer since it’s not really a foot, but rather a little flap of muscle that hangs off the side of the medallion. It’s totally edible, but a little bit tougher than the rest of the scallop, so some people prefer to remove it. The foot is usually removed in the U.S.—so if that’s where you live and you’ve only ever eaten scallops in restaurants, you may not have seen this part of the creature before—though people in many parts of the world regularly eat it. If the scallop is male, the foot will be white and might blend in (so again, if you don’t notice it and end up eating it, that’s fine!), but appears orange on a female scallop.
Step 2: Dry Them

This step is maybe the most important when it comes to cooking scallops to browned perfection. You will have a really hard time achieving that signature look if your scallops are at all wet. So lay them out on a few paper towels, and gently press on them with another layer on paper towels. Leave them like this for a few minutes before you’re ready to cook. You can spend this time getting out any other ingredients, or getting your saute pan ready.
Step 3: Prepare Your Pan
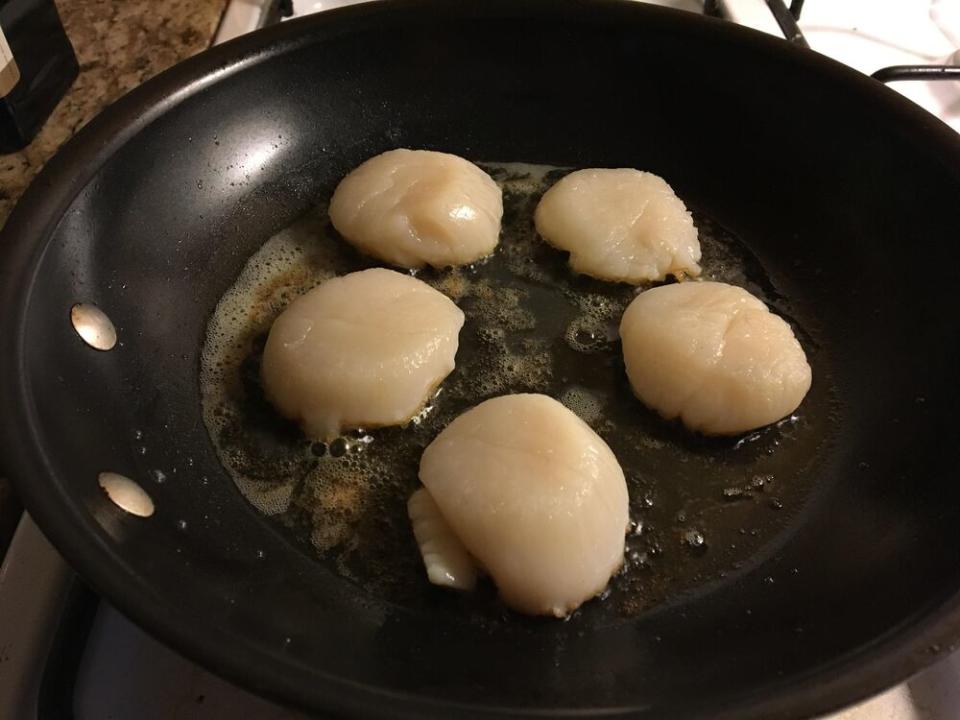
Make sure to pick a pan that has enough space for you to spread out the scallops. They should have a few inches between them and not be touching. It is crucial to have a ripping hot pan over a high flame since you’ll want to cook them quickly for a short period of time to develop a brown crust on the outside without overcooking. Add enough butter (olive oil would work here too, but butter imbues a scallop with a richer taste) to pool on the bottom of the pan.
Step 4: Season Them

Just before you’re ready to cook, sprinkle a little bit of kosher salt on each scallop. You want to do this mere seconds before cooking because salt brings out moisture—if the scallops you’ve spent a few minutes drying are left sitting too long salted, they will get wet again, and I can’t emphasize enough how much moisture is not our friend here. Scallops have a really delightful flavor, and you honestly don’t need to do much else besides season them with a little bit of salt.
Step 5: Brown Them
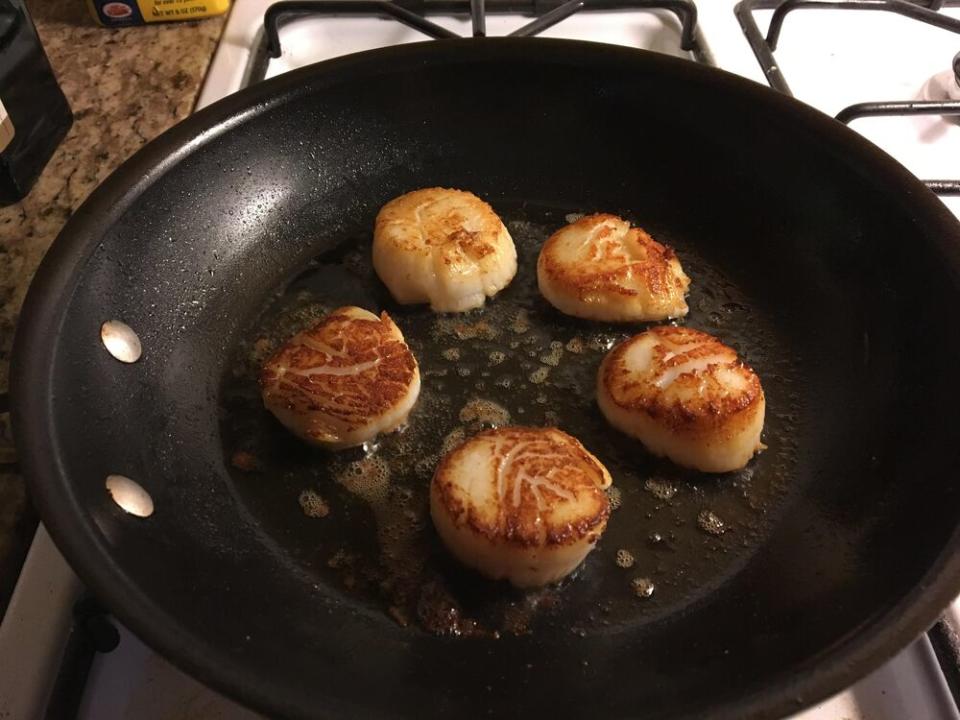
Place each scallop with one flat side in the pan, making sure not to crowd them, and give each scallop a quick little press to make sure it makes full contact with the heated surface. Then don’t move them for about 2 minutes. Both of these mini-steps are crucial to letting them brown. When you begin to see some color creeping ever so slightly up the side, tilt the pan so all the melted butter pools along one edge, and spoon some over each of the scallops. This will help cook them from the top down a bit, while still letting the bottom brown. Lastly, flip each scallop over, again making sure the flat surface is fully pressed against the pan, and let them cook for another 2 minutes, or until the second side is fully browned as well.

