How To Deep Clean Your Refrigerator, According To Experts
It's time to give this appliance a top-to-bottom refresh.

Getty Images
Despite the fridge’s undeniable importance in keeping our food fresh, beverages perfectly chilled, and kitchens fully functional, many of us cut corners and take shortcuts when cleaning this appliance. While a simple wipe-down with a damp paper towel might suffice for small spills and day-to-day maintenance, it is important to deep clean your refrigerator from time to time. Here, experts break down the refrigerator deep clean: how often it needs to happen, instructions step by step, and methods to remove and prevent bad odors.
What’s The Difference Between "Cleaning" And "Deep Cleaning" The Fridge?
A deep cleaning varies from a standard-issue cleaning both in terms of thoroughness and time commitment.
According to cleaning expert Karen Barrigan of Housetastic, a weekly or daily fridge cleanup "should include disinfecting the door handle and wiping down the surfaces. You should also rotate the food as it starts to get older to prevent things from spoiling. Wipe lids on [food containers], and put paper towels down underneath anything likely to drip.” Rotating food in your fridge is a system that restaurants and supermarkets use to manage their perishables, called FIFO, "first in first out." It's also a system that needs to be done continually. Every time you get new food, rotate the old stuff to the front.
By contrast, a deep clean requires you to empty the refrigerator, do a thorough scrub-down of the interior (including the shelves and bins), wash and dust the outside, and fully clean the floor under, behind, and around the fridge.
How Often To Deep Clean Your Fridge
Barrigan tells us that refrigerator deep cleans should be performed a few times per year. For a standard fridge, deep cleaning once every three to four months should do the trick.
However, if your fridge includes a built-in water dispenser and/or ice dispenser, then more frequent cleaning will be necessary. The presence of a water line in the fridge introduces more moisture, and “surfaces with moisture and organic matter offer the ideal conditions for a mold spore to transition into a living colony,” explains indoor air quality expert and founder of HomeCleanse Michael Rubino. For that reason, a fridge with a water/ice dispenser should be deep cleaned at least every two months.
Getty Images
Considerations Before Getting Started
Before you begin the process, you'll need to have a place to keep food cold. Once the fridge is unplugged, remove all food and beverage items from the shelves, bins, and compartments. This part of the process is a prime opportunity to check the expiration dates on all refrigerator contents and to discard items past their prime.
Also, while the food and drink items are on your counters, you can use a dish rag or paper towel to wipe down the containers and remove any product residue from bottle tops and jar lids. If you have items that need to remain cold during the cleaning process (like meat, dairy, and medications), set up a cooler in the kitchen to store these products.
It can be tempting to use bleach and other chemical cleaners to deep clean a refrigerator, but our experts strenuously advise against it. According to Vera Peterson, president of Molly Maid, bleach and harsher chemicals can "damage surface materials and possibly release harmful toxins into your food.”
Using gentle dish soap and food-grade pantry items like white vinegar and baking soda will effectively clean the fridge’s interior without the risk of chemical contaminants or structural damage.
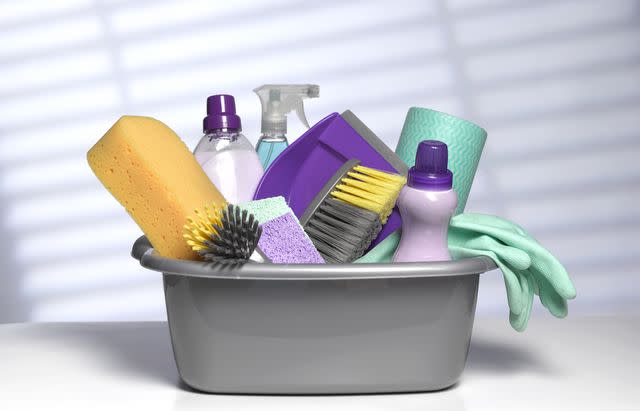
What You Need:
Clean water
Baking soda
Rags or dishcloths
White vinegar
Spray bottle
Dish soap
Towels or microfiber cloths
Stainless steel cleaner (if your fridge is made of stainless steel)
Vacuum
If there’s a possibility of coming across rotten food or mold in the fridge, biohazard expert and supervisor Gabby Martin of Bio Recovery urges you to use personal protective equipment (PPE) while cleaning. Specifically, she recommends "tight-fitting, nitrile gloves and an N-95 mask."
How To Deep Clean Your Fridge
Step 1: Turn off or unplug the fridge
In most cases, turning off the power means unplugging the appliance.
“Since water is present [while cleaning], be sure to eliminate hazards by shutting off all power before scrubbing,” says Kathy Cohoon, operations manager of Two Maids.
Step 2: Remove all food, shelves, and drawers
Remove all food from the refrigerator. Pull out the shelves and bins, and get ready to scrub them down.
"Any shelves, drawers, or other removable parts that can be cleaned individually and subsequently replaced should be taken out. Cleaning the goods will be much easier if they are not in the refrigerator. Since many of the shelves and drawers fit into a standard kitchen sink, cleaning will be easy,” says Maria Ivanova, founder of Master Maid.
Before you start washing the shelves and drawers, let them come to room temperature; using warm water on fridge-temperature plastic or glass can result in cracking and splintering. When the pieces are at the proper temperature, wash them with warm water, gentle dish soap, and a soft sponge or dishcloth. Use towels to thoroughly dry the shelves and bins.
Getty Images
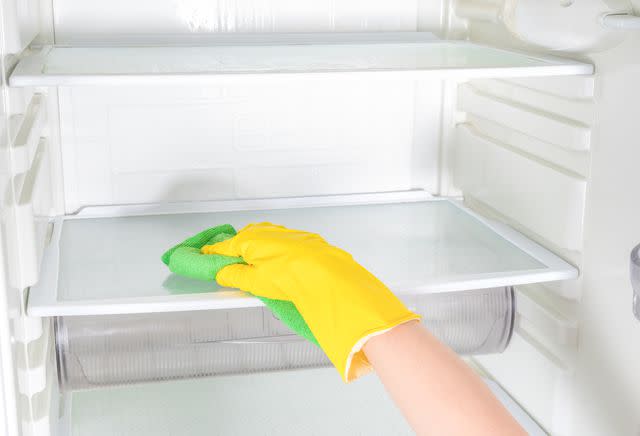
Step 3: Scrub the interior with water, white vinegar, dish soap, and baking soda
A mixture of warm water and a few drops of mild dishwashing soap will give you a gentle yet effective cleaning solution for the fridge's interior. Soak a clean dish rag or a soft sponge in the solution, and wipe down the inside of the refrigerator, focusing on areas with spillage and stains. If you come across a particularly sticky or unyielding mess, create a paste with baking soda and water, and scrub the paste into the stain with the dish rag until it lifts.
To disinfect the inside of the refrigerator without bleach or other chemicals, mix one part of white vinegar and two parts of hot water in a spray bottle. Liberally spray the inside of the fridge with this mixture, then wipe it clean with a dry dishcloth.
Once the inside of the fridge is fully cleaned, the drawers and shelves can be returned to their rightful positions. As an extra safeguard against fridge odors, place an open box of baking soda in the back corner of the refrigerator’s top shelf.
Step 4: Wipe down the rubber gasket with a dishcloth and warm water
The rubber seal (or gasket) framing the interior of the fridge door is often overlooked during refrigerator cleaning sessions, but, as Barrigan tells us, “the folds on the door seals can collect crumbs and debris” and can even develop mold and mildew. Adding a gasket wipe to your fridge deep clean will also “help keep the seal tight, allowing your fridge to work at maximum efficiency.”
Luckily, this phase of the deep clean is one of the easiest. Just “wipe the gasket down with a damp cloth” to remove any food particles and dust, says exposure scientist and writer Samantha Radford, PhD, of Evidence-Based Mommy. Radford doesn’t encourage the use of any cleaning agents aside from warm, clean water, explaining that vinegar or bleach “can damage the gasket, causing your fridge to cool less efficiently.”
Step 5: Clean the outside with dish soap or stainless steel cleaner.
The method that you use to clean the outside of the fridge will depend on its material. A standard-issue fridge with a plastic facade can be washed with "a cloth dampened with soapy warm water," says chief hygiene officer Jennifer Rodriguez of Pro Housekeepers. After wiping the exterior of the fridge down with the cloth soaked with the dish soap-water mixture, "dry with a microfiber cloth."
If your fridge has a stainless steel facade, Rodriguez recommends "using a stainless-steel cleaner" instead of soapy water. In addition to cleaning the outside of the door and any visible fridge sides, "don’t forget to clean the top of the refrigerator. We often overlook this area, [but] a lot of dust can get accumulated there."
Step 6: Vacuum the coils and clean the floor under and around the fridge
The final step before turning the fridge back on is to vacuum the coils (the cooling condensers usually found on the back of the refrigerator) and vacuum and clean the floor area on which the fridge sits. Use a powerful vacuum with a hose to “vacuum the back coils and the grate on the bottom of the fridge,” says Cohoon. While you have the vacuum out, take the time to get rid of any food bits, dust, and other debris on the floor space around, under, and behind the fridge.
Step 7: Clean the water line
This step only applies to refrigerators that have built-in dispensers for water and ice.
While these amenities are highly convenient and desirable for many homeowners, the flow of water into the appliance can increase the odds of mold growth. According to Rubino, the best way to avoid mold outbreaks is to clean the water line at least [once] every six months.
Rubino says that this process should begin by “disconnecting the water line and the ice maker line from the fridge. Drain any water that’s inside the lines.”
Next, fill the water line and ice maker line with white vinegar and “leave it for at least 30 minutes; tape it upright to the back of the fridge. If there is an ice machine, turn it on so the vinegar cycles through.”
Then, pour out the vinegar, rinse the lines with water, and change the water filter. Finally, reconnect the water line, “turn the power back on, and turn the water valve back on. Make sure to run the water dispenser quite a few times afterward to get rid of all the vinegar in the lines. Also, toss the first few batches of ice for the same reason.”
Related: What Temperature Should Your Refrigerator Be Set To?
How To Keep Your Refrigerator Cleaner For Longer
We all know it doesn't take long after a deep clean for the fridge to get messy again. A couple of nights of takeout and a lingering gallon of milk may be all it takes to create a dirty and smelly fridge. Here are a few tips you can implement between deep cleans to keep your refrigerator sparkling.
Once a week, check expiration dates and remove anything old, such as takeout boxes, expired food, and leftovers from last week.
About twice a month wipe off any spills from shelves, sticky jars, or bottles.
Before putting something in the fridge, ensure it is clean and in a good container that won't spill easily.
Utilize refrigerator organizers and bins to provide a place for everything that is going into your fridge. This not only helps you easily navigate your fridge but also prevents things from getting knocked over and spilling by securing them in place.
How To Get Rid Of And Prevent Smells In Your Refrigerator
If you've ever opened your fridge and got a strong whiff of something smelly, you know that bad odors can seriously ruin a perfectly good appetite. But don't fear—there are a few solutions to this stinky problem.
First things first, you'll need to find the root of the smell and toss it out. Usually, food that has expired or gone moldy, like old leftovers or moldy produce, is the culprit to bad smells. Once you toss it out, if the smell lingers or doesn't go away within a couple of hours, we recommend doing a partial deep clean, following steps one through four. After cleaning, open the fridge doors and allow it to air out for about twenty minutes.
If the smell persists, try these methods:
Place an open container of dry baking soda in your fridge.
Place a bowl of coffee beans or coffee grounds in your fridge.
Let the refrigerator air out for longer, up to a few days.
Soak a cotton swab or ball with vanilla extract and place it in the fridge for up to 24 hours.
Slice a lemon and leave it in the fridge for up to a week.
Wipe shelves with a rag damp with lemon juice.
Place an open container of charcoal in your fridge.
To prevent a smelly fridge, check the contents of your fridge regularly and throw anything out that is past its freshness. Leaving an open container of baking soda in your fridge can help neutralize odors. When spills happen, clean them immediately, and ensure that whatever you put in the fridge is tightly closed into a container.
How to Get Rid of Streaks on Stainless Steal
To get rid of streaks on your stainless steel refrigerator, follow these steps:
Gather two clean microfiber cloths and a stainless steel cleaner.
Shake the stainless steel cleaner.
Spray the cleaner on your stainless steel refrigerator, then wipe with an unused microfiber cloth going in the direction of the grain or striations of the stainless steel. The grain will either be vertical or horizontal.
Wipe off the remaining product in the grain's direction.
Take your second unused microfiber cloth and buff the surface in the grain's direction until no streaks remain and the surface shines.
Related: 7 Items You Shouldn't Store In The Refrigerator Door, According To Pros
Meet the Expert
Karen Barrigan is a cleaning expert at Housetastic.
Michael Rubino is an indoor air quality expert and the founder of HomeCleanse.
Vera Peterson is the president of Molly Maid.
Gabby Martin is a biohazard expert and a supervisor at Bio Recovery, a company that specializes in biohazard cleanup.
Kathy Cohoon is the operations manager of Two Maids.
Maria Ivanova is the founder of Master Maid.
Samantha Radford, PhD, is the founder of Evidence-Based Mommy.
Jennifer Rodriguez is the Chief Hygiene Officer at Pro Housekeepers.
For more Southern Living news, make sure to sign up for our newsletter!
Read the original article on Southern Living.

